Page 2 of 20
2
Power Mirror/Window Switches
Memory Seat ButtonsF
INSTRUMENT PANEL
Audio Volume Controls (behind steering wheel)
Engine Start/Stop Button (on instrument panel)
Audio Favorite Station or Seek Controls (behind steering wheel)
Steering Wheel Adjustment Lever (under steering column)
Power Liftgate ControlF
Symbols
Low Fuel
Traction Control Off
Brake System
Cruise Control
StabiliTrak Active
StabiliTrak Off
Forward Collision Alert
Security
PARK Electric Parking Brake
Service Electric Parking Brake
Lights On Reminder
Airbag Readiness
Engine Oil Pressure
Check Engine
Lane Keep Assist
Exterior/Interior Lighting Controls
Turn Signal Lever/IntelliBeam Control
Windshield Wipers Lever
Manual Shift Paddle
Manual Shift Paddle
Driver Information Center/Voice Recognition Controls
Head-Up Display ControlsF
Cruise Control/Forward Collision Alert/Heated Steering WheelF Buttons
Driver Information Center
Page 7 of 20

7
STEERING WHEEL ADJUSTMENT
POWER FRONT SEATSF
With the vehicle parked, push down the lever under the left side of the steering column to adjust the steering wheel. The steering wheel can be moved up or down and in or out. Pull up the lever to lock the steering wheel in place.
See Instruments and Controls in your Owner’s Manual.
Power Seat Adjustments
A. Seat Adjustment
Move the horizontal control to move the seat forward or rearward and to tilt, raise or lower the seat.
B. Seatback Recline Adjustment
Move the vertical control to recline or raise the seatback.
C. Lumbar Adjustment/MassageF
Turn the feature select knob to view lumber or massage settings on the infotainment screen. Press the 4-way control to adjust the selected setting.
D. Massage Recall
Press the button to turn the massage feature on/off.
Set Memory Seat Position
1. Adjust the seat and power outside mirrors.
2. Press the SET button on the driver’s door. A beep will sound.
3. Immediately press and hold button 1 or 2 until two beeps sound.
To set a seat position for more clearance when exiting the vehicle, repeat these steps using the Exit button instead of button 1 or 2.
Recall Memory Seat Position
Press and hold button 1, 2, or Exit until the set position is reached.
The memory/exit positions can be programmed to be recalled automatically when the
ignition is turned off (for exit recall, the driver’s door must be opened).
To set the recall options, go to Settings > Vehicle > Seating Position > Seat Entry Memory and Seat Exit Memory.
See Seats and Restraints in your Owner’s Manual.
F Optional equipment
ABC
D
Page 15 of 20

15F Optional equipment
AUTOMATIC CLIMATE CONTROLS
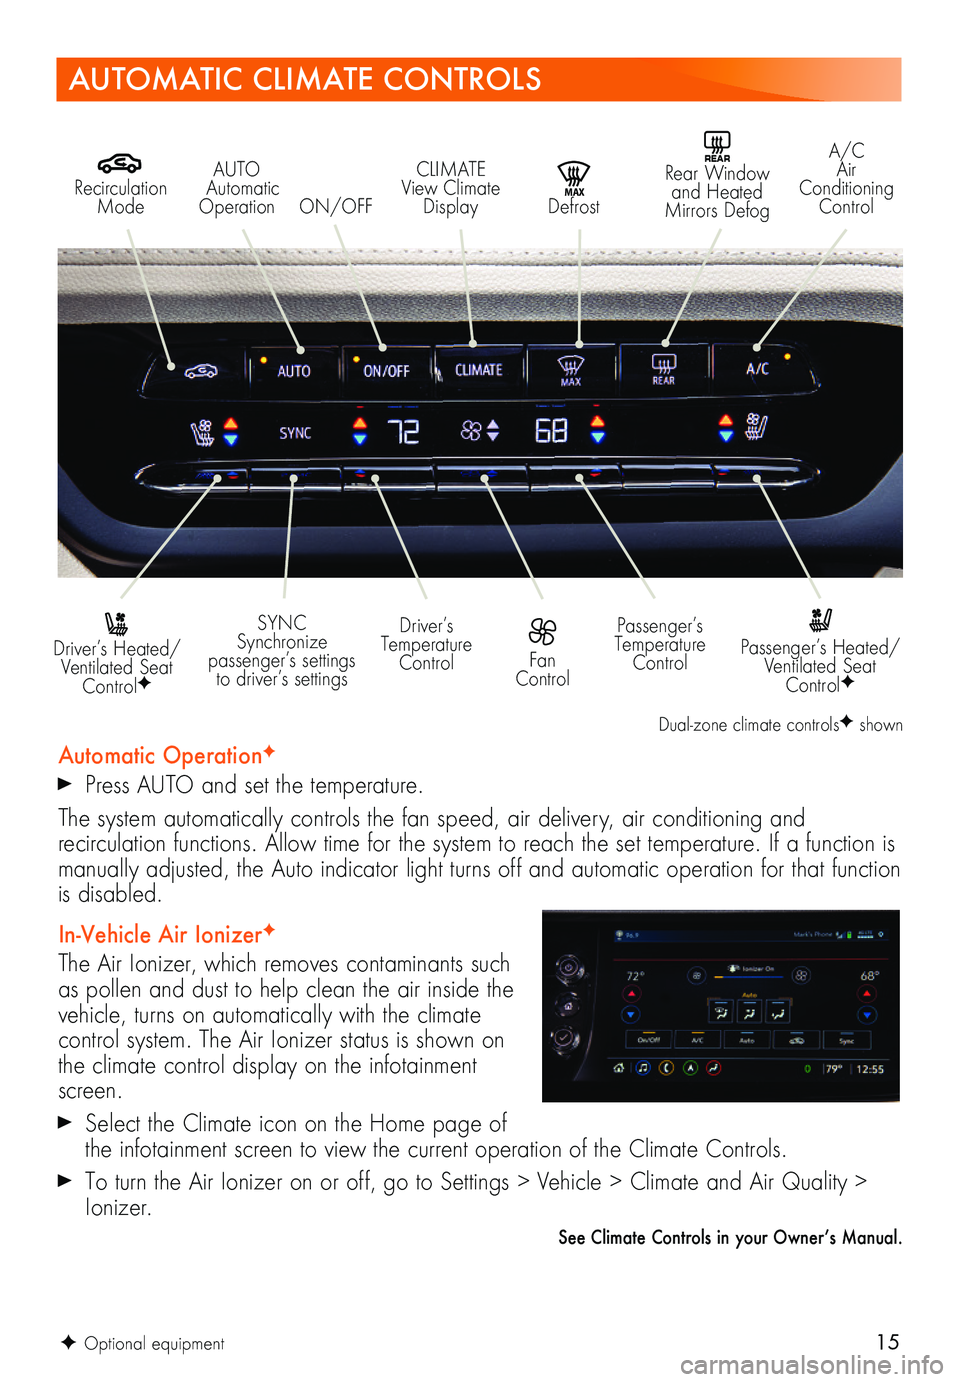
Recirculation Mode
REAR Rear Window and Heated Mirrors DefogMAX Defrost
A/C Air Conditioning Control
Driver’s Heated/Ventilated Seat ControlF
Passenger’s Heated/Ventilated Seat ControlF
Driver’s Temperature Control
Passenger’s Temperature Control
SYNC Synchronize passenger’s settings to driver’s settings
AUTO Automatic Operation
Automatic OperationF
Press AUTO and set the temperature.
The system automatically controls the fan speed, air delivery, air conditioning and
recirculation functions. Allow time for the system to reach the set temperature. If a function is manually adjusted, the Auto indicator light turns off and automatic operation for that function is disabled.
In-Vehicle Air IonizerF
The Air Ionizer, which removes contaminants such as pollen and dust to help clean the air inside the vehicle, turns on automatically with the climate control system. The Air Ionizer status is shown on the climate control display on the infotainment screen.
Select the Climate icon on the Home page of the infotainment screen to view the current operation of the Climate Controls.
To turn the Air Ionizer on or off, go to Settings > Vehicle > Climate and Air Quality > Ionizer.
See Climate Controls in your Owner’s Manual.
Fan Control
CLIMATE View Climate DisplayON/OFF
Dual-zone climate controlsF shown
Page 19 of 20

19F Optional equipment
DRIVER ASSISTANCE SYSTEMS
UNIVERSAL REMOTE SYSTEMF
TIRE PRESSURE MONITORING WITH TIRE FILL ALERT
Enhanced Automatic Parking AssistF — The system can search for a parallel or perpendic-ular parking space and then steer and brake the vehicle into that space while shifting gears as needed. It can also help you unpark the vehicle after parallel parking. While using the system, you need to remain in your vehicle and be prepared to override and take control.
To activate the system, press the Auto Parking Assist button on the center console. A parking assist display will be shown. Follow all instructions as directed.
See Driving and Operating in your Owner’s Manual.
The Universal Remote System on the overhead console enables your vehicle to control 3 different devices, ranging from garage doors and gates to home lighting. Go to homelink.com for detailed videos and instructions on how to program the Universal Remote System. For additional assistance, call 1-800-355-3515.
See Instruments and Controls in your Owner’s Manual.
The Low Tire Pressure warning light on the instrument cluster illuminates when one or more of the vehicle’s tires is significantly underinflated. Fill the tires to the proper tire pres-sures listed on the Tire and Loading Information label, located below the driver’s door latch. Current tire pressures can be viewed on the Driver Information Center.
The Tire Fill Alert provides visual and audible alerts to help when inflating a tire to the rec-ommended tire pressure. With the vehicle on, the horn sounds and the turn signals change from flashing to solid when the recommended pressure is reached.
See Vehicle Care in your Owner’s Manual.
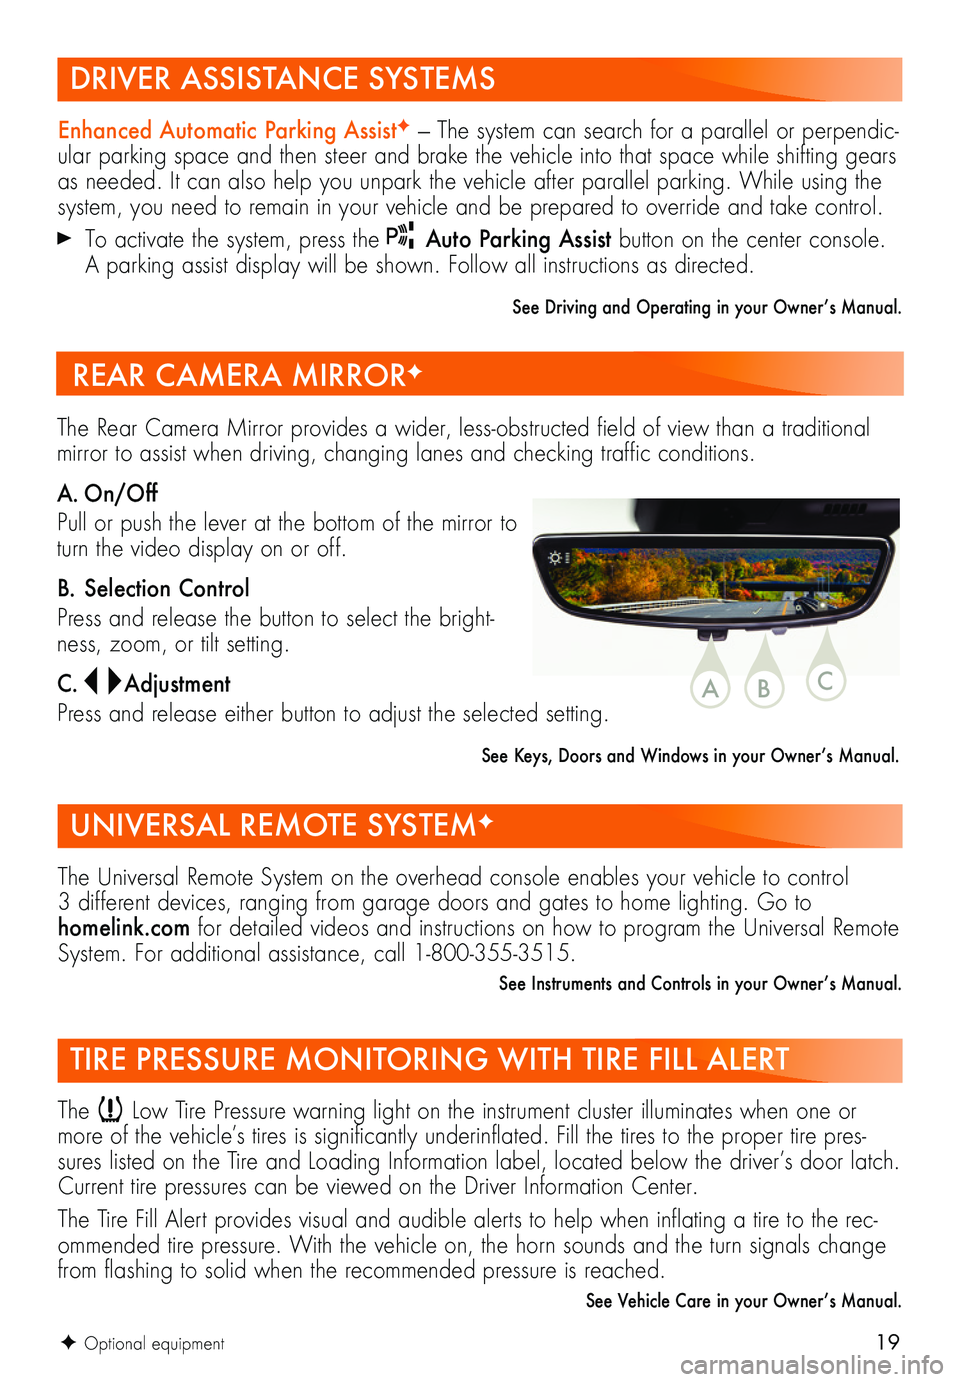
The Rear Camera Mirror provides a wider, less-obstructed field of view than a traditional mirror to assist when driving, changing lanes and checking traffic conditions.
A. On/Off
Pull or push the lever at the bottom of the mirror to turn the video display on or off.
B. Selection Control
Press and release the button to select the bright-ness, zoom, or tilt setting.
C. Adjustment
Press and release either button to adjust the selected setting.
See Keys, Doors and Windows in your Owner’s Manual.
REAR CAMERA MIRRORF
CBA