2021 AUDI E-TRON driver seat adjustment
[x] Cancel search: driver seat adjustmentPage 26 of 308

Head-up display
Head-up display
Description
Applies to: vehicles with head-up display
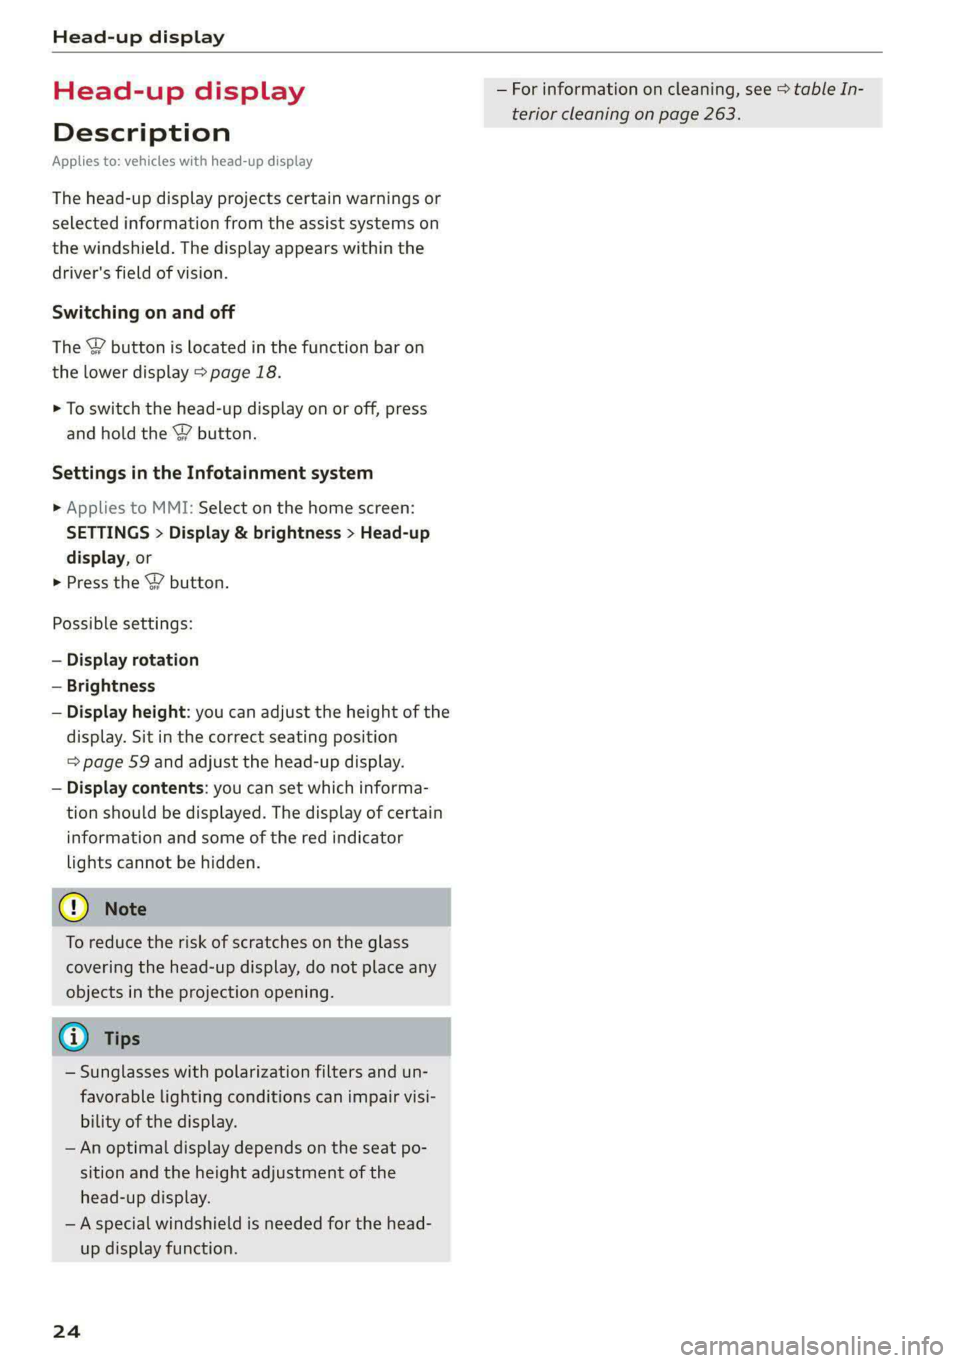
The head-up display projects certain warnings or
selected information from the assist systems on
the windshield. The display appears within the
driver's field of vision.
Switching on and off
The Y button is located in the function bar on
the lower display > page 18.
> To switch the head-up display on or off, press
and hold the Y button.
Settings in the Infotainment system
> Applies to MMI: Select on the home screen:
SETTINGS > Display & brightness > Head-up
display, or
> Press the Y button.
Possible settings:
— Display rotation
— Brightness
— Display height: you can adjust the height of the
display. Sit in the correct seating position
=> page 59 and adjust the head-up display.
— Display contents: you can set which informa-
tion should be displayed. The display of certain
information and some of the red indicator
lights cannot be hidden.
® Note
To reduce the risk of scratches on the glass
covering the head-up display, do not place any
objects in the projection opening.
@ Tips
— Sunglasses with polarization filters and un-
favorable lighting conditions can impair visi-
bility of the display.
— An optimal display depends on the seat po-
sition and the height adjustment of the
head-up display.
— A special windshield is needed for the head-
up display function.
24
— For information on cleaning, see > table In-
terior cleaning on page 263.
Page 62 of 308

Sitting correctly and safely
— The distance between your upper body and the
steering wheel or instrument panel is at least
10 inches (25 cm)
— The distance between your knees and the in-
strument panel is at least 4 inches (10 cm)
— Your thighs are lightly supported by the front
surface of the seat
— The backrest is in an upright position and your
back is resting against it
— You have a sufficient view of the area around
the vehicle
— You have a clear view of the instrument cluster,
indicator lights, and the head-up display*
Seat settings menu: quick access
Applies to: vehicles with seat settings in the MMI
If you press on the image of the driver's or front
passenger's seat in the climate control system
menu > page 84, fig. 78 @), you will go directly
to the seat settings for that seat.
Z\ WARNING
— If you are too close to the steering wheel or
instrument panel, the airbag system cannot
provide the optimal protection, which in-
creases the risk of injury and death.
—To reduce the risk of injury in the event of
sudden braking maneuvers or accidents,
never drive with the backrest reclined very
far. The airbag system and seat belts can on-
ly provide optimal protection when the back-
rest is in an upright position and the driver
is wearing the seat belt correctly. If the
backrest is angled back too far, the safety
belt can shift to soft areas of the body, such
as the stomach, which increases the risk of
injury.
—To reduce the risk of an accident, only adjust
the seats when the vehicle is stationary.
— Be careful when adjusting the seat. Lack of
control or attention when adjusting can re-
sult in injuries due to pinching to vehicle oc-
cupants both in the front seats and rear
seats.
— Never place objects in the driver's footwell.
Objects could shift and enter the area
around the pedals, which could prevent you
from using them. You would then be unable
60
to use the pedals if sudden driving or brak-
ing maneuvers were needed, which increas-
es the risk of an accident.
— Make sure that the floor mats are always se-
curely attached.
—To reduce the risk of an accident, never place
additional floor mats or other floor covers
over the installed floor mats, because this
reduces the pedal's range of motion and can
impair pedal operation.
—To reduce the risk of injury, never place your
feet on the instrument panel, out of the
window, or on the seat surfaces. This also
applies to passengers in the rear seats.
@) Note
To reduce the risk of damage, be very careful
when adjusting the seat to make sure the
head restraints do not come into contact with
the headliner or the sunroof*.
G@) Tips
At the same time, only move the respective
seat using the controls.
Adjusting the front power seats
7
©
|
[RAz-0172
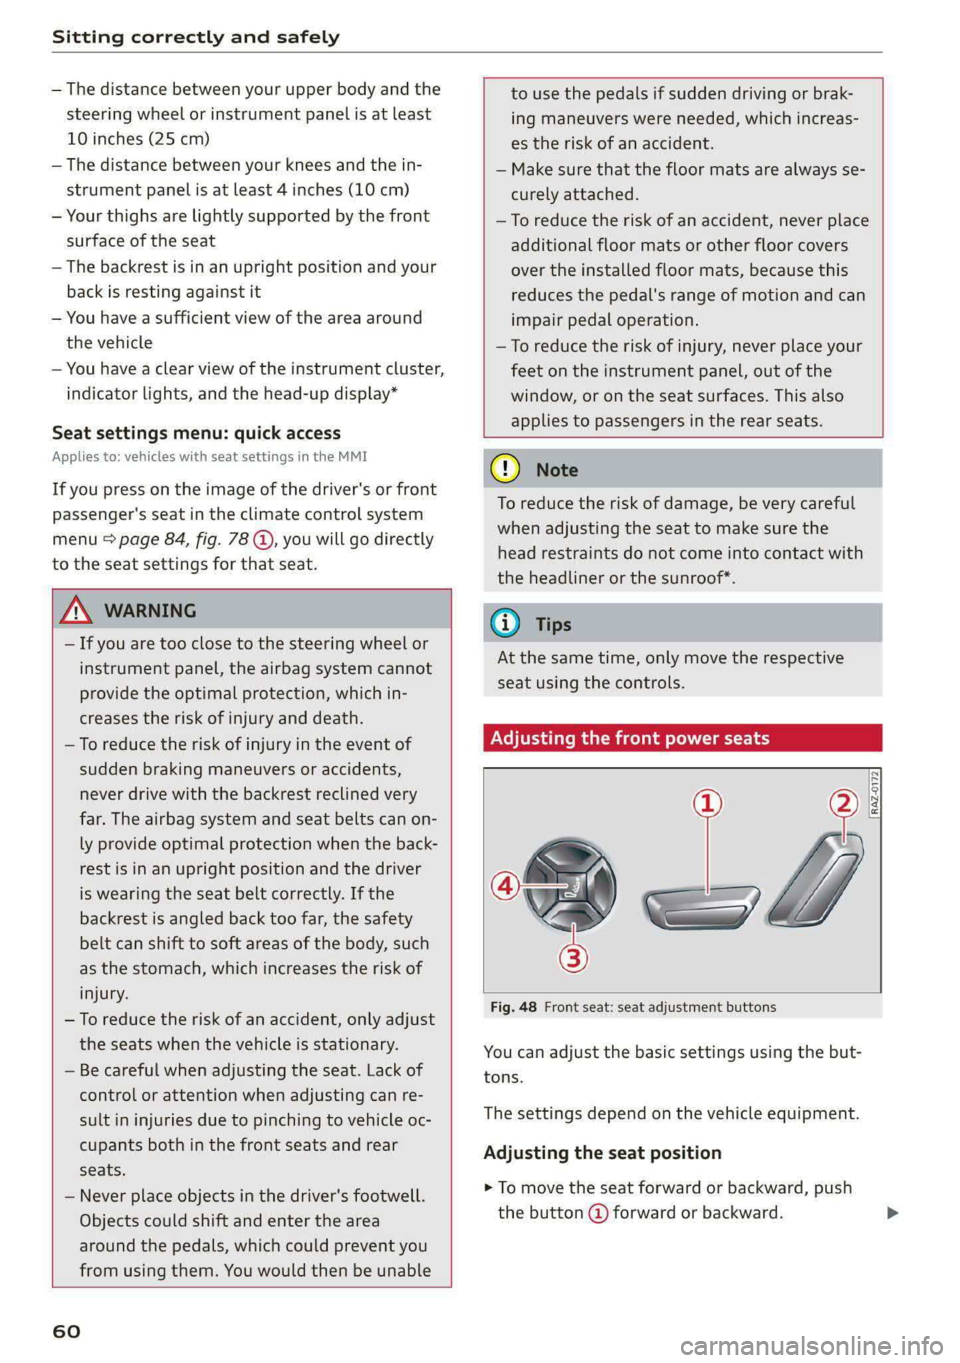
Fig. 48 Front seat: seat adjustment buttons
You can adjust the basic settings using the but-
tons.
The settings depend on the vehicle equipment.
Adjusting the seat position
> To move the seat forward or backward, push
the button @ forward or backward.
Page 64 of 308

Sitting correctly and safely
Reset seat position
You can adjust the position of the front passeng-
er’s seat to match the driver's seat.
Driver seat entry assistance/Front passenger
seat entry assistance
Entry assistance makes it easier to enter or exit
the vehicle.
Adjusting the front passenger's seat from
A tnMe laa
Applies to: vehicles with front passenger seat adjustment
You can adjust the front passenger's side with the
driver's seat buttons.
Applies to: MMI:
> Select on the home screen: VEHICLE > Seats.
> To display the various seats, press ) or ¢.
> To switch on the function, press the 2/ button.
The lower edge of the button will turn red.
After you have switched on the function, you can
adjust the front passenger's seat using the driv-
er's seat buttons > page 60, fig. 48.
@ Tips
The function switches off automatically when
you exit the menu.
anime Cerne
Applies to: vehicles with a front center armrest
The front center armrest is located between the
front
seats.
Adjusting the center armrest
> To adjust the armrest forward or backward,
move the armrest in the desired direction.
> To adjust the angle, raise the armrest from the
starting position in stages.
> To bring the armrest back into the starting po-
sition, raise
it out of the top level and fold it
back down.
Z\ WARNING
In certain positions, the front center armrest
can interfere with the driver’s arm movement,
which increases the risk of injury.
62
Steering wheel
General information
Make sure that:
— The distance between your upper body and the
steering wheel is at least 10 inches (25 cm)
— Your arms are bent slightly at the elbows
— You have a sufficient view of the area around
the vehicle and you have a clear view of the in-
strument cluster and head-up display”.
— You are always holding the steering wheel with
both hands on the outer edge at the sides (9:00
and
3:00 position) when driving
Z\ WARNING
—To reduce the risk of an accident, make sure
the steering wheel is adjusted correctly and
cannot be moved out of position before you
start to drive.
— If you are too close to the steering wheel,
the driver's airbag cannot provide optimal
protection, which increases the risk of injury
or fatality.
— Never hold the steering wheel in the 12:00
position or in any other way, such as holding
the center of the steering wheel. Otherwise,
your arms, hands, and head could be injured
in the event that the driver's airbag deploys.
Power steering wheel position adjustment
BFY-0110
Fig. 50 Steering column: switch for adjusting the steering
wheel position
The steering wheel position can be adjusted elec-
trically up/down and forward/back.
> To move the steering wheel upward or down-
ward, press the switch upward or downward. >
Page 69 of 308

4KE012721BF
Sitting correctly and safely
may need to be activated. Follow the instruc-
tions from the child safety seat manufacturer.
>» When a vehicle passenger has fastened a safety
belt, the belt retractor lock should not be acti-
vated. If the belt retractor lock has been acti-
vated unexpectedly, deactivate it.
Deactivating or activating the belt retractor lock
=> page 75.
Safety belt retractor
The safety belts are equipped with an automatic
belt retractor. This automatic retractor allows the
safety belt to be pulled all the way out when the
belt is pulled slowly. However, the automatic re-
tractor locks during sudden braking maneuvers.
It also locks the belts when accelerating, driving
uphill, and driving around curves.
Belt force limiter
Safety belts with belt force limiters reduce the
force placed on the body by the safety belts dur-
ing a collision.
Safety belt pretensioners
Safety belts may be tightened with reversible
belt tensioners when you start driving and in cer-
tain driving situations. If the safety belt is too
loose, it will be tightened so that the belt will
rest closer to the body.
In some collisions, pyrotechnic belt tensioners
may secure the safety belts so that they cannot
loosen. This reduces forward movement by the
vehicle passengers.
Z\ WARNING
The pyrotechnic system can only provide pro-
tection during one collision. If the pyrotechnic
belt tensioners deploy, the pretensioning sys-
tem must be replaced by an authorized Audi
dealer or authorized Audi Service Facility.
@) Tips
Smoke may be released when pyrotechnic belt
tensioners deploy. This is not a sign of a vehi-
cle fire.
Memory function
General information
Applies to: vehicles with memory function
With the memory function, you can save and call
up seat profiles using the memory buttons in the
door trim panel.
Depending on vehicle equipment, some settings
such as the driver’s seat and exterior mirror posi-
tion can be stored.
Storing and recalling a seat profile
Applies to: vehicles with memory function
The memory function buttons are located in the
door trim panel.
Storing a seat profile
> Press the [SET] button. If the LED in the button
turns on, a seat profile can be stored.
> Push one of the numbered memory buttons. A
tone confirms that the settings were stored.
Accessing a seat profile
> While the driver’s or front passenger's door is
open and the ignition is switched off, press the
memory button once briefly. The seat will be
fully adjusted to the settings in the seat profile.
> If the driver's/front passenger's door is closed
or the ignition is switched on, press and hold
the memory button until the seat profile is
completely set.
Z\ WARNING
—To reduce the risk of an accident, the seat
setting can only be recalled when the vehicle
is stationary.
—Inan emergency, the recall process can be
canceled by pressing the seat adjustment
button on that seat.
67
Page 281 of 308

4KE012721BF
Fuses and bulbs
Fuse panel (2) (black) Fuse panel (4) (brown)
9 |Instrument cluster No. | Equipment
10 | Volume control Right front safety belt tensioner
11 | Light switch, switch panels Left front safety belt tensioner
12 | Steering column electronics Air suspension/suspension control
15 |Steering column adjustment Right headlight
16 | Steering wheel heating Left headlight
Fuse panel 2) (black)
Left rear door control module
No. | Equipment
WOl/@OIN|
A)
M|AILN
Right rear door control module
10 | Infotainment system
1 |Front seat heating - -
> |Cimateconerl system 11 Exe Sealealite systems control module
3 |Left headlight electronics 12 | Diagnostic interface
4 |Panoramic glass roof Fuse panel (5) (black)
5 |Left front door control module No. | Equipment
6 | Sockets 1 Seat electronics, front seat ventilation,
8 | Instrument panel rearview mirror, diagnostic connection
9 | Right headlight electronics 2 Vehicle electrical system control module,
Windshield washer system/headlight diagnostic interface
10 washer system 3 | Exterior sound generator
12 | Parking lock 5 | Electric drive system
raven 6 | Traffic information antenna (TMC)
Fuse panel (8) (re
ueeiP eed) 7 |Active accelerator pedal
No. | Equi it
o. atipmen 8 | Night vision assist
1 |Anti-theft alarm system - - -
9 |Adaptive cruise assist
2 |Drive system control module , - . -
ll Driver assistance systems, intersection as-
3_| Emergency call module sistant control module
4 | Selector lever 15 |USB input
5 |Horn
6 | Parking brake Fuse assignment - luggage compa
7 High-voltage battery, battery monitoring
control module
8 | Roof electronics control module
10 | Airbag control module
11 | Left front lumbar support
12 | Diagnostic connection, light/rain sensor
14 | Right front door control module
15 | Climate control system compressor
16 | Climate control system blower
5 iF
| | eo ed oO
' rR mae Y= ae
aR EE
Fig. 177 Left side of the luggage compartment: fuse panel
with plastic clip
279
>
Page 303 of 308

4KE012721BF
Replacement parts.............-.00000- 287
Replacing fuses ........ 000 esc ce eee ees 277
Reporting Safety Defects................ 287
Reverse gear
refer to Gear's « ssc » waver 6 owe es eter 92
RIMS:s ss sesccie = o secece oo ee 2 ween eo a eo 255
Cleaning ....... 0... cece cece eee 263
Road Garnier crs ao sumene 2 3 omme o wneno © woe 103
ROLLING 2 sccmnes 2 snece ev mice ee anaes =n aerene @ ¥ 91
Rolling ability
Electromechanical parking brake......... 98
Hold assist....................0.00005 99
Transmission idle’s « 2 wees + ease 2 5 pea o 5 we 93
Roof
refer to Panoramic glass roof............ 44
ROOFLOA « swisins as sxawes oo orosaun oo imaeen ow a 291
Roofifackeuws s ¢ geen ss news sy ewes ¢ oREES ¢ ae 83
also refer to Roof rack..............0--. 83
Route guidance
StOpPiINg...... cece eee eee eee eee 198
also refer to Navigation............... 194
Raeute planner (@-trOn): « «cows oe coen sc eee 198
Running direction (tires)...........00005 272
S
Safety belts. ........ 0... cee eee eee eee 64
Cleaning « ¢ ecews ¢ 2 sews ¢ e seems co oem ee os 264
LOCKING ire = = wosicens w= coevece « © eweere © w cireuene ou ee 75
Securing child safety seats.............. 75
Satellite map... 2.2... eee eee eee 202
Screen
refer to Touch display..............000. 15
Screwdriver .......... 0c c eee e eee eee 267
Search function
refer to Free text search............... 222
Seat heating............ 0. eee eee eee 86
Seats
Adjusting the front seats............... 60
Cleaning « « sess vs ewes ow seen 2 a sure & o oe 264
Folding
Front passenger’s seat adjustment....... 62
Head restraints: « sisi so oun 2 x svemve © 2 ome 63
Massage function.............. eee eee 60
Memory function..............2-.0 eee 67
Resetting the position.................. 61
Storing aseat profile................... 67
Seatventilationrc «cow «x cecsoee wx awavous oo as 86
Securing the vehicle ............c0eeeeees 91
Selecting a source (media).............. 218
Selector lever's « saws « x warms s g eres ag es g 92
Sensors
Coverage areas aves. w 3 saves w 2 coms o 0 ous 130
Locations..... 00.0.0... ce eee ee eee 131
Service interval display..............0.. 239
Setting measurement units.............. 228
SOCLINGS’s 5 2 ssees w & come © o cone so meses oH Hee 228
Announcements and tones............. 228
Bluetooth........................005 229
Datetaniel tim@iss s ¢ wusu s ¢ eeens « ¢ caves a 2s 228
Dit CORY. cesses x © cance 4 o memes ow memes % sree 183
E-mail... eee eee 184
LANGUAGE sce x + mewn x 2 eS 4 2 EEE 4 2 ce 228
Measurement:umitsice 6 2 cance so namie x + anne 228
Media... .. 2... cee eee eee eee eee 222
NaVigatioOnies + « sac = « sat ¢ x news se ees 205
Radi@iavsns x © suns ov svarene sw amma © x xno Wa 0 213
Sound .......... 0000 eee eee eee eee 228
SYStEM s < s dawg < fae & @ Hotes GY Here ¥ oe 228
Telephone :evccsie = seceses o = eierewe = 4 aoeuene © v eeeve 182
Text MesSageS... 1.2... cee eee eee 183
TIME ZONGicas « s awe 3 y Gee + EES Ge eR 228
WWicEi OTSPOE acces 2 6 cee ov ee a coe oo 189
Setting the charging target.............. 115
Setting the language...............-... 228
Setting the time ss ¢ ¢ ees ss pees cv teas 9? 228
Shift paddles
Adjusting recuperation................. 95
Ship ¢arriet > sees <= ewe s 5 eews =e ewe ee oe 103
SHOp)s = = ews ¢ o ees 2 o ees ge teen gs eee 188
Shortcut
referto Shortcuts « sess a seas ss ova sean 21
SHOPteUtss « < means = nwa ov ewe yy BeeE Ge 21
SHUfElGnye = = soem : seems ¢ SRR GE ReGH s Fe 220
Side assist... .............0 00000 c eee 160
Cleaning the sensors...........00e0 00 262
SIMPGStG 's seus x + emmys xs eae ge Ree ee GOR 187
Sliding/tilting sunroof
refer to Panoramic glass roof............ 44
Smart Favorites
refer to PresetS.........-..00--00 eee 210
Smartphone
refer to Telephone.............02e0 00s 175
301