2021 ALFA ROMEO GIULIA ad blue
[x] Cancel search: ad bluePage 11 of 284

9
Adaptive Frontlight System
(AFS Function) — If Equipped ................ 44 Turn Signals ........................................... 44
Lane Change Assist ............................... 44
Static Bending Light Function (SBL) —
If Equipped ............................................. 44
INTERIOR LIGHTS .....................................44
Front Map Reading Lights ..................... 45
Interior Ambient Lighting ....................... 45
Rear Overhead Light .............................. 46
Instrument Panel Dimmer Control ....... 46
WINDSHIELD WIPERS AND WASHERS....46
Windshield Wiper Operation ................ 47
Rain Sensing Wipers.............................. 47
CLIMATE CONTROL .................................48
Automatic Dual-Zone Climate
Control System ...................................... 49
INTERIOR STORAGE AND EQUIPMENT....55
Glove Compartment .............................. 55
Center Console ...................................... 56
Power Outlet........................................... 56
Cigar Lighter And Ash Tray —
If Equipped ............................................. 57
Wireless Charging Pad — If Equipped ... 57
POWER WINDOWS ...................................58
Power Window Controls......................... 58
POWER SUNROOF — IF EQUIPPED ..........60
Power Sunroof........................................ 60
Opening And Closing The Sunroof ........ 60
Venting Sunroof ..................................... 61
Sun Shade Operation ............................ 61
Pinch Protect Feature ............................ 61
Re-Initialization Procedure .................... 61
Sunroof Maintenance ............................ 61
HOOD ........................................................ 62
Opening .................................................. 62
Closing.................................................... 62
TRUNK ...................................................... 63
Opening .................................................. 63
Closing.................................................... 64
Trunk Initialization ................................. 64
Trunk Specifications ............................. 64
ENVIRONMENTAL PROTECTION
SYSTEMS .................................................. 65
ACTIVE AERODYNAMIC SPOILER
(QUADRIFOGLIO VEHICLES) .................... 65
Carbon Fiber Active Aero Front
Spoiler .................................................... 65
GETTING TO KNOW YOUR INSTRUMENT
PANEL
INSTRUMENT PANEL FEATURES............. 66
Instrument Cluster ................................ 66
Tachometer............................................ 67
Engine Oil Temperature Gauge ............ 67
Fuel Level Gauge ................................... 68
Speedometer ......................................... 68
INSTRUMENT CLUSTER DISPLAY............ 68
Instrument Cluster Display
Description ............................................. 68 Reconfigurable Instrument Cluster
Display.................................................... 68 Reconfigurable Display Items ............... 68
Customer Programmable Settings ....... 72
WARNING LIGHTS AND MESSAGES
ON THE INSTRUMENT PANEL ................. 73
Red Warning Lights ............................... 73
Amber Warning Lights ........................... 75 Green Indicator Lights ...........................77
Blue Indicator Lights ..............................77
Red Symbols...........................................78
Amber Symbols ......................................79
Green Symbols .......................................83
Blue Symbols .......................................... 83
ONBOARD DIAGNOSTIC SYSTEM ...........84
Onboard Diagnostic System (OBD II)
Cybersecurity .......................................... 84
EMISSIONS INSPECTION AND
MAINTENANCE PROGRAMS ....................85
STARTING AND OPERATING
STARTING THE ENGINE ............................86
Starting Procedure .................................86
Remote Starting System ........................86
Cold Weather Operation ........................87
Extended Park Starting ..........................87
If Engine Fails To Start ...........................88
After Starting — Warming Up The
Engine .....................................................88 Stopping The Engine ..............................88
Turbocharger Cool Down .......................88
ENGINE BLOCK HEATER —
IF EQUIPPED ............................................89
ENGINE BREAK-IN
RECOMMENDATIONS ...............................89
Engine Break-In ......................................89
ELECTRIC PARK BRAKE (EPB) .................90
Electric Park Brake (EPB) Operating
Modes .....................................................92 Safe Hold ................................................92
21_GA_OM_EN_USC_t.book Page 9
Page 15 of 284

13
Some car components have colored labels
with symbols indicating precautions to be
observed when using this component. It is
important to follow all warnings when oper-
ating your vehicle. See below for the definition
of each symbol
Ú
page 68.
Red Warning Lights
Air Bag Warning Light
Ú
page 73
Brake Warning Light
Ú
page 73
Electronic Brake Force
Distribution (EBD) Failure
Ú
page 74
Oil Temperature Warning Light
Ú
page 74
Seat Belt Reminder Warning Light
Ú
page 75
Amber Warning Lights
Anti-Lock Brake System (ABS)
Warning Light
Ú
page 75
Electronic Stability Control (ESC) Indicator Light — If Equipped
Ú
page 75
Electronic Stability Control
(ESC) OFF Indicator Light — If Equipped
Ú
page 75
Tire Pressure Low Warning Light
Ú
page 75
Tire Pressure Monitoring
System (TPMS) Warning Light
Ú
page 76
Rear Fog Lights
Ú
page 76
Engine Check/Malfunction Indicator Light (MIL)
Ú
page 77
Forward Collision Warning (FCW) System
Ú
page 77
Fuel Reserve/Limited Range
Ú
page 77
Green Indicator Lights
Automatic High Beam
Indicator Light — If Equipped
Ú
page 77
Amber Warning Lights
Left Turn Signal Indicator
Light
Ú
page 77
Park/Headlight On Indicator Light
Ú
page 77
Right Turn Signal Indicator Light
Ú
page 77
Blue Indicator Lights
High Beam Indicator Light
— If Equipped
Ú
page 77
Red Symbols
Alfa Steering Torque (AST)
Failure
Ú
page 78
Alternator Failure
Ú
page 78
Automatic Transmission Failure
Ú
page 78
Driver Attention Assist
(DAA) System Activation
Ú
page 78
Green Indicator Lights
21_GA_OM_EN_USC_t.book Page 13
Page 17 of 284

15
Speed Limiter System Failure
Ú
page 81
Loose Fuel Filler Cap
Ú
page 81
Electric Park Brake Failure
Ú
page 81
Low Coolant Level — If Equipped
Ú
page 82
Service Adaptive Cruise Control (ACC) System
Ú
page 82
Wear On Brake Pads
Ú
page 82
Dynamic Drive Control System Failure
Ú
page 82
Windshield Wiper Failure
Ú
page 82
Generic Indication
Ú
page 82
All Wheel Drive Failure
Ú
page 82
Amber Symbols
Temporary All Wheel Drive
Failure — If Equipped
Ú
page 82
ABS Activation
Ú
page 82
Adaptive Front Lighting System Failure
Ú
page 82
Soft Suspension Calibration Insertion — If Equipped
Ú
page 82
Shock Absorbers Failure
Ú
page 82
Windshield Washer Liquid Level
Ú
page 82
Wear ON Carbon Ceramic
Material (CCM) Brake Discs — If Equipped
Ú
page 83
Driver Attention Assist (DAA) System Failure
Ú
page 83
Highway Assist System
(HAS)/Traffic Jam Assist (TJA) System Failure
Ú
page 83
Amber SymbolsGreen Symbols
Headlights
Ú
page 83
Automatic Headlights
Ú
page 83
Stop/Start Operation
Ú
page 83
Cruise Control Activated
Ú
page 83
Adaptive Cruise Control System — If Equipped
Ú
page 83
Blue Indicator Lights
Automatic High Beam
Headlights — If Equipped
Ú
page 83
High Beam Headlights
Ú
page 83
21_GA_OM_EN_USC_t.book Page 15
Page 45 of 284

43
To turn the automatic headlights off, turn the
headlight switch out of the (AUTO) position.
Flash-To-Pass
You can signal another vehicle with your head-
lights by lightly pulling the multifunction lever
toward you. This will cause the high beam
headlights to turn on, and remain on, until the
lever is released.
Automatic High Beam Headlights — If
Equipped
The Automatic High Beam Headlights system
provides increased forward lighting at night by
automating high beam control through the use
of a camera mounted on the windshield. This
camera detects vehicle specific light and auto -
matically switches from high beams to low
beams until the approaching vehicle is out of
view.
This function is enabled with the radio system,
and can only be activated with the light switch
turned to (auto).
If the high beam headlights are on, the blue
icon/warning light will illuminate in the
instrument panel.
When the speed is higher than 25 mph
(40 km/h) and the function is active, the lights
will turn off if the multifunction lever is pushed
again. When the speed is lower than 15 mph
(25 km/h) and the function is active, the func
-
tion switches the high beam headlights off.
If the high beam headlights are operated
quickly again (pushing the multifunction lever
towards the instrument panel), the warning
light/icon will illuminate in the instrument
panel, and the high beam headlights will turn
on constantly until the speed exceeds 25 mph
(40 km/h).
When the speed of 25 mph (40 km/h) is
exceeded again, the automatic functioning is
reactivated.
If the multifunction lever is pushed again with
the Automatic High Beam Headlights acti -
vated, the Automatic High Beam Headlights
function deactivates.
To deactivate the automatic headlight function,
rotate the headlight switch to the position.
NOTE:
If the system recognizes heavy traffic areas,
the automatic functions remain disabled
independently of the vehicle’s speed.
The Automatic High Beam functionality may
also be influenced by:
• Reflections on road signs
• Dim headlights from oncoming traffic
• Poor weather conditions •
Presence of dirt or other obstructions on
the sensor
• Damage to the windshield
Parking Lights
To turn on the parking lights and instrument
panel lights, rotate the headlight switch clock -
wise to the position. All of the parking lights
will turn on for eight minutes, and opening the
door activates an audible warning.
To leave only the lights on one side (right/left)
illuminated, move the multifunction lever
(located on the left side of the steering wheel)
to the side that you want to remain on. With
the parking lights on, the warning light on
the instrument panel will illuminate.
To turn off the parking lights, rotate the head -
light switch back to the O (off) position.
Headlight Off Delay
To assist when exiting the vehicle, the “Head -
light Off Delay” feature will leave the head -
lights on for up to 90 seconds. This delay is
initiated when the ignition is placed in the OFF
position while the headlight switch is on, and
then the headlight switch is cycled off. Head -
light delay can be canceled by either turning
on the headlights or side lights, or by placing
the ignition in the ON position.
21_GA_OM_EN_USC_t.book Page 43
Page 79 of 284

77
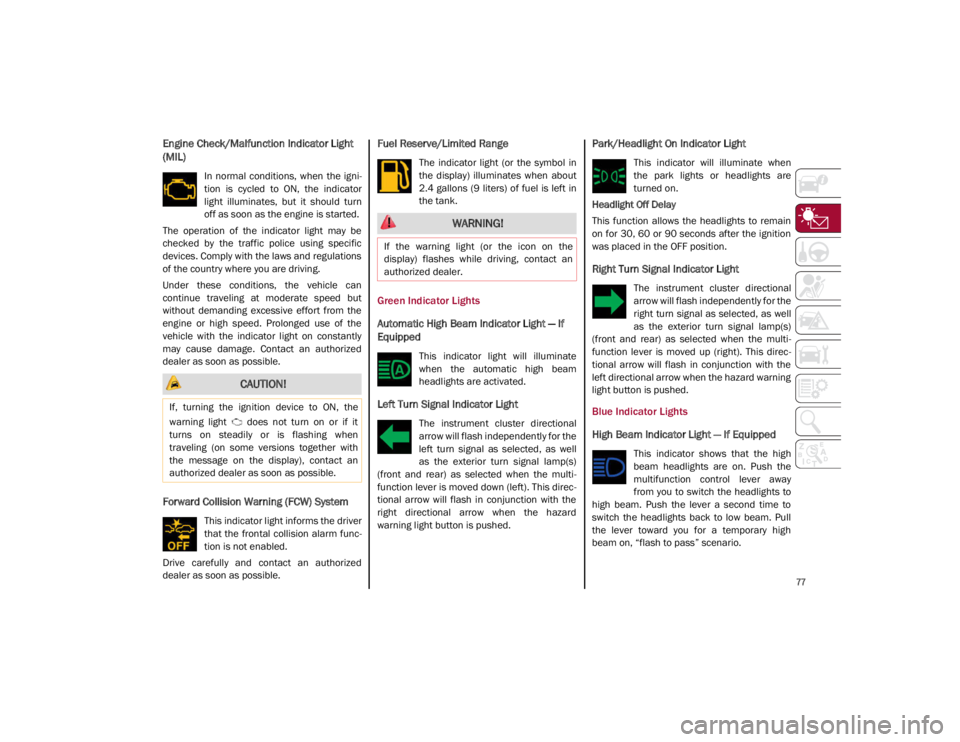
Engine Check/Malfunction Indicator Light
(MIL)
In normal conditions, when the igni-
tion is cycled to ON, the indicator
light illuminates, but it should turn
off as soon as the engine is started.
The operation of the indicator light may be
checked by the traffic police using specific
devices. Comply with the laws and regulations
of the country where you are driving.
Under these conditions, the vehicle can
continue traveling at moderate speed but
without demanding excessive effort from the
engine or high speed. Prolonged use of the
vehicle with the indicator light on constantly
may cause damage. Contact an authorized
dealer as soon as possible.
Forward Collision Warning (FCW) System
This indicator light informs the driver
that the frontal collision alarm func -
tion is not enabled.
Drive carefully and contact an authorized
dealer as soon as possible.
Fuel Reserve/Limited Range
The indicator light (or the symbol in
the display) illuminates when about
2.4 gallons (9 liters) of fuel is left in
the tank.
Green Indicator Lights
Automatic High Beam Indicator Light — If
Equipped
This indicator light will illuminate
when the automatic high beam
headlights are activated.
Left Turn Signal Indicator Light
The instrument cluster directional
arrow will flash independently for the
left turn signal as selected, as well
as the exterior turn signal lamp(s)
(front and rear) as selected when the multi -
function lever is moved down (left). This direc -
tional arrow will flash in conjunction with the
right directional arrow when the hazard
warning light button is pushed.
Park/Headlight On Indicator Light
This indicator will illuminate when
the park lights or headlights are
turned on.
Headlight Off Delay
This function allows the headlights to remain
on for 30, 60 or 90 seconds after the ignition
was placed in the OFF position.
Right Turn Signal Indicator Light
The instrument cluster directional
arrow will flash independently for the
right turn signal as selected, as well
as the exterior turn signal lamp(s)
(front and rear) as selected when the multi -
function lever is moved up (right). This direc -
tional arrow will flash in conjunction with the
left directional arrow when the hazard warning
light button is pushed.
Blue Indicator Lights
High Beam Indicator Light — If Equipped
This indicator shows that the high
beam headlights are on. Push the
multifunction control lever away
from you to switch the headlights to
high beam. Push the lever a second time to
switch the headlights back to low beam. Pull
the lever toward you for a temporary high
beam on, “flash to pass” scenario.
CAUTION!
If, turning the ignition device to ON, the
warning light does not turn on or if it
turns on steadily or is flashing when
traveling (on some versions together with
the message on the display), contact an
authorized dealer as soon as possible.
WARNING!
If the warning light (or the icon on the
display) flashes while driving, contact an
authorized dealer.
21_GA_OM_EN_USC_t.book Page 77
Page 85 of 284

83
WEAR ON Carbon Ceramic Material (CCM)
Brake Discs — If Equipped
This light will illuminate when the
carbon ceramic material brake discs
have reached their wear limit.
Contact an authorized dealer as soon as
possible.
Driver Attention Assist (DAA) System Failure
The symbol comes on in the event of
a DAA system failure.
Contact an Alfa Romeo Dealership as soon as
possible to have the failure eliminated.
Highway Assist System (HAS)/Traffic Jam
Assist (TJA) System Failure
The symbol lights up in case of HAS
or TJA system failure.
Contact an Alfa Romeo Dealership as soon as
possible to have the failure eliminated.
Green Symbols
Headlights
The telltale will illuminate when the
headlights are turned on.
Automatic Headlights
The symbol lights up when the auto -
matic headlights are on.
Stop/Start Operation
The telltale will illuminate in the case
of Stop/Start system intervention
(stopping the engine).
When the engine is restarted, the telltale will
shut off
Ú
page 102.
Cruise Control Activated
The telltale will illuminate when the
Cruise Control system is activated.
Adaptive Cruise Control System — If
Equipped
The symbol comes on when the
Adaptive Cruise Control system is
activated.
Blue Symbols
Automatic High Beam Headlights — If
Equipped
The telltale will illuminate when the
automatic high beam headlights are
activated.
High Beam Headlights
The telltale will illuminate when the
high beam headlights are activated.
WARNING!
It is recommended to use only OEM brake
pads to ensure the original performance of
the braking system.
21_GA_OM_EN_USC_t.book Page 83
Page 101 of 284

99
ALFA DNA / PRO SELECTOR
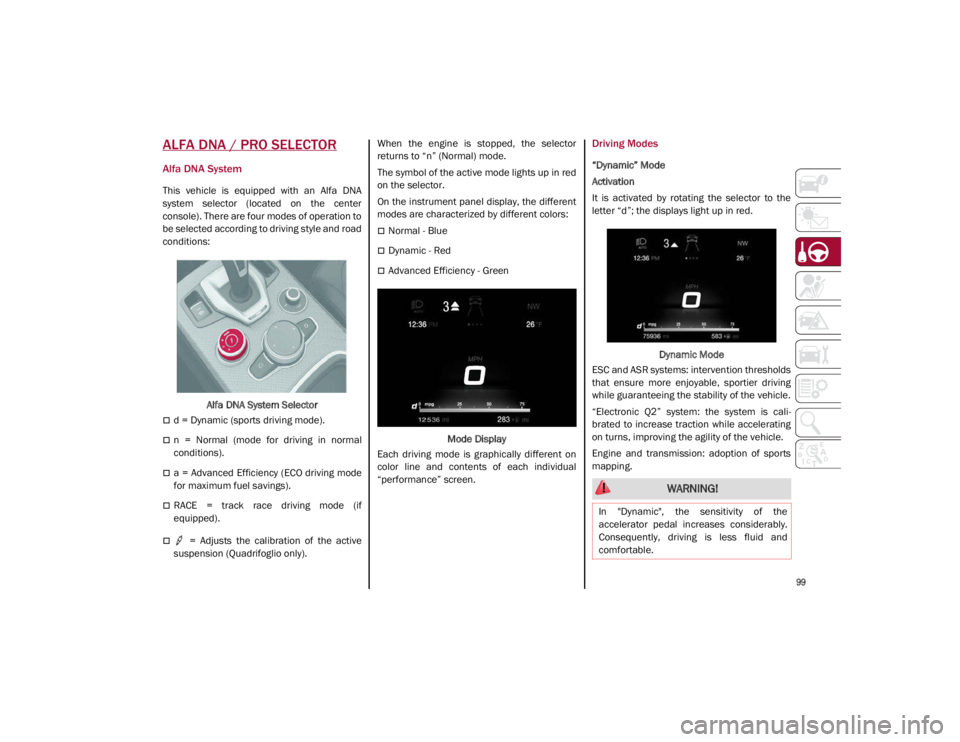
Alfa DNA System
This vehicle is equipped with an Alfa DNA
system selector (located on the center
console). There are four modes of operation to
be selected according to driving style and road
conditions:Alfa DNA System Selector
d = Dynamic (sports driving mode).
n = Normal (mode for driving in normal
conditions).
a = Advanced Efficiency (ECO driving mode
for maximum fuel savings).
RACE = track race driving mode (if
equipped).
= Adjusts the calibration of the active
suspension (Quadrifoglio only). When the engine is stopped, the selector
returns to “n” (Normal) mode.
The symbol of the active mode lights up in red
on the selector.
On the instrument panel display, the different
modes are characterized by different colors:
Normal - Blue
Dynamic - Red
Advanced Efficiency - Green
Mode Display
Each driving mode is graphically different on
color line and contents of each individual
“performance” screen.
Driving Modes
“Dynamic” Mode
Activation
It is activated by rotating the selector to the
letter “d”; the displays light up in red.
Dynamic Mode
ESC and ASR systems: intervention thresholds
that ensure more enjoyable, sportier driving
while guaranteeing the stability of the vehicle.
“Electronic Q2” system: the system is cali -
brated to increase traction while accelerating
on turns, improving the agility of the vehicle.
Engine and transmission: adoption of sports
mapping.
WARNING!
In "Dynamic", the sensitivity of the
accelerator pedal increases considerably.
Consequently, driving is less fluid and
comfortable.
21_GA_OM_EN_USC_t.book Page 99
Page 102 of 284

STARTING AND OPERATING
100
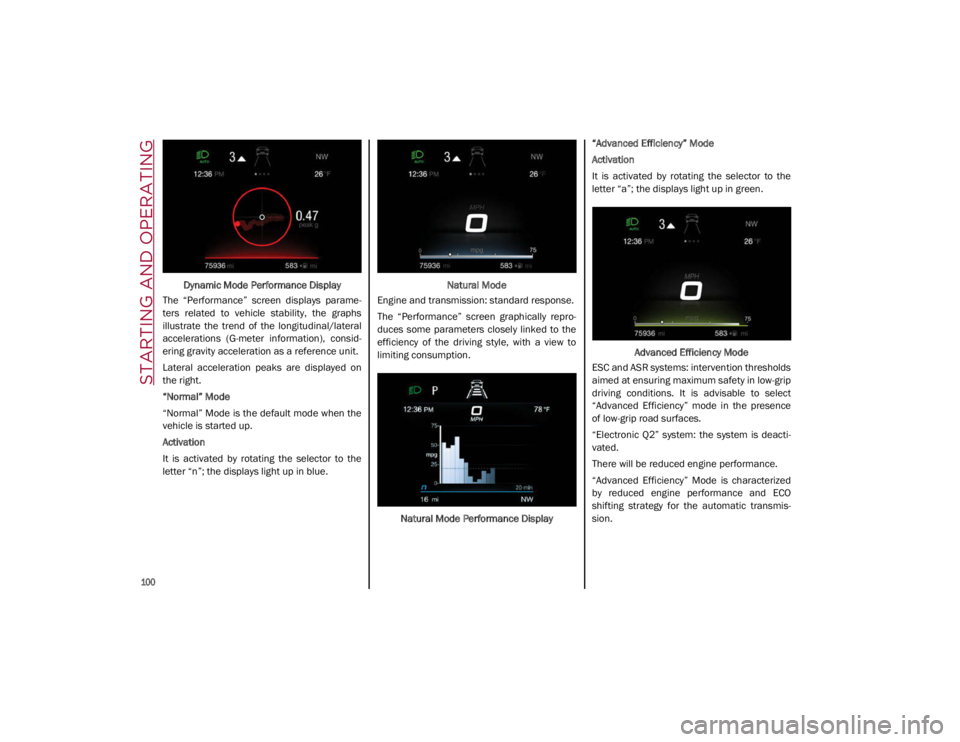
Dynamic Mode Performance Display
The “Performance” screen displays parame -
ters related to vehicle stability, the graphs
illustrate the trend of the longitudinal/lateral
accelerations (G-meter information), consid -
ering gravity acceleration as a reference unit.
Lateral acceleration peaks are displayed on
the right.
“Normal” Mode
“Normal” Mode is the default mode when the
vehicle is started up.
Activation
It is activated by rotating the selector to the
letter “n”; the displays light up in blue. Natural Mode
Engine and transmission: standard response.
The “Performance” screen graphically repro -
duces some parameters closely linked to the
efficiency of the driving style, with a view to
limiting consumption.
Natural Mode Performance Display “Advanced Efficiency” Mode
Activation
It is activated by rotating the selector to the
letter “a”; the displays light up in green.
Advanced Efficiency Mode
ESC and ASR systems: intervention thresholds
aimed at ensuring maximum safety in low-grip
driving conditions. It is advisable to select
“Advanced Efficiency” mode in the presence
of low-grip road surfaces.
“Electronic Q2” system: the system is deacti -
vated.
There will be reduced engine performance.
“Advanced Efficiency” Mode is characterized
by reduced engine performance and ECO
shifting strategy for the automatic transmis -
sion.
21_GA_OM_EN_USC_t.book Page 100