2021 ALFA ROMEO GIULIA seat adjustment
[x] Cancel search: seat adjustmentPage 38 of 284

GETTING TO KNOW YOUR VEHICLE
36
For upward adjustment, pull up on the head
restraint until it clicks into place.
For downward adjustment, push in the adjust-
ment button and lower the head restraint
while holding the button to the desired height.
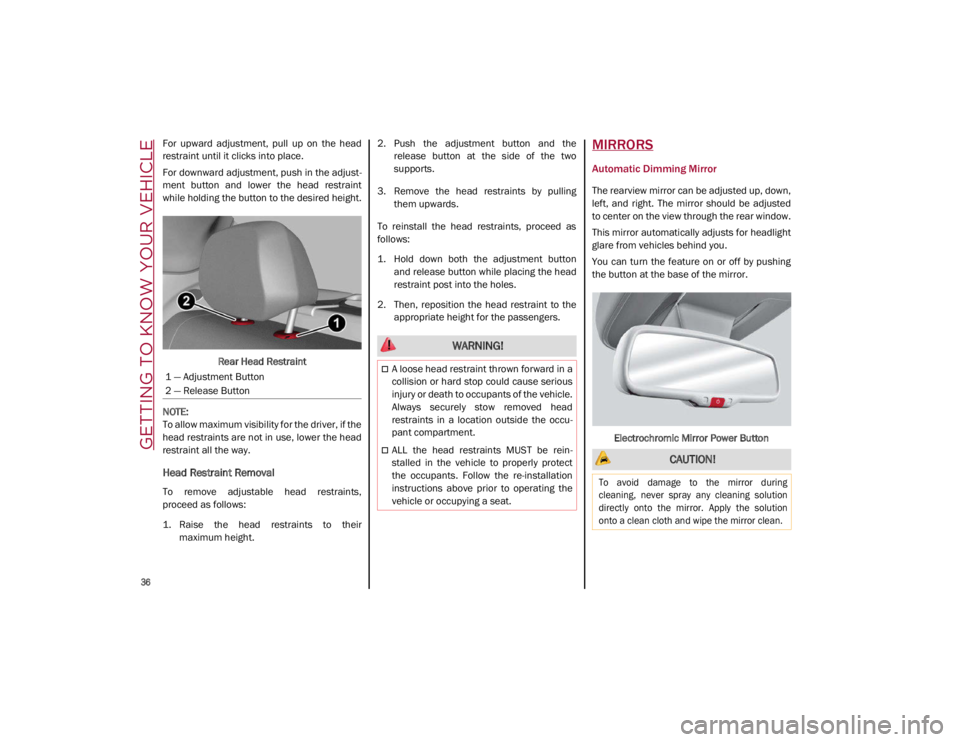
Rear Head Restraint
NOTE:
To allow maximum visibility for the driver, if the
head restraints are not in use, lower the head
restraint all the way.
Head Restraint Removal
To remove adjustable head restraints,
proceed as follows:
1. Raise the head restraints to their maximum height. 2. Push the adjustment button and the
release button at the side of the two
supports.
3. Remove the head restraints by pulling them upwards.
To reinstall the head restraints, proceed as
follows:
1. Hold down both the adjustment button and release button while placing the head
restraint post into the holes.
2. Then, reposition the head restraint to the appropriate height for the passengers.
MIRRORS
Automatic Dimming Mirror
The rearview mirror can be adjusted up, down,
left, and right. The mirror should be adjusted
to center on the view through the rear window.
This mirror automatically adjusts for headlight
glare from vehicles behind you.
You can turn the feature on or off by pushing
the button at the base of the mirror.
Electrochromic Mirror Power Button
1 — Adjustment Button
2 — Release Button
WARNING!
A loose head restraint thrown forward in a
collision or hard stop could cause serious
injury or death to occupants of the vehicle.
Always securely stow removed head
restraints in a location outside the occu
-
pant compartment.
ALL the head restraints MUST be rein -
stalled in the vehicle to properly protect
the occupants. Follow the re-installation
instructions above prior to operating the
vehicle or occupying a seat. CAUTION!
To avoid damage to the mirror during
cleaning, never spray any cleaning solution
directly onto the mirror. Apply the solution
onto a clean cloth and wipe the mirror clean.
21_GA_OM_EN_USC_t.book Page 36
Page 39 of 284

37
Vanity Mirror
On the driver and passenger sun visor, there is
a light which illuminates the sun visor mirror
when folded down.Sun Visor Mirror
The courtesy light turns on automatically by
lifting the cover.
Sun Visors
The sun visors are located at the sides of the
interior rearview mirror. They can be adjusted
forward and toward the side window.
To direct the visor toward the side window,
detach the visor from the interior rearview
mirror side hook and turn it towards the side
window. From this position, the sun visor can also be
extended toward the rear of the vehicle for
additional blockage of sunlight.
There are courtesy mirrors with lights on the
back of the sun visors.
Rotate Sun Visor Toward Passenger Window
NOTE:
A rear facing child restraint system should
never be fitted in the front passenger seat.
Always comply with the instructions on the sun
visor
Ú
page 174.Outside Power Mirrors
The power mirror switch is located on the
driver’s side door trim panel.
To adjust the power mirrors, first select the
desired mirror using the power mirror control. To adjust the selected mirror, push the knob in
the direction desired.
NOTE:
Once adjustment is complete, rotate the
knob to the neutral position to prevent acci
-
dental movements.
The power mirrors can be adjusted with the
ignition in the ACC or ON/RUN position.
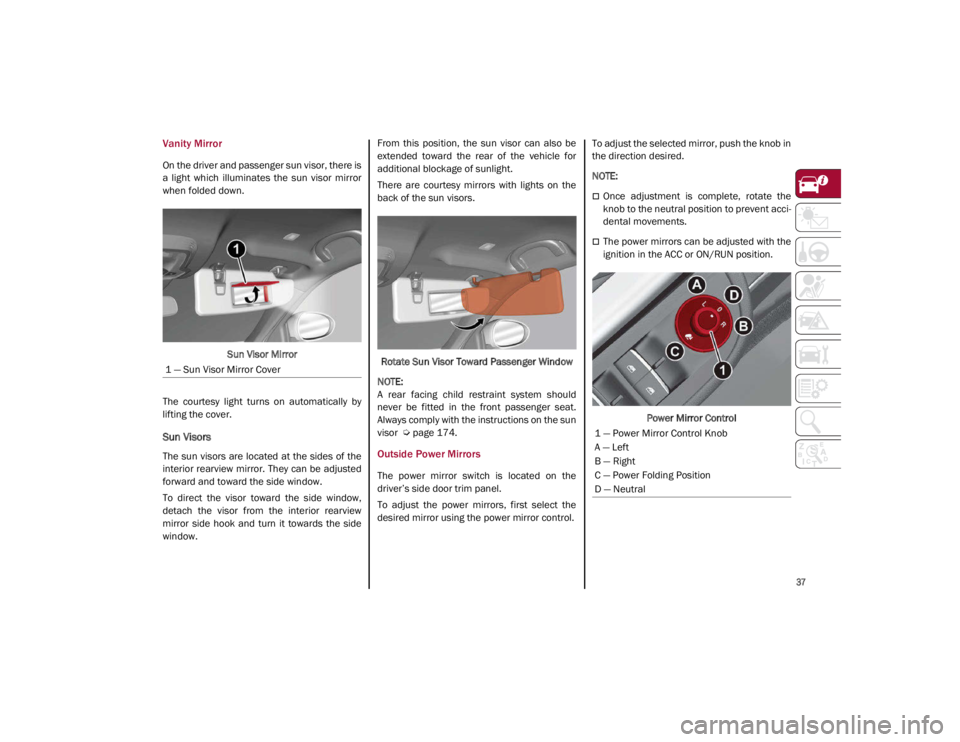
Power Mirror Control
1 — Sun Visor Mirror Cover
1 — Power Mirror Control Knob
A — Left
B — Right
C — Power Folding Position
D — Neutral
21_GA_OM_EN_USC_t.book Page 37
Page 51 of 284

49
Automatic Dual-Zone Climate Control System
Automatic Climate Control System (Instrument Panel Controls)
1 — Driver Temperature Adjustment Knob 9 — Passenger Temperature Adjustment Knob
2 — Driver Side AUTO Button (Automatic Operation) 10 — SYNC Button (Set Temperature Alignment) Driver/Passenger Side
3 — Driver Side Air Distribution Selection Button 11 — Passenger Heated Seat Button — If Equipped
4 — Max Defrost Button 12 — Air Conditioning Button
5 — Blower Speed Adjustment Knob 13 — Steering Wheel Heater Button — If Equipped
6 — Rear Defrost Button 14 — Driver Side Heated Seat Button — If Equipped
7 — Passenger Side Air Distribution Selection Button 15 — Air Recirculation Button
8 — Passenger Side AUTO Button (Automatic Operation)
21_GA_OM_EN_USC_t.book Page 49
Page 105 of 284

103
System Manual Activation/Deactivation
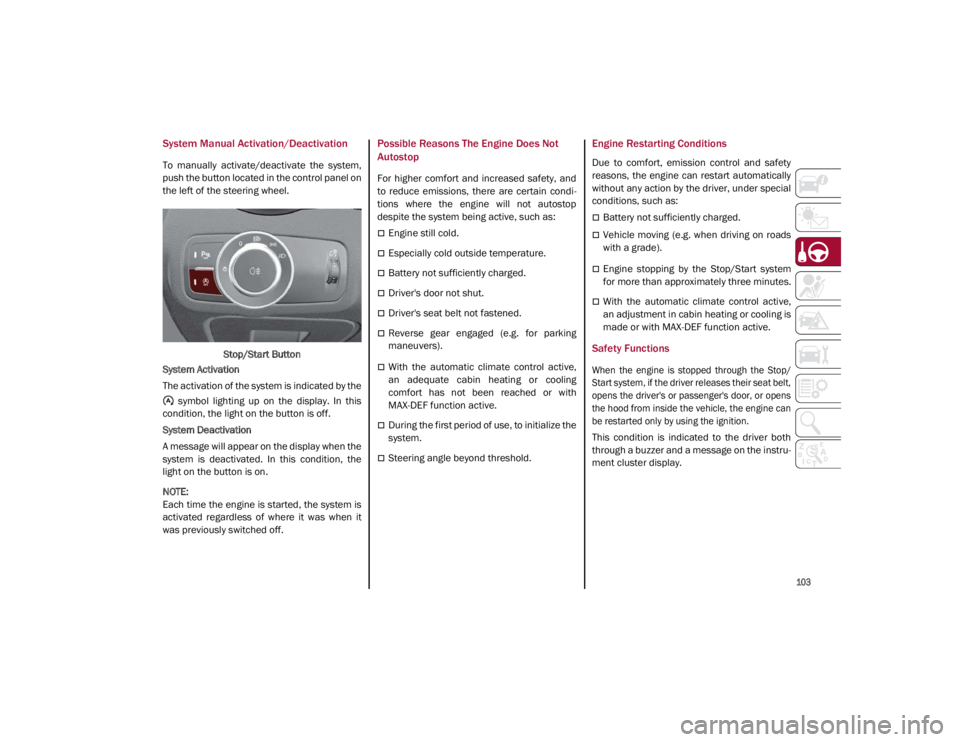
To manually activate/deactivate the system,
push the button located in the control panel on
the left of the steering wheel.Stop/Start Button
System Activation
The activation of the system is indicated by the symbol lighting up on the display. In this
condition, the light on the button is off.
System Deactivation
A message will appear on the display when the
system is deactivated. In this condition, the
light on the button is on.
NOTE:
Each time the engine is started, the system is
activated regardless of where it was when it
was previously switched off.
Possible Reasons The Engine Does Not
Autostop
For higher comfort and increased safety, and
to reduce emissions, there are certain condi -
tions where the engine will not autostop
despite the system being active, such as:
Engine still cold.
Especially cold outside temperature.
Battery not sufficiently charged.
Driver's door not shut.
Driver's seat belt not fastened.
Reverse gear engaged (e.g. for parking
maneuvers).
With the automatic climate control active,
an adequate cabin heating or cooling
comfort has not been reached or with
MAX-DEF function active.
During the first period of use, to initialize the
system.
Steering angle beyond threshold.
Engine Restarting Conditions
Due to comfort, emission control and safety
reasons, the engine can restart automatically
without any action by the driver, under special
conditions, such as:
Battery not sufficiently charged.
Vehicle moving (e.g. when driving on roads
with a grade).
Engine stopping by the Stop/Start system
for more than approximately three minutes.
With the automatic climate control active,
an adjustment in cabin heating or cooling is
made or with MAX-DEF function active.
Safety Functions
When the engine is stopped through the Stop/
Start system, if the driver releases their seat belt,
opens the driver's or passenger's door, or opens
the hood from inside the vehicle, the engine can
be restarted only by using the ignition.
This condition is indicated to the driver both
through a buzzer and a message on the instru-
ment cluster display.
21_GA_OM_EN_USC_t.book Page 103
Page 279 of 284

277
R
Radial Ply Tires ...........................................244
Radio Transmitters And Mobile Phones ....... 4
Rear Camera ..............................................134
Rear Cross Path .........................................145
Reformulated Gasoline .............................. 263
Refueling Procedure ..................................135
Refueling The Vehicle ................................ 135
Refuelling.................................................... 265
Reminder, Seat Belt ...................................160
Remote ControlStarting System........................................ 20
Remote Keyless Entry .................................. 16
Remote Starting Exit Remote Start Mode .......................... 21
Remote Starting System ....................... 20, 86
Remote Trunk Release ................................ 63
Replacement Bulbs..................228, 231, 232
Replacement Tires ..................................... 245
Reporting Safety Defects ...........................272
Restraints, Child .........................................174
Rims And Tires ...........................................234
S
Safety Checks Inside Vehicle ....................187
Safety Checks Outside Vehicle.................. 188
Safety Defects, Reporting ..........................272
Safety Information, Tire .............................234
Safety Tips ..................................................187
Safety, Exhaust Gas ...................................189
Saving Fuel .................................................138
Scheduled Servicing ..................................204 Scheduled Servicing Program
(2.0 T4 MAir Engine Versions) .................. 205
Scheduled Servicing Program
(2.9 V6 Gasoline Engine Versions) ........... 208
Seat Belt Reminder ..................................... 75
Seat Belts .......................................... 159, 187
Child Restraints ..................................... 174
Energy Management Feature ............... 164
Front Seat ..................................... 159, 160
Inspection .............................................. 187
Lap/Shoulder Belt Untwisting............... 162
Lap/Shoulder Belts ............................... 160
Pregnant Women ................................... 163
Pretensioners......................................... 164
Rear Seat ............................................... 160
Reminder................................................ 160
Seat Belt Pretensioner .......................... 164Untwisting Procedure ............................ 162
Seats.......................................................29, 32 Adjustment .........................................29, 32
Head Restraints ....................................... 35
Heated................................................33, 34
Power........................................................ 32
Security Alarm .............................................. 21
Service Assistance ..................................... 270
Service Contract......................................... 271
Service Manuals ........................................ 272
Servicing Procedures ................................. 217
Shoulder Belts............................................ 160
Signals, Turn ....................................... 77, 188
Snow Chains .............................................. 248
Snow Tires .................................................. 247 Spare Tires ................................................. 246
Speed Control
Accel/Decel .................................. 106, 107
Accel/Decel (ACC Only) ......................... 110
Cancel .................................................... 107Distance Setting (ACC Only).................. 111
Resume.................................................. 107
Set .......................................................... 106
Speed Control (Cruise Control) ................. 105
Starting Button .......................................................19Cold Weather ............................................87
Remote .....................................................20
Starting The Engine ......................................86
Steering Tilt Column................................................26
Wheel, Heated .......................................... 27
Wheel, Tilt ................................................. 26
Steering System ........................................ 259
Stop/Start System ..................................... 102
Storage Console .....................................................56
Glove Compartment .................................55
Suggestions For Driving ............................ 138
Sun Roof ................................................ 60, 61
Sun Visor .......................................................37
Supplemental Restraint System –
Air Bag ........................................................ 166
Suspension ................................................ 259
System, Remote Starting ............................. 20
21_GA_OM_EN_USC_t.book Page 277