Page 299 of 502

Fig. 146(lower arrows).
Hook the retaining straps onto the boot lid Fig. 146(upper arrows).
WARNING
Objects that are not secured or secured incorrectly or animals on the luggage compartment cover
may cause severe injuries in the event of sudden driving or braking manoeuvres or accidents.
Do not stow any hard, heavy or sharp items on the luggage compartment cover either loosely or in
bags.
Do not transport animals on the luggage compartment cover.
NOTICE
To prevent damage to the luggage compartment cover, do not load the luggage compartment to
such a height that the luggage compartment cover presses against the load when the boot lid is
closed.
Luggage compartment floor
Luggage compartment floor Functions
Fig. 147 In the luggage compartment: opening the luggage compartment floor.
Fig. 148 In the luggage compartment: locking the luggage compartment floor.
Opening the luggage compartment floor
Grip the recessed handle in the luggage compartment floor Fig. 147and lift it upwards.
Page 300 of 502

ment floor until it is held in position by the side
restraints Fig. 148(close-up).
Closing the luggage compartment floor
Place the luggage compartment floor on the side supports
NOTICE
Never drop the luggage compartment floor; guide it slowly back down. The trims or the luggage
compartment floor could otherwise be damaged.
Variable luggage compartment floor
Fig. 149 In the luggage compartment: opening the luggage compartment floor.
Fig. 150 In the luggage compartment: lowering the luggage compartment floor.
Opening the luggage compartment floor
Grip the recessed handle in the luggage compartment floor and lift it upwards Fig. 149
To lock in position, lift up the luggage compartment floor until it is held in position by the side
restraints.
Closing the luggage compartment floor
Place the luggage compartment floor on the side supports
Lowering the luggage compartment floor
Lift back the luggage compartment floor and push it under the guides Fig. 150(arrows).
Place the luggage compartment floor on the floor covering.
Page 303 of 502
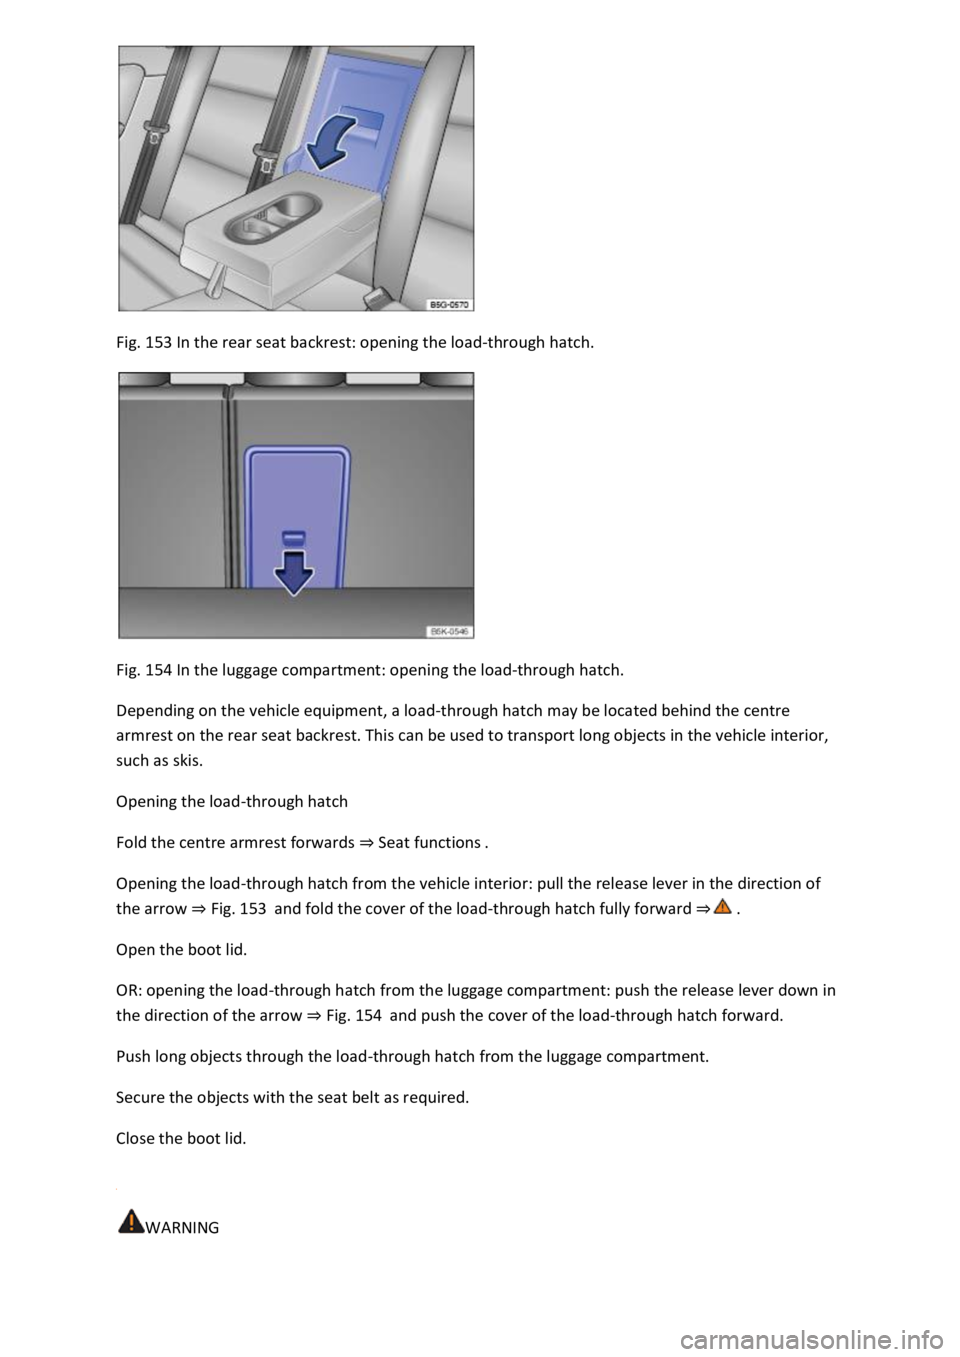
Fig. 153 In the rear seat backrest: opening the load-through hatch.
Fig. 154 In the luggage compartment: opening the load-through hatch.
Depending on the vehicle equipment, a load-through hatch may be located behind the centre
armrest on the rear seat backrest. This can be used to transport long objects in the vehicle interior,
such as skis.
Opening the load-through hatch
Fold the centre armrest forwards Seat functions
Opening the load-through hatch from the vehicle interior: pull the release lever in the direction of
the arrow Fig. 153and fold the cover of the load-through hatch fully forward
Open the boot lid.
OR: opening the load-through hatch from the luggage compartment: push the release lever down in
the direction of the arrow Fig. 154and push the cover of the load-through hatch forward.
Push long objects through the load-through hatch from the luggage compartment.
Secure the objects with the seat belt as required.
Close the boot lid.
WARNING
Page 306 of 502

First read and observe the introductoryinformation and safety warnings
Maximum permitted roof load
The maximum permitted roof load is 75 kg.
The roof load limit refers to the combined weight of the roof carrier and the load carried on the roof
Make sure you are aware of the weight of the roof carrier system and the load to be transported.
Weigh the load if necessary.
However, you will not be able to carry the maximum permitted roof load if you are using a roof
carrier with a lower load rating. In this case, do not exceed the maximum weight limit for the load
carrier system which is specified in the manufacturer's installation instructions.
Distributing the load
Distribute the load evenly and secure it correctly
WARNING
Accidents and significant vehicle damage can occur if the maximum permitted roof load is exceeded.
Never exceed the stated roof load, the maximum permissible axle loads, and the permissible gross
vehicle weight for the vehicle.
Do not exceed the load rating of the roof carrier, even if the maximum roof load has not been
reached.
WARNING
Loose and incorrectly secured loads can fall off the roof carrier and cause accidents and injuries.
Always use suitable and undamaged lashing, retaining or securing straps.
NOTICE
When opening the boot lid, take care not to let it hit the roof load.
Notes on use
First read and observe the introductoryinformation and safety warnings
Remove the roof carrier in the following situations
The roof carrier is no longer needed.
Page 307 of 502

The vehicle height exceeds the required clearance height, e.g. in a garage.
NOTICE
Always remove the roof carrier before driving through an automatic car wash.
The height of the vehicle is changed by the installation of a roof carrier and the load secured to it.
Check and compare the height of the vehicle with clearance heights, e.g. for underpasses and garage
doors.
The roof carrier and its load must not obstruct you from opening and closing the glass roof and the
boot lid. The roof aerial must also remain unaffected.
Driving with a fitted roof carrier will increase air resistance and thus increase fuel consumption.
Trailer towing
Introduction
This chapter contains information on the followingsubjects:
Technical requirements
Fitting the removable ball head
Removing the ball head
Notes on towing a trailer
Loading the trailer
Driving with a trailer
Trailer stabilisation
Retrofitting a towing bracket
The vehicle can be used to tow a trailer if it has the required technical equipment for this. The
additional trailer load will affect the amount of wear, fuel consumption and performance of the
vehicle and, in certain circumstances, could shorten the service intervals.
Driving with a trailer not only places an extra load on the vehicle, but also requires increased
concentration on the part of the driver.
Vehicles with start/stop system
When using towing brackets that were not retrofitted by Volkswagen, the start/stop system must be
deactivated manually using the button in the centre console before towing a trailer, and it must
remain deactivated for as long as a trailer is being towed
Page 323 of 502
WARNING
Filling the tank with the wrong fuel can damage the vehicle.
uels that have been approved for the vehicle.
-approved service additives in the
approved quantity.
CAUTION
Fuel may run out of a fuel canister. This could cause fire and injuries.
Fuels can pollute the environment. Collect any service fluids that escape or are spilled and dispose of
them correctly.
The tank flap cannot be opened manually. Seek expert assistance in an emergency.
Fuel types and refuelling
Introduction
This chapter contains information on the followingsubjects:
Fuel standards
Petrol
Diesel
The tank flap is located at the rear right-hand side of the vehicle.
Different engines require different fuels. There is a factory-fitted sticker in the tank flap that
indicates the required fuel type for the vehicle.
Page 326 of 502
Incorrect refuelling can lead to fire, serious injuries and vehicle damage.
requirements.
-approved service additives in the approved quantity.
At cold temperatures, louder noises may occur in the diesel engine and the exhaust gas may be
tinged blue.
Refuelling
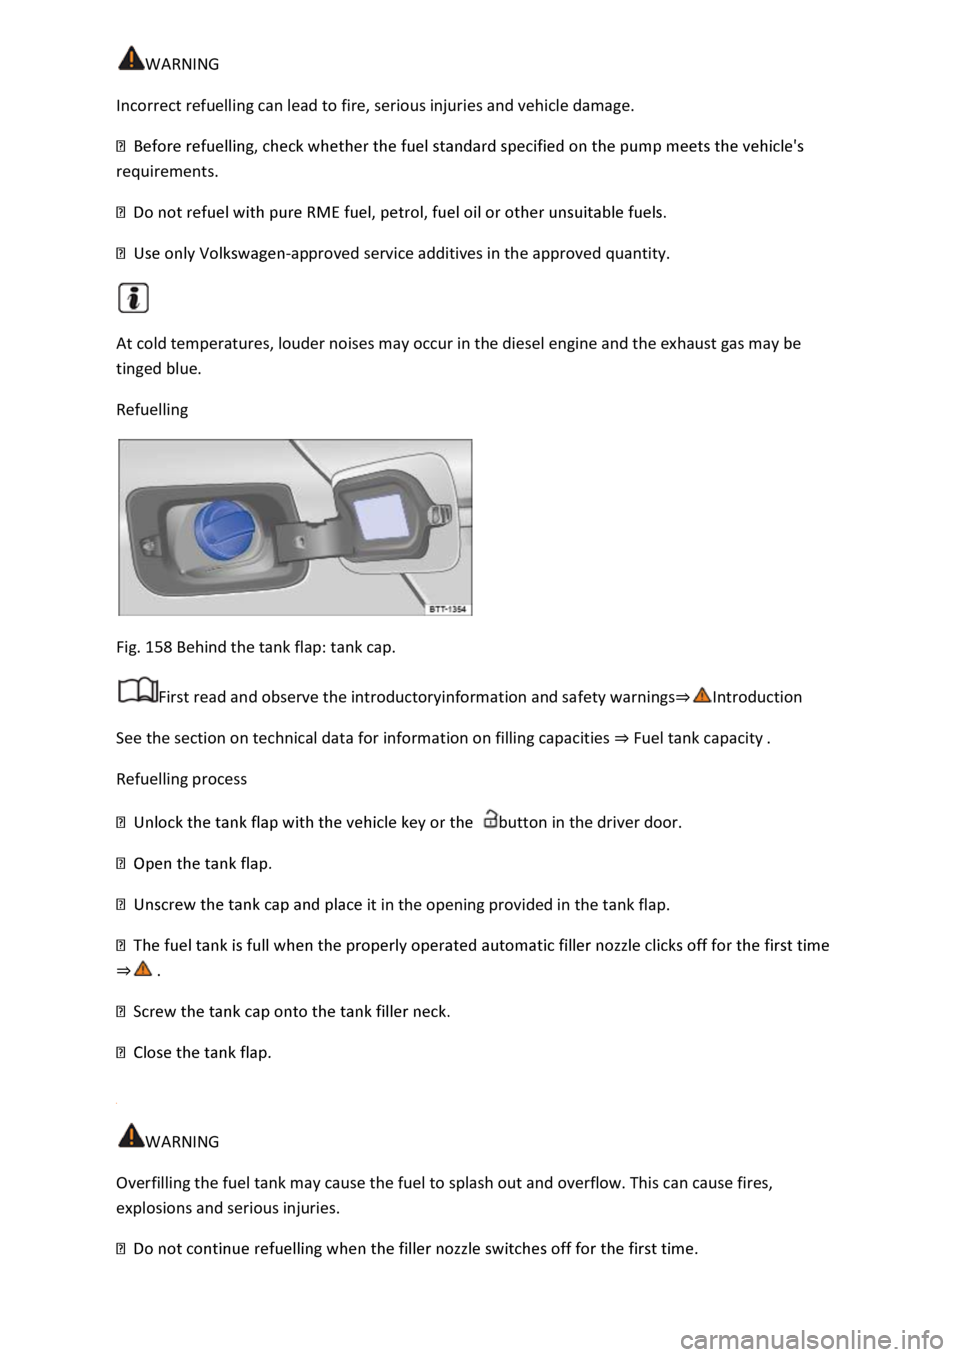
Fig. 158 Behind the tank flap: tank cap.
First read and observe the introductoryinformation and safety warnings
See the section on technical data for information on filling capacities Fuel tank capacity
Refuelling process
button in the driver door.
it in the opening provided in the tank flap.
WARNING
Overfilling the fuel tank may cause the fuel to splash out and overflow. This can cause fires,
explosions and serious injuries.
Page 334 of 502
Fig. 161 In the luggage compartment: opening the luggage compartment floor.
First read and observe the introductoryinformation and safety warnings
The vehicle toolkit may be located in various places in the vehicle, e.g. in the side stowage area of
the luggage compartment or under the luggage compartment floor Fig. 161
luggage net if necessary Transporting items
the side restraints (arrows).
NOTICE
Never drop the luggage compartment floor; guide it slowly back down. The trims or the luggage
compartment floor could otherwise be damaged.
After using the vehicle jack, crank it back to its original position so that it can be stowed safely.
Vehicle toolkit contents
Fig. 162 Contents of the vehicle toolkit.
First read and observe the introductoryinformation and safety warnings