2020 TOYOTA PROACE CITY seat adjustment
[x] Cancel search: seat adjustmentPage 2 of 272
2
■Overview
Labels 4
■Eco-driving
Eco-coaching 8
1Instruments
Instrument Panel 9Warning and indicator lamps 11Indicators 16Trip computer 21Setting the date and time 22
2Access
Electronic key with remote control function and built-in key, 23Back-up procedures 30Central locking / unlocking 32Doors 34General recommendations for the sliding side
doors 35Rear roof flap 36Alarm 37Electric windows 39Tilting rear door windows 40
3Ease of use and comfort
General recommendations for the seats 41Front seats 41
Steering wheel adjustment 44
Mirrors 442-seat front bench seat 45Rear bench seat 47Interior fittings 48Extenso cabin 53Crew cab 55Heating and Ventilation 58Heating 59Manual air conditioning 59Dual-zone automatic air conditioning 60Front demisting - defrosting 62Rear screen and/or door mirrors demisting - defrosting 63Additional heating/ventilation system 63
4Lighting and visibility
Lighting control lever 67Direction indicators 68Automatic illumination of headlamps 68Daytime running lamps / Sidelamps 69Parking lamps 69Automatic headlamp dipping 70
Headlamp beam height adjustment 71Wiper control lever 71Changing a wiper blade 73Automatic wiping 74
5Safety
General safety recommendations 75Emergency or assistance call 75Hazard warning lamps 78
Horn 78Electronic stability control (ESC) 78Advanced Grip Control 80Hill Assist Descent Control 82Seat belts 83Airbags 85Child seats 88Deactivating the front passenger airbag 90Manual child lock 93Electric child lock 93
6Driving
Driving recommendations 95Starting/switching off the engine 97Manual parking brake 100Electric parking brake 101Hill start assist 1045-speed manual gearbox 1046-speed manual gearbox 105Automatic gearbox 105Gear efficiency indicator 109Stop & Start 109
Under-inflation detection 111Head-up display 11 3Driving and manoeuvring aids - General recommendations 11 4Speed Limit Recognition and Recommendation 11 6Speed limiter 11 9Cruise control - particular recommendations 121Programmable cruise control 122
Adaptive Cruise Control 124
Page 41 of 272
41
Ease of use and comfort
3
General
recommendations for the
seats
WARNI NG
For safety reasons, seat adjustments must only be made when the vehicle is stationary.
WARNI NG
Folding or unfolding the seat backrests must only be done with the vehicle stationary.
WARNI NG
Before moving the seat backwards, ensure that there is no person or object that might prevent the full travel of the seat.There is a risk of trapping or pinching
passengers if present in the rear seats or of jamming the seat if large objects are placed on the floor behind the seat.
WARNI NG
Do not place hard or heavy objects on the backrests forming a table. They could become
dangerous projectiles in the event of sudden braking or a collision.– Do not remove a head restraint without stowing it; secure it to a support inside the vehicle.– Check that the seat belts remain accessible to the passenger and easy to fasten.– Passengers must never take their seat without adjusting and fastening their seat belt.
WARNI NG
Before carrying out the manoeuvres, check that nothing and no one is obstructing the moving elements and their locking.To avoid sudden folding, take care to hold the backrest and support it until it is horizontal.Never put your hand underneath the seat cushion to guide the seat downwards or upwards, you could get your fingers trapped. Place your hand on the grip/strap (depending on equipment) at the top of the seat cushion.
WARNI NG
Please note: an incorrectly latched backrest compromises the safety of passengers in the event of sudden braking or an impact.The contents of the boot may be thrown forward - risk of severe injury!
Front seats
Correct driving position
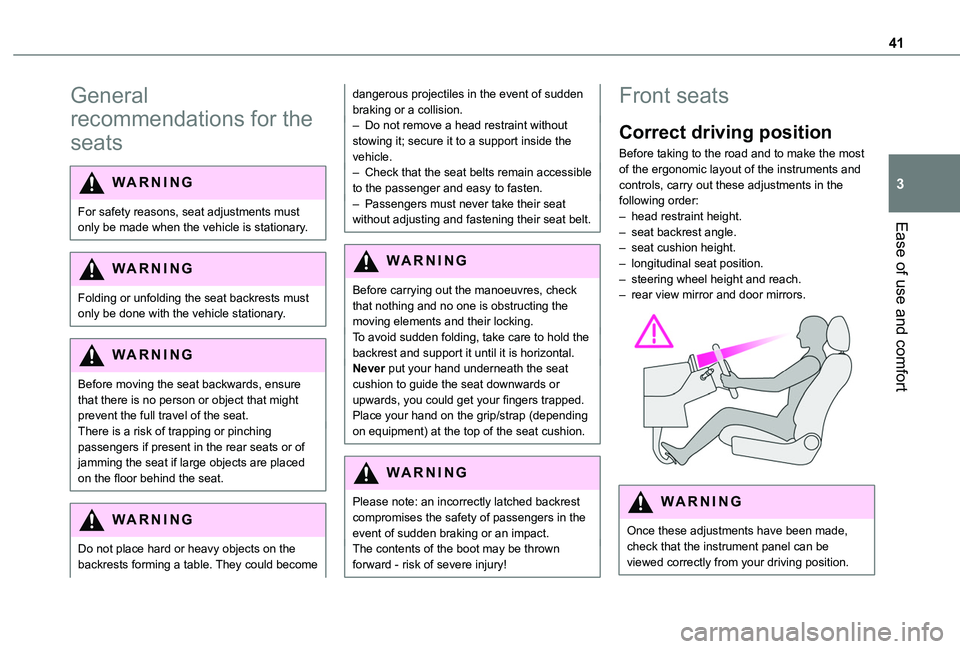
Before taking to the road and to make the most of the ergonomic layout of the instruments and controls, carry out these adjustments in the following order:– head restraint height.– seat backrest angle.– seat cushion height.– longitudinal seat position.– steering wheel height and reach.– rear view mirror and door mirrors.
WARNI NG
Once these adjustments have been made,
check that the instrument panel can be viewed correctly from your driving position.
Page 42 of 272
42
Adjustments
Longitudinal
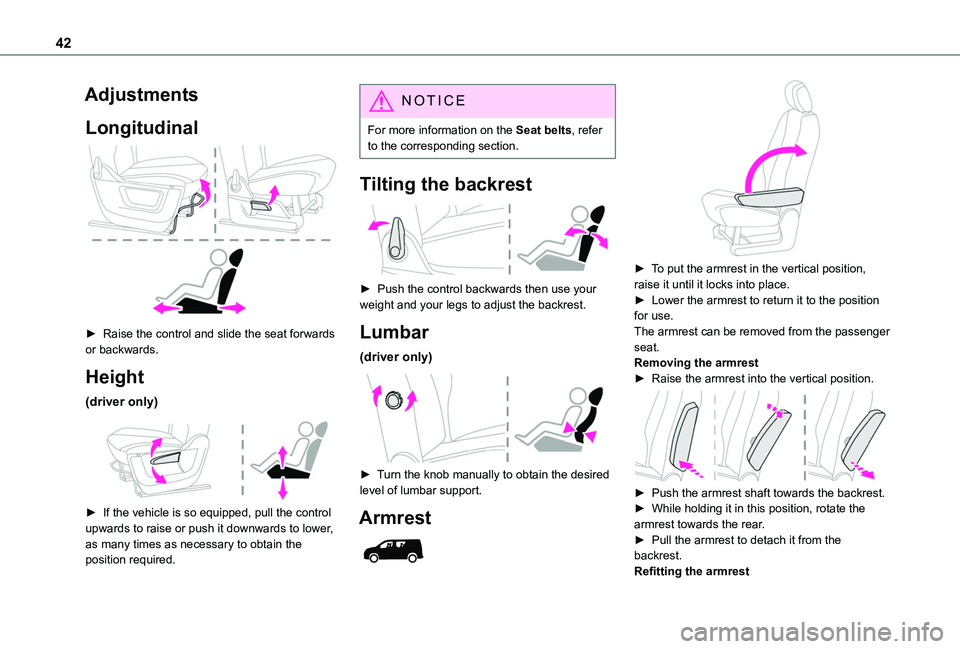
► Raise the control and slide the seat forwards or backwards.
Height
(driver only)
► If the vehicle is so equipped, pull the control upwards to raise or push it downwards to lower, as many times as necessary to obtain the
position required.
NOTIC E
For more information on the Seat belts, refer to the corresponding section.
Tilting the backrest
► Push the control backwards then use your weight and your legs to adjust the backrest.
Lumbar
(driver only)
► Turn the knob manually to obtain the desired level of lumbar support.
Armrest
► To put the armrest in the vertical position, raise it until it locks into place.► Lower the armrest to return it to the position for use.The armrest can be removed from the passenger seat.Removing the armrest► Raise the armrest into the vertical position.
► Push the armrest shaft towards the backrest.► While holding it in this position, rotate the armrest towards the rear.► Pull the armrest to detach it from the backrest.Refitting the armrest
Page 45 of 272

45
Ease of use and comfort
3
NOTIC E
The folding / unfolding on locking / unlocking can be deactivated. Contact a TOYOTA dealer or a qualified workshop.If necessary, it is possible to fold the mirrors manually.
Heated mirrors
► Press this button.
NOTIC E
For more information on Rear screen
demisting/defrosting, refer to the corresponding section.
Interior rear view mirror
Equipped with an anti-dazzle system, which darkens the mirror glass and reduces the nuisance to the driver caused by the sun, headlamps of other vehicles, etc.
Manual model
Day/night position
► Pull the lever to change to the anti-dazzle
"night” position.► Push the lever to change to the normal "day" position.Adjustment► Set the mirror to the normal “day” position.
Automatic "electrochrome" model
This system automatically and gradually transitions between day and night use, with the aid of a sensor that measures the light arriving from the rear of the vehicle.
NOTIC E
To ensure optimum visibility while manoeuvring, the mirror lightens automatically when reverse gear is engaged.
2-seat front bench seat
Central seat
Table position
► To lower the backrest, pull the tab on the lower edge of the seat.
The backrest of the central seat of the bench seat tilts to form a work table, creating a mobile office (for use while stationary).
Page 47 of 272

47
Ease of use and comfort
3
WARNI NG
Never put your hand underneath the seat cushion to guide the seat downwards or upwards, you could get your fingers trapped.Always just use the strap.Before carrying out these manoeuvres, check that nothing and nobody is obstructing the moving elements and their locking.
Folded position
► Lift the yellow crank at the base of the seat to unlock and lift the assembly into folded position (seat raised against the backrest) until it locks.This position allows the transport of high loads inside the cab.To replace the seat, push on the yellow crank under the seat and lower the assembly until the seat locks into position on the floor.
WARNI NG
Never put your hand underneath the seat cushion to guide the seat downwards or upwards, you could get your fingers trapped.Place your hand on the front of the seat cushion.Before carrying out these manipulations, check that nothing and nobody is obstructing the moving elements and their locking.
Rear bench seat
WARNI NG
For safety reasons, seat adjustments must only be made when the vehicle is stationary.
Folding the backrests
First steps:► lower the head restraints,► if necessary, move the front seats forward,► check that nothing or no person might interfere with the folding of the backrests (clothing, luggage, etc.),► check that the outer seat belts are lying flat on the backrests.
NOTIC E
The folding of the backrest is accompanied by a slight lowering of the corresponding seat cushion.When the backrest is released, the red indicator is visible in the release grips on the outer seats.
► Turn the backrest release handle 1.► Guide the backrest down to the horizontal position.
Repositioning the backrests
WARNI NG
First check that the outer seat belts are lying vertically flat alongside the backrest latching rings.
► Put the backrest in the upright position and push it firmly to latch it home.
Page 48 of 272
48
► Check that the red indicator in the release grip 1 is no longer visible.► Ensure that the outer seat belts are not trapped during the manoeuvre.
Head restraint height
adjustment
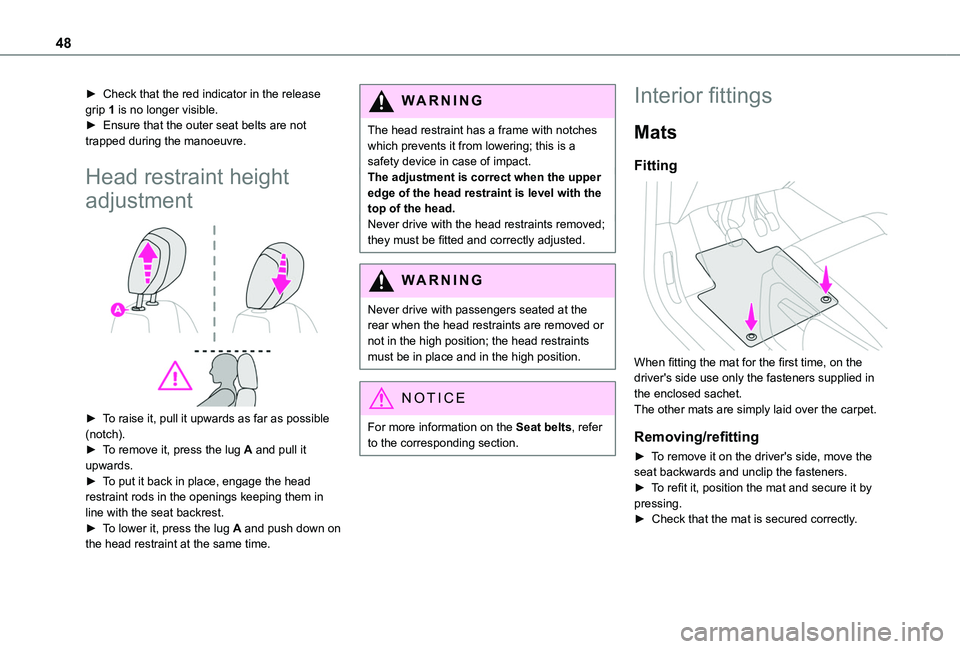
► To raise it, pull it upwards as far as possible (notch).► To remove it, press the lug A and pull it upwards.► To put it back in place, engage the head restraint rods in the openings keeping them in line with the seat backrest.► To lower it, press the lug A and push down on the head restraint at the same time.
WARNI NG
The head restraint has a frame with notches which prevents it from lowering; this is a safety device in case of impact.The adjustment is correct when the upper edge of the head restraint is level with the top of the head.Never drive with the head restraints removed; they must be fitted and correctly adjusted.
WARNI NG
Never drive with passengers seated at the rear when the head restraints are removed or not in the high position; the head restraints must be in place and in the high position.
NOTIC E
For more information on the Seat belts, refer to the corresponding section.
Interior fittings
Mats
Fitting
When fitting the mat for the first time, on the driver's side use only the fasteners supplied in the enclosed sachet.The other mats are simply laid over the carpet.
Removing/refitting
► To remove it on the driver's side, move the seat backwards and unclip the fasteners.► To refit it, position the mat and secure it by pressing.► Check that the mat is secured correctly.
Page 247 of 272
247
Alphabetical index
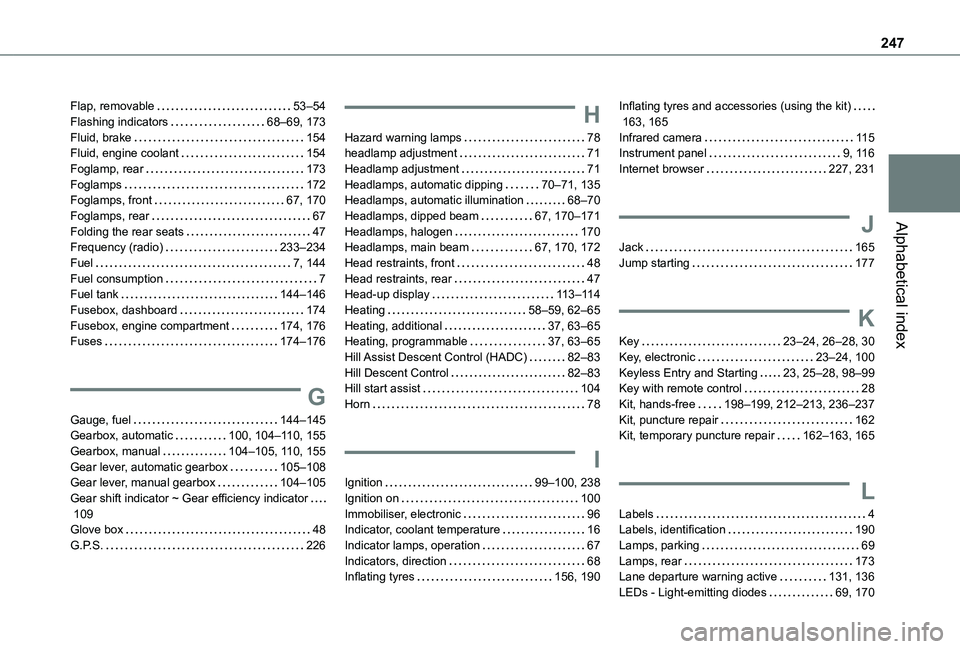
Flap, removable 53–54Flashing indicators 68–69, 173Fluid, brake 154Fluid, engine coolant 154Foglamp, rear 173Foglamps 172Foglamps, front 67, 170Foglamps, rear 67Folding the rear seats 47Frequency (radio) 233–234Fuel 7, 144Fuel consumption 7Fuel tank 144–146Fusebox, dashboard 174Fusebox, engine compartment 174, 176Fuses 174–176
G
Gauge, fuel 144–145Gearbox, automatic 100, 104–11 0, 155
Gearbox, manual 104–105, 11 0, 155Gear lever, automatic gearbox 105–108Gear lever, manual gearbox 104–105Gear shift indicator ~ Gear efficiency indicator 109Glove box 48G.P.S. 226
H
Hazard warning lamps 78headlamp adjustment 71Headlamp adjustment 71Headlamps, automatic dipping 70–71, 135Headlamps, automatic illumination 68–70Headlamps, dipped beam 67, 170–171Headlamps, halogen 170Headlamps, main beam 67, 170, 172Head restraints, front 48Head restraints, rear 47Head-up display 11 3–11 4Heating 58–59, 62–65Heating, additional 37, 63–65Heating, programmable 37, 63–65Hill Assist Descent Control (HADC) 82–83Hill Descent Control 82–83Hill start assist 104Horn 78
I
Ignition 99–100, 238Ignition on 100Immobiliser, electronic 96Indicator, coolant temperature 16Indicator lamps, operation 67Indicators, direction 68Inflating tyres 156, 190
Inflating tyres and accessories (using the kit) 163, 165Infrared camera 11 5Instrument panel 9, 11 6Internet browser 227, 231
J
Jack 165Jump starting 177
K
Key 23–24, 26–28, 30Key, electronic 23–24, 100Keyless Entry and Starting 23, 25–28, 98–99Key with remote control 28Kit, hands-free 198–199, 212–213, 236–237Kit, puncture repair 162Kit, temporary puncture repair 162–163, 165
L
Labels 4Labels, identification 190Lamps, parking 69Lamps, rear 173Lane departure warning active 131, 136LEDs - Light-emitting diodes 69, 170
Page 249 of 272
249
Alphabetical index
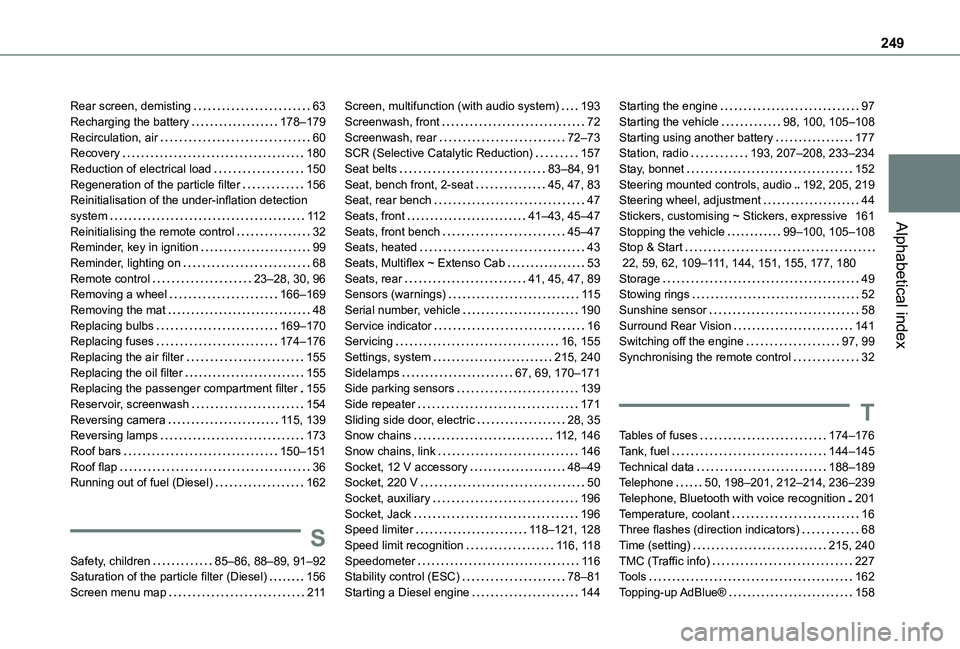
Rear screen, demisting 63Recharging the battery 178–179Recirculation, air 60Recovery 180Reduction of electrical load 150Regeneration of the particle filter 156Reinitialisation of the under-inflation detection system 11 2Reinitialising the remote control 32Reminder, key in ignition 99Reminder, lighting on 68Remote control 23–28, 30, 96Removing a wheel 166–169Removing the mat 48Replacing bulbs 169–170Replacing fuses 174–176Replacing the air filter 155Replacing the oil filter 155Replacing the passenger compartment filter 155Reservoir, screenwash 154Reversing camera 11 5, 139Reversing lamps 173
Roof bars 150–151Roof flap 36Running out of fuel (Diesel) 162
S
Safety, children 85–86, 88–89, 91–92Saturation of the particle filter (Diesel) 156Screen menu map 2 11
Screen, multifunction (with audio system) 193Screenwash, front 72Screenwash, rear 72–73SCR (Selective Catalytic Reduction) 157Seat belts 83–84, 91Seat, bench front, 2-seat 45, 47, 83Seat, rear bench 47Seats, front 41–43, 45–47Seats, front bench 45–47Seats, heated 43Seats, Multiflex ~ Extenso Cab 53Seats, rear 41, 45, 47, 89Sensors (warnings) 11 5Serial number, vehicle 190Service indicator 16Servicing 16, 155Settings, system 215, 240Sidelamps 67, 69, 170–171Side parking sensors 139Side repeater 171Sliding side door, electric 28, 35Snow chains 11 2, 146
Snow chains, link 146Socket, 12 V accessory 48–49Socket, 220 V 50Socket, auxiliary 196Socket, Jack 196Speed limiter 11 8–121, 128Speed limit recognition 11 6, 11 8Speedometer 11 6Stability control (ESC) 78–81Starting a Diesel engine 144
Starting the engine 97Starting the vehicle 98, 100, 105–108Starting using another battery 177Station, radio 193, 207–208, 233–234Stay, bonnet 152Steering mounted controls, audio 192, 205, 219Steering wheel, adjustment 44Stickers, customising ~ Stickers, expressive 161Stopping the vehicle 99–100, 105–108Stop & Start 22, 59, 62, 109–111, 144, 151, 155, 177, 180Storage 49Stowing rings 52Sunshine sensor 58Surround Rear Vision 141Switching off the engine 97, 99Synchronising the remote control 32
T
Tables of fuses 174–176
Tank, fuel 144–145Technical data 188–189Telephone 50, 198–201, 212–214, 236–239Telephone, Bluetooth with voice recognition 201Temperature, coolant 16Three flashes (direction indicators) 68Time (setting) 215, 240TMC (Traffic info) 227Tools 162Topping-up AdBlue® 158