2020 TOYOTA PROACE CITY tow bar
[x] Cancel search: tow barPage 3 of 272

3
Contents
Memorising speeds 128Active Safety Brake with Collision Risk Alert and Intelligent emergency braking assistance 128Active Lane Departure Warning System 131Blind Spot Monitoring System 134Active Blind Spot Monitoring System 136Distraction detection 136Parking sensors 137Reversing Camera 139Surround Rear Vision 141
7Practical information
Compatibility of fuels 144Refuelling 144Misfuel prevention (Diesel) 145Snow chains 146Towing device 147Overload indicator 149Energy economy mode 150Roof bars / Roof rack 150Bonnet 151Engine compartment 152
Checking levels 153Speed checks 155AdBlue® (Diesel engines) 157Free-wheeling 159Advice on care and maintenance 160
8In the event of a breakdown
Running out of fuel (Diesel) 162Tool kit 162
Temporary puncture repair kit 163Spare wheel 165Changing a bulb 169Changing a fuse 17412 V battery 176Towing 180
9Technical data
Dimensions 182Engine technical data and towed loads 187Identification markings 190
10Bluetooth® audio system
First steps 191Steering mounted controls 192Menus 193Radio 193DAB (Digital Audio Broadcasting) radio 194Media 195Telephone 198Frequently asked questions 201
11TOYOTA Connect Radio
First steps 204Steering mounted controls 205Menus 206Applications 207Radio 207DAB (Digital Audio Broadcasting) radio 209Media 209
Telephone 2 11
Settings 214Frequently asked questions 216
12TOYOTA Connect Nav
First steps 218Steering mounted controls 219Menus 219Voice commands 221Navigation 225Connected navigation 227Applications 230Radio 233DAB (Digital Audio Broadcasting) radio 234Media 235Telephone 236Settings 239Frequently asked questions 241
■Alphabetical index
Page 42 of 272
42
Adjustments
Longitudinal
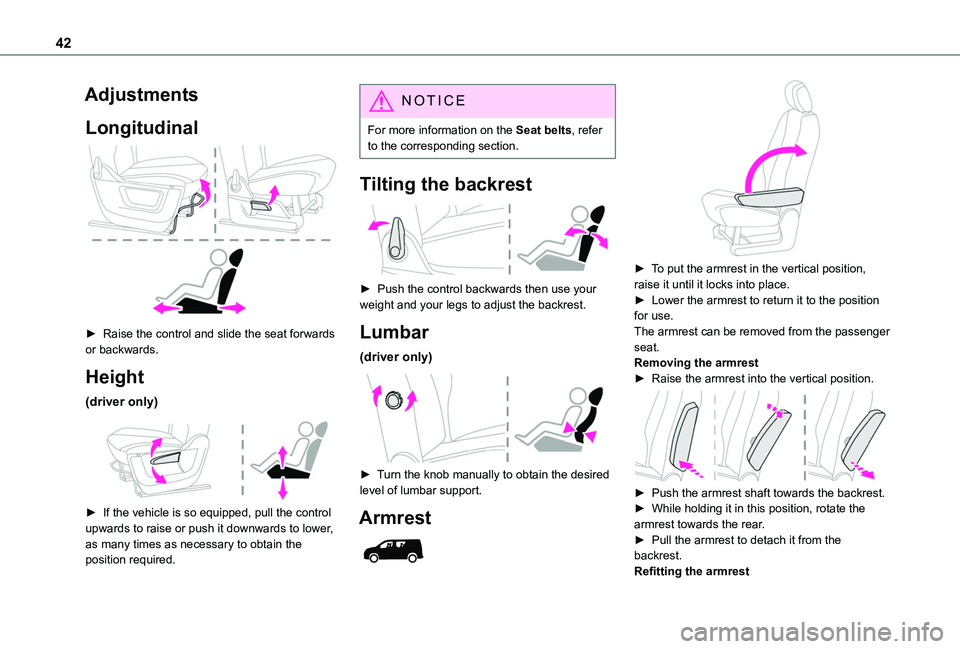
► Raise the control and slide the seat forwards or backwards.
Height
(driver only)
► If the vehicle is so equipped, pull the control upwards to raise or push it downwards to lower, as many times as necessary to obtain the
position required.
NOTIC E
For more information on the Seat belts, refer to the corresponding section.
Tilting the backrest
► Push the control backwards then use your weight and your legs to adjust the backrest.
Lumbar
(driver only)
► Turn the knob manually to obtain the desired level of lumbar support.
Armrest
► To put the armrest in the vertical position, raise it until it locks into place.► Lower the armrest to return it to the position for use.The armrest can be removed from the passenger seat.Removing the armrest► Raise the armrest into the vertical position.
► Push the armrest shaft towards the backrest.► While holding it in this position, rotate the armrest towards the rear.► Pull the armrest to detach it from the backrest.Refitting the armrest
Page 52 of 272
52
Stowing rings
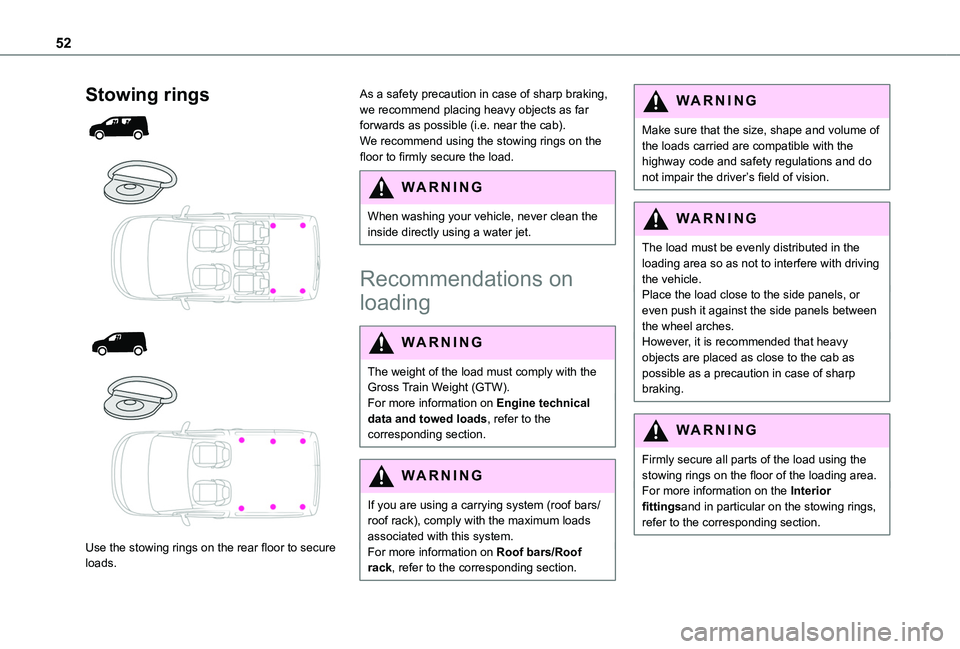
Use the stowing rings on the rear floor to secure loads.
As a safety precaution in case of sharp braking, we recommend placing heavy objects as far forwards as possible (i.e. near the cab).We recommend using the stowing rings on the floor to firmly secure the load.
WARNI NG
When washing your vehicle, never clean the inside directly using a water jet.
Recommendations on
loading
WARNI NG
The weight of the load must comply with the Gross Train Weight (GTW).For more information on Engine technical data and towed loads, refer to the corresponding section.
WARNI NG
If you are using a carrying system (roof bars/roof rack), comply with the maximum loads associated with this system.For more information on Roof bars/Roof rack, refer to the corresponding section.
WARNI NG
Make sure that the size, shape and volume of the loads carried are compatible with the highway code and safety regulations and do not impair the driver’s field of vision.
WARNI NG
The load must be evenly distributed in the loading area so as not to interfere with driving the vehicle.Place the load close to the side panels, or even push it against the side panels between the wheel arches.However, it is recommended that heavy objects are placed as close to the cab as possible as a precaution in case of sharp braking.
WARNI NG
Firmly secure all parts of the load using the stowing rings on the floor of the loading area.For more information on the Interior fittingsand in particular on the stowing rings, refer to the corresponding section.
Page 72 of 272
72
Manual controls
The wipers are controlled directly by the driver.
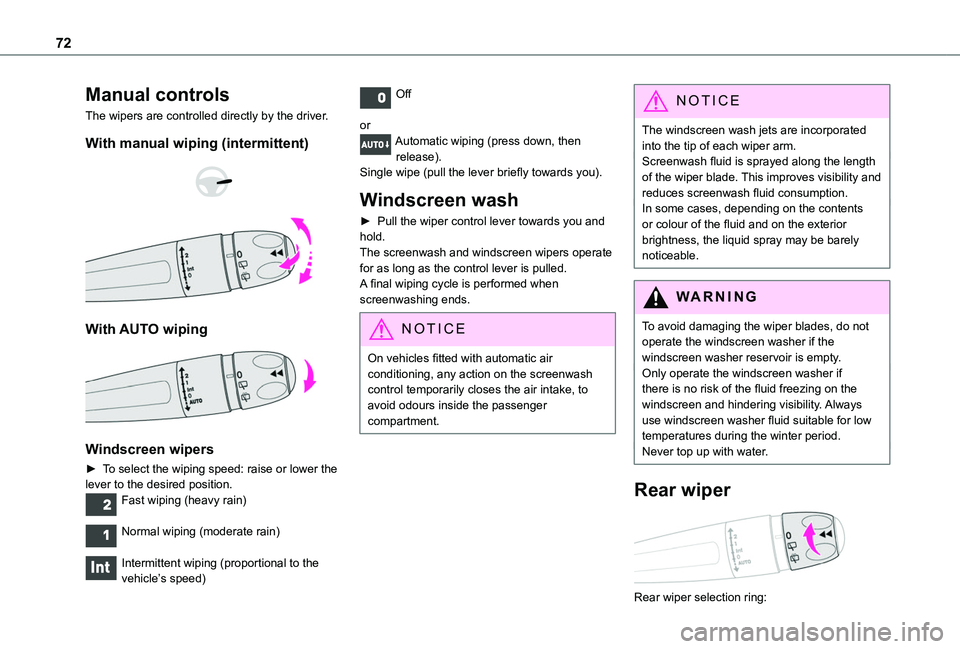
With manual wiping (intermittent)
With AUTO wiping
Windscreen wipers
► To select the wiping speed: raise or lower the lever to the desired position.Fast wiping (heavy rain)
Normal wiping (moderate rain)
Intermittent wiping (proportional to the vehicle’s speed)
Off
orAutomatic wiping (press down, then release).Single wipe (pull the lever briefly towards you).
Windscreen wash
► Pull the wiper control lever towards you and hold.The screenwash and windscreen wipers operate for as long as the control lever is pulled.A final wiping cycle is performed when screenwashing ends.
NOTIC E
On vehicles fitted with automatic air conditioning, any action on the screenwash control temporarily closes the air intake, to avoid odours inside the passenger compartment.
NOTIC E
The windscreen wash jets are incorporated into the tip of each wiper arm.Screenwash fluid is sprayed along the length of the wiper blade. This improves visibility and reduces screenwash fluid consumption.In some cases, depending on the contents or colour of the fluid and on the exterior brightness, the liquid spray may be barely noticeable.
WARNI NG
To avoid damaging the wiper blades, do not operate the windscreen washer if the windscreen washer reservoir is empty.Only operate the windscreen washer if there is no risk of the fluid freezing on the windscreen and hindering visibility. Always use windscreen washer fluid suitable for low temperatures during the winter period.
Never top up with water.
Rear wiper
Rear wiper selection ring:
Page 128 of 272
128
WARNI NG
If any of the following malfunctions occurs, do not use the system:– Following an impact on the windscreen close to the camera.– Brake lamps not working.
WARNI NG
If the vehicle has undergone any of the following modifications, do not use the system:– Carrying long objects on roof bars or a roof rack.– Towing.– Front end of the vehicle modified (for example by adding long-range headlamps or painting the front bumper).
Malfunction
In the event of a cruise control malfunction, dashes are displayed instead of the cruise control speed setting.This warning lamp comes on, accompanied by an audible signal and an onscreen message, to indicate a system malfunction.Have the system checked by a TOYOTA dealer or a qualified workshop.
NOTIC E
The adaptive cruise control deactivates automatically if the use of a “space-saver” type spare wheel is detected or in the event of a malfunction of the lateral brake lamps or trailer brake lamps (for approved trailers).
Memorising speeds
This function, used only for the speed limiter and programmable cruise control, lets you save speed settings that will subsequently be proposed for the purpose of configuring these two systems.You can memorise multiple speed settings for each of the two systems.By default, some speed settings are already memorised.
WARNI NG
As a safety measure, the driver must only change speed settings when stationary.
Changing a speed setting
In the Driving / Vehicle touch screen menu, select "Driving functions" then "Memorised speed settings".
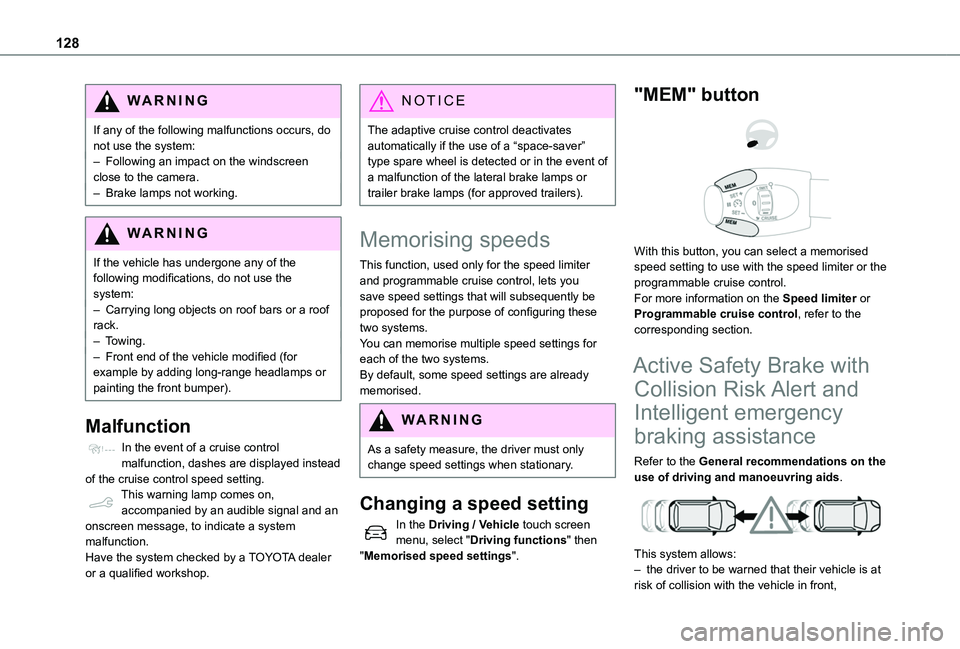
"MEM" button
With this button, you can select a memorised speed setting to use with the speed limiter or the programmable cruise control.For more information on the Speed limiter or Programmable cruise control, refer to the corresponding section.
Active Safety Brake with
Collision Risk Alert and
Intelligent emergency
braking assistance
Refer to the General recommendations on the use of driving and manoeuvring aids.
This system allows:– the driver to be warned that their vehicle is at risk of collision with the vehicle in front,
Page 129 of 272
129
Driving
6
– a collision to be prevented, or its severity to be limited, by reducing the vehicle’s speed.This system is comprised of three functions:– Collision Risk Alert,– Intelligent emergency braking assistance,– Active Safety Brake (automatic emergency braking).
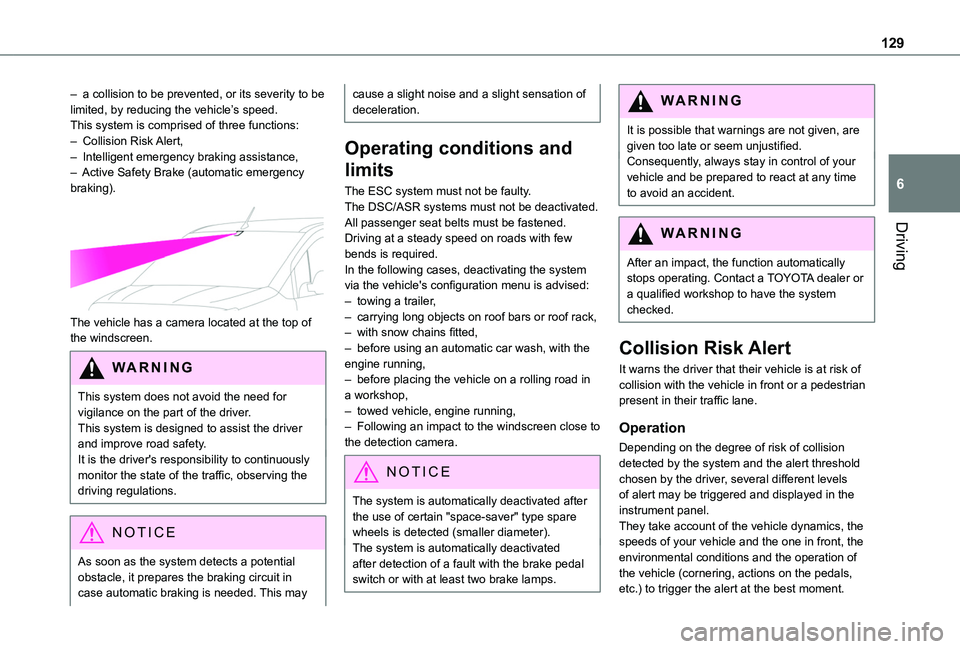
The vehicle has a camera located at the top of the windscreen.
W ARNI NG
This system does not avoid the need for vigilance on the part of the driver.This system is designed to assist the driver and improve road safety.It is the driver's responsibility to continuously monitor the state of the traffic, observing the
driving regulations.
NOTIC E
As soon as the system detects a potential obstacle, it prepares the braking circuit in case automatic braking is needed. This may
cause a slight noise and a slight sensation of deceleration.
Operating conditions and
limits
The ESC system must not be faulty.The DSC/ASR systems must not be deactivated.All passenger seat belts must be fastened.Driving at a steady speed on roads with few bends is required.In the following cases, deactivating the system via the vehicle's configuration menu is advised:– towing a trailer,– carrying long objects on roof bars or roof rack,– with snow chains fitted,– before using an automatic car wash, with the engine running,– before placing the vehicle on a rolling road in a workshop,– towed vehicle, engine running,– Following an impact to the windscreen close to the detection camera.
NOTIC E
The system is automatically deactivated after the use of certain "space-saver" type spare wheels is detected (smaller diameter).The system is automatically deactivated after detection of a fault with the brake pedal switch or with at least two brake lamps.
WARNI NG
It is possible that warnings are not given, are given too late or seem unjustified.Consequently, always stay in control of your vehicle and be prepared to react at any time to avoid an accident.
WARNI NG
After an impact, the function automatically stops operating. Contact a TOYOTA dealer or a qualified workshop to have the system checked.
Collision Risk Alert
It warns the driver that their vehicle is at risk of collision with the vehicle in front or a pedestrian present in their traffic lane.
Operation
Depending on the degree of risk of collision detected by the system and the alert threshold chosen by the driver, several different levels of alert may be triggered and displayed in the instrument panel.They take account of the vehicle dynamics, the speeds of your vehicle and the one in front, the environmental conditions and the operation of the vehicle (cornering, actions on the pedals, etc.) to trigger the alert at the best moment.
Page 135 of 272
135
Driving
6
– flashing, after a delay of about one second, when overtaking a vehicle slowly, and when the direction indicator is used.
Activation / Deactivation
Activation or deactivation is set via the vehicle configuration menu.
NOTIC E
The system state remains in memory when the ignition is switched off.
NOTIC E
The system is automatically deactivated when towing with a towbar approved by TOYOTA.
Conditions for operation
– All vehicles are moving in the same direction and in adjacent lanes.– The speed of your vehicle must be between 12 and 140 km/h (7 and 87 mph).– When overtaking a vehicle, the speed difference is less than 10 km/h (6 mph).– When overtaken by a vehicle, the speed difference is less than 25 km/h (16 mph).– Traffic is flowing normally.– Overtaking a vehicle over a certain period of time and the vehicle being overtaken remains in the blind spot.
– You are driving on a straight or slightly curved road.– Your vehicle is not pulling a trailer, a caravan, etc.
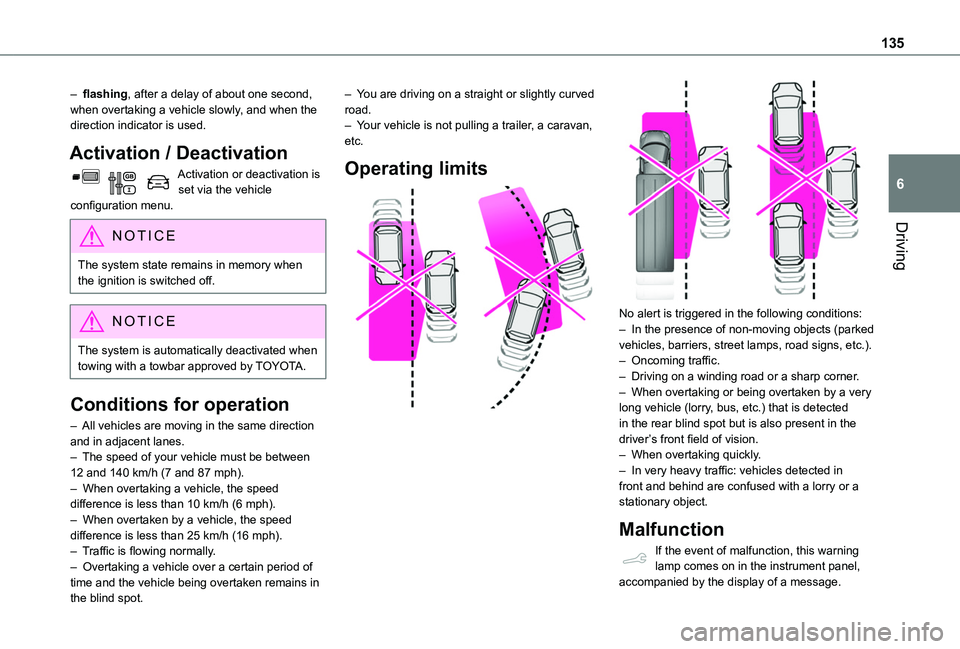
Operating limits
No alert is triggered in the following conditions:– In the presence of non-moving objects (parked vehicles, barriers, street lamps, road signs, etc.).– Oncoming traffic.– Driving on a winding road or a sharp corner.– When overtaking or being overtaken by a very long vehicle (lorry, bus, etc.) that is detected in the rear blind spot but is also present in the driver’s front field of vision.– When overtaking quickly.– In very heavy traffic: vehicles detected in front and behind are confused with a lorry or a stationary object.
Malfunction
If the event of malfunction, this warning lamp comes on in the instrument panel, accompanied by the display of a message.
Page 147 of 272
147
Practical information
7
Original tyre sizeMaximum link size (mm)
195/65 R159
205/60 R16
205/55 R17
215/65 R16
215/60 R17cannot be fitted with chains
You can also use snow socks.For more information, contact a TOYOTA dealer or a qualified workshop.
Towing device
Load distribution► Distribute the load in the trailer so that the heaviest items are as close as possible to the axle and the nose weight approaches the maximum permitted without exceeding it.Air density decreases with altitude, thus reducing engine performance. The maximum towed load must be reduced by 10 % for every 1,000 metres (3,280 ft) of altitude.
NOTIC E
Use towing devices and their unmodified harnesses approved by TOYOTA. It is recommended that the installation be
performed by a TOYOTA dealer or a qualified workshop.If the towing device is not fitted by a TOYOTA dealer, it must still be fitted in accordance with the vehicle manufacturer's instructions.Certain driving assistance or manoeuvring assistance functions are automatically disabled if an approved towbar is used.
WARNI NG
Observe the maximum authorised towable weight, indicated on your vehicle's registration certificate, the manufacturer's label as well as in the Technical data section of this guide.Complying with the maximum authorised nose weight (towball) also includes the use of accessories (bicycle carriers, tow boxes, etc.).
WARNI NG
Observe the legislation in force in the country in which you are driving.