2020 TOYOTA PROACE CITY fold seats
[x] Cancel search: fold seatsPage 41 of 272
41
Ease of use and comfort
3
General
recommendations for the
seats
WARNI NG
For safety reasons, seat adjustments must only be made when the vehicle is stationary.
WARNI NG
Folding or unfolding the seat backrests must only be done with the vehicle stationary.
WARNI NG
Before moving the seat backwards, ensure that there is no person or object that might prevent the full travel of the seat.There is a risk of trapping or pinching
passengers if present in the rear seats or of jamming the seat if large objects are placed on the floor behind the seat.
WARNI NG
Do not place hard or heavy objects on the backrests forming a table. They could become
dangerous projectiles in the event of sudden braking or a collision.– Do not remove a head restraint without stowing it; secure it to a support inside the vehicle.– Check that the seat belts remain accessible to the passenger and easy to fasten.– Passengers must never take their seat without adjusting and fastening their seat belt.
WARNI NG
Before carrying out the manoeuvres, check that nothing and no one is obstructing the moving elements and their locking.To avoid sudden folding, take care to hold the backrest and support it until it is horizontal.Never put your hand underneath the seat cushion to guide the seat downwards or upwards, you could get your fingers trapped. Place your hand on the grip/strap (depending on equipment) at the top of the seat cushion.
WARNI NG
Please note: an incorrectly latched backrest compromises the safety of passengers in the event of sudden braking or an impact.The contents of the boot may be thrown forward - risk of severe injury!
Front seats
Correct driving position
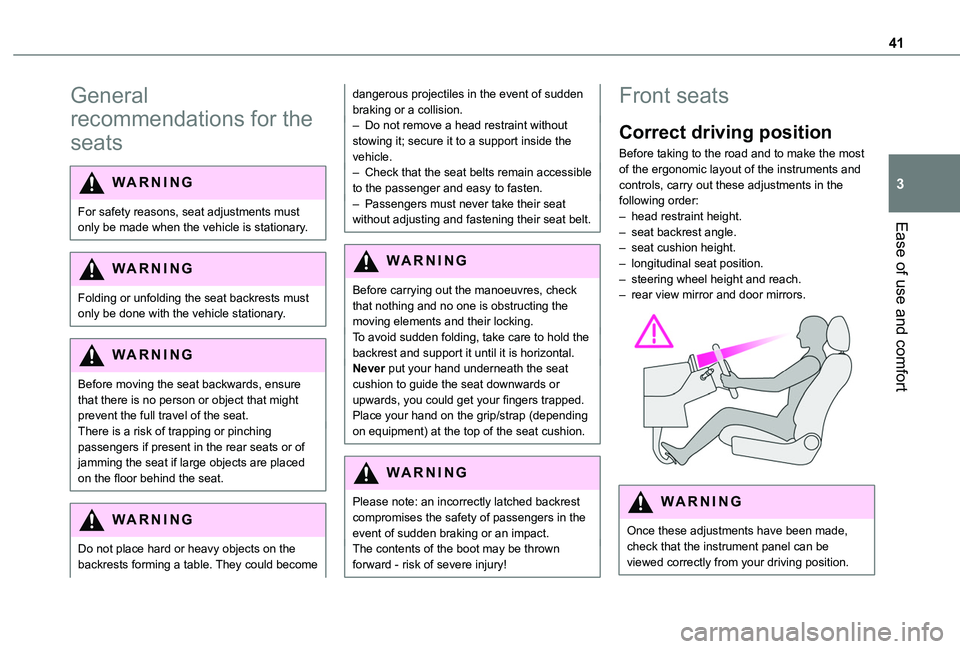
Before taking to the road and to make the most of the ergonomic layout of the instruments and controls, carry out these adjustments in the following order:– head restraint height.– seat backrest angle.– seat cushion height.– longitudinal seat position.– steering wheel height and reach.– rear view mirror and door mirrors.
WARNI NG
Once these adjustments have been made,
check that the instrument panel can be viewed correctly from your driving position.
Page 47 of 272

47
Ease of use and comfort
3
WARNI NG
Never put your hand underneath the seat cushion to guide the seat downwards or upwards, you could get your fingers trapped.Always just use the strap.Before carrying out these manoeuvres, check that nothing and nobody is obstructing the moving elements and their locking.
Folded position
► Lift the yellow crank at the base of the seat to unlock and lift the assembly into folded position (seat raised against the backrest) until it locks.This position allows the transport of high loads inside the cab.To replace the seat, push on the yellow crank under the seat and lower the assembly until the seat locks into position on the floor.
WARNI NG
Never put your hand underneath the seat cushion to guide the seat downwards or upwards, you could get your fingers trapped.Place your hand on the front of the seat cushion.Before carrying out these manipulations, check that nothing and nobody is obstructing the moving elements and their locking.
Rear bench seat
WARNI NG
For safety reasons, seat adjustments must only be made when the vehicle is stationary.
Folding the backrests
First steps:► lower the head restraints,► if necessary, move the front seats forward,► check that nothing or no person might interfere with the folding of the backrests (clothing, luggage, etc.),► check that the outer seat belts are lying flat on the backrests.
NOTIC E
The folding of the backrest is accompanied by a slight lowering of the corresponding seat cushion.When the backrest is released, the red indicator is visible in the release grips on the outer seats.
► Turn the backrest release handle 1.► Guide the backrest down to the horizontal position.
Repositioning the backrests
WARNI NG
First check that the outer seat belts are lying vertically flat alongside the backrest latching rings.
► Put the backrest in the upright position and push it firmly to latch it home.
Page 55 of 272
55
Ease of use and comfort
3
► Tighten the strap using the adjustable section in order to correctly retain the items that have been loaded inside the cover.
NOTIC E
The protective cover may be left in place after use.
NOTIC E
Regularly check the condition of the protective cover.When signs of wear and tear appear, contact a TOYOTA dealer to have it replaced by a protective cover that meets the specifications and qualities required by TOYOTA and your vehicle.
Crew cab
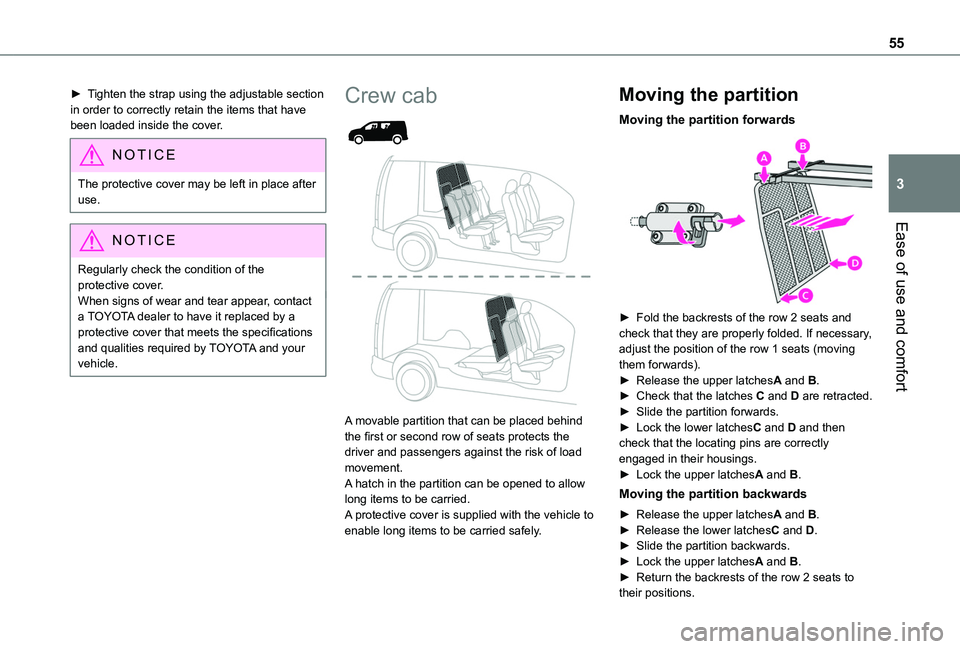
A movable partition that can be placed behind the first or second row of seats protects the
driver and passengers against the risk of load movement.A hatch in the partition can be opened to allow long items to be carried.A protective cover is supplied with the vehicle to enable long items to be carried safely.
Moving the partition
Moving the partition forwards
► Fold the backrests of the row 2 seats and check that they are properly folded. If necessary, adjust the position of the row 1 seats (moving them forwards).► Release the upper latchesA and B.► Check that the latches C and D are retracted.► Slide the partition forwards.► Lock the lower latchesC and D and then check that the locating pins are correctly
engaged in their housings.► Lock the upper latchesA and B.
Moving the partition backwards
► Release the upper latchesA and B.► Release the lower latchesC and D.► Slide the partition backwards.► Lock the upper latchesA and B.► Return the backrests of the row 2 seats to their positions.
Page 56 of 272
56
NOTIC E
The upper stops may be adjusted if:– excessive force is needed to operate the upper latches A and B.– there is noise while driving, caused by excessive play.
NOTIC E
When the partition is locked behind the row 2 or row 1 seats, an engagement noise tells you that the upper latches are closed.A visible mark and a coloured mark show the position of the latches.
WARNI NG
The partition must not be moved with the latches extended - risk of scratches or damage to the plastic trims!
WARNI NG
The partition must never be removed to convert the vehicle from a commercial vehicle to a passenger vehicle.This would pose a risk to the safety of users due to the absence of a child lock on the tailgate (mandatory on passenger vehicles).
Opening/closing the hatch
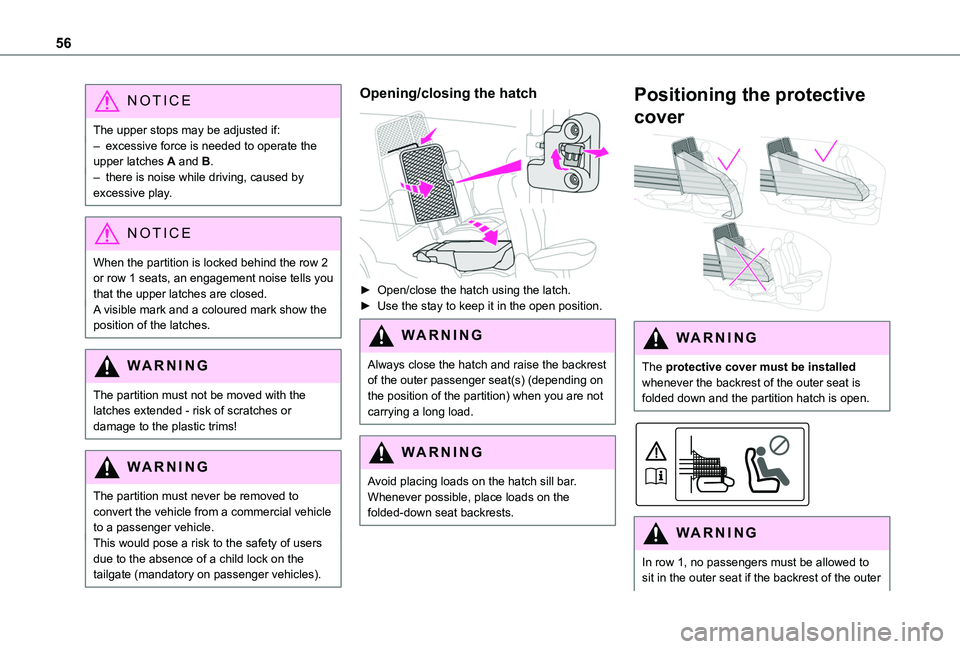
► Open/close the hatch using the latch.► Use the stay to keep it in the open position.
WARNI NG
Always close the hatch and raise the backrest of the outer passenger seat(s) (depending on the position of the partition) when you are not carrying a long load.
WARNI NG
Avoid placing loads on the hatch sill bar. Whenever possible, place loads on the folded-down seat backrests.
Positioning the protective
cover
WARNI NG
The protective cover must be installed whenever the backrest of the outer seat is folded down and the partition hatch is open.
WARNI NG
In row 1, no passengers must be allowed to sit in the outer seat if the backrest of the outer
Page 84 of 272
84
Seat belt(s) warning lamp
With individual front seats
On switching on the ignition, this warning lamp
comes on if a seat belt is not fastened or is unfastened.At speeds above approximately 20 km/h (12 mph), the warning lamp flashes for 2 minutes, accompanied by an audible signal.Once these 2 minutes have elapsed, the warning lamp remains on until the driver and/or passenger fasten their seat belt.
With two-seat front bench seat (and driver’s seat)
On switching on the ignition, this warning lamp comes on if the driver’s seat belt is not fastened or is unfastened.On switching on the ignition, this warning lamp comes on if a passenger seat belt is unfastened.At speeds above approximately 20 km/h (12 mph), the warning lamp flashes for 2 minutes, accompanied by an audible signal.Once these 2 minutes have elapsed, the warning lamp remains on until the driver fastens their seat belt.
Advice
WARNI NG
The driver must ensure that passengers use the seat belts correctly and that they are all fastened before setting off.Wherever you are seated in the vehicle, always fasten your seat belt, even for short journeys.
Do not interchange the seat belt buckles, as they will not fulfil their role fully.Before and after use, ensure that the seat belt is reeled in correctly.After folding or moving a seat or rear bench seat, ensure that the seat belt is positioned and reeled in correctly.
WARNI NG
InstallationThe lower part of the strap must be positioned as low as possible on the pelvis.The upper part must be positioned in the hollow of the shoulder.In order to be effective, a seat belt must:– be tightened as close to the body as possible,– be pulled in front of you with a smooth
movement, checking that it does not twist,– be used to restrain only one person,
– not show any signs of cuts or fraying,– not be converted or modified in order not to affect its performance.
WARNI NG
Recommendations for childrenUse a suitable child seat if the passenger is less than 12 years old or shorter than one and a half metres (4 ft 11").
Never use the same seat belt to secure more than one child.Never carry a child on your lap.For more information on Child seats, refer to the corresponding section.
WARNI NG
MaintenanceIn accordance with current safety regulations, for all repairs on your vehicle's seat belts, go to a qualified workshop with the skills and equipment needed, which a TOYOTA dealer is able to provide.Have the seat belts checked regularly by a TOYOTA dealer or a qualified workshop, particularly if the straps show signs of damage.
Clean the seat belt straps with soapy water or a textile cleaning product, sold by TOYOTA dealers.
Page 247 of 272
247
Alphabetical index
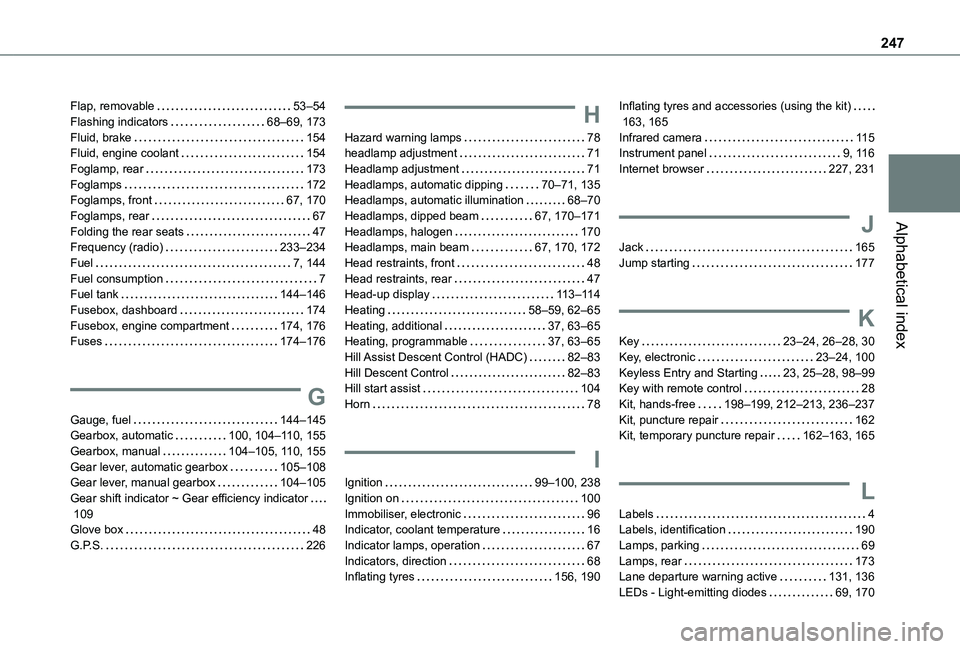
Flap, removable 53–54Flashing indicators 68–69, 173Fluid, brake 154Fluid, engine coolant 154Foglamp, rear 173Foglamps 172Foglamps, front 67, 170Foglamps, rear 67Folding the rear seats 47Frequency (radio) 233–234Fuel 7, 144Fuel consumption 7Fuel tank 144–146Fusebox, dashboard 174Fusebox, engine compartment 174, 176Fuses 174–176
G
Gauge, fuel 144–145Gearbox, automatic 100, 104–11 0, 155
Gearbox, manual 104–105, 11 0, 155Gear lever, automatic gearbox 105–108Gear lever, manual gearbox 104–105Gear shift indicator ~ Gear efficiency indicator 109Glove box 48G.P.S. 226
H
Hazard warning lamps 78headlamp adjustment 71Headlamp adjustment 71Headlamps, automatic dipping 70–71, 135Headlamps, automatic illumination 68–70Headlamps, dipped beam 67, 170–171Headlamps, halogen 170Headlamps, main beam 67, 170, 172Head restraints, front 48Head restraints, rear 47Head-up display 11 3–11 4Heating 58–59, 62–65Heating, additional 37, 63–65Heating, programmable 37, 63–65Hill Assist Descent Control (HADC) 82–83Hill Descent Control 82–83Hill start assist 104Horn 78
I
Ignition 99–100, 238Ignition on 100Immobiliser, electronic 96Indicator, coolant temperature 16Indicator lamps, operation 67Indicators, direction 68Inflating tyres 156, 190
Inflating tyres and accessories (using the kit) 163, 165Infrared camera 11 5Instrument panel 9, 11 6Internet browser 227, 231
J
Jack 165Jump starting 177
K
Key 23–24, 26–28, 30Key, electronic 23–24, 100Keyless Entry and Starting 23, 25–28, 98–99Key with remote control 28Kit, hands-free 198–199, 212–213, 236–237Kit, puncture repair 162Kit, temporary puncture repair 162–163, 165
L
Labels 4Labels, identification 190Lamps, parking 69Lamps, rear 173Lane departure warning active 131, 136LEDs - Light-emitting diodes 69, 170