Page 166 of 272
166
► Follow the safety instructions (hazard warning lamps, warning triangle, wearing high visibility vest, etc.) according to the legislation in force in the country where you are driving.► Switch off the ignition.
Access to the spare wheel
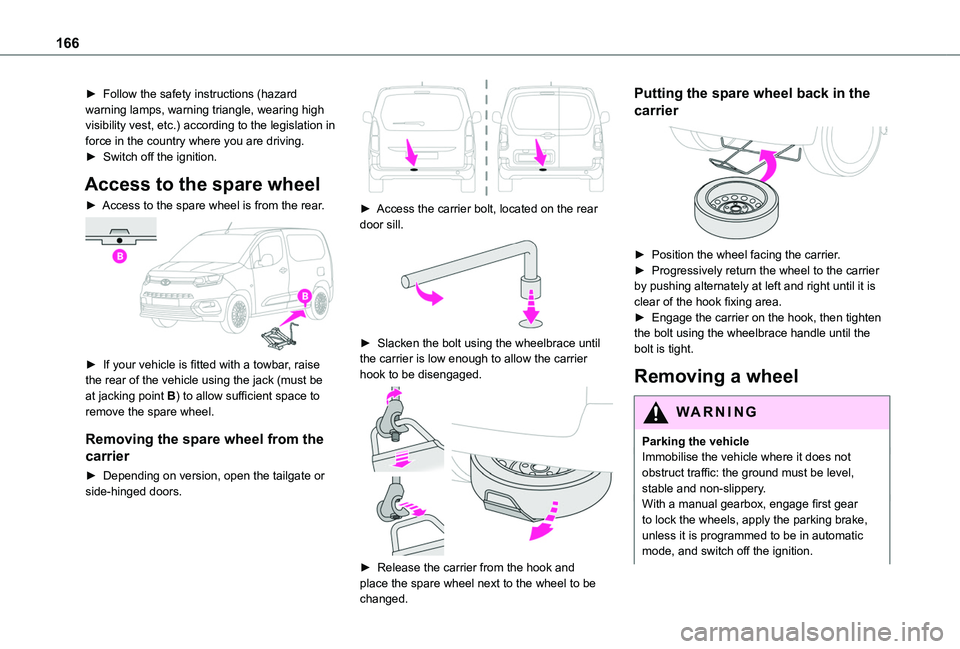
► Access to the spare wheel is from the rear.
► If your vehicle is fitted with a towbar, raise the rear of the vehicle using the jack (must be at jacking point B) to allow sufficient space to remove the spare wheel.
Removing the spare wheel from the
carrier
► Depending on version, open the tailgate or side-hinged doors.
► Access the carrier bolt, located on the rear door sill.
► Slacken the bolt using the wheelbrace until the carrier is low enough to allow the carrier hook to be disengaged.
► Release the carrier from the hook and place the spare wheel next to the wheel to be changed.
Putting the spare wheel back in the
carrier
► Position the wheel facing the carrier.► Progressively return the wheel to the carrier by pushing alternately at left and right until it is clear of the hook fixing area.► Engage the carrier on the hook, then tighten the bolt using the wheelbrace handle until the bolt is tight.
Removing a wheel
WARNI NG
Parking the vehicleImmobilise the vehicle where it does not obstruct traffic: the ground must be level, stable and non-slippery.With a manual gearbox, engage first gear to lock the wheels, apply the parking brake, unless it is programmed to be in automatic
mode, and switch off the ignition.
Page 167 of 272
167
In the event of a breakdown
8
With an automatic gearbox, select mode P to lock the wheels, apply the parking brake, unless it is programmed to be in automatic mode, and switch off the ignition.Check for the fixed illumination of the parking brake warning lamps in the instrument panel.The occupants must get out of the vehicle and wait where they are safe.If necessary, place a chock under the wheel diagonally opposite the wheel to be changed.Never go underneath a vehicle raised using a jack; use an axle stand.
NOTIC E
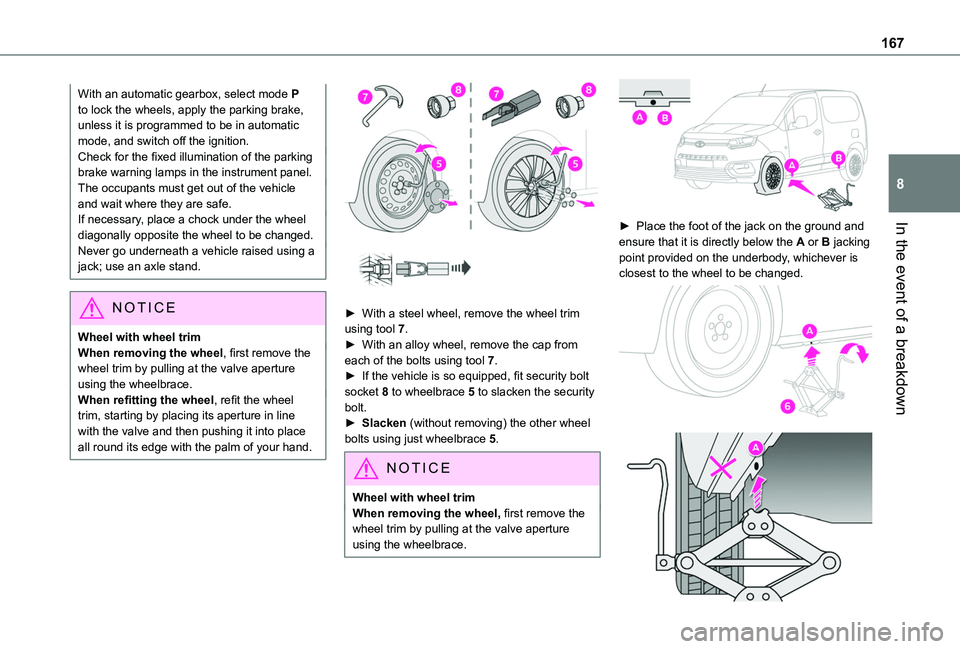
Wheel with wheel trimWhen removing the wheel, first remove the wheel trim by pulling at the valve aperture using the wheelbrace.When refitting the wheel, refit the wheel trim, starting by placing its aperture in line with the valve and then pushing it into place
all round its edge with the palm of your hand.
► With a steel wheel, remove the wheel trim using tool 7.► With an alloy wheel, remove the cap from each of the bolts using tool 7.► If the vehicle is so equipped, fit security bolt socket 8 to wheelbrace 5 to slacken the security bolt.► Slacken (without removing) the other wheel bolts using just wheelbrace 5.
NOTIC E
Wheel with wheel trimWhen removing the wheel, first remove the wheel trim by pulling at the valve aperture using the wheelbrace.
► Place the foot of the jack on the ground and ensure that it is directly below the A or B jacking
point provided on the underbody, whichever is closest to the wheel to be changed.
Page 180 of 272
180
– the remote control key or the electronic key (depending on version),– the electric windows,– the electric doors,– the date and time,– the radio preset stations.
NOTIC E
The Stop & Start system may not be operational during the trip following the first engine start.In this case, the system will only be available again after a continuous period of immobilisation of the vehicle, a period which depends on the exterior temperature and the state of charge of the battery (up to about 8 hours).
Towing
Procedure for having your vehicle towed or for towing another vehicle using the towing eye.
NOTIC E
General recommendationsObserve the legislation in force in the country where you are driving.Ensure that the weight of the towing vehicle is higher than that of the towed vehicle.The driver must remain at the wheel of the towed vehicle and must have a valid driving licence.When towing a vehicle with all four wheels on the ground, always use an approved towbar; ropes and straps are prohibited.
The towing vehicle must move off gently.When the vehicle is towed with its engine off, there is no longer braking and steering assistance.
WARNI NG
A professional recovery service must be called if:– broken down on a motorway or main road;
– not possible to put the gearbox into neutral, unlock the steering, or release the parking brake;– not possible to tow a vehicle with an automatic gearbox, with the engine running;– towing with only two wheels on the ground;– four-wheel drive vehicle;– no approved towbar available.
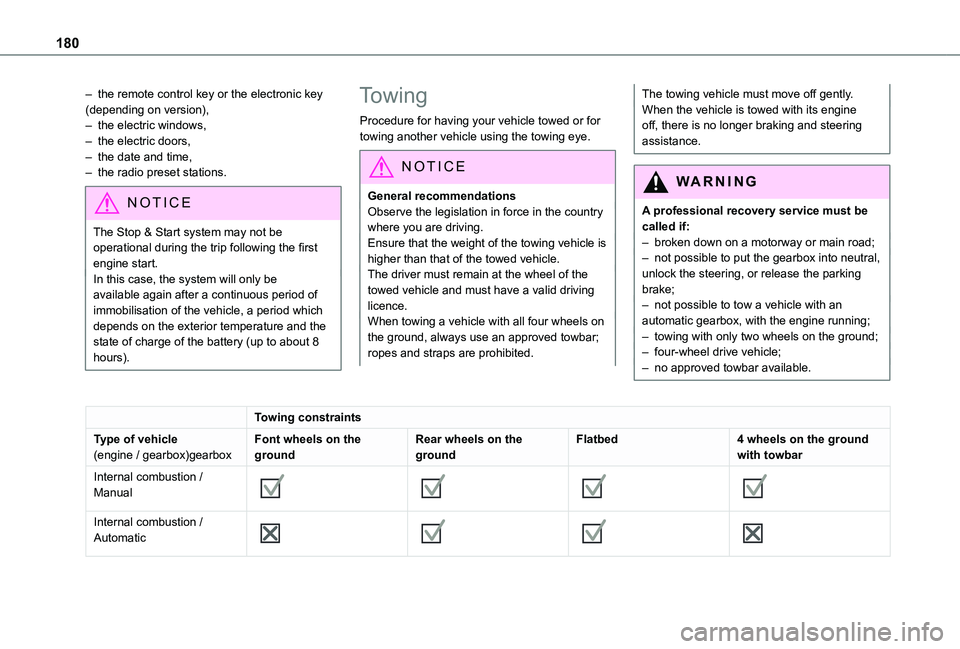
Towing constraints
Type of vehicle(engine / gearbox)gearboxFont wheels on the groundRear wheels on the groundFlatbed4 wheels on the ground with towbar
Internal combustion / Manual
Internal combustion / Automatic
Page 181 of 272
181
In the event of a breakdown
8
NOTIC E
In case of battery or electric parking brake failure, it is essential to call a professional using flatbed recovery vehicles (excluding manual gearbox).
Access to the eye
NOTIC E
For more information on the Tool kit, refer to the corresponding section.
WARNI NG
With a manual gearbox, move the gear lever into neutral.With an automatic gearbox, place the gear selector into position N.Failure to adhere to this instruction may lead to damage to braking system components and the lack of braking assistance on restarting the engine.
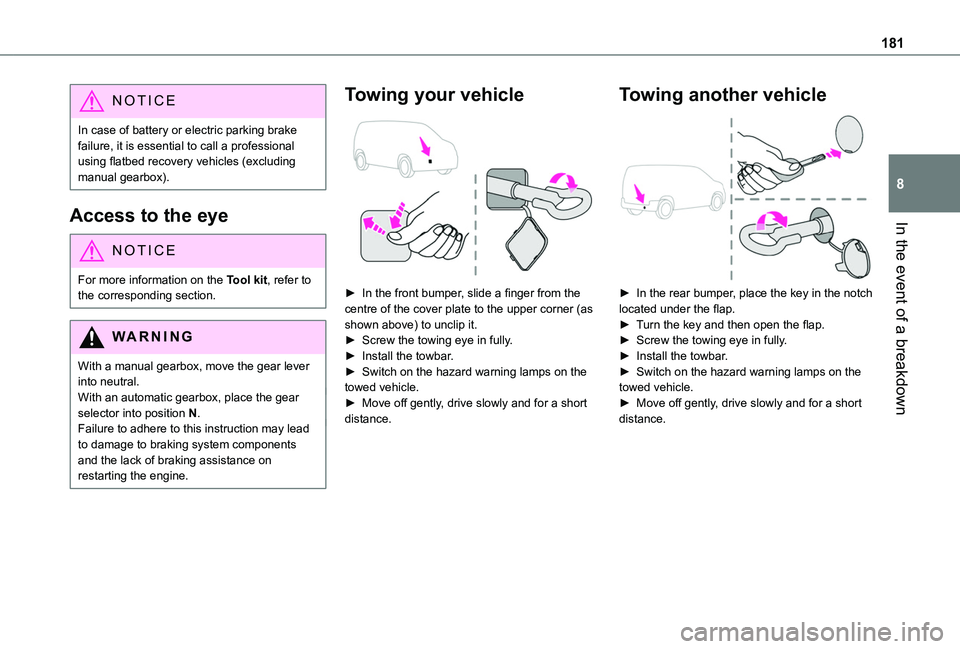
Towing your vehicle
► In the front bumper, slide a finger from the centre of the cover plate to the upper corner (as shown above) to unclip it.► Screw the towing eye in fully.► Install the towbar.► Switch on the hazard warning lamps on the towed vehicle.► Move off gently, drive slowly and for a short distance.
Towing another vehicle
► In the rear bumper, place the key in the notch located under the flap.► Turn the key and then open the flap.► Screw the towing eye in fully.► Install the towbar.► Switch on the hazard warning lamps on the towed vehicle.► Move off gently, drive slowly and for a short distance.
Page 188 of 272
188
Engines and towed loads - PETROL EURO 6.3
Engine1.2Turbo 110HP1.2Turbo 130HP
GearboxManual 6-speedAutomatic 8-speed
CodeEB2ADT STTd BVM6EB2ADTS STTd EAT8
Model CodeEUHNP2-LEUHNS3-L
Cubic capacity (cc)1,1991,199
Max. power: EC standard (kW)8196
FuelUnleadedUnleaded
Braked trailer (within the GTW limit) on a 12% slope900 kg (1,984 lb)950 kg (2,094 lb)
Unbraked trailer750 kg (1,653 lb)750 kg (1,653 lb)
Maximum authorised nose/towball weight74 kg (163 lb)74 kg (163 lb)
Page 189 of 272
189
Technical data
9
Engines and towed loads - DIESEL EURO 6.2 and 6.3
Engine1.5D-4D 75HP1.5D-4D 100HP1.5D-4D 130HP
GearboxManual 5-speedManual 5-speedManual 6-speedAutomatic 8-speed
CodeDV5RD STTd BVM5DV5RC STTd BVM6DV5RC STTa EAT8
Model CodeEFYHYC-LEFYHZJ-LEFYHZR-L
Cubic capacity (cc)1,4991,4991,499
Max. power: EC standard (kW)759696
FuelDieselDieselDieselDiesel
Braked trailer (within the GTW limit) on a 12% slope
1,050 kg (2,314 lb)1,250 kg (2,755 lb)1,050 kg (2,314 lb)
Unbraked trailer 750 kg (1,653 lb)750 kg (1,653 lb)750 kg (1,653 lb)
Maximum authorised nose/towball weight 74 kg (163 lb)74 kg (163 lb)74 kg (163 lb)
Page 247 of 272
247
Alphabetical index
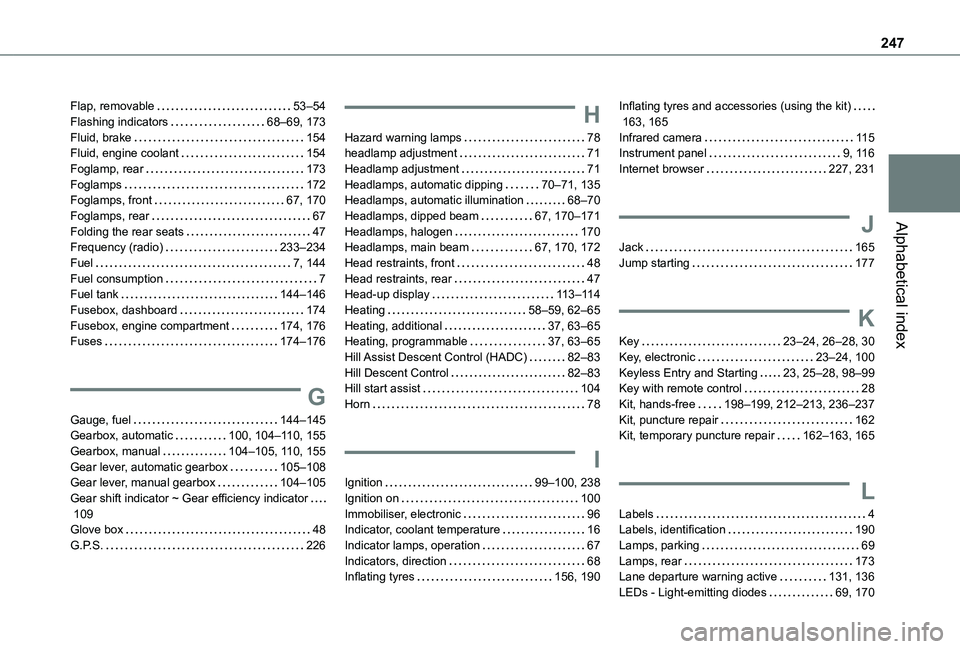
Flap, removable 53–54Flashing indicators 68–69, 173Fluid, brake 154Fluid, engine coolant 154Foglamp, rear 173Foglamps 172Foglamps, front 67, 170Foglamps, rear 67Folding the rear seats 47Frequency (radio) 233–234Fuel 7, 144Fuel consumption 7Fuel tank 144–146Fusebox, dashboard 174Fusebox, engine compartment 174, 176Fuses 174–176
G
Gauge, fuel 144–145Gearbox, automatic 100, 104–11 0, 155
Gearbox, manual 104–105, 11 0, 155Gear lever, automatic gearbox 105–108Gear lever, manual gearbox 104–105Gear shift indicator ~ Gear efficiency indicator 109Glove box 48G.P.S. 226
H
Hazard warning lamps 78headlamp adjustment 71Headlamp adjustment 71Headlamps, automatic dipping 70–71, 135Headlamps, automatic illumination 68–70Headlamps, dipped beam 67, 170–171Headlamps, halogen 170Headlamps, main beam 67, 170, 172Head restraints, front 48Head restraints, rear 47Head-up display 11 3–11 4Heating 58–59, 62–65Heating, additional 37, 63–65Heating, programmable 37, 63–65Hill Assist Descent Control (HADC) 82–83Hill Descent Control 82–83Hill start assist 104Horn 78
I
Ignition 99–100, 238Ignition on 100Immobiliser, electronic 96Indicator, coolant temperature 16Indicator lamps, operation 67Indicators, direction 68Inflating tyres 156, 190
Inflating tyres and accessories (using the kit) 163, 165Infrared camera 11 5Instrument panel 9, 11 6Internet browser 227, 231
J
Jack 165Jump starting 177
K
Key 23–24, 26–28, 30Key, electronic 23–24, 100Keyless Entry and Starting 23, 25–28, 98–99Key with remote control 28Kit, hands-free 198–199, 212–213, 236–237Kit, puncture repair 162Kit, temporary puncture repair 162–163, 165
L
Labels 4Labels, identification 190Lamps, parking 69Lamps, rear 173Lane departure warning active 131, 136LEDs - Light-emitting diodes 69, 170