2020 TOYOTA PRIUS PRIME flat tire
[x] Cancel search: flat tirePage 670 of 792

6708-2. Steps to take in an emergency
PRIUS PRIME_OM_OM47C77U_(U)
WARNING
■Maintenance of the tires
Each tire, including the spare (if provided), should be checked monthly
when cold and inflated to the inflation pressure recommended by the
vehicle manufacturer on the vehicle placard or tire inflation p ressure
label (tire and load information label). (If your vehicle has t ires of a dif-
ferent size than the size indicated on the vehicle placard or t ire inflation
pressure label [tire and load information label], you should de termine
the proper tire inflation p ressure for those tires.)
As an added safety feature, your vehicle has been equipped with a tire
pressure monitoring system (TPMS -tire pressure warning system) that
illuminates a low tire pressure telltale (tire pressure warning light) when
one or more of your tires is significantly under-inflated. Acco rdingly,
when the low tire pressure telltale (tire pressure warning ligh t) illumi-
nates, you should stop and check your tires as soon as possible , and
inflate them to the proper pressure. Driving on a significantly under-
inflated tire causes the tire to overheat and can lead to tire failure.
Under-inflation also reduces fuel efficiency and tire tread lif e, and may
affect the vehicle’s handling and stopping ability.
Please note that the TPMS (tire pressure warning system) is not a sub-
stitute for proper tire maintenance, and it is the driver’s res ponsibility to
maintain correct tire pressure, even if under-inflation has not reached
the level to trigger illumination of the TPMS low tire pressure telltale (tire pressure warning light).
Your vehicle has also been equipped with a TPMS (tire pressure warn-
ing system) malfunction indicato r to indicate when the system is not
operating properly. The TPMS (tire pressure warning system) mal func-
tion indicator is combined with the low tire pressure telltale (tire pressure
warning light). When the system detects a malfunction, the tell tale will
flash for approximately one minute and then remain continuously illumi-
nated. This sequence will continue upon subsequent vehicle star t-ups
as long as the malfunction exists . When the malfunction indicator is illu-
minated, the system may not be able to detect or signal low tir e pres-
sure as intended.
TPMS (tire pressure warning system) malfunctions may occur for a vari-
ety of reasons, including the installation of replacement or alternate tires
or wheels on the vehicle that prevent the TPMS (tire pressure w arning
system) from functioning properly. Always check the TPMS (tire pres-
sure warning system) malfunction telltale after replacing one or more
tires or wheels on your vehicle to ensure that the replacement or alter-
nate tires and wheels allow the TPMS (tire pressure warning system) to
continue to function properly.
Page 680 of 792
680
PRIUS PRIME_OM_OM47C77U_(U)
8-2. Steps to take in an emergency
If you have a flat tire
Your vehicle is not equipped with a spare tire, but instead is
equipped with an emergency tire puncture repair kit.
A puncture caused by a nail or screw passing through the tire
tread can be repaired temporarily using the emergency tire
puncture repair kit. (The kit contains a bottle of sealant. The
sealant can be used only once to temporarily repair one tire
without removing the nail or screw from the tire.) After tempor ar-
ily repairing the tire with the kit, have the tire repaired or
replaced by your Toyota dealer.
WARNING
■If you have a flat tire
Do not continue driving with a flat tire.
Driving even a short distance wit h a flat tire can damage the tire and the
wheel beyond repair, which cou ld result in an accident.
Page 681 of 792
6818-2. Steps to take in an emergency
PRIUS PRIME_OM_OM47C77U_(U)
8
When trouble arises
●Stop the vehicle in a safe place on a hard, flat surface.
● Set the parking brake.
● Shift the shift position to P.
● Stop the hybrid system.
● Turn on the emergency flashers.
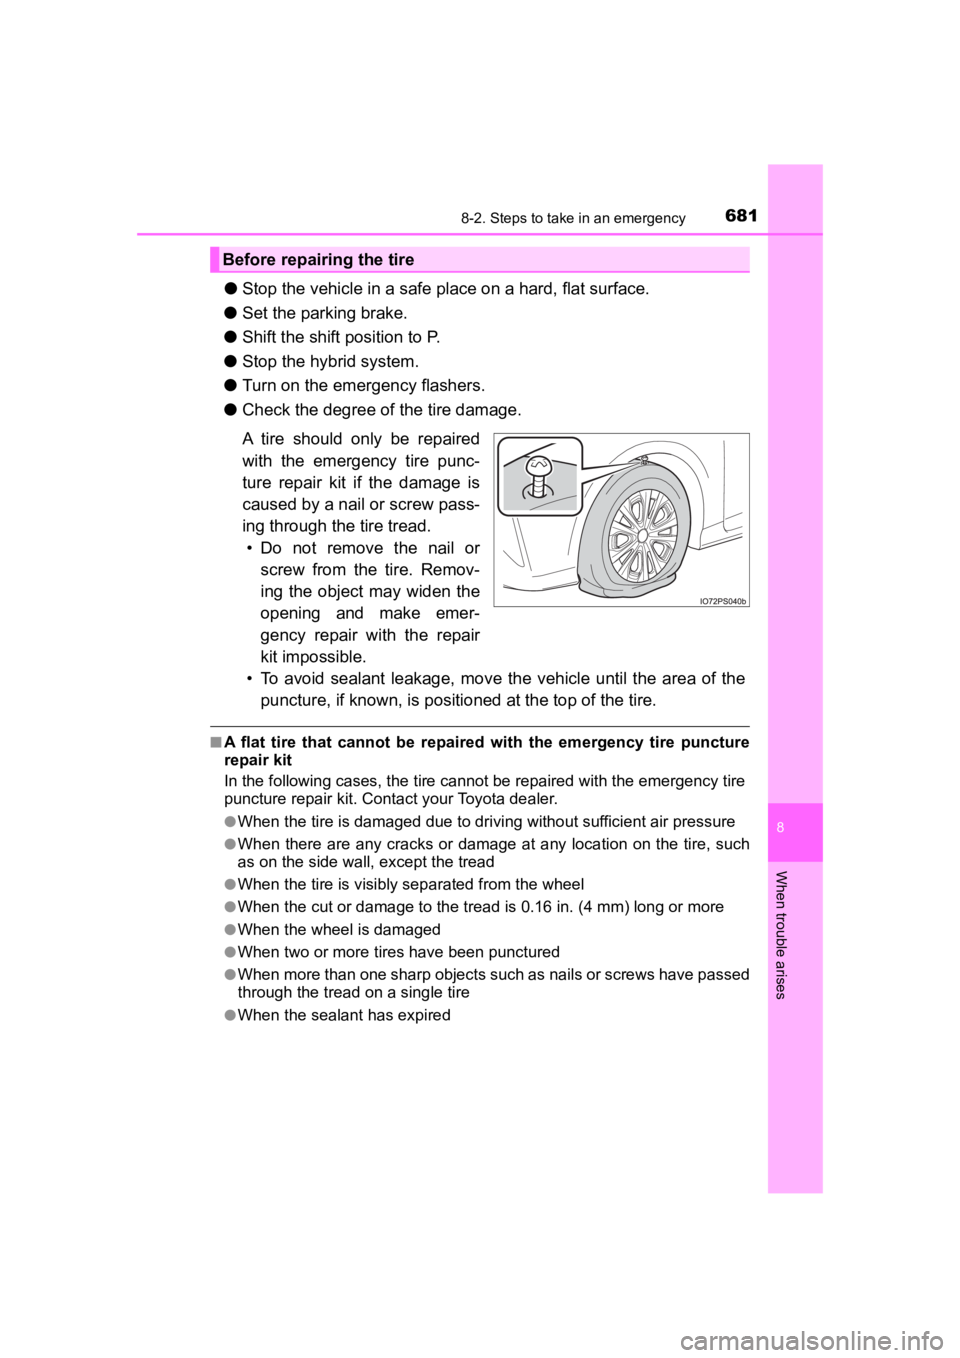
● Check the degree of the tire damage.
A tire should only be repaired
with the emergency tire punc-
ture repair kit if the damage is
caused by a nail or screw pass-
ing through the tire tread. • Do not remove the nail or screw from the tire. Remov-
ing the object may widen the
opening and make emer-
gency repair with the repair
kit impossible.
• To avoid sealant leakage, move the vehicle until the area of the
puncture, if known, is positioned at the top of the tire.
■A flat tire that cannot be repaired with the emergency tire pun cture
repair kit
In the following cases, the tire cannot be repaired with the em ergency tire
puncture repair kit. Contact your Toyota dealer.
●When the tire is damaged due to driving without sufficient air pressure
●When there are any cracks or damage at any location on the tire , such
as on the side wall, except the tread
●When the tire is visibly separated from the wheel
●When the cut or damage to the tr ead is 0.16 in. (4 mm) long or more
●When the wheel is damaged
●When two or more tires have been punctured
●When more than one sharp objects such as nails or screws have p assed
through the tread on a single tire
●When the sealant has expired
Before repairing the tire
Page 687 of 792
6878-2. Steps to take in an emergency
PRIUS PRIME_OM_OM47C77U_(U)
8
When trouble arises
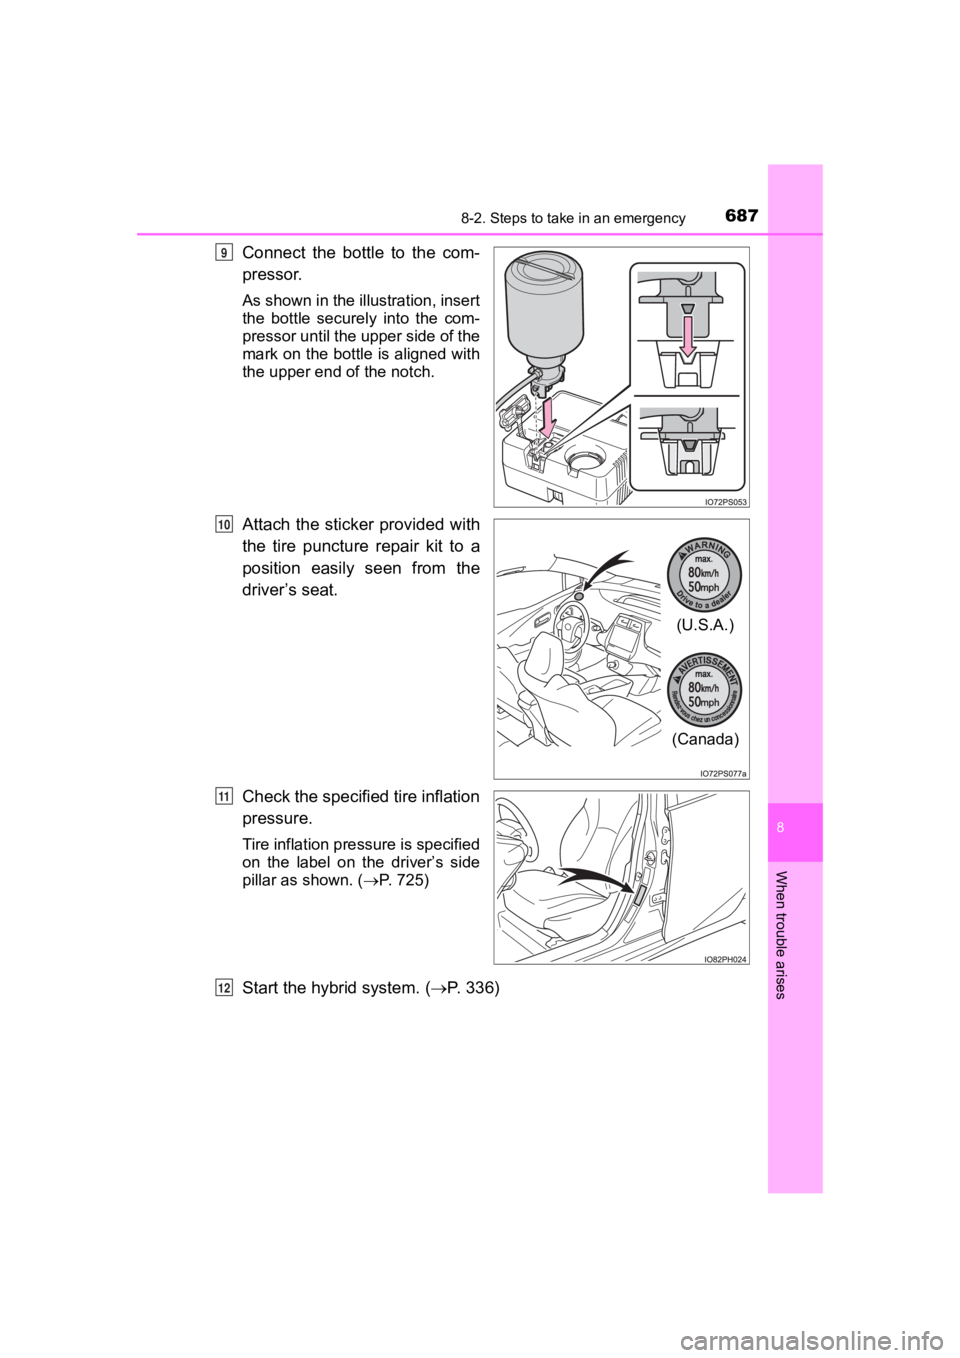
Connect the bottle to the com-
pressor.
As shown in the illustration, insert
the bottle securely into the com-
pressor until the upper side of the
mark on the bottle is aligned with
the upper end of the notch.
Attach the sticker provided with
the tire puncture repair kit to a
position easily seen from the
driver’s seat.
Check the specified tire inflation
pressure.
Tire inflation pressure is specified
on the label on the driver’s side
pillar as shown. (P. 7 2 5 )
Start the hybrid system. ( P. 3 3 6 )
9
(U.S.A.)
(Canada)
10
11
12
Page 688 of 792
6888-2. Steps to take in an emergency
PRIUS PRIME_OM_OM47C77U_(U)
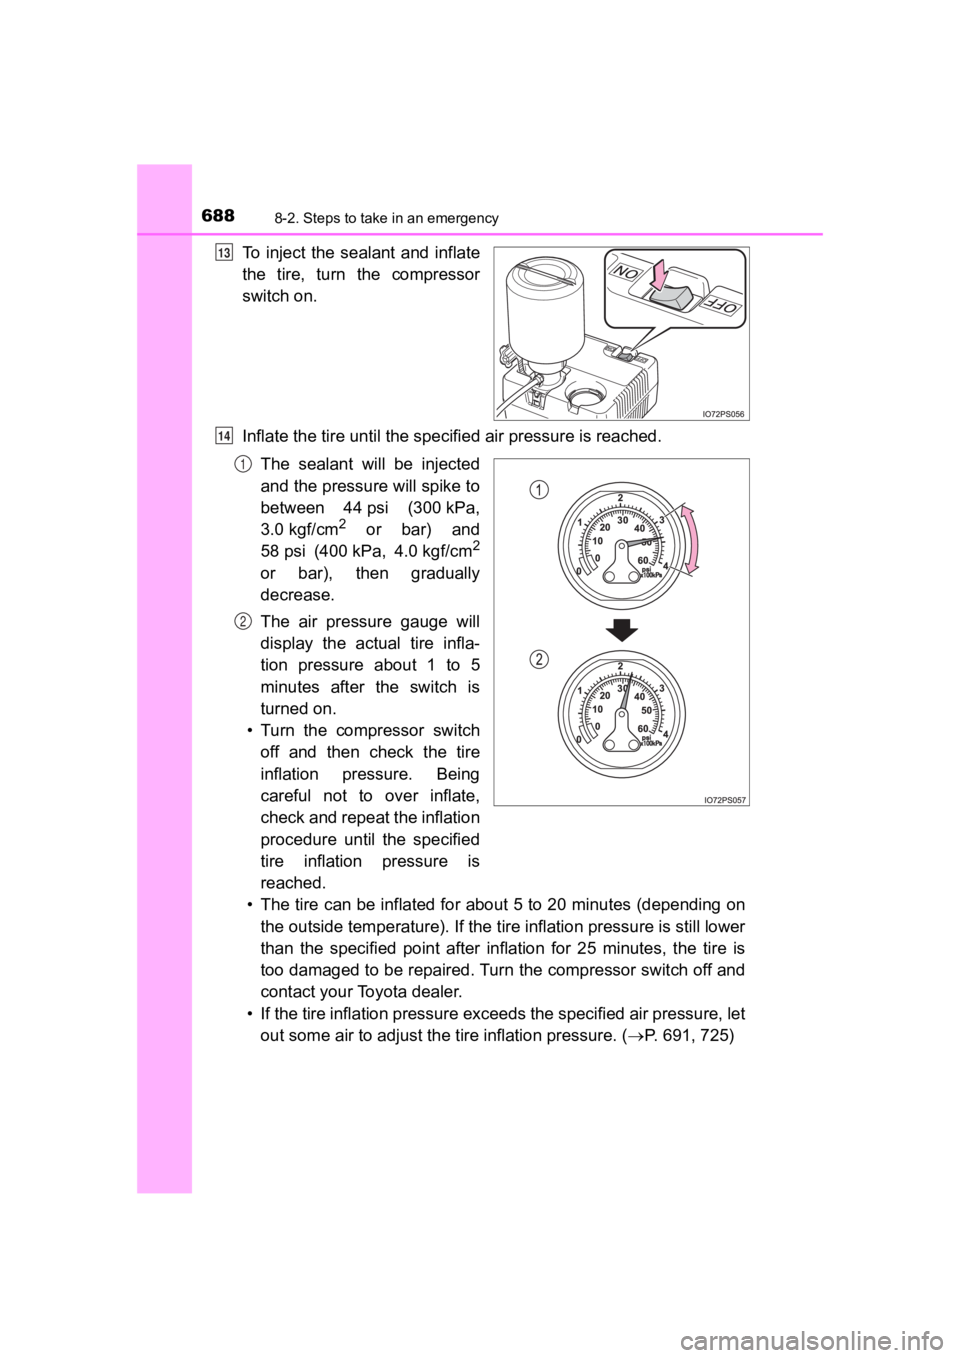
To inject the sealant and inflate
the tire, turn the compressor
switch on.
Inflate the tire until the specified air pressure is reached.The sealant will be injected
and the pressure will spike to
between 44 psi (300 kPa,
3.0 kgf/cm
2 or bar) and
58 psi (400 kPa, 4.0 kgf/cm2
or bar), then gradually
decrease.
The air pressure gauge will
display the actual tire infla-
tion pressure about 1 to 5
minutes after the switch is
turned on.
• Turn the compressor switch off and then check the tire
inflation pressure. Being
careful not to over inflate,
check and repeat the inflation
procedure until the specified
tire inflation pressure is
reached.
• The tire can be inflated for about 5 to 20 minutes (depending on
the outside temperature). If the t ire inflation pressure is still lower
than the specified point after inflation for 25 minutes, the tire is
too damaged to be repaired. Turn the compressor switch off and
contact your Toyota dealer.
• If the tire inflation pressure exceeds the specified air press ure, let
out some air to adjust the tire inflation pressure. ( P. 691, 725)
13
14
1
2
Page 689 of 792
6898-2. Steps to take in an emergency
PRIUS PRIME_OM_OM47C77U_(U)
8
When trouble arises
With the compressor switch off, disconnect the hose from the valve
on the tire and then pull out the power plug from the power out let
socket.
Some sealant may leak when the hose is removed.
Install the valve cap onto the valve of the emergency repaired tire.
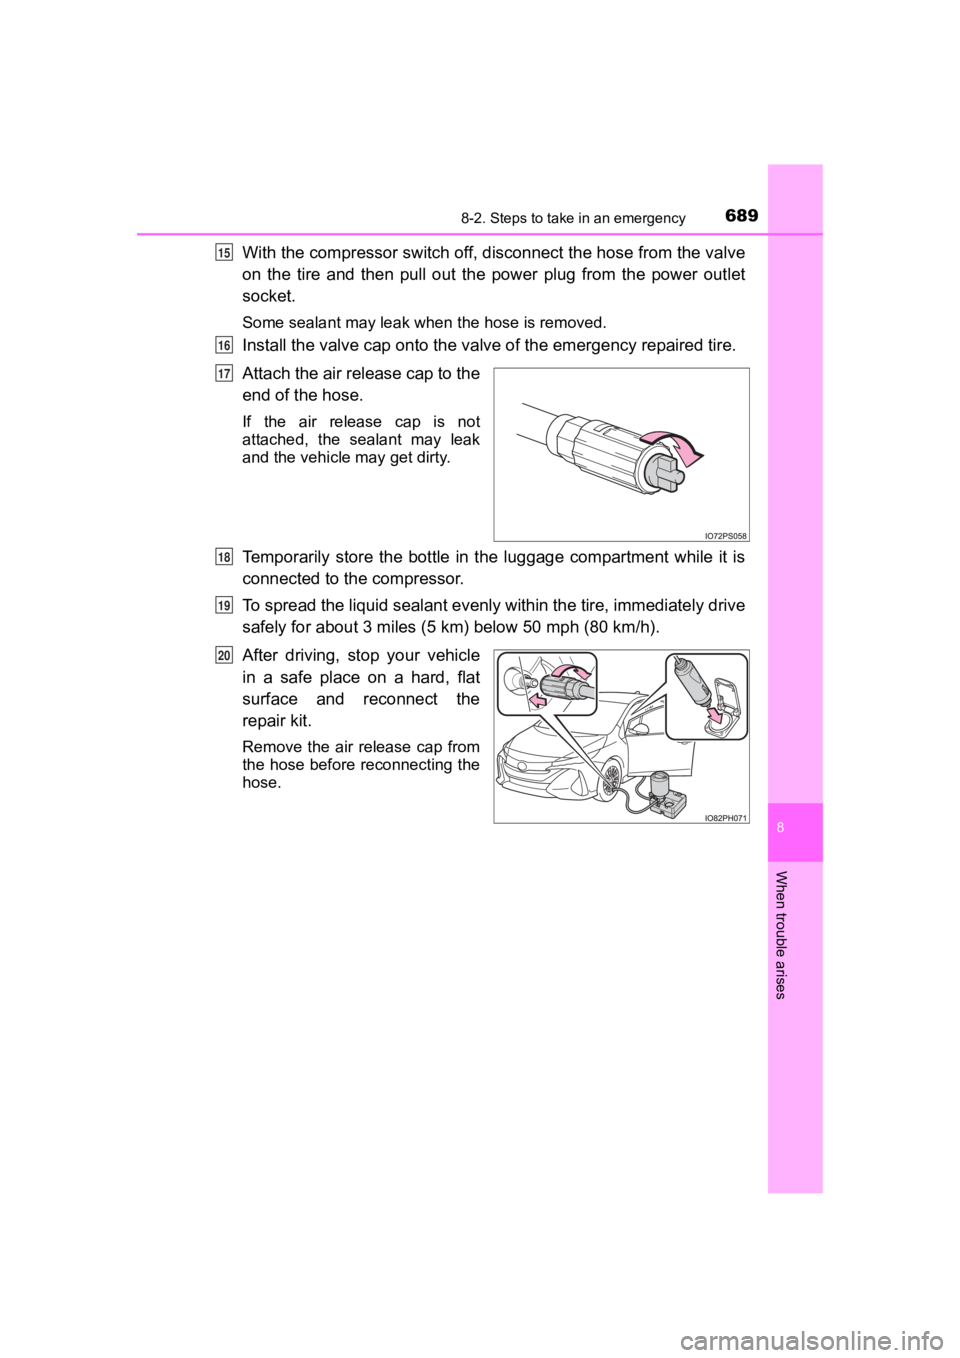
Attach the air release cap to the
end of the hose.
If the air release cap is not
attached, the sealant may leak
and the vehicle may get dirty.
Temporarily store the bottle in the luggage compartment while i t is
connected to the compressor.
To spread the liquid sealant evenly within the tire, immediatel y drive
safely for about 3 miles (5 km) below 50 mph (80 km/h).
After driving, s top your vehicle
in a safe place on a hard, flat
surface and reconnect the
repair kit.
Remove the air release cap from
the hose before reconnecting the
hose.
15
16
17
18
19
20
Page 690 of 792
6908-2. Steps to take in an emergency
PRIUS PRIME_OM_OM47C77U_(U)
Turn the compressor switch on and wait for several seconds, then
turn it off. Check the t ire inflation pressure.
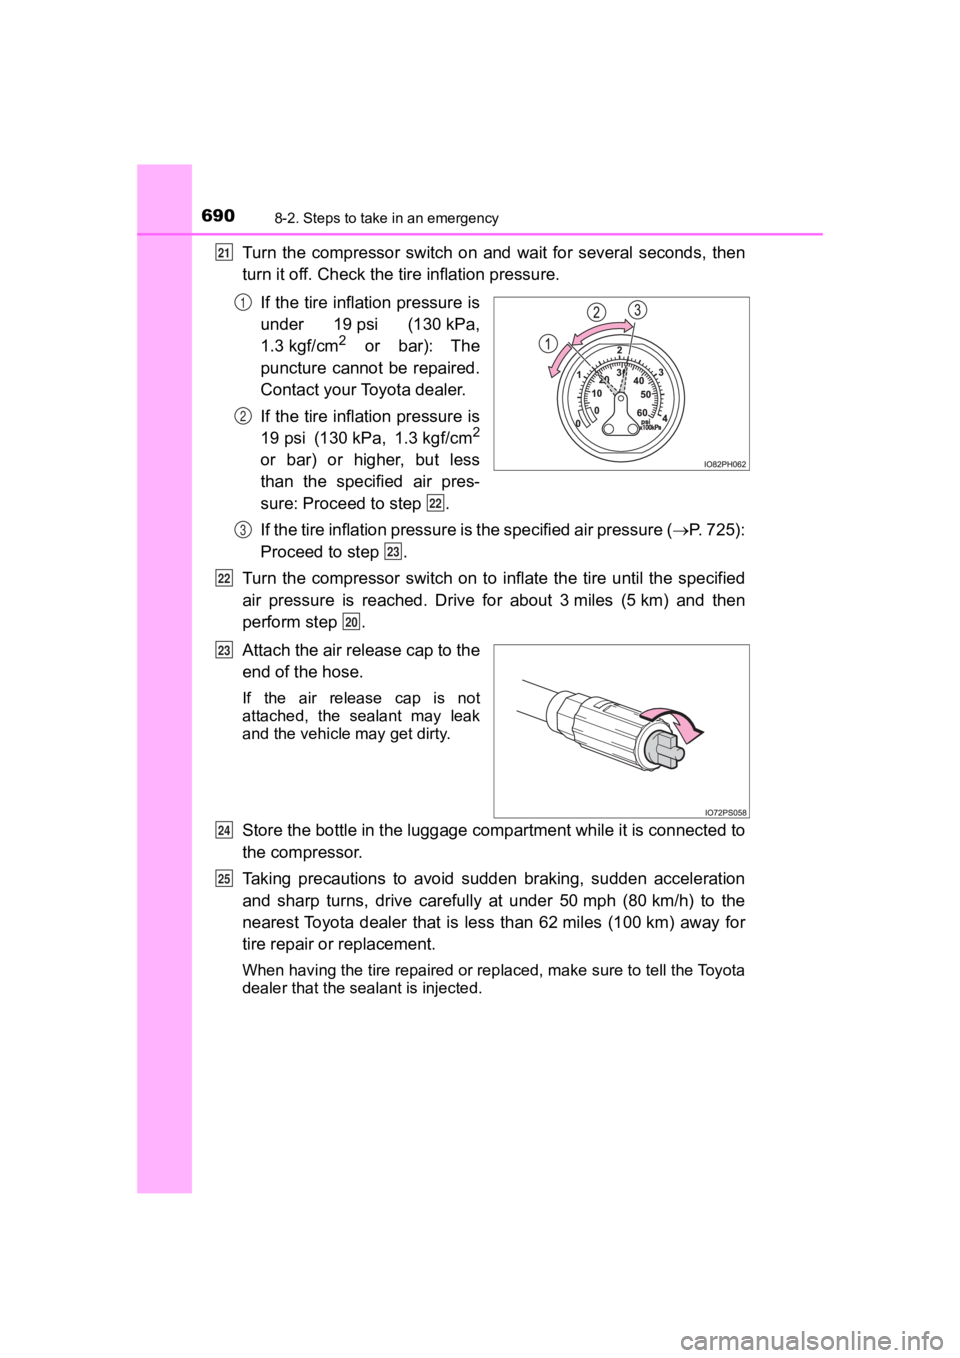
If the tire inflation pressure is
under 19 psi (130 kPa,
1.3 kgf/cm
2 or bar): The
puncture cannot be repaired.
Contact your Toyota dealer.
If the tire inflation pressure is
19 psi (130 kPa, 1.3 kgf/cm
2
or bar) or higher, but less
than the specified air pres-
sure: Proceed to step .
If the tire inflation pressure is the specified air pressure ( P. 725):
Proceed to step .
Turn the compressor switch on to inflate the tire until the spe cified
air pressure is reached. Drive for about 3 miles (5 km) and then
perform step .
Attach the air release cap to the
end of the hose.
If the air release cap is not
attached, the sealant may leak
and the vehicle may get dirty.
Store the bottle in the luggage compartment while it is connect ed to
the compressor.
Taking precautions to avoid sudden braking, sudden acceleration
and sharp turns, drive carefully at under 50 mph (80 km/h) to the
nearest Toyota dealer that is less than 62 miles (100 km) away fo r
tire repair or replacement.
When having the tire repaired or replaced, make sure to tell th e Toyota
dealer that the sealant is injected.
21
1
2
22
3
23
22
20
23
24
25
Page 691 of 792
6918-2. Steps to take in an emergency
PRIUS PRIME_OM_OM47C77U_(U)
8
When trouble arises
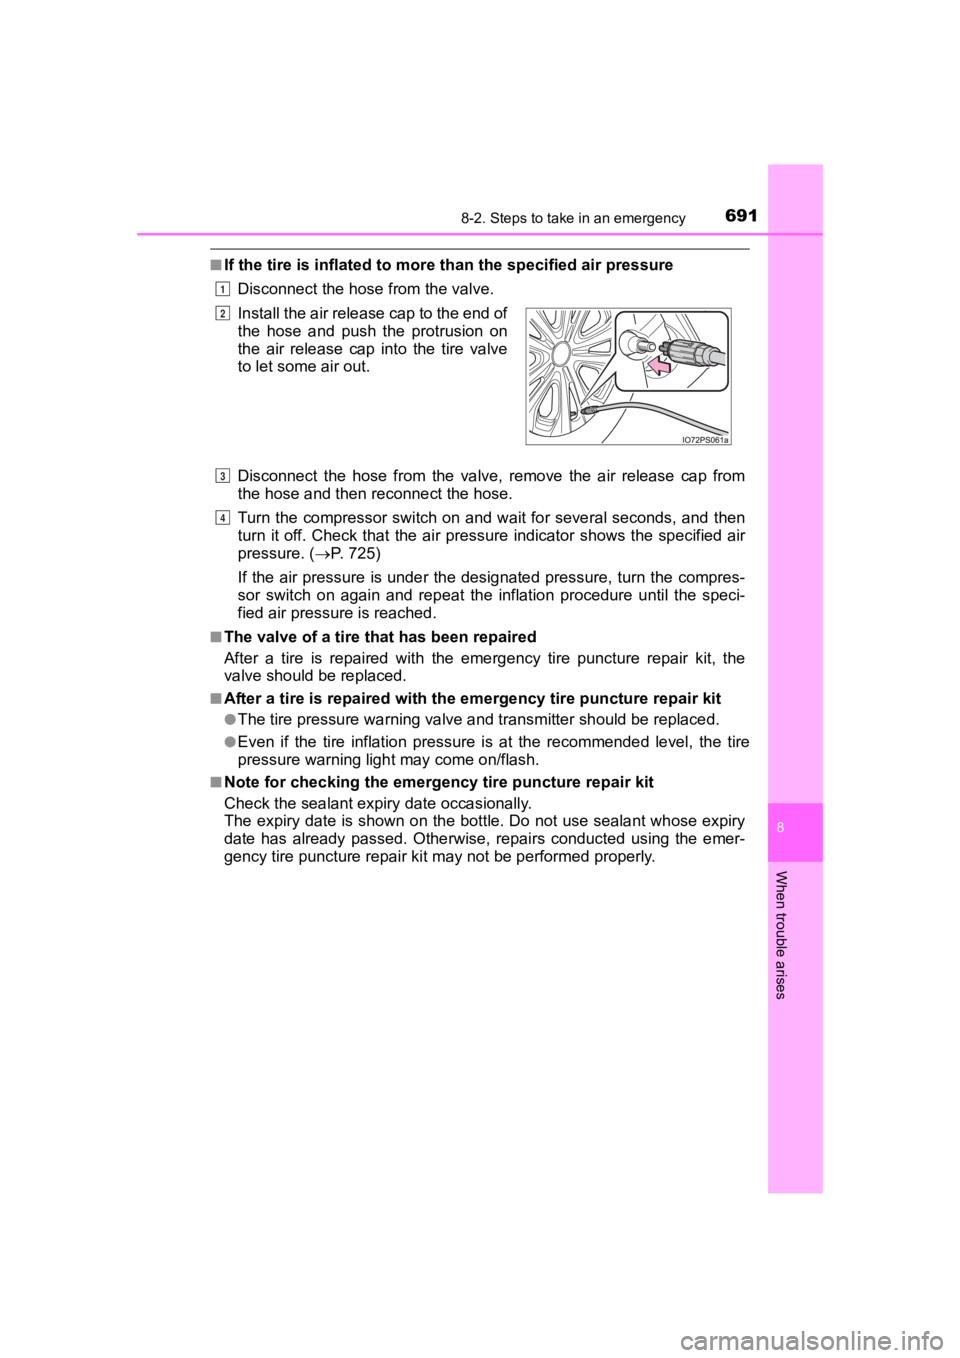
■If the tire is inflated to more than the specified air pressure
Disconnect the hose from the valve.
Disconnect the hose from the valv e, remove the air release cap from
the hose and then reconnect the hose.
Turn the compressor switch on and wait for several seconds, and then
turn it off. Check that the air pressure indicator shows the sp ecified air
pressure. ( P. 725)
If the air pressure is under the designated pressure, turn the compres-
sor switch on again and repeat the inflation procedure until th e speci-
fied air pressure is reached.
■The valve of a tire that has been repaired
After a tire is repaired with the emergency tire puncture repai r kit, the
valve should be replaced.
■After a tire is repaired with the emergency tire puncture repai r kit
●The tire pressure warning valve and transmitter should be replaced.
●Even if the tire inflation pressure is at the recommended level, the tire
pressure warning light may come on/flash.
■Note for checking the emergency tire puncture repair kit
Check the sealant expiry date occasionally.
The expiry date is shown on the bottle. Do not use sealant whos e expiry
date has already passed. Otherwise, repairs conducted using the emer-
gency tire puncture repair kit may not be performed properly. Install the air release cap to the end of
the hose and push the protrusion on
the air release cap into the tire valve
to let some air out.
1
2
3
4