Page 51 of 226

Starting and Powering
Off
Starting When you open a door, Model S powers on
the instrument panel and touchscreen and you
can operate all controls.
To drive Model S:
1. PRESS THE BRAKE PEDAL - Model S
powers on and is ready to drive.
2. SELECT A GEAR - Move the gear lever all
the way down for Drive and all the way up
for Reverse. See Shifting Gears on page
52.
Note: If the PIN to Drive feature is enabled
(see PIN to Drive on page 149), you must also
enter a valid PIN on the touchscreen before
you can drive Model S.
Note: If Passive Entry is off and you do not
press the brake pedal to start Model S within
approximately five minutes, a message
displays on the instrument panel and you must
use the key to lock then unlock Model S again
before starting the vehicle.
Everything you need to know when driving
Model S displays on the instrument panel.
Key Not Inside
If Model S does not detect a key when you
press the brake, the instrument panel displays
a message telling you that a key is not inside.
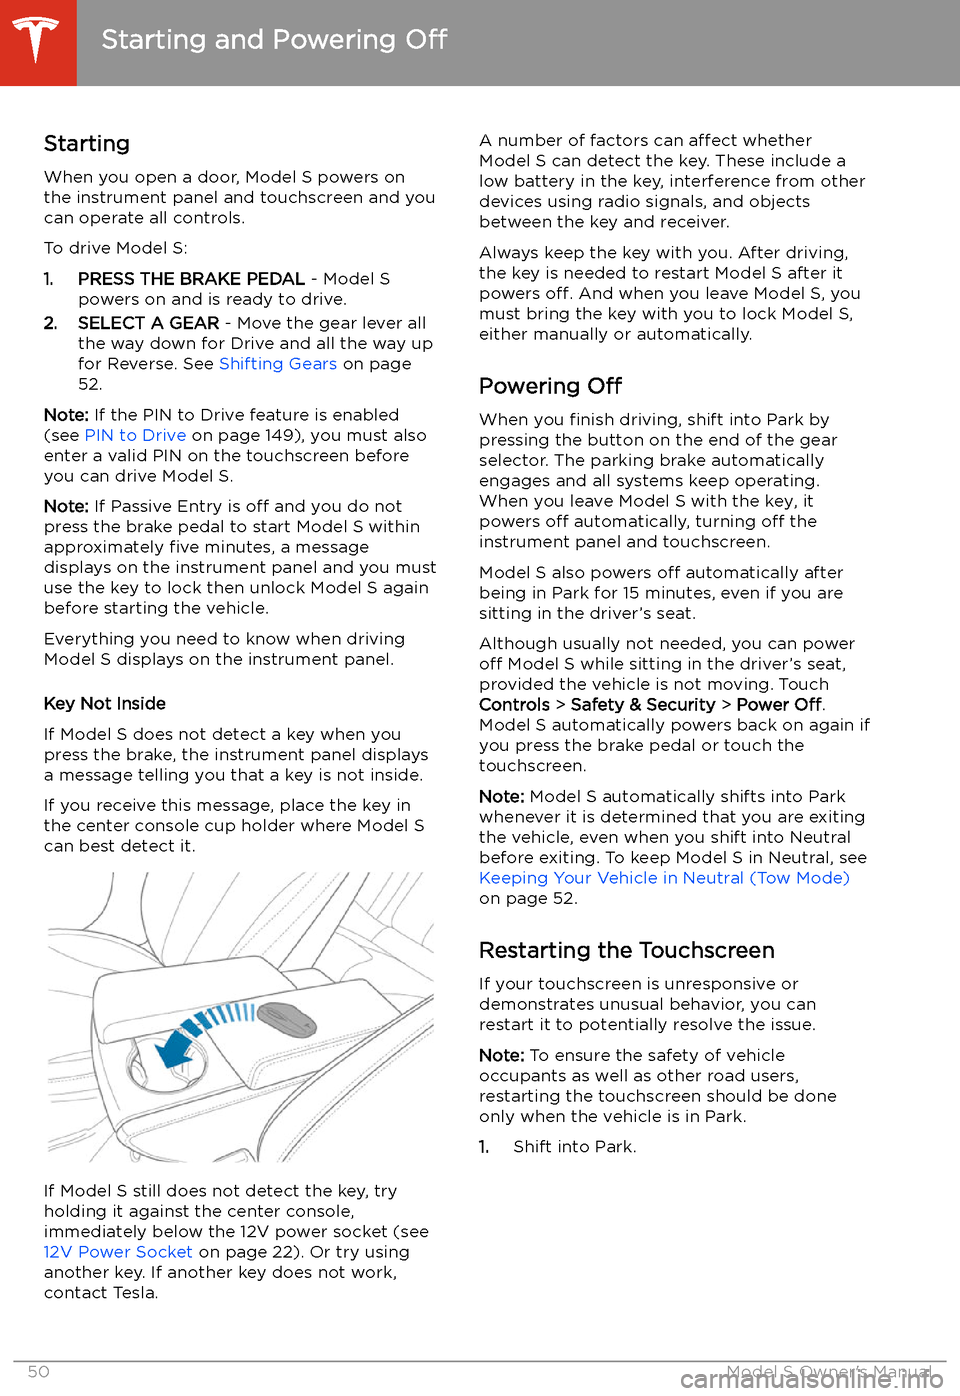
If you receive this message, place the key in
the center console cup holder where Model S
can best detect it.
If Model S still does not detect the key, try holding it against the center console,
immediately below the 12V power socket (see
12V Power Socket on page 22). Or try using
another key. If another key does not work, contact Tesla.
A number of factors can affect whether
Model S can detect the key. These include a
low battery in the key, interference from other
devices using radio signals, and objects
between the key and receiver.
Always keep the key with you. After driving,
the key is needed to restart Model S after it
powers off. And when you leave Model S, you
must bring the key with you to lock Model S, either manually or automatically.
Powering Off
When you finish driving, shift into Park by
pressing the button on the end of the gear selector. The parking brake automatically
engages and all systems keep operating.
When you leave Model S with the key, it
powers off automatically, turning off the
instrument panel and touchscreen.
Model S also powers off automatically after
being in Park for 15 minutes, even if you are
sitting in the driver
Page 53 of 226

Gears
Shifting Gears When Model S is in Park, you must press the
brake to shift to another gear.
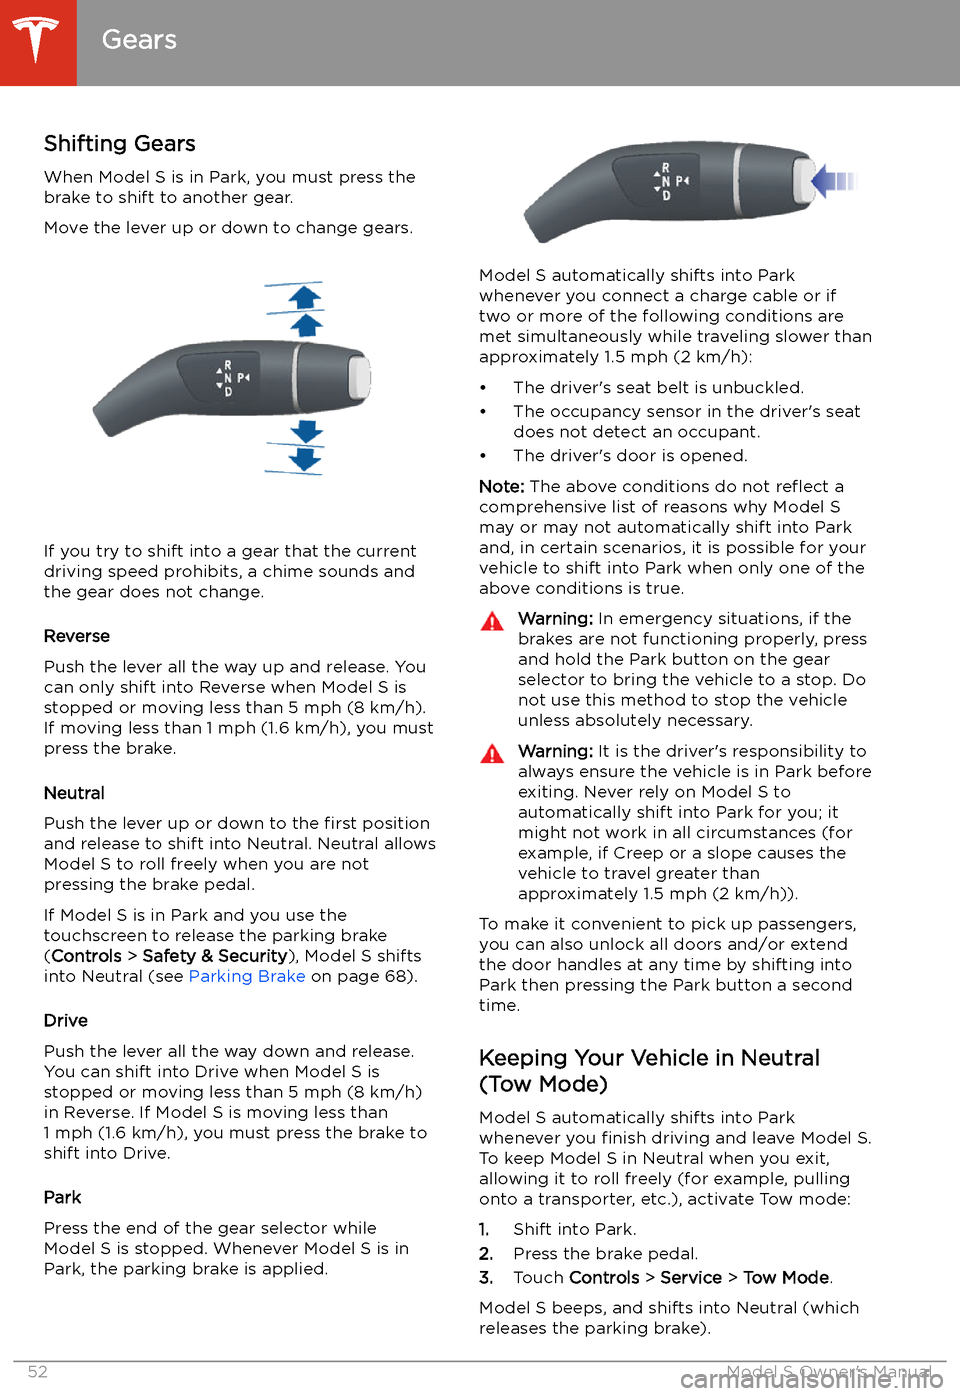
Move the lever up or down to change gears.
If you try to shift into a gear that the current
driving speed prohibits, a chime sounds and
the gear does not change.
Reverse
Push the lever all the way up and release. You
can only shift into Reverse when Model S is
stopped or moving less than 5 mph (8 km/h).
If moving less than 1 mph (1.6 km/h), you must
press the brake.
Neutral
Push the lever up or down to the first position
and release to shift into Neutral. Neutral allows
Model S to roll freely when you are not
pressing the brake pedal.
If Model S is in Park and you use the
touchscreen to release the parking brake
( Controls > Safety & Security ), Model S shifts
into Neutral (see Parking Brake on page 68).
Drive
Push the lever all the way down and release.
You can shift into Drive when Model S is stopped or moving less than 5 mph (8 km/h)in Reverse. If Model S is moving less than
1 mph (1.6 km/h), you must press the brake to shift into Drive.
Park
Press the end of the gear selector while
Model S is stopped. Whenever Model S is in Park, the parking brake is applied.
Model S automatically shifts into Park
whenever you connect a charge cable or if
two or more of the following conditions are
met simultaneously while traveling slower than
approximately 1.5 mph (2 km/h):
Page 54 of 226
When Tow mode is active, Model S
displays this indicator light on the
instrument panel, along with a
message telling you that Model S will
roll freely.
Note: In Tow mode, Model S does not shift into
a driving gear. To cancel Tow mode, shift into
Park or touch Tow mode again. Tow mode also
cancels if you use the touchscreen to apply
the parking brake ( Controls > Safety &
Security > Parking Brake ).
Gears
Driving53
Page 60 of 226
IndicatorDescriptionHigh beam headlights are temporarily turned off because Auto High Beam is on
and is detecting light in front of Model S. When light is no longer detected, the
high beams automatically turn back on. See High Beam Headlights on page 56.Parking lights (side marker lights, tail lights, and license plate lights) are on. See
Lights on page 54.Front fog lights, if equipped. See Lights on page 54.Adaptive Front Lighting, if equipped. See Adaptive Front Lighting System (AFS)
on page 56.Electronic stability control systems are actively minimizing wheel spin by
controlling brake pressure and motor power (indicator
Page 61 of 226
IndicatorDescription
An ABS (Anti-lock Braking System) fault is detected. See Braking and Stopping on
page 66. Contact Tesla immediately.The parking brake is manually applied. See Parking Brake on page 68.A parking brake fault is detected. Contact Tesla. See Parking Brake on page 68.Vehicle Hold is actively applying the brakes. See Vehicle Hold on page 73.Tire pressure warning. The pressure of a tire is out of range. If a fault with the Tire
Pressure Monitoring System (TPMS) is detected, the indicator
Page 70 of 226

Use the touchscreen to manually release the
parking brake (which also shifts Model S into Neutral):
1. Touch Controls > Safety & Security .
2. Press the brake pedal, then touch Parking
Brake . If Model S was previously in Park, it
shifts into Neutral.When you use the touchscreen to
manually apply the parking brake,
the red parking brake indicator lights
up on the instrument panel.If the parking brake experiences an
electrical issue, the amber parking brake indicator lights up and a fault
message displays at the top of the
instrument panel.Caution: In the unlikely event that Model S
loses electrical power, you cannot access
the touchscreen and are therefore unable to release the parking brake. Contact
Tesla.
Brake Wear
Model S brake pads are equipped with wear
indicators. A wear indicator is a thin metal
strip attached to the brake pad that squeals as
it rubs against the rotor when the pad wears
down. This squealing sound indicates that the
brake pads have reached the end of their service life and require replacement. To
replace the brake pads, contact Tesla Service.
Brakes must be periodically inspected visually by removing the tire and wheel. For detailed
specifications and service limits for rotors and
brake pads, see Subsystems on page 194.
Additionally, Tesla recommends cleaning and
lubricating the brake calipers every year or
12,500 miles (20,000 km) if in an area where
roads are salted during winter months.
Warning: Neglecting to replace worn
brake pads damages the braking system
and can result in a braking hazard.
Braking and Stopping
Driving69
Page 208 of 226
Disable the Self-Leveling AirSuspension System
If Model S is equipped with the air suspension
system, it automatically self-levels, even when
power is off. To prevent damage, you must
activate Jack Mode to disable self-leveling:
1. Touch Controls > Suspension on the
touchscreen.
2. Press the brake pedal, then touch Very
High to maximize height.
3. Touch Jack.When Jack Mode is active, Model S
displays this red indicator light on
the instrument panel, along with a message telling you that active
suspension is disabled.
Note: Jack Mode cancels when driving speed
exceeds 4 mph (7 kph).
Warning: Failure to activate Jack Mode on
a vehicle equipped with the air
suspension system can result in the
vehicle becoming loose during transport,
which may cause significant damage.
Activate Transport Mode
Transport Mode keeps the parking brake
disengaged while winching Model S onto a
Page 221 of 226

child protectiondisabling rear window switches 15child seatscleaning 181
installing and using 30child-protectiondisabling liftgate and rear door handles
13
Chill acceleration 74
cleaning 180
climate controls 128
cold weather driving 83
collision avoidance assist 113
connecting to Wi-Fi 156
console12V power socket 22
cup holders 23
USB ports 21
consumption chart 77
contact informationroadside assistance 205
Tesla 215
copyrights 211
Creep 67
cruise control 88
cup holders 23
D dashboard overview 2
Dashcam 80
data recording 213
data sharing 213
declarations of conformity 216
delivery mileage 214
devicesBluetooth, playing audio files 142
connecting 21
playing audio files from 142
dimensions 192
dome (map) lights 54
door handles 12
door labels 190
Door Unlock Mode 12
doors 10
doors, opening 10
drive away locking 13
Drive gear 52
driverprofiles 42
seat adjustment 25drivingseating position 25
starting 50
tips to maximize range 77E
Easter Eggs 209
easy entry, driver profile 42
EDR (event data recorder) 213
electric parking brake 68
emergency braking 113
emergency