2020 TESLA MODEL 3 wheels
[x] Cancel search: wheelsPage 4 of 220

Exterior Overview
1.Exterior lights ( Lights on page 58)
2. Autopilot camera ( About Autopilot on page 84)
3. Front door handle ( Using Exterior Door Handles on page 15)
4. Key card sensor ( Keys on page 9), Autopilot camera ( About Autopilot on page 84)
5. Rear door handle ( Using Exterior Door Handles on page 15)
6. Charge port ( Charging Instructions on page 157)
7. Autopilot cameras ( About Autopilot on page 84)
8. Exterior mirrors ( Mirrors on page 52)
9. Radar sensor (hidden from view) ( About Autopilot on page 84)
10. Hood/front trunk ( Front Trunk on page 21)
11. Tow eye cover ( Instructions for Transporters on page 199)
12. Wheels and tires ( Wheels and Tires on page 190)
13. Rear view camera ( Rear View Camera on page 75)
14. Rear trunk ( Rear Trunk on page 19)
Exterior Overview
Overview3
Page 66 of 220

Braking and Stopping
Braking Systems
Warning: Properly functioning braking
systems are critical to ensure safety. If you experience a problem with the brake
pedal, brake caliper, or any component of
a Model 3 braking system, contact Tesla
immediately.
Model 3 has an anti-lock braking system (ABS)
that prevents the wheels from locking when
you apply maximum brake pressure. This improves steering control during heavy
braking in most road conditions.
During emergency braking conditions, the
ABS constantly monitors the speed of each
wheel and varies the brake pressure according to the grip available.
The alteration of brake pressure can be felt as
a pulsing sensation through the brake pedal.
This demonstrates that the ABS is operating
and is not a cause for concern. Keep firm and
steady pressure on the brake pedal while
experiencing the pulsing.
The ABS indicator brie
Page 69 of 220

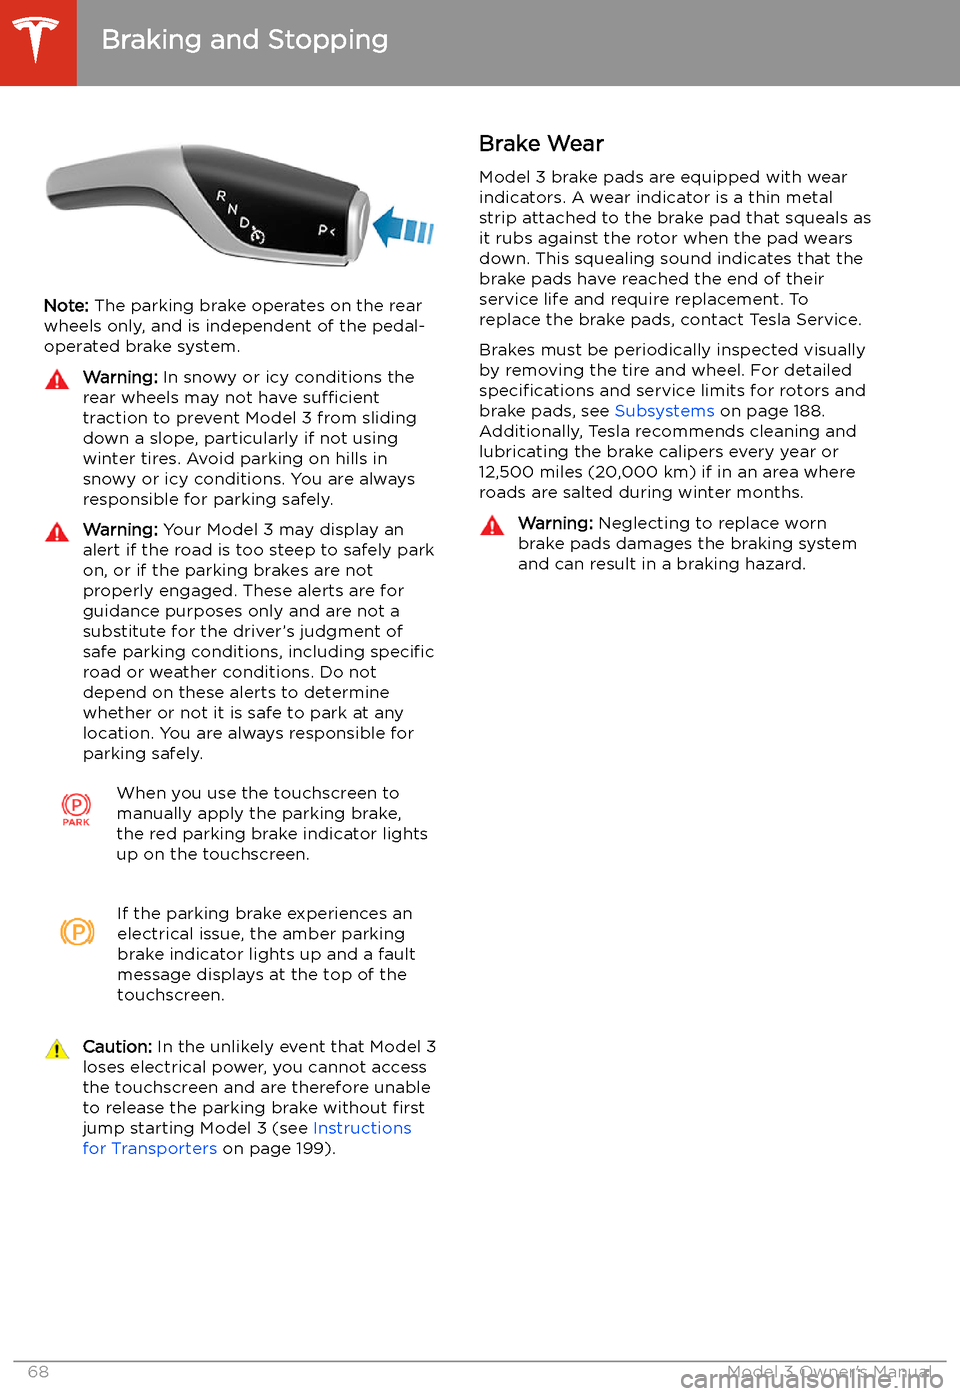
Note: The parking brake operates on the rear
wheels only, and is independent of the pedal-
operated brake system.
Warning: In snowy or icy conditions the
rear wheels may not have sufficient
traction to prevent Model 3 from sliding
down a slope, particularly if not using winter tires. Avoid parking on hills in
snowy or icy conditions. You are always responsible for parking safely.Warning: Your Model 3 may display an
alert if the road is too steep to safely park
on, or if the parking brakes are not
properly engaged. These alerts are for
guidance purposes only and are not a
substitute for the driver’s judgment of safe parking conditions, including specific
road or weather conditions. Do not
depend on these alerts to determine
whether or not it is safe to park at any location. You are always responsible for
parking safely.When you use the touchscreen to
manually apply the parking brake,
the red parking brake indicator lights
up on the touchscreen.If the parking brake experiences an
electrical issue, the amber parking brake indicator lights up and a fault
message displays at the top of the
touchscreen.Caution: In the unlikely event that Model 3
loses electrical power, you cannot access
the touchscreen and are therefore unable to release the parking brake without first
jump starting Model 3 (see Instructions
for Transporters on page 199).Brake Wear
Model 3 brake pads are equipped with wear indicators. A wear indicator is a thin metal
strip attached to the brake pad that squeals as
it rubs against the rotor when the pad wears
down. This squealing sound indicates that the
brake pads have reached the end of their service life and require replacement. To
replace the brake pads, contact Tesla Service.
Brakes must be periodically inspected visually by removing the tire and wheel. For detailed
specifications and service limits for rotors and
brake pads, see Subsystems on page 188.
Additionally, Tesla recommends cleaning and
lubricating the brake calipers every year or
12,500 miles (20,000 km) if in an area where
roads are salted during winter months.Warning: Neglecting to replace worn
brake pads damages the braking system
and can result in a braking hazard.
Braking and Stopping
68Model 3 Owner
Page 70 of 220

Traction Control
How It Works The traction control system constantly
monitors the speed of the front and rear
wheels. If Model 3 experiences a loss of
traction, the system minimizes wheel spin by
controlling brake pressure and motor power.
By default, the traction control system is on.
Under normal conditions, it should remain on
to ensure maximum safety.
This yellow indicator
Page 168 of 220

Asymmetric Tires
Model 3 tires are asymmetric and must be
mounted on the wheel with the correct
sidewall facing outward. The sidewall of the
tire is marked with the word OUTSIDE. When
new tires are installed, make sure that the tires
are correctly mounted on the wheels.Warning: Road holding is seriously
impaired if the tires are incorrectly
installed on the wheels.
Removing and Installing Aero Covers
If your Model 3 is equipped with aero covers,
you must remove them to access the lug nuts.
To remove an aero cover:
1. Grasp the aero cover firmly with both
hands.
2. Pull the aero cover toward you to release
the retaining clips.
To install an aero cover:
1. Align the aero cover into position so that
the notch at the base of the Tesla "T" is aligned with the tire
Page 169 of 220

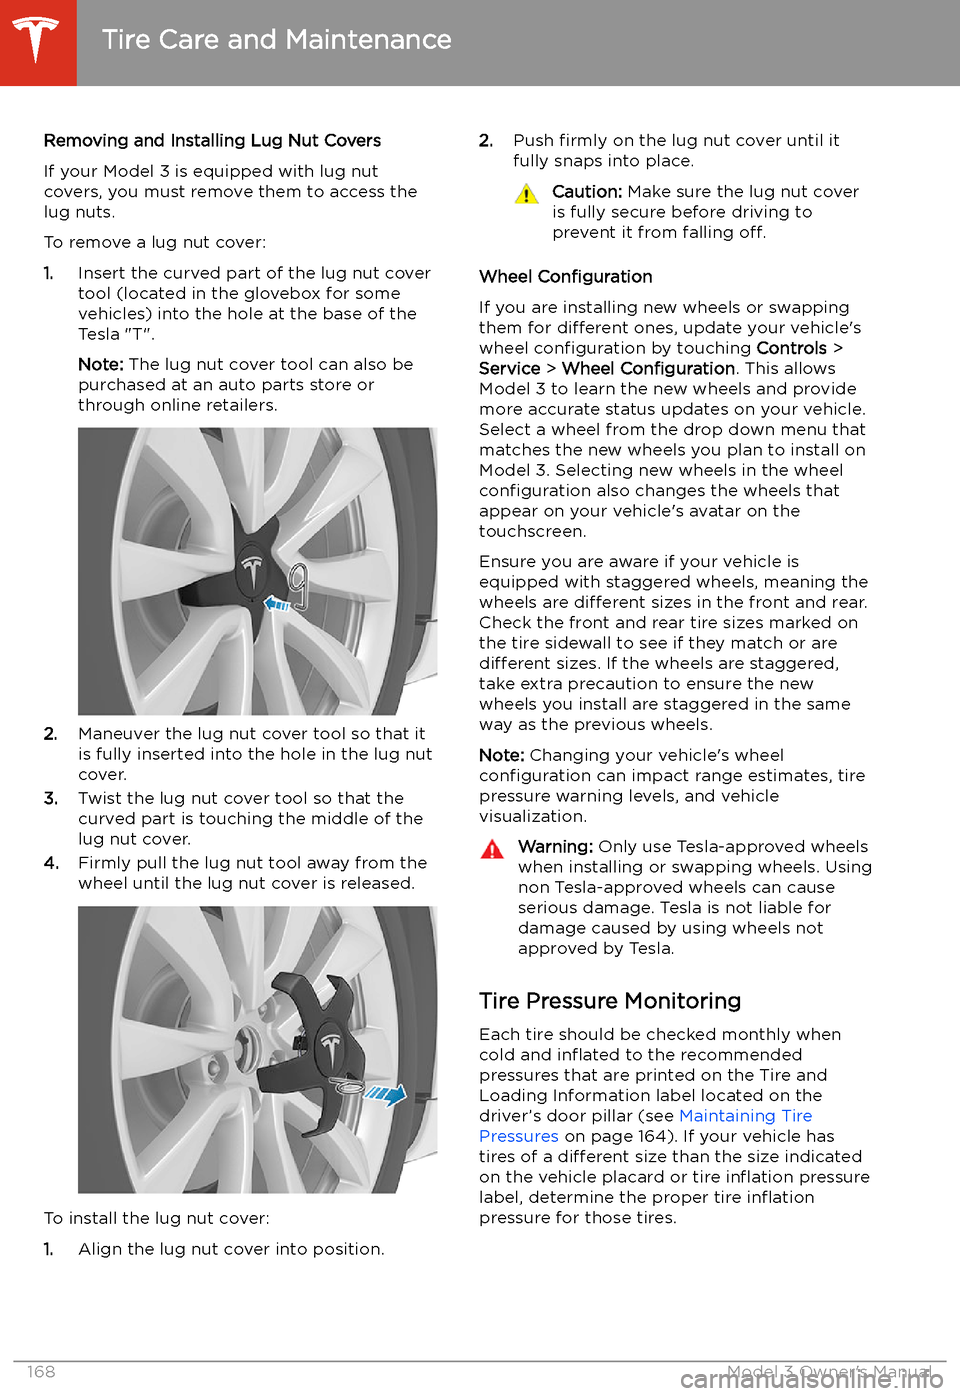
Removing and Installing Lug Nut Covers
If your Model 3 is equipped with lug nut covers, you must remove them to access the
lug nuts.
To remove a lug nut cover:
1. Insert the curved part of the lug nut cover
tool (located in the glovebox for some
vehicles) into the hole at the base of the
Tesla "T".
Note: The lug nut cover tool can also be
purchased at an auto parts store or
through online retailers.
2. Maneuver the lug nut cover tool so that it
is fully inserted into the hole in the lug nut
cover.
3. Twist the lug nut cover tool so that the
curved part is touching the middle of the
lug nut cover.
4. Firmly pull the lug nut tool away from the
wheel until the lug nut cover is released.
To install the lug nut cover:
1. Align the lug nut cover into position.
2.
Push firmly on the lug nut cover until it
fully snaps into place.Caution: Make sure the lug nut cover
is fully secure before driving to
prevent it from falling off.
Wheel Configuration
If you are installing new wheels or swapping
them for different ones, update your vehicle
Page 171 of 220

TPMS malfunctions can occur for a variety of
reasons, including installing replacement or
alternate tires or wheels that prevent the
TPMS from functioning properly. Always check
the TPMS malfunction indicator light after replacing one or more tires or wheels on yourvehicle to ensure that the replacement tires or
wheels allow the TPMS to continue to function
properly.
Note: If a tire has been replaced or repaired
using a different tire sealant than the one
available from Tesla, and a low tire pressure is
detected, it is possible that the tire sensor has
been damaged. Contact Tesla to have the fault repaired as soon as possible.Seasonal Tire Types
Summer Tires
Your vehicle may be originally equipped with high performance summer tires or all season
tires. Tesla recommends using winter tires if
driving in cold temperatures or on roads
where snow or ice may be present. Contact
Tesla for winter tire recommendations.Warning: In cold temperatures or on snow
or ice, summer tires do not provide
adequate traction. Selecting and installing the appropriate tires for winter conditions
is important to ensure the safety and
optimum performance of your Model 3.
All-Season Tires
Your Model 3 may be originally equipped with all-season tires. These tires are designed to
provide adequate traction in most conditions
year-round, but may not provide the same level of traction as winter tires in snowy or icy
conditions. All-season tires can be identified
by “ALL SEASON" and/or "M+S” (mud and
snow) on the tire sidewall.
Winter Tires
Use winter tires to increase traction in snowy
or icy conditions. When installing winter tires,
always install a complete set of four tires at
the same time. Winter tires must be the same
diameter, brand, construction and tread
pattern on all four wheels. Contact Tesla for
winter tire recommendations.
Winter tires can be identified by a
mountain/snow
Page 180 of 220

Parts and Accessories
Parts, Accessories, and
Modifications
Use only genuine Tesla parts and accessories.
Tesla performs rigorous testing on parts to
ensure their suitability, safety, and reliability.
Purchase these parts from Tesla, where they
are professionally installed and where you can receive expert advice about modifications to
Model 3. Accessories are available for
purchase from Tesla stores or online at www.tesla.com .
Note: Some accessories may not be available
in your market region.
Tesla is unable to assess parts manufactured
by other distributors and therefore accepts no responsibility if you use non-Tesla parts onModel 3.
Warning: Installing non-approved parts
and accessories, or performing non- approved modifications, can affect the
performance of Model 3 and the safety of
its occupants. Any damage caused by
using or installing non-approved parts, or by performing non-approved
modifications, is not covered by the
warranty.Warning: Tesla does not accept liability
for death, personal injury or damage that
occurs if you use or install non-approved
accessories or make non-approved
modifications.Accessory Wheels and Tires
If your Model 3 is fitted with Tesla accessory
wheels or tires, the Gross Axle Weight Rating
(GAWR), wheel, tire, and loading information
may be different from the labels shown on the
vehicle. Refer to the relevant following section
for updated information.
Note: If your vehicle is not fitted with Tesla
accessory wheels or tires (it is fitted with the
factory original wheels and tires, including
Tesla genuine replacement parts), refer to the
labels attached to the center door pillar for
the most accurate information for your Model 3.
20" Sport WheelsWheelsLocationWidth (in)Offset(mm)20"Front/Rear8.540Tires (front/rear)SizeTire
PressureMichelin, Pilot
Sport 4S (PS4S)235/35ZR2 042 PSI
(290 kPa)**Increase the tire pressure to 44 PSI (300
kPa) prior to driving 136 mph (220 kph) or faster.GAWRFront2407 lbs1,092 kgRear2,767 lbs1,255 kg
Parts and Accessories
Maintenance179