2020 TESLA MODEL 3 replace
[x] Cancel search: replacePage 13 of 220

Replacing the Key Fob Battery
Under normal use, the accessory key fob
(available at https://shop.tesla.com ) has a
battery that lasts for up to five years,
depending on key fob version and selected
vehicle settings. When the battery is low, a
message displays on the touchscreen.
To replace the key fob battery:
1. With the key fob placed button side down
on a soft surface, release the bottom cover.
2. Remove the battery by lifting it away from
the retaining clips.
3. While avoiding touching the battery
Page 34 of 220

If the pre-tensioners and airbags did not
activate in an impact, this does not mean they
malfunctioned. It usually means that the strength or type of force needed to activate
them was not present.
Warning: Once the seat belt pre-
tensioners have been activated, they must
be replaced. After any collision, have the
airbags, seat belt pre-tensioners and any
associated components checked and, if
necessary, replaced.
Testing Seat Belts
To confirm that seat belts are operating
correctly, perform these three simple checks
on each seat belt.
1. With the seat belt fastened, give the
webbing nearest the buckle a quick pull.
The buckle should remain securely locked.
2. With the belt unfastened, unreel the
webbing to its limit. Check that unreeling
is free from snags, and visually check the
webbing for wear. Allow the webbing to retract, checking that retraction is smooth
and complete.
3. With the webbing half unreeled, hold the
tongue plate and pull forward quickly. The
mechanism should lock automatically and
prevent further unreeling.
If a seat belt fails any of these tests, contact
Tesla immediately.
For information about cleaning seat belts, see
Seat Belts on page 173.
Seat Belt WarningsWarning: Seat belts should be worn by all
occupants at all times, even if driving for
a very short distance. Failure to do so
increases the risk of injury or death if a collision occurs.Warning: Secure small children in a
suitable child safety seat as described in
the Child Safety Seat topic. Always follow
the child safety seat manufacturer
Page 69 of 220

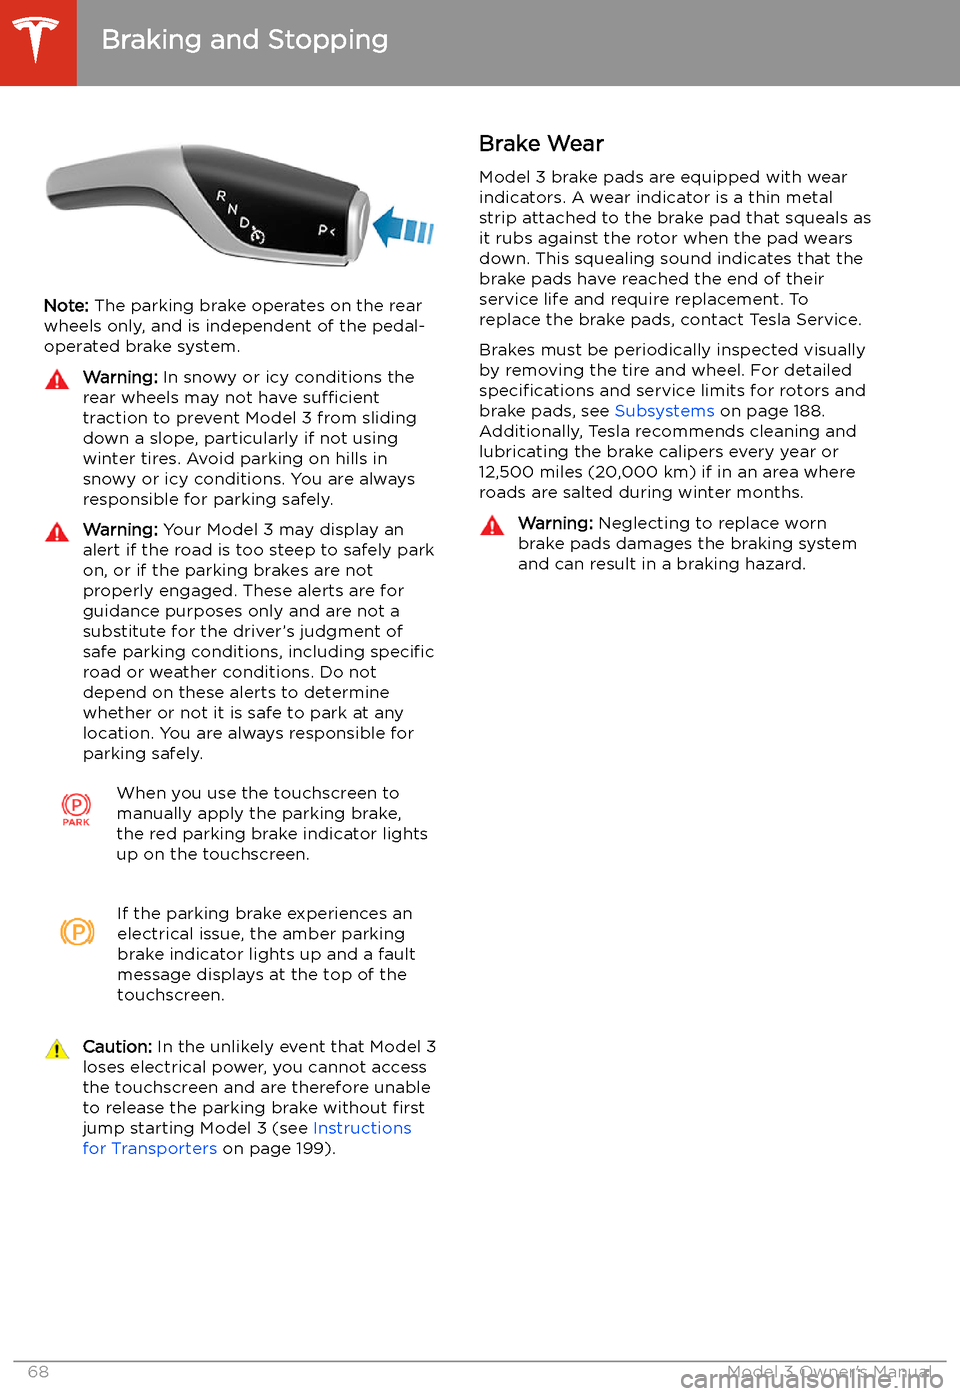
Note: The parking brake operates on the rear
wheels only, and is independent of the pedal-
operated brake system.
Warning: In snowy or icy conditions the
rear wheels may not have sufficient
traction to prevent Model 3 from sliding
down a slope, particularly if not using winter tires. Avoid parking on hills in
snowy or icy conditions. You are always responsible for parking safely.Warning: Your Model 3 may display an
alert if the road is too steep to safely park
on, or if the parking brakes are not
properly engaged. These alerts are for
guidance purposes only and are not a
substitute for the driver’s judgment of safe parking conditions, including specific
road or weather conditions. Do not
depend on these alerts to determine
whether or not it is safe to park at any location. You are always responsible for
parking safely.When you use the touchscreen to
manually apply the parking brake,
the red parking brake indicator lights
up on the touchscreen.If the parking brake experiences an
electrical issue, the amber parking brake indicator lights up and a fault
message displays at the top of the
touchscreen.Caution: In the unlikely event that Model 3
loses electrical power, you cannot access
the touchscreen and are therefore unable to release the parking brake without first
jump starting Model 3 (see Instructions
for Transporters on page 199).Brake Wear
Model 3 brake pads are equipped with wear indicators. A wear indicator is a thin metal
strip attached to the brake pad that squeals as
it rubs against the rotor when the pad wears
down. This squealing sound indicates that the
brake pads have reached the end of their service life and require replacement. To
replace the brake pads, contact Tesla Service.
Brakes must be periodically inspected visually by removing the tire and wheel. For detailed
specifications and service limits for rotors and
brake pads, see Subsystems on page 188.
Additionally, Tesla recommends cleaning and
lubricating the brake calipers every year or
12,500 miles (20,000 km) if in an area where
roads are salted during winter months.Warning: Neglecting to replace worn
brake pads damages the braking system
and can result in a braking hazard.
Braking and Stopping
68Model 3 Owner
Page 71 of 220

Park Assist
How Park Assist Works
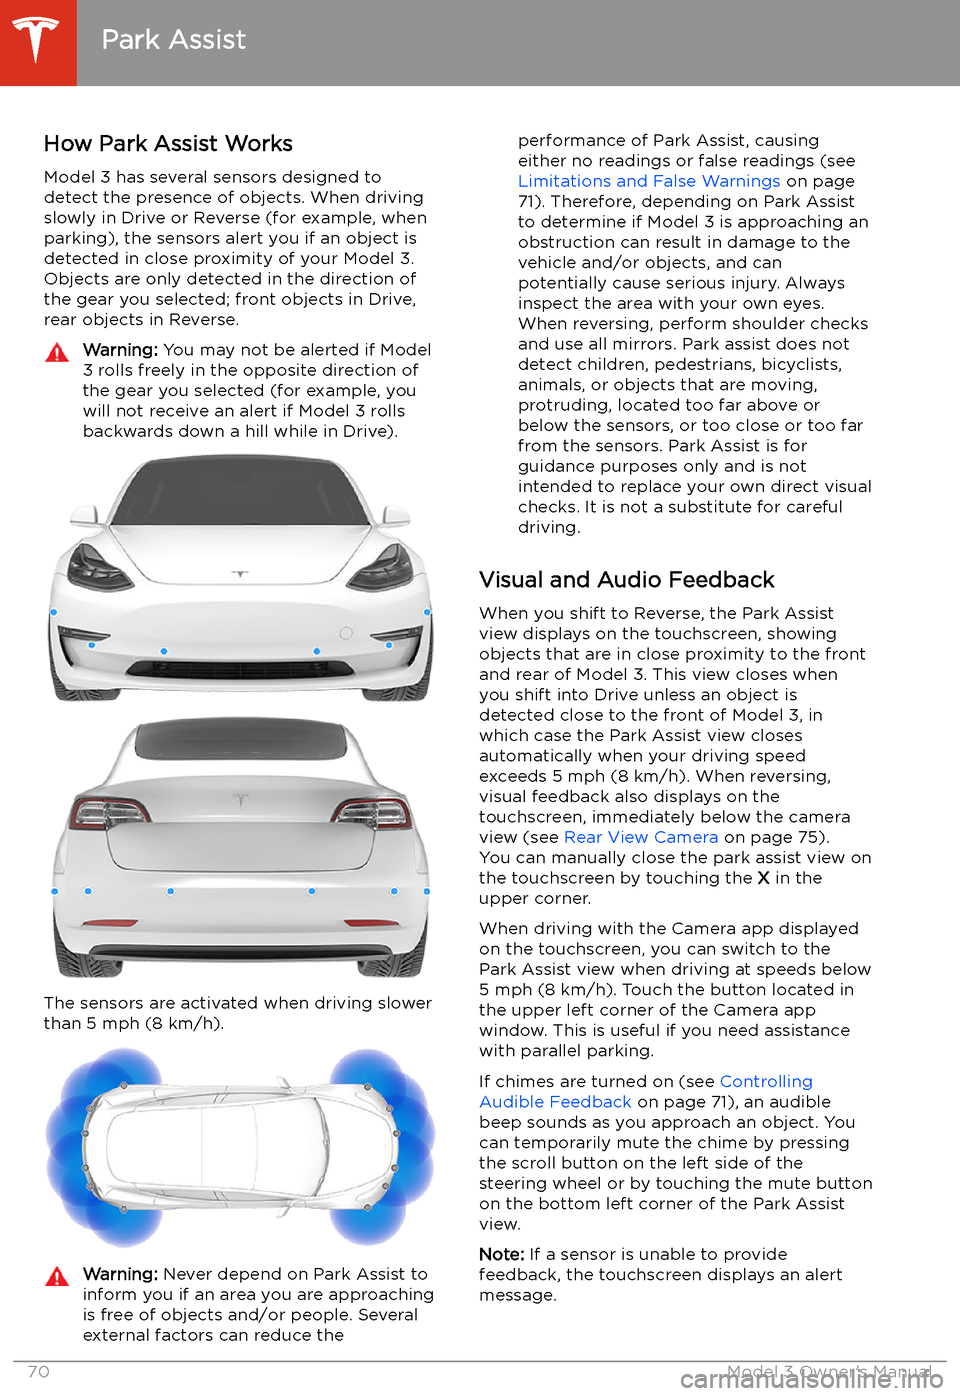
Model 3 has several sensors designed to
detect the presence of objects. When driving
slowly in Drive or Reverse (for example, when
parking), the sensors alert you if an object is
detected in close proximity of your Model 3.
Objects are only detected in the direction of
the gear you selected; front objects in Drive,
rear objects in Reverse.
Warning: You may not be alerted if Model
3 rolls freely in the opposite direction of
the gear you selected (for example, you
will not receive an alert if Model 3 rolls
backwards down a hill while in Drive).
The sensors are activated when driving slower
than 5 mph (8 km/h).
Warning: Never depend on Park Assist to
inform you if an area you are approaching is free of objects and/or people. Several
external factors can reduce theperformance of Park Assist, causing
either no readings or false readings (see
Limitations and False Warnings on page
71). Therefore, depending on Park Assist
to determine if Model 3 is approaching an
obstruction can result in damage to the vehicle and/or objects, and can
potentially cause serious injury. Always
inspect the area with your own eyes.
When reversing, perform shoulder checks and use all mirrors. Park assist does not
detect children, pedestrians, bicyclists,
animals, or objects that are moving, protruding, located too far above or
below the sensors, or too close or too far
from the sensors. Park Assist is for
guidance purposes only and is not intended to replace your own direct visual
checks. It is not a substitute for careful
driving.
Visual and Audio Feedback
When you shift to Reverse, the Park Assist
view displays on the touchscreen, showing objects that are in close proximity to the front
and rear of Model 3. This view closes when you shift into Drive unless an object is
detected close to the front of Model 3, in
which case the Park Assist view closes automatically when your driving speed
exceeds 5 mph (8 km/h). When reversing,
visual feedback also displays on the touchscreen, immediately below the camera
view (see Rear View Camera on page 75).
You can manually close the park assist view on
the touchscreen by touching the X in the
upper corner.
When driving with the Camera app displayed
on the touchscreen, you can switch to the
Park Assist view when driving at speeds below
5 mph (8 km/h). Touch the button located in
the upper left corner of the Camera app
window. This is useful if you need assistance
with parallel parking.
If chimes are turned on (see Controlling
Audible Feedback on page 71), an audible
beep sounds as you approach an object. You
can temporarily mute the chime by pressing
the scroll button on the left side of the
steering wheel or by touching the mute button on the bottom left corner of the Park Assist
view.
Note: If a sensor is unable to provide
feedback, the touchscreen displays an alert
message.
Park Assist
70Model 3 Owner
Page 76 of 220

Rear View Camera
Camera Location
Model 3 is equipped with a rear view camera
located above the rear license plate.
Whenever you shift into Reverse, the
touchscreen displays the view from the
camera. Lines show your driving path based
on the position of the steering wheel. These
lines adjust appropriately as you move the
steering wheel.
Note: Visual feedback from the parking
sensors display on the touchscreen (see Park
Assist on page 70).
To display the view from the camera at any
time:
Touch the camera icon on the
"Cards" area on the touchscreen.Warning: Never depend on the rear view
camera to inform you if the area behind
you is free of objects and/or people when
reversing. The camera may not detect
objects or barriers that can potentially
cause damage or injury. In addition, several external factors can reduce the
performance of the camera, including a
dirty or obstructed lens. Therefore,
depending on the rear view camera to
determine if Model 3 is approaching an
obstruction can result in damage to the vehicle and/or objects, and canpotentially cause serious injury. Always
inspect the area with your own eyes.
When reversing, perform shoulder checks and use all mirrors. Use the camera forguidance purposes only. It is not intendedto replace your own direct visual checks
and is not a substitute for careful driving.
Cleaning the Camera
To ensure a clear picture, keep the camera lens clean, and free of obstructions. Remove any
buildup of dirt by occasionally wiping the
camera lens with a soft damp cloth.
Caution: Do not use chemical-based or
abrasive cleaners. Doing so can damage
the surface of the camera lens.
Rear View Camera
Driving75
Page 154 of 220

Charging
Electric Vehicle Components
High Voltage Components
1. Air Conditioning Compressor
2. Front Motor (Dual Motor vehicles only)
3. Cabin Heater
4. High Voltage Battery
5. High Voltage Battery Service Panel
6. Rear Motor
7. High Voltage Cabling
8. Charge Port
Warning:
The high voltage system has no user serviceable parts. Do not disassemble, remove
or replace high voltage components, cables or connectors. High voltage cables are typically colored orange for easy identification.Warning: Read and follow all instructions provided on the labels that are attached to Model 3.
These labels are there for your safety.Warning: In the unlikely event that a fire occurs, immediately contact your local fire
emergency responders.
Electric Vehicle Components
Charging153
Page 156 of 220

Battery Information
About the Battery
Model 3 has one of the most sophisticated
battery systems in the world. The most
important way to preserve the Battery is to LEAVE YOUR VEHICLE PLUGGED IN when
you are not using it. This is particularly important if you are not planning to drive
Model 3 for several weeks. When plugged in,
Model 3 wakes up when needed to
automatically maintain a charge level that
maximizes the lifetime of the Battery.
Note: When left idle and unplugged, your
vehicle periodically uses energy from the Battery for system tests and recharging the
12V battery when necessary.
There is no advantage to waiting until the
Battery’s level is low before charging. In fact, the Battery performs best when charged
regularly.
Note: If you allow the Battery to discharge to
0%, other components may become damaged
or require replacement (for example, the 12V
battery). In these cases, you are responsible for repair and/or transporting expenses.
Discharge-related expenses are not covered
by the warranty or under the Roadside
Assistance policy.
The peak charging rate of the Battery may
decrease slightly after a large number of DC
Fast Charging sessions, such as those at
Superchargers. To ensure maximum driving
range and Battery safety, the Battery charge
rate is decreased when the Battery is too cold,
when the Battery’s charge is nearly full, and when the Battery conditions change with
usage and age. These changes in the condition of the Battery are driven by battery physics
and may increase the total Supercharging
duration by a few minutes over time.
Battery Care
Never allow the Battery to fully discharge.
Even when Model 3 is not being driven, its
Battery discharges very slowly to power the
onboard electronics. The Battery can
discharge at a rate of approximately 1% per day, though the discharge rate may vary
depending on environmental factors (such as
cold weather), vehicle configuration, and your
selected settings on the touchscreen.
Situations can arise in which you must leave
Model 3 unplugged for an extended period of time (for example, at an airport when
traveling). In these situations, keep the 1% in
mind to ensure that you leave the Battery with a sufficient charge level. For example, over a
two week period (14 days), the Battery may
discharge by approximately 14%.
Discharging the Battery to 0% may result in
damage to vehicle components. To protect
against a complete discharge, Model 3 enters
a low-power consumption mode when the
displayed charge level drops to approximately
0%. In this mode, the Battery stops supporting
the onboard electronics and auxiliary 12V
battery. Once this low-power consumption
mode is active, immediately plug in Model 3 to
prevent a jump-start and 12V battery
replacement.
Note: If the vehicle is unresponsive and will
not unlock, open, or charge, then the 12V
battery may have become discharged. In this
situation, contact Tesla.
Temperature Limits
For better long-term performance, avoid
exposing Model 3 to ambient temperatures
above 140
Page 167 of 220

Punctured Tires
A puncture eventually causes the tire to lose pressure, which is why it is important to check
tire pressures frequently. Permanently repair
or replace punctured or damaged tires as
soon as possible.
Your tubeless tires may not leak when
penetrated, provided the object remains in the tire. If, however, you feel a sudden vibration or
ride disturbance while driving, or you suspect a tire is damaged, immediately reduce yourspeed. Drive slowly, while avoiding heavy
braking or sharp steering and, when safe to do so, stop the vehicle. Arrange to have Model 3
transported to a Tesla Service Center, or to a nearby tire repair center.
Note: In some cases, you can temporarily
repair small tire punctures (under 1/4” (6
mm)) using an optional tire repair kit available from Tesla. This allows you to slowly drive
Model 3 to Tesla or to a nearby tire repair
facility.Warning: Do not drive with a punctured
tire that has not been repaired, even if the puncture has not caused the tire to
de