Page 317 of 560

317
3-5. Other interior features
3
Interior features
BRZ_U
WARNING
Observe the following precautions.
Failure to do so may cause the driver's floor mat to slip, possibly interfering
with the pedals while driving. An unexpectedly high speed may result or it may
become difficult to stop the vehicle. Th
is could lead to an accident, resulting in
death or serious injury.
■ When installing the driver's floor mat
● Do not use floor mats designed for ot her models or different model year
vehicles, even if they are SUBARU Genuine floor mats.
● Only use floor mats designed for the driver's seat.
● Always install the floor mat securely using the retaining hooks (clips) pro-
vided.
● Do not use two or more floor mats on top of each other.
● Do not place the floor mat bottom-side up or upside-down.
■ Before driving
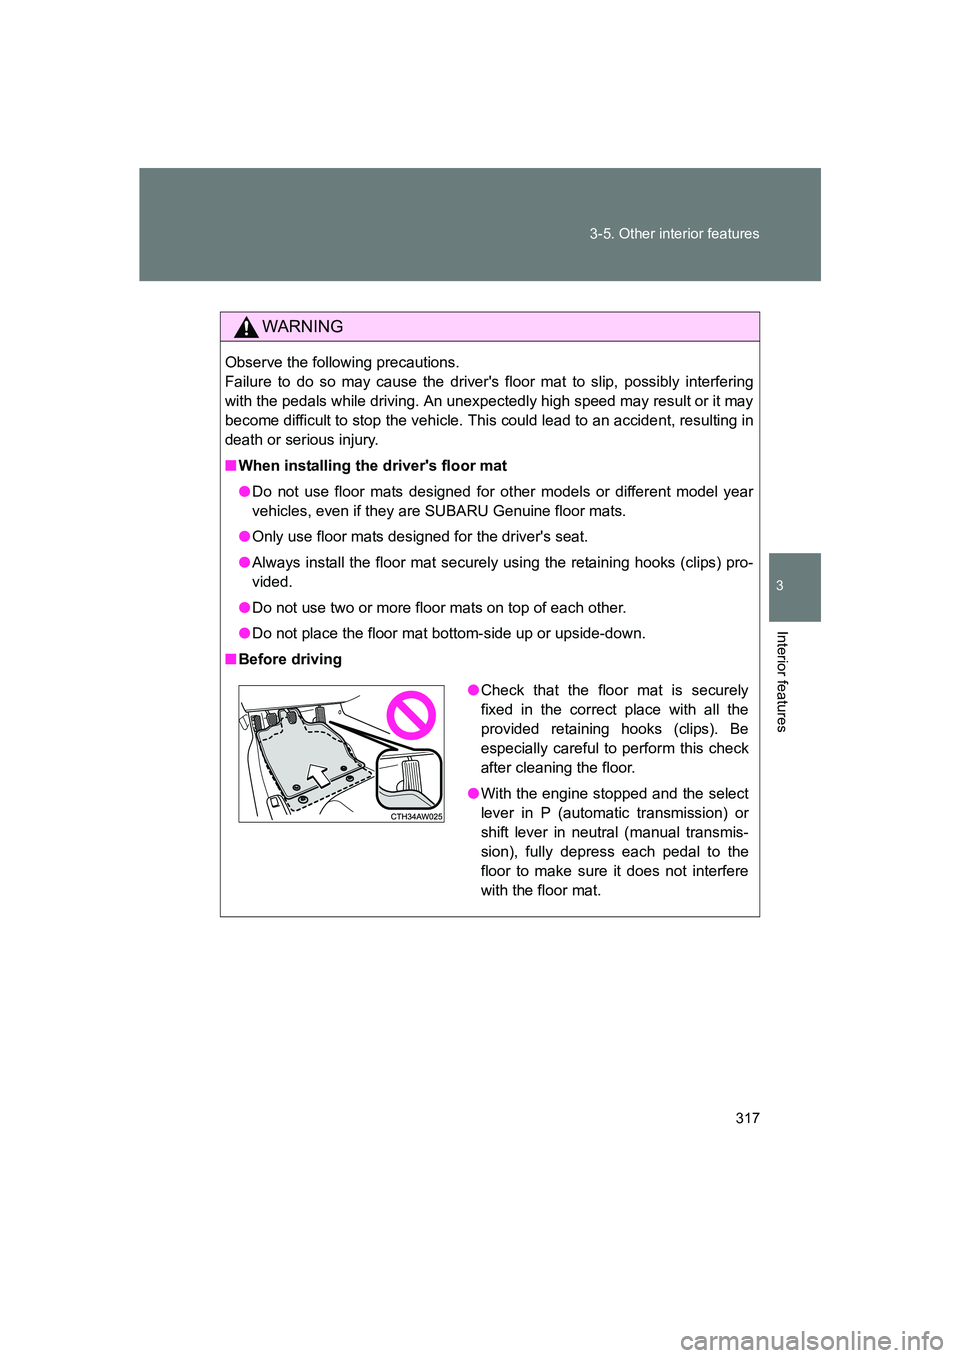
●Check that the floor mat is securely
fixed in the correct place with all the
provided retaining hooks (clips). Be
especially careful to perform this check
after cleaning the floor.
● With the engine stopped and the select
lever in P (automatic transmission) or
shift lever in neutral (manual transmis-
sion), fully depress each pedal to the
floor to make sure it does not interfere
with the floor mat.
Page 323 of 560

323
3-5. Other interior features
3
Interior features
BRZ_U
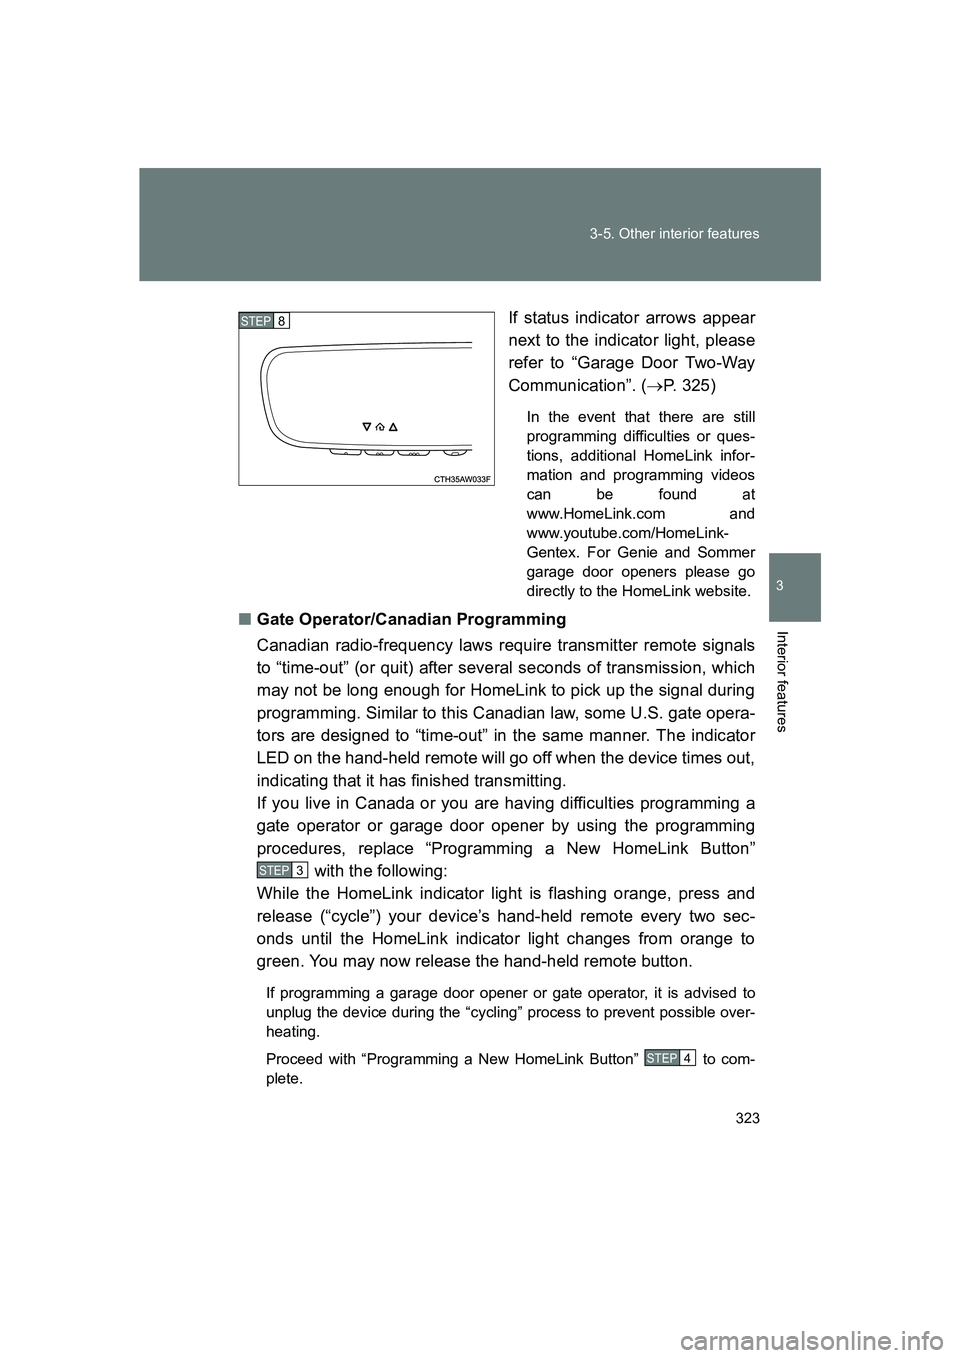
If status indicator arrows appear
next to the indicator light, please
refer to “Garage Door Two-Way
Communication”. (
→P. 325)
In the event that there are still
programming difficulties or ques-
tions, additional HomeLink infor-
mation and programming videos
can be found at
www.HomeLink.com and
www.youtube.com/HomeLink-
Gentex. For Genie and Sommer
garage door openers please go
directly to the HomeLink website.
■ Gate Operator/Canadian Programming
Canadian radio-frequency laws require transmitter remote signals
to “time-out” (or quit) after several seconds of transmission, which
may not be long enough for HomeLink to pick up the signal during
programming. Similar to this Canadian law, some U.S. gate opera-
tors are designed to “time-out” in the same manner. The indicator
LED on the hand-held remote will go off when the device times out,
indicating that it has finished transmitting.
If you live in Canada or you are having difficulties programming a
gate operator or garage door opener by using the programming
procedures, replace “Programming a New HomeLink Button”
with the following:
While the HomeLink indicator light is flashing orange, press and
release (“cycle”) your device’s hand-held remote every two sec-
onds until the HomeLink indicator light changes from orange to
green. You may now release the hand-held remote button.
If programming a garage door opener or gate operator, it is advised to
unplug the device during the “cycling” process to prevent possible over-
heating.
Proceed with “Programming a New HomeLink Button” to com-
plete.
STEP 8
STEP 3
STEP 4
Page 348 of 560
348 4-2. Maintenance
BRZ_U
Vehicle interior
ItemsCheck points
Accelerator pedal • Moves smoothly (without uneven
pedal effort or catching)?
Automatic transmission “Park”
mechanism • Can the vehicle be held securely
on an incline with the select lever
in P?
Brake pedal • Moves smoothly?
• Does it have appropriate clear-
ance and correct amount of free
play?
Brakes • Not pull to one side when
applied?
• Loss of brake effectiveness?
• Spongy feeling brake pedal?
• Pedal almost touches floor?
Clutch pedal • Moves smoothly?
Head restraints • Move smoothly and lock
securely?
Indicators/buzzers • Function properly?
Lights • Do all the lights come on?
Parking brake • Moves smoothly?
• Can hold the vehicle securely on
an incline?
Seatbelts • Does the seatbelt system oper-
ate smoothly?
• Are the belts undamaged?
Seats • Do the seat controls operate
properly?
Steering wheel • Moves smoothly?
• Has correct free play?
• No strange noises?
Page 358 of 560

358 4-3. Do-it-yourself maintenance
BRZ_U■
Adding engine oil
If the oil level is below or near
the low level mark, add engine
oil of the same type as already in
the engine.
Make sure to check the oil type and prepare the items needed before
adding oil.
Remove the oil filler cap by turning it counterclockwise.
Add engine oil slowly, checking the dipstick.
Install the oil filler cap by turning it clockwise.
Engine oil selection →
P. 492
Oil quantity
(Low → Full) 1.1 qt. (1.0 L, 0.9 Imp. qt.)
Items
Clean funnel
■ Engine oil consumption
Some engine oil will be consumed while driving. The rate of consumption
can be affected by such factors as transmission type, driving style, terrain
and temperature. Under the followi ng conditions, oil consumption can be
increased and thus require refilling between maintenance intervals:
● When the engine is new and within the break-in period
● When the engine oil is of lower quality
● When the incorrect oil viscosity is used
● When engine braking is employed (repeatedly)
STEP 1
STEP 2
STEP 3
Page 397 of 560

397
4-3. Do-it-yourself maintenance
4
Maintenance and care
BRZ_U
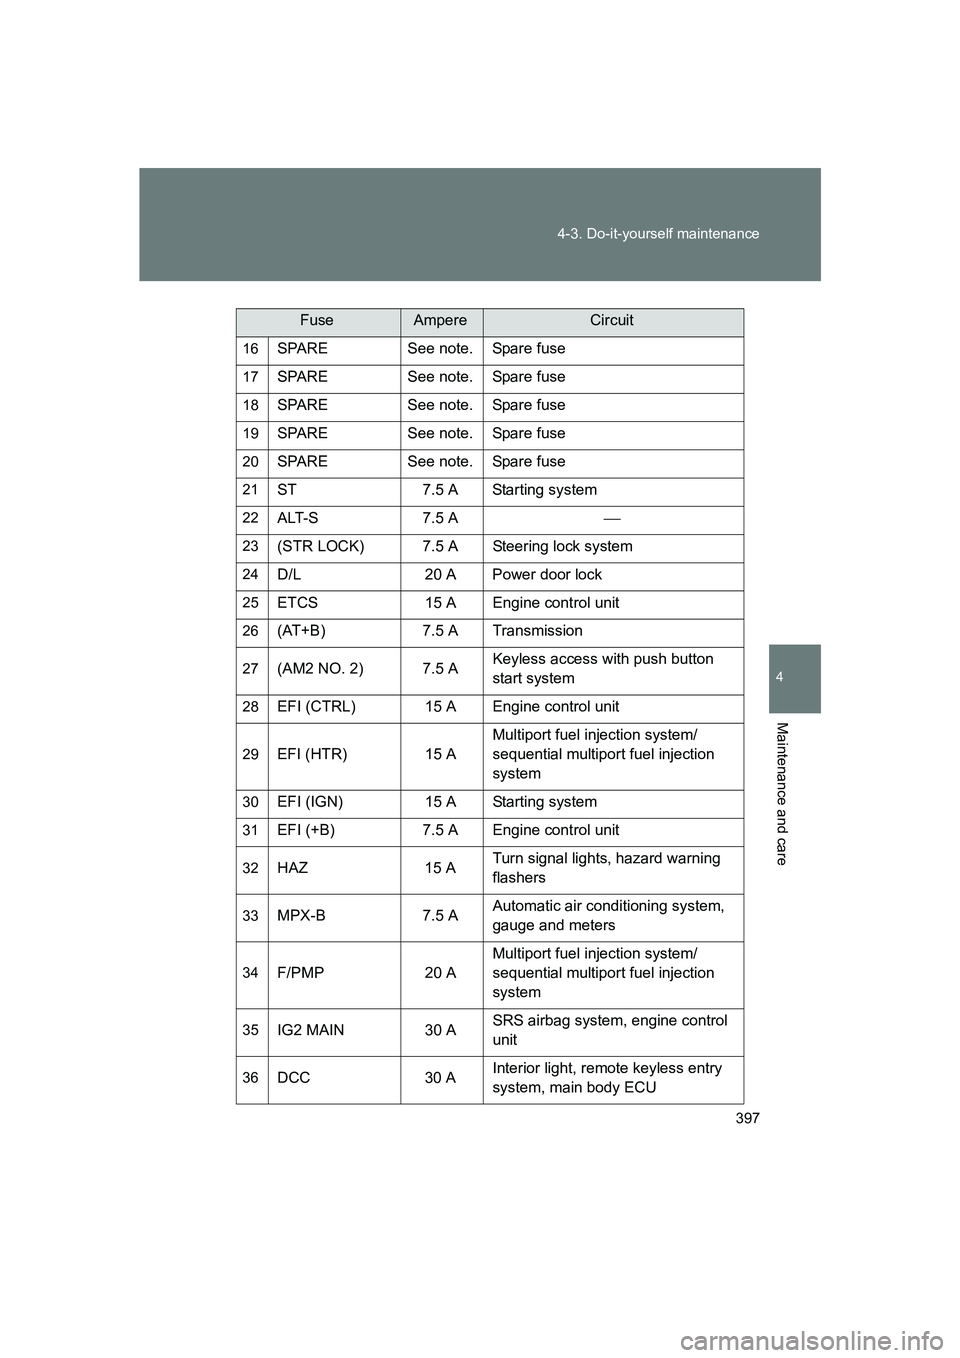
16SPARE See note. Spare fuse
17SPARE See note. Spare fuse
18SPARE See note. Spare fuse
19SPARE See note. Spare fuse
20SPARE See note. Spare fuse
21ST 7.5 A Starting system
22ALT-S 7.5 A
23(STR LOCK) 7.5 A Steering lock system
24D/L 20 A Power door lock
25ETCS 15 A Engine control unit
26(AT+B) 7.5 A Transmission
27(AM2 NO. 2) 7.5 AKeyless access with push button
start system
28EFI (CTRL) 15 A Engine control unit
29EFI (HTR) 15 AMultiport fuel injection system/
sequential multiport fuel injection
system
30EFI (IGN) 15 A Starting system
31EFI (+B) 7.5 A Engine control unit
32HAZ 15 A
Turn signal lights, hazard warning
flashers
33MPX-B 7.5 AAutomatic air condi
tioning system,
gauge and meters
34F/PMP 20 A Multiport fuel injection system/
sequential multiport fuel injection
system
35IG2 MAIN 30 A
SRS airbag system, engine control
unit
36DCC 30 AInterior light, remote keyless entry
system, main body ECU
FuseAmpereCircuit
Page 399 of 560
399
4-3. Do-it-yourself maintenance
4
Maintenance and care
BRZ_U
■
Instrument panel
FuseAmpereCircuit
1ECU ACC 10 A Main body ECU, outside rear view
mirrors
2P/POINT No.2 15 A Power outlet
3PANEL 10 A Illumination
4TAIL 10 A Tail lights
5DRL 10 A Daytime running light system
6UNIT IG1 10A
7STOP 7.5 A Stop lights
8OBD 7.5 A On-board diagnosis system
9HEATER-S 7.5 A Air conditioning system
10HEATER 10 A Air conditioning system
11FR FOG LH 10 A Left-hand front fog light
12FR FOG RH 10 A Right-hand front fog light
13BK/UP LP 7.5 A Back-up lights
14ECU IG1 10 A ABS, electric power steering
15AM1 7.5 A Starting system
16AMP 15 A Audio system
17AT UNIT 15 A Transmission
18GAUGE 7.5 AGauge and meters, keyless access
with push button start system
19ECU IG2 10 A Engine control unit
20SEAT HTR LH 10 A Left-hand seat heater
21SEAT HTR RH 10 A Right-hand seat heater
22RADIO 7.5 A Audio system
23P/POINT No.1 15 A Power outlet
Page 413 of 560

When trouble arises5
413
BRZ_U
5-1. Essential informationHazard warning flashers .......................... 414
If your vehicle needs to be towed ........................ 415
If you think something is wrong ............................. 422
Fuel pump shut off system ........................... 423
5-2. Steps to take in an emergency
If a warning light turns on or a warning buzzer
sounds... ....................... 424
If a warning message is displayed (vehicles with
a color multi-information
display) .......................... 436
If you have a flat tire......... 453 If the engine will not
start ................................ 467
If the select lever cannot be shifted from P
(vehicles with an
automatic
transmission) ................. 470
If you lose your keys ........ 471
If the access key does not operate properly
(vehicles with a keyless
access with push button
start system) .................. 472
If the battery is discharged ..................... 476
If your vehicle overheats ....................... 481
If the vehicle becomes stuck .............................. 484
Page 415 of 560

5
When trouble arises
415
5-1. Essential information
BRZ_U
If your vehicle needs to be towed
Emergency towingIf a tow truck is not available in an emergency, your vehicle may be
temporarily towed using a cable or chain secured to the emergency
towing eyelet to move the vehicle to a safe location or to free a stuck
vehicle from sand or snow. This should only be attempted on hard
surfaced roads for short distances at low speeds.
A driver must be in the vehicle to steer and operate the brakes. The
vehicle's wheels, drive train, axles, steering and brakes must be in
good condition.
For vehicles with an automatic transmission, only the front towing
eyelet may be used. Towing eyelet
If towing is necessary, we recommend having your vehicle towed by
your SUBARU dealer or a comme rcial towing service, using a flat
bed truck.
The vehicle must be secured properly with safety chains. Each
safety chain should be equally tightened and care must be taken not
to pull the chains so tightly that the suspension bottoms out.