2020 Ram ProMaster Page 53
[x] Cancel search: Page 53Page 235 of 264

MULTIMEDIA233
Shortest Route
You can choose whether you would like the
navigation system to chose the shortest
route by distance to the destination.
Most Eco-Friendly Route
You can choose whether you would like the
navigation system to chose the route that will
consume the least amount of energy.
Avoid Interstate Highways
You can choose whether you would like the
navigation system to avoid all highways while
navigating to the destination.
Sounds And Warnings
Select this setting to change the following
sounds and warnings:
Warning Type : You can choose the type of
warnings you want to hear when you are
driving:
Warning Sounds: Hear only warning
sounds
None: No warning sounds are given
Safety Warnings : You can change settings for
whether you want to be warned, never
warned, or warned only if you are speeding.
The following options are available:
When speeding: This warning is given
when you exceed the speed limit by more
than 3 mph (5 km/h). When you are
speeding, the speed panel also turns red
in the guidance view.
Driver Safety: Select this setting to make some features locked while the vehicle is
in motion.
NOTE:
This feature increases safety by minimizing
driver distraction. When driver safety is on, a
message tells you when the lock is enabled.
System
Select this setting to reset all other settings.
Selecting “Reset” will delete all saved places
and settings and restore the standard settings.
This includes the language, voice settings,
warning settings, and theme. NOTE:
This is not a software update and will not affect
the version of the software application installed
on your Uconnect system.
Points Of Interest
About Points Of Interest
Points Of Interest (POI), are useful places on the
map.
Here are some examples:
Restaurants
Hotels
Museums
Parking lots
Gas stations
Emergency Services
9
20_VF_OM_EN_US_t.book Page 233
Page 236 of 264
234MULTIMEDIA
Using POIs To Plan A Route
When you plan a route, you can use a POI for the
destination or as a stop along the route.
Using Search
1. Select “Search” on the Main Menu to begin
a search. The search screen will open,
displaying the keyboard. Enter the name of
your desired destination. Your search
results will be displayed in two lists.
Addresses and city matches are shown in
the list called “Addresses.” POIs, types of
POIs, and Places are shown in the list called
“Points of Interest.” You can also select a
POI category to only see POI search results
from that category.
2. Select the desired POI. The location will appear on the map. From here, you can
save the POI to “My Places,” use this POI as
a starting point, begin navigation to this
destination, or view more details about this
POI. By pressing “More Information,” you
can view the phone number and full
address of the POI.
3. If a route is already planned, you can add the location to your current route. To plan a
route to this destination, press the Drive
button on the touchscreen. Select A Route With A POI
NOTE:
Your navigation system will calculate a route,
and guidance to your destination will begin.
Guidance view will begin as soon as you start
driving. Refer to “Planning A Route” for more
information on how to search for a POI. Refer to
“My Places” for more information on how to add
a POI to your saved list of My Places.
My Places
About My Places
My Places provides an easy way to
select a location without the need to
enter the address or search for the location. You
can use My Places to create a collection of
useful or favorite addresses. The following items are always in My Places:
Home
: Your home location can be your home
address or somewhere you often visit. This
feature provides an easy way to navigate
there.
Recent Destinations: Select this button to
select your destination from a list of locations
you have recently navigated to.
Using My Places
You can use My Places as a way of navigating to
a place without having to enter the address. To
navigate to a saved destination in My Places,
follow these steps:
1. Press the touchscreen to bring up the Main menu and press “My Places”.
2. Select the desired destination. The location will appear on the map with a pop-up menu.
3. Press the Drive button to begin navigation to this destination.
NOTE:
Your navigation system immediately starts
guiding you to your destination with spoken
instructions and visual instructions on the
touchscreen.
20_VF_OM_EN_US_t.book Page 234
Page 237 of 264
MULTIMEDIA235
Adding A Location To My Places
Adding From My Places
1. In the Main menu, press “My Places”.
2. Press “Add”.
Adding To My Places
3. To select a location, do one of the following:
Zoom in on the map at the location you
want to select. Press and hold to select
the location, then press the add location
symbol.
Search for a location using the search
function. Select “Show on Map,” then
press the add location symbol. Adding A Location From The Map
1. In Map View, move the map and zoom in
until you can see the destination that you
want to navigate to.
2. Press and hold the point on the map to select that location.
3. Press the three vertical dots to the right of the name to open the pop-up menu.
4. Press “Add to My Places”.
Adding A Location From The Map
5. The name of the location will appear in the edit screen. You can edit the name of the
location for easy recognition. 6. Press “Done” to save your location in the My
Places list.
Adding A Location Using Search
1. In the Main Menu, press “Search”.
2. Enter the name or address of a location using the touchscreen keyboard.
3. Select the desired location, and then press “Show in map”.
4. The map view will show the location. Press the pop-up menu button.
5. Press “Add to My Places”.
6. The name of the location will appear in the edit screen. You can edit the name of the
location for easy recognition.
7. Press “Done” to save your location in the My Places list.
9
20_VF_OM_EN_US_t.book Page 235
Page 238 of 264
236MULTIMEDIA
Setting Your Home Location
1. In the Main Menu, press “My Places”.
2. Press “Home”.
3. To select a location for home, do one of the
following:
Zoom in on the map at the location you
want to select. Press and hold to select
the location, then press the home icon
next to the name of the location.
You can also search for a location using
the search function. Select “Set home
location.”
Deleting A Location From My Places
Deleting A Recent Destination From My Places
1. In the Main Menu, select “My Places”.
2. Press “Recent Destinations”.
3. Press “Edit List”.
4. Select the destination(s) you want to delete.
5. Press the “Delete” button. Deleting A Location From My Places
1. In the Main Menu, select “My Places”.
2. Press “Edit List”.
3. Select the destination(s) you want to delete.
4. Press the “Delete” button.
Getting Help
About Getting Help
Press the Help button in the Main
menu or from the Settings menu to
see the following information:
About: Press this button to view information
about your Uconnect system. This informa -
tion includes:
Serial number
Application version
Installed maps
Legal information, such as Copyright and
Licenses for EULA and Open Source
Important Safety Notices And Warnings
Global Positioning System
The Global Positioning System (GPS) is a satel -
lite-based system that provides location and
timing information around the globe. GPS is
operated and controlled under the sole respon -
sibility of the Government of the United States
of America, which is responsible for its avail -
ability and accuracy. Any changes in GPS avail -
ability and accuracy, or in environmental
conditions, may impact the operation of this
navigation system. TomTom® does not accept
any liability for the availability and accuracy of
GPS.
Use With Care
Use of TomTom® navigation while driving still
means that you need to drive with due care and
attention.
20_VF_OM_EN_US_t.book Page 236
Page 239 of 264
MULTIMEDIA237
Safety Settings
We recommend using the safety settings to
make your driving as safe as possible. These
are some of the options included in the safety
settings:
Show safety reminders
Warn when driving faster than allowed
You can also drive more safely by using voice
commands to control navigation.
Refer to “Settings” earlier in this section to learn
more about how to control safety and warning
settings.
This Document
Great care was taken in preparing this docu -
ment. Constant product development may
mean that some information is not entirely up to
date. The information in this document is
subject to change without notice. TomTom® shall not be liable for technical or
editorial errors or omissions contained herein,
nor for incidental or consequential damages
resulting from the performance or use of this
document. This document contains information
protected by copyright. No part of this docu
-
ment may be photocopied or reproduced in any
form without prior written consent from
TomTom® N.V.
Copyright Notices
© 2019 TomTom®. All rights reserved.
TomTom® and the "two hands" logo are regis -
tered trademarks of TomTom® N.V. or one of its
subsidiaries. Please see www.tomtom.com/
en_us/legal/ for warranties and end user
license agreements applying to this product.
© 2019 TomTom®. All rights reserved. This
material is proprietary and the subject of copy -
right protection and/or database rights protec -
tion and/or other intellectual property rights
owned by TomTom® or its suppliers. The use of
this material is subject to the terms of a license
agreement. Any unauthorized copying or disclo -
sure of this material will lead to criminal and
civil liabilities. Data Source © 2019 TomTom® All rights
reserved.
The software included in this product contains
copyrighted software that is licensed under the
GPL. A copy of that license can be viewed in the
License section. You can obtain the complete
corresponding source code from us for a period
of three years after our last shipment of this
product. For more information, visit
https://
www.tomtom.com/en_gb/opensource or
contact your local TomTom® customer support
team via us.support.tomtom.com/app/
answers/list . Upon request, we will send you a
CD with the corresponding source code.
Linotype, Frutiger and Univers are trademarks
of Linotype GmbH registered in the U.S. Patent
and Trademark Office and may be registered in
certain other jurisdictions. MHei is a trademark
of The Monotype Corporation and may be regis -
tered in certain jurisdictions.
9
20_VF_OM_EN_US_t.book Page 237
Page 240 of 264
238MULTIMEDIA
STEERING WHEEL AUDIO CONTROLS
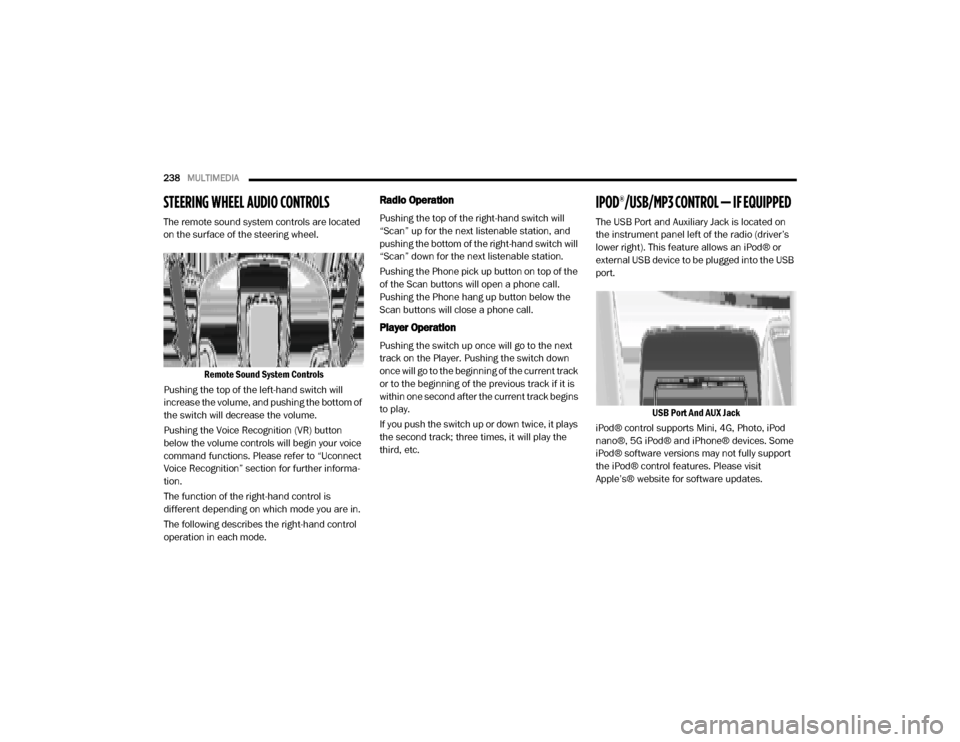
The remote sound system controls are located
on the surface of the steering wheel.
Remote Sound System Controls
Pushing the top of the left-hand switch will
increase the volume, and pushing the bottom of
the switch will decrease the volume.
Pushing the Voice Recognition (VR) button
below the volume controls will begin your voice
command functions. Please refer to “Uconnect
Voice Recognition” section for further informa -
tion.
The function of the right-hand control is
different depending on which mode you are in.
The following describes the right-hand control
operation in each mode.
Radio Operation
Pushing the top of the right-hand switch will
“Scan” up for the next listenable station, and
pushing the bottom of the right-hand switch will
“Scan” down for the next listenable station.
Pushing the Phone pick up button on top of the
of the Scan buttons will open a phone call.
Pushing the Phone hang up button below the
Scan buttons will close a phone call.
Player Operation
Pushing the switch up once will go to the next
track on the Player. Pushing the switch down
once will go to the beginning of the current track
or to the beginning of the previous track if it is
within one second after the current track begins
to play.
If you push the switch up or down twice, it plays
the second track; three times, it will play the
third, etc.
IPOD®/USB/MP3 CONTROL — IF EQUIPPED
The USB Port and Auxiliary Jack is located on
the instrument panel left of the radio (driver’s
lower right). This feature allows an iPod® or
external USB device to be plugged into the USB
port.
USB Port And AUX Jack
iPod® control supports Mini, 4G, Photo, iPod
nano®, 5G iPod® and iPhone® devices. Some
iPod® software versions may not fully support
the iPod® control features. Please visit
Apple’s® website for software updates.
20_VF_OM_EN_US_t.book Page 238
Page 241 of 264
MULTIMEDIA239
USB Charging Port
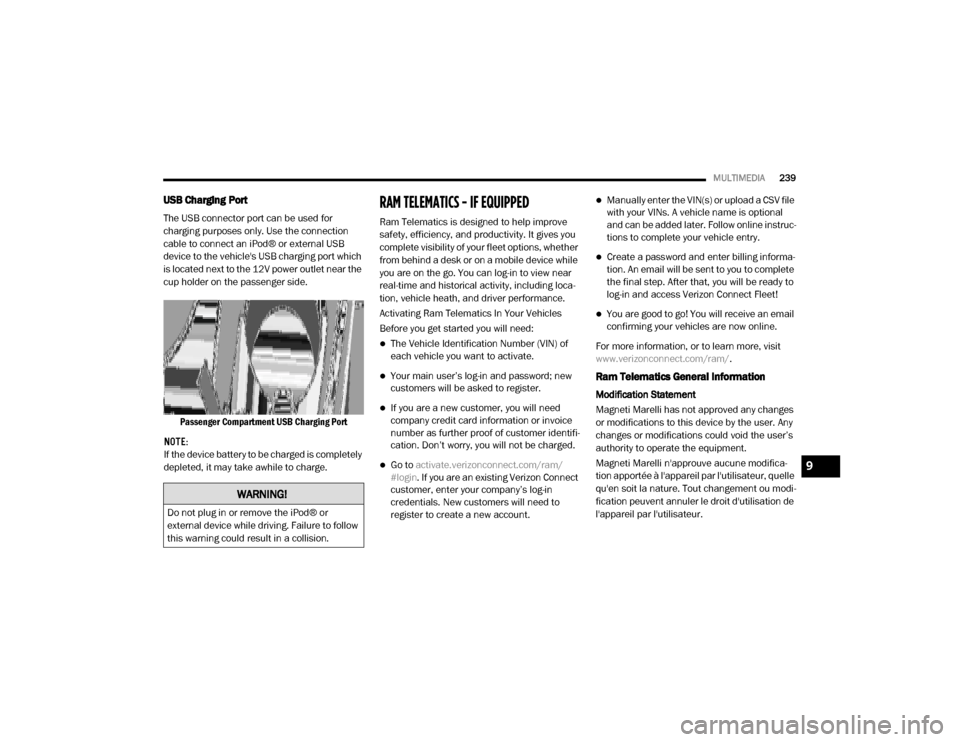
The USB connector port can be used for
charging purposes only. Use the connection
cable to connect an iPod® or external USB
device to the vehicle's USB charging port which
is located next to the 12V power outlet near the
cup holder on the passenger side.
Passenger Compartment USB Charging Port
NOTE:
If the device battery to be charged is completely
depleted, it may take awhile to charge.
RAM TELEMATICS - IF EQUIPPED
Ram Telematics is designed to help improve
safety, efficiency, and productivity. It gives you
complete visibility of your fleet options, whether
from behind a desk or on a mobile device while
you are on the go. You can log-in to view near
real-time and historical activity, including loca -
tion, vehicle heath, and driver performance.
Activating Ram Telematics In Your Vehicles
Before you get started you will need:
The Vehicle Identification Number (VIN) of
each vehicle you want to activate.
Your main user’s log-in and password; new
customers will be asked to register.
If you are a new customer, you will need
company credit card information or invoice
number as further proof of customer identifi -
cation. Don’t worry, you will not be charged.
Go to activate.verizonconnect.com/ram/
#login . If you are an existing Verizon Connect
customer, enter your company’s log-in
credentials. New customers will need to
register to create a new account.
Manually enter the VIN(s) or upload a CSV file
with your VINs. A vehicle name is optional
and can be added later. Follow online instruc -
tions to complete your vehicle entry.
Create a password and enter billing informa -
tion. An email will be sent to you to complete
the final step. After that, you will be ready to
log-in and access Verizon Connect Fleet!
You are good to go! You will receive an email
confirming your vehicles are now online.
For more information, or to learn more, visit
www.verizonconnect.com/ram/ .
Ram Telematics General Information
Modification Statement
Magneti Marelli has not approved any changes
or modifications to this device by the user. Any
changes or modifications could void the user’s
authority to operate the equipment.
Magneti Marelli n'approuve aucune modifica -
tion apportée à l'appareil par l'utilisateur, quelle
qu'en soit la nature. Tout changement ou modi -
fication peuvent annuler le droit d'utilisation de
l'appareil par l'utilisateur.
WARNING!
Do not plug in or remove the iPod® or
external device while driving. Failure to follow
this warning could result in a collision.
9
20_VF_OM_EN_US_t.book Page 239
Page 242 of 264

240MULTIMEDIA
Interference Statement
This device complies with Part 15, 22, 24, and
27 of the FCC and Industry Canada
licence-exempt RSS standard(s). Operation is
subject to the following two conditions:(1) This
device may not cause interference, and(2) This
device must accept any interference, including
interference that may cause undesired opera -
tion of the device.
RF Exposure
This equipment complies with FCC and IC radia-
tion exposure limits set forth for an uncontrolled
environment. The antenna should be installed
and operated with minimum distance of 20 cm
between the radiator and your body.
Cet appareil est conforme aux limites d'exposi -
tion aux rayonnements de la IC pour environne -
ment non contrôlé. L'antenne doit être installé
de façon à garder une distance minmale de 20
centimètres entre la source de rayonnements
et votre corps.RADIO OPERATION AND MOBILE PHONES
Under certain conditions, the mobile phone
being on in your vehicle can cause erratic or
noisy performance from your radio. This condi -
tion may be lessened or eliminated by relo -
cating the mobile phone. This condition is not
harmful to the radio. If your radio performance
does not satisfactorily “clear” by the reposi -
tioning of the phone, it is recommended that the
radio volume be turned down or off during
mobile phone operation when not using Ucon -
nect (if equipped).
Regulatory And Safety Information
USA/CANADA
Exposure to Radio Frequency Radiation
The radiated output power of the internal wire -
less radio is far below the FCC and IC radio
frequency exposure limits. Nevertheless, the
wireless radio will be used in such a manner
that the radio is 8 inch (20 cm) or further from
the human body.
The internal wireless radio operates within
guidelines found in radio frequency safety stan -
dards and recommendations, which reflect the
consensus of the scientific community. The radio manufacturer believes the internal
wireless radio is safe for use by consumers. The
level of energy emitted is far less than the elec
-
tromagnetic energy emitted by wireless devices
such as mobile phones. However, the use of
wireless radios may be restricted in some situa-
tions or environments, such as aboard
airplanes. If you are unsure of restrictions, you
are encouraged to ask for authorization before
turning on the wireless radio.
The following regulatory statement applies to all
Radio Frequency (RF) devices equipped in this
vehicle:
This device complies with Part 15 of the FCC
Rules and with Innovation, Science and
Economic Development Canada license-exempt
RSS standard(s). Operation is subject to the
following two conditions:
1. This device may not cause harmful interfer -
ence, and
2. This device must accept any interference received, including interference that may
cause undesired operation.
20_VF_OM_EN_US_t.book Page 240