2020 PEUGEOT PARTNER TEPEE fuel
[x] Cancel search: fuelPage 22 of 216

20
For more information on Fuel, refer to the
corresponding section.
Coolant temperature
If the needle is positioned before the red
zone: normal operation.
In arduous conditions of use or hot climatic
conditions, the needle may move close to the
red graduations.
What to do if the needle goes into the red
zone:
F
s
low down the vehicle or let the engine idle. What to do if the warning lamp lights up:
F
s
top immediately, switch off the ignition. The
fan may continue to operate for a certain
time up to approximately ten minutes,
F
w
ait for the engine to cool down in order
to check the coolant level and top it up if
necessary.
Since the cooling system is under pressure,
follow these instructions to avoid any risk of
burns:
F
w
ait at least one hour after the engine stops
to intervene,
F
u
nscrew the cap by 1/4 of a turn to allow the
pressure to drop,
F
w
hen the pressure has dropped, check the
level in the expansion bottle,
F
i
f necessary, remove the cap to top up.
If the needle remains in the red zone, have
it checked by a PEUGEOT dealer or by a
qualified workshop.
For more information on Levels , refer to
the corresponding section.
AdBlue® fluid range
indicators
Alert settings and display
Different levels of alert are triggered according
to the remaining driving range threshold.
You will be informed as each mileage threshold
is reached and the alerts will change from
temporary to permanent.
-
T
he 1
st alert is triggered at a remaining
driving range of 1,500 miles (2,400 km).
-
T
he 2
nd alert is triggered at a remaining
driving range of 375 miles (600 km).
Up to 0
miles, at which point it will be
impossible to restart the engine after a stop.
Driving range
F Press this button to display the information.
With the touch screen: F
s
elect the "Driving assistance"
menu,
F
s
elect "Diagnostic",
F
s
elect CHECK.
Above 3,000
miles (5,000 km), the value is not
defined.
Instruments
Page 25 of 216

23
Each press of the button on the end of the
wiper control stalk allows you to scroll through
the various trip computer information displays,
depending on the screen.
The "vehicle" tab with the range, current fuel
consumption and remaining distance to travel.
The "1" tab (trip 1) with the average speed,
average fuel consumption and distance
travelled in trip 1 .
The "2" tab (trip 2) with the same information
for a 2
nd trip.
Zero reset
F When the desired trip is displayed, press the control for more than two seconds.
A few definitions
Range: displays the distance that can still be
travelled with the fuel detected in the tank on
the basis of the average consumption over the
last few miles (kilometres) travelled. If dashes instead of figures continue to
be displayed when driving, contact a
PEUGEOT dealer.
This displayed value can vary greatly
following a change in the vehicle's driving
conditions or the terrain. When the range falls below 19
miles (30 km),
dashes are displayed. After filling with at least
10 litres of fuel, the range is recalculated and is
displayed if it exceeds 62 miles (100 km).
Current fuel consumption: calculated
and displayed only when exceeding 19 mph
(30
km/h).
Average consumption: this is the average
fuel consumption since the last trip computer
zero reset.
Distance travelled: calculated from the last
trip computer zero reset.
Remaining distance: calculated according
to the final destination entered by the user. If
navigation is activated, the navigation system
calculates it instantaneously.
Average speed: this is the average speed
calculated since the last trip computer zero
reset (with the ignition on).
Date and time setting
Centre console without
screen
To adjust the time on the clock, use the left-
hand button on the instrument panel.
F
T
urn to the left: the minutes flash.
F
T
urn to the right to increase the minutes
(hold the button towards the right to scroll
through faster).
F
T
urn to the left: the hours flash.
F
T
urn to the right to increase the hours (hold
the button towards the right to scroll through
faster).
F
T
urn to the left: 24H or 12H is displayed.
F
T
urn to the right to select 24H or 12H.
F
T
urn to the left to finish setting the time.
The usual screen displays again when the
button has not been pressed for approximately
30
seconds.
1
Instruments
Page 27 of 216

25
Key
This locks and unlocks the vehicle's doors,
opens and closes the fuel filler cap, as well as
starting and stopping the engine.
Remote control
Unfolding/folding
If you do not press the button, there is a risk of
damaging the key's mechanism.Take care not to allow the remote control
to come into contact with grease, dust,
rain or a humid environment.
A heavy object attached to the key (key
ring, etc.) could weigh down on the shaft
of the key in the ignition switch, which may
cause a malfunction.
Unlocking
Pressing this button unlocks all of
your vehicle's doors.
The direction indicators flash two times.
Unlocking the cab or
vehicle
An initial press on this button unlocks
the front doors.
A second press on this button
unlocks the vehicle fully.
The direction indicators flash two times.
Unlocking the load space
Pressing this button unlocks all of the
rear doors.
Operating security
To unlock the load space only:
2
Access
Page 30 of 216

28
Front doors
From outside
From inside
Sliding side door(s)From outside
F Pull the handle towards you, then backwards and open the side door, guiding
it as it slides backwards until it passes the
point of resistance and it stays open.
A mechanical system prevents the
left side door being opened when
the fuel filler flap is open.
From inside
F Unlock and open the side door using this handle, guiding it to the rear until it reaches
the point of resistance. Pass this point to
keep the door open.
Close the side door again using
the handle to start sliding and
pass the point of resistance. Then
use the shaped recess at the top
of the door pillar to guide the door
until it locks.
Do not use the grab handle to
slide the door.
F
U
se the remote control to lock /unlock the
vehicle.
F
I
f the remote control does not work, insert
the metal part of the key into the driver's
door lock.
F
U
se the door opening control to unlock and
open the respective door.
Access
Page 41 of 216

39
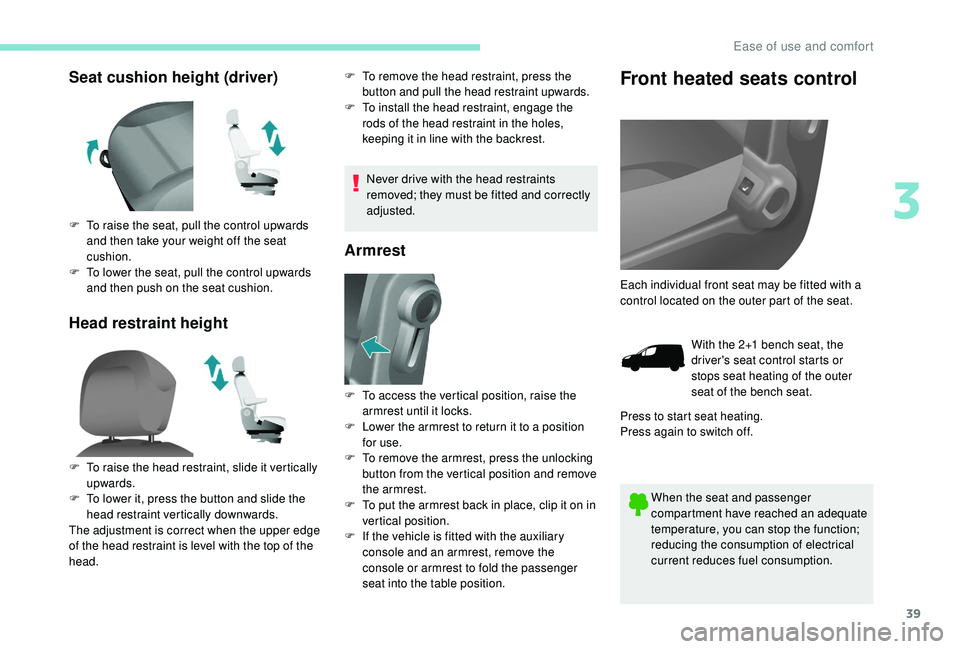
Seat cushion height (driver)
Head restraint heightF To remove the head restraint, press the button and pull the head restraint upwards.
F
T
o install the head restraint, engage the
rods of the head restraint in the holes,
keeping it in line with the backrest.
Never drive with the head restraints
removed; they must be fitted and correctly
adjusted.
Armrest
Front heated seats control
When the seat and passenger
compartment have reached an adequate
temperature, you can stop the function;
reducing the consumption of electrical
current reduces fuel consumption.
F
T
o raise the seat, pull the control upwards
and then take your weight off the seat
cushion.
F
T
o lower the seat, pull the control upwards
and then push on the seat cushion.
F
T
o raise the head restraint, slide it vertically
upwards.
F
T
o lower it, press the button and slide the
head restraint vertically downwards.
The adjustment is correct when the upper edge
of the head restraint is level with the top of the
head. F
T
o access the vertical position, raise the
armrest until it locks.
F
L
ower the armrest to return it to a position
for use.
F
T
o remove the armrest, press the unlocking
button from the vertical position and remove
the armrest.
F
T
o put the armrest back in place, clip it on in
vertical position.
F
I
f the vehicle is fitted with the auxiliary
console and an armrest, remove the
console or armrest to fold the passenger
seat into the table position. Each individual front seat may be fitted with a
control located on the outer part of the seat.
With the 2+1 bench seat, the
driver's seat control starts or
stops seat heating of the outer
seat of the bench seat.
Press to start seat heating.
Press again to switch off.
3
Ease of use and comfort
Page 83 of 216

81
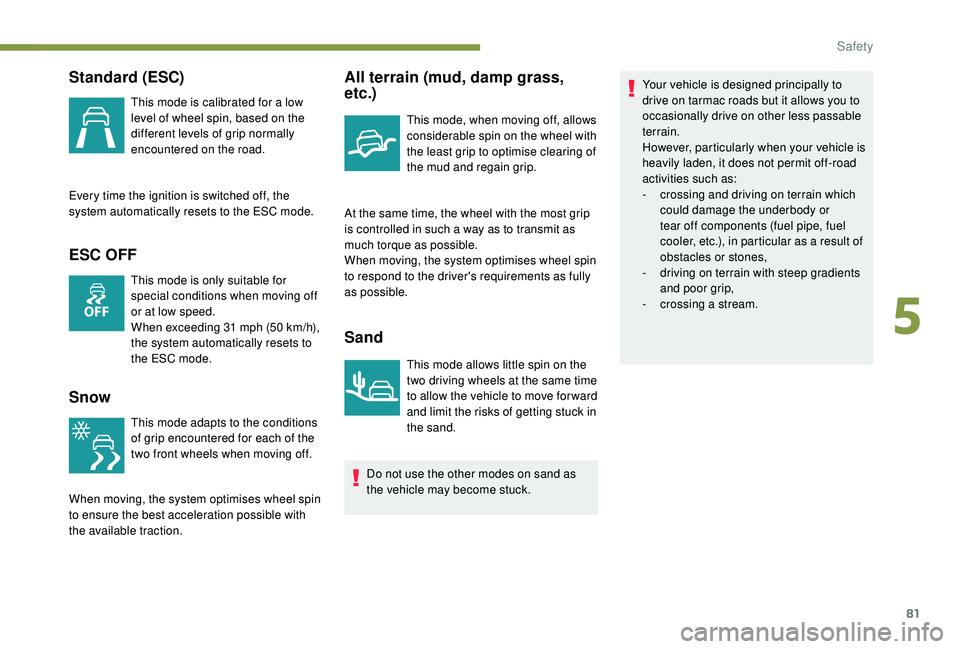
Standard (ESC)
This mode is calibrated for a low
level of wheel spin, based on the
different levels of grip normally
encountered on the road.
Every time the ignition is switched off, the
system automatically resets to the ESC mode.
ESC OFF
This mode is only suitable for
special conditions when moving off
or at low speed.
When exceeding 31
mph (50 km/h),
the system automatically resets to
the ESC mode.
Snow
This mode adapts to the conditions
of grip encountered for each of the
two front wheels when moving off.
When moving, the system optimises wheel spin
to ensure the best acceleration possible with
the available traction.
All terrain (mud, damp grass,
etc.)
This mode, when moving off, allows
considerable spin on the wheel with
the least grip to optimise clearing of
the mud and regain grip.
At the same time, the wheel with the most grip
is controlled in such a way as to transmit as
much torque as possible.
When moving, the system optimises wheel spin
to respond to the driver's requirements as fully
as possible.
Sand
This mode allows little spin on the
two driving wheels at the same time
to allow the vehicle to move for ward
and limit the risks of getting stuck in
the sand. Your vehicle is designed principally to
drive on tarmac roads but it allows you to
occasionally drive on other less passable
terrain.
However, particularly when your vehicle is
heavily laden, it does not permit off-road
activities such as:
-
c
rossing and driving on terrain which
could damage the underbody or
tear off components (fuel pipe, fuel
cooler, etc.), in particular as a result of
obstacles or stones,
-
d
riving on terrain with steep gradients
and poor grip,
-
c
rossing a stream.
Do not use the other modes on sand as
the vehicle may become stuck.
5
Safety
Page 109 of 216

107
F Move the gear selector to R.
Only engage it when the vehicle is
stationary.
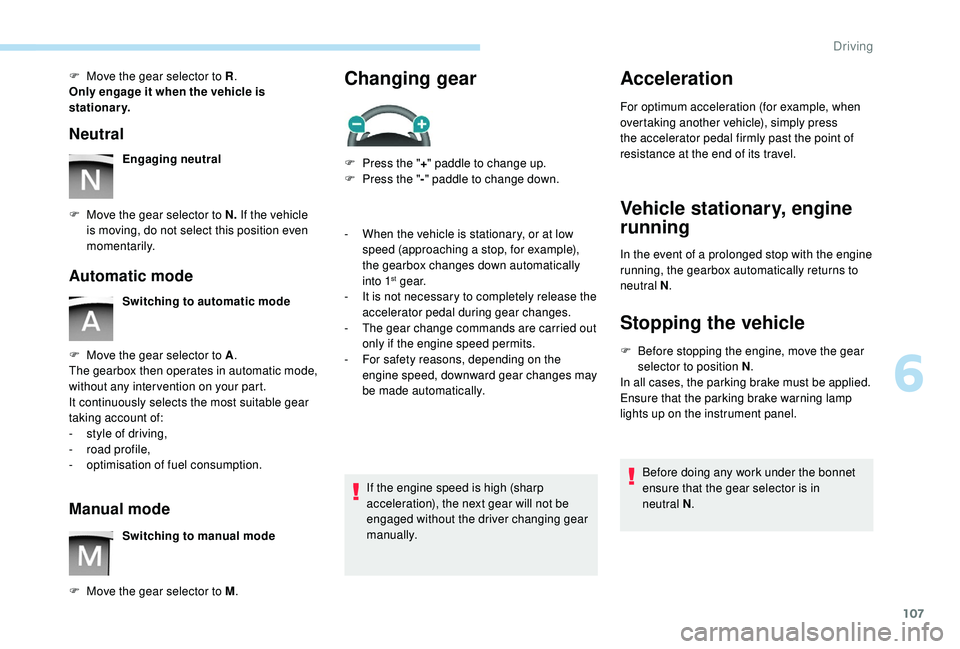
Neutral
Engaging neutral
F
M
ove the gear selector to N. If the vehicle
is moving, do not select this position even
m o m e nt a r i l y.
Automatic mode
Switching to automatic mode
F
M
ove the gear selector to A .
The gearbox then operates in automatic mode,
without any inter vention on your part.
It continuously selects the most suitable gear
taking account of:
-
s
tyle of driving,
-
ro
ad profile,
-
o
ptimisation of fuel consumption.
Manual mode
Switching to manual mode
F
M
ove the gear selector to M .
Changing gear
F Press the "+" paddle to change up.
F P ress the " -" paddle to change down.
-
W
hen the vehicle is stationary, or at low
speed (approaching a stop, for example),
the gearbox changes down automatically
into 1
st g e a r.
-
I
t is not necessary to completely release the
accelerator pedal during gear changes.
-
T
he gear change commands are carried out
only if the engine speed permits.
-
F
or safety reasons, depending on the
engine speed, downward gear changes may
be made automatically.
If the engine speed is high (sharp
acceleration), the next gear will not be
engaged without the driver changing gear
manually.
Acceleration
For optimum acceleration (for example, when
overtaking another vehicle), simply press
the accelerator pedal firmly past the point of
resistance at the end of its travel.
Vehicle stationary, engine
running
In the event of a prolonged stop with the engine
running, the gearbox automatically returns to
neutral N .
Stopping the vehicle
F Before stopping the engine, move the gear
selector to position N .
In all cases, the parking brake must be applied.
Ensure that the parking brake warning lamp
lights up on the instrument panel.
Before doing any work under the bonnet
ensure that the gear selector is in
neutral
N.
6
Driving
Page 110 of 216

108
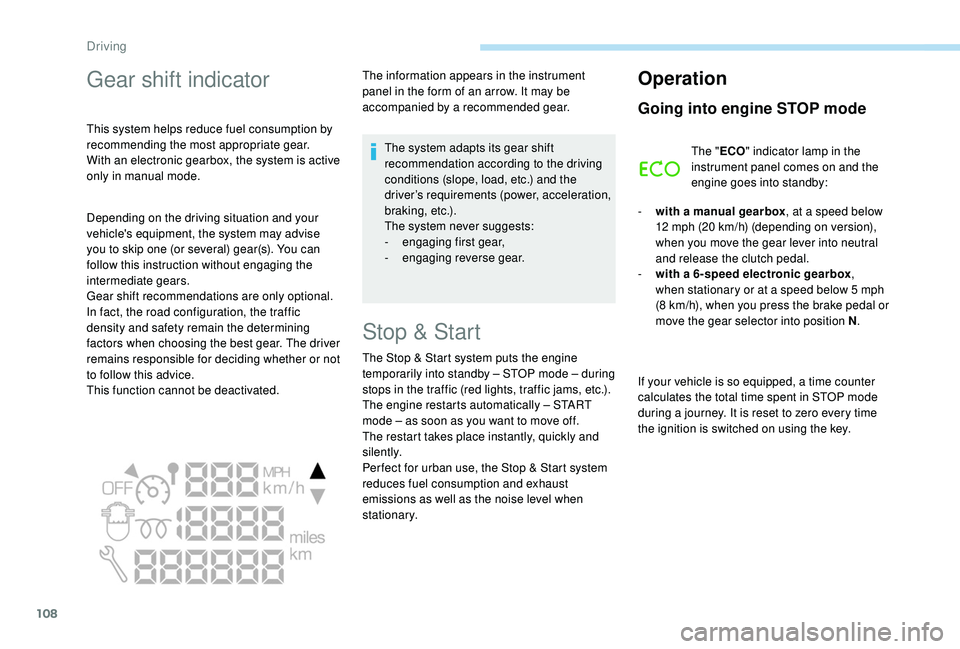
Gear shift indicator
This system helps reduce fuel consumption by
recommending the most appropriate gear.
With an electronic gearbox, the system is active
only in manual mode.The information appears in the instrument
panel in the form of an arrow. It may be
accompanied by a recommended gear.
The system adapts its gear shift
recommendation according to the driving
conditions (slope, load, etc.) and the
driver’s requirements (power, acceleration,
b r a k i n g , e t c .) .
The system never suggests:
-
e
ngaging first gear,
-
enga
ging reverse gear.
Stop & Start
The Stop & Start system puts the engine
t emporarily into standby – STOP mode – during
stops in the traffic (red lights, traffic jams, etc.).
The engine restarts automatically – START
mode – as soon as you want to move off.
The restart takes place instantly, quickly and
silently.
Per fect for urban use, the Stop & Start system
reduces fuel consumption and exhaust
emissions as well as the noise level when
stationary.
Operation
Going into engine STOP mode
The " ECO" indicator lamp in the
instrument panel comes on and the
engine goes into standby:
-
w
ith a manual gearbox , at a speed below
12
mph (20 km/h) (depending on version),
when you move the gear lever into neutral
and release the clutch pedal.
-
w
ith a 6-speed electronic gearbox ,
when stationary or at a speed below 5
mph
(8
km/h), when you press the brake pedal or
move the gear selector into position N .
If your vehicle is so equipped, a time counter
calculates the total time spent in STOP mode
during a journey. It is reset to zero every time
the ignition is switched on using the key.
Depending on the driving situation and your
vehicle's equipment, the system may advise
you to skip one (or several) gear(s). You can
follow this instruction without engaging the
intermediate gears.
Gear shift recommendations are only optional.
In fact, the road configuration, the traffic
density and safety remain the determining
factors when choosing the best gear. The driver
remains responsible for deciding whether or not
to follow this advice.
This function cannot be deactivated.
Driving