2020 PEUGEOT 5008 CD player
[x] Cancel search: CD playerPage 26 of 308

24
Instruments
For more information on the "Multimedia"
application, refer to the "Audio equipment and
telematics" section.
"Telephone" menu
With the audio system switched on, this
menu allows you to make a call, view the
calls log or the various telephone directories.
For more information on the "Telephone"
application, refer to the "Audio equipment and
telematics" section.
"Connections" menu
With the audio system on, this menu
allows a Bluetooth device (telephone,
media player) to be paired and the connection
mode
to be defined (hands-free, playing audio
files).
For more information on the "Connections"
application, refer to the "Audio equipment and
telematics" section.
"Personalisation-
configuration" menu
This menu gives access to the following functions:
– "Define
the vehicle parameters",
–
"Choice of language",
–
"Display configuration".
Defining the vehicle parameters
This menu allows the activation or deactivation
of the following equipment, depending on
version:
–
"Access to the vehicle" :
•
"Plip action".
For more information on the Remote control
,
and in particular the selective unlocking of the
driver's door, refer to the "Access" section.
–
"Comfort"
:
• “Rear
wipe in reverse gear".
• “Parking
assistance".
•
"Fatigue Detection System".
For more information on the
W
iper control
stalk,
refer to the “Lighting and visibility” section.
For more information on the
Parking sensors
or the Fatigue detection system, refer to the
“Driving”
section.
–
"Driving assistance" :
•
"Auto. emergency braking" (Active Safety
Brake).
•
"Speed recommendation" (Road signs
recognition).
•
"Tyre inflation" (Tyre under-inflation
detection).
For more information on the
Active Safety
Brake ,
the Road signs recognition or the
Tyre
under-inflation detection ,
refer to the “Driving”
section.
Choice of language
This menu allows selection of the language used
by the screen and the instrument panel.
Display configuration
This menu gives access to the following settings:
– "Choice of units",
–
"Date and time adjustment",
–
"Display parameters",
–
"Brightness".
Adjusting the date and time
► Press
the "7" or "8" button to display the
"Display
configuration" menu, then press
OK
.
► Press
the "5" or "6" button to select the
"Date and time adjustment" button, then press
OK.
► Press
the "7" or "8" button to select the
setting
to modify. Confirm by pressing
OK
, then
modify
the setting and confirm again to save the
modification.
►
Adjust the settings one by one, confirming
with the
OK button.
► Press
the "5" or "6" button, then the OK
button to select the OK
box and confirm or the
Back button to cancel.
As a safety measure, the driver must only
carry out operations that require
sustained attention when stationary.
Touch screen
This system gives access to the following elements:
–
Permanent display of the time and the exterior
temperature (a blue warning lamp appears if
there is a risk of ice).
Page 72 of 308

70
Ease of use and comfort
In "Permanent lighting" mode, the lighting time
varies according to the circumstances:
–
With
the ignition off, approximately 10 minutes.
–
In energy saving mode, approximately 30
seconds.
–
With the engine running, unlimited.
When the front courtesy lamp is in the
"Permanent lighting" position, the rear
courtesy lamp also comes on, unless it is in
the "Permanently off" position.
To switch off the rear courtesy lamp, put it in
the "Permanently off" position.
Map reading lamps
► With the ignition on, operate the
corresponding switch.
Take care not to place anything in contact with the courtesy lamps.
Interior ambience lighting
The dimmed passenger compartment lighting
improves visibility in the vehicle when the light
is poor.
At night, the ambience lighting automatically
comes on / switches off when the sidelamps are
switched on / off.
Activation / deactivation and adjustment of the light intensity are set via the
Driving
/ Vehicle touch screen menu.
Rear fittings
230 V/50 Hz socket
It is located at the back of the centre console
beneath a protective cover.
This socket (max. power: 150 W) operates with
the engine running, and with the Stop & Start
system in STOP mode.
►
Lift the protective cover
.
►
Check that the green indicator lamp is on.
►
Connect your multimedia or other electrical
device (telephone charger
, laptop computer,
CD-DVD player, bottle warmer, etc.).
In the event of a malfunction, the
green
indicator lamp flashes.
Have the socket checked by a PEUGEOT dealer
or a qualified workshop.
Connect only one device at a time to the
socket (do not use extension leads or
multi-socket adapters).
Connect only devices with class II insulation
(shown on the device).
Do not use metal-cased devices (e.g. electric
shaver, etc.).
As a safety measure, if power consumption is high and power is
required by the vehicle's electrical system
(due to severe weather conditions, electrical
overload, etc.), power to the socket may be
cut off, in which case the green indicator lamp
goes off.
12 V accessory socket
► To connect a 12 V accessory (maximum
power: 120 W), lift the cover and plug in a
suitable adaptor.
The connection of an electrical device not approved by PEUGEOT, such as a
USB charger, may adversely affect the
operation of vehicle electrical systems,
causing faults such as poor radio reception or
interference with displays in the screens.
Rear armrest
The armrest incorporates two cup holders.
Page 208 of 308

206
In the event of a breakdown
► Open the glove box.
► Press on the central handle of the fusebox
cover
.
►
Lower the cover completely
.
►
T
ake the tweezers from their housing.
Changing a fuse
Before changing a fuse:
► Identify the cause of the fault and fix it.
►
Stop all power consumption.
►
Immobilise the vehicle and switch the ignition
off.
►
Identify the defective fuse using the current
allocation tables and diagrams.
T
o replace a fuse, it is essential to:
►
Use the special tweezers to extract the fuse
from its housing and check the condition of its
filament.
►
Always replace the failed fuse with a fuse of
the same rating (same colour); use of a different
rating may cause malfunctions - risk of fire!
If the fault recurs after replacing a fuse, have
the electrical system checked by a PEUGEOT
dealer or a qualified workshop.
The fuse allocation tables and the corresponding diagrams are available
from a PEUGEOT dealer or from a qualified
workshop.
The replacement of a fuse not shown in the allocation tables may cause a serious
malfunction of your vehicle. Contact a
PEUGEOT dealer or a qualified workshop.
Good
Failed
Tweezers
Installing electrical accessories
Your vehicle's electrical system is
designed to operate with standard or optional
equipment.
Before installing other electrical equipment
or accessories on your vehicle, contact a
PEUGEOT dealer or a qualified workshop.
PEUGEOT accepts no responsibility for
the cost incurred in repairing your vehicle
or for rectifying malfunctions resulting from
the installation of accessories not supplied
and not recommended by PEUGEOT and not
installed in accordance with specifications, in
particular when the combined power
consumption of all of the additional equipment
connected exceeds 10 milliamperes.
Fuses in the dashboard
The fusebox is located in the lower dashboard
(left-hand side).
To access the fuses, follow the same procedure
as described for accessing the fuse replacement
tools.
Version 1 (Full)
Box 1
Fuse N° Rating (A)Functions
F1 3 AKeyless Entry and Starting.
F2 5 AMultifunction screen.
F5 5 AReversing camera - Parking sensors.
F7 10 AHi-Fi amplifier.
F8 20 ARear wiper.
F10 30 ALocks.
F 11 30 ALocks.
F17 10 ABoot 12 V accessory socket.
F18 5 AEmergency and assistance calls.
F22 3 AGlove box lighting.
F26 3 ASeat belts not fastened warning lamps display.
F27 3 ARain/sunshine sensor.
F31 5 AAirbags.
F33 15 AFront 12 V accessory socket.
F35 5 AInstrument panel.
F36 20 AAudio system - Touch screen - CD player - Audio/navigation system.
Box 2 Fuse N° Rating (A)Functions
F17 10 AMemorising driving positions.
Page 209 of 308

Box 1
Fuse N°Rating (A)Functions
F1 3 AKeyless Entry and Starting.
F2 5 AMultifunction screen.
F5 5 AReversing camera - Parking sensors.
F7 10 AHi-Fi")
207
In the event of a breakdown
8Version 1 (Full)
Box 1
Fuse N°Rating (A)Functions
F1 3 AKeyless Entry and Starting.
F2 5 AMultifunction screen.
F5 5 AReversing camera - Parking sensors.
F7 10 AHi-Fi amplifier.
F8 20 ARear wiper.
F10 30 ALocks.
F 11 30 ALocks.
F17 10 ABoot 12
V accessory socket.
F18 5 AEmergency and assistance calls.
F22 3 AGlove box lighting.
F26 3 ASeat belts not fastened warning lamps display.
F27 3 ARain/sunshine sensor.
F31 5 AAirbags.
F33 15 AFront 12
V accessory socket.
F35 5 AInstrument panel.
F36 20 AAudio system - Touch screen - CD player - Audio/navigation system.
Box 2
Fuse N° Rating (A)Functions
F17 10 AMemorising driving positions.
Page 210 of 308

Fuse N°Rating (A)Functions
F4 15 AHorn.
F5 20 AWindscreen wash pump.
F6 20 ARear screenwash pump.
F7 10 A12
V accessory socket.
F8 20 ARear wiper.
F1")
208
In the event of a breakdown
Version 2 (Eco)
Fuse N°Rating (A)Functions
F4 15 AHorn.
F5 20 AWindscreen wash pump.
F6 20 ARear screenwash pump.
F7 10 A12
V accessory socket.
F8 20 ARear wiper.
F10 30 ALocks.
F 11 30 ALocks.
F14 5 AAlarm siren.
F17 5 AInstrument panel.
F22 3 ARain/sunshine sensor.
F24 5 AReversing camera - Parking sensors.
F25 5 AAirbags.
F27 5 AAlarm.
F28 5 AEmergency and assistance calls.
F29 20 AAudio system - Touch screen - CD player - Audio/navigation system.
F32 15 ACigarette lighter.
F36 5 AGlove box lighting.
Engine compartment fuses
The fusebox is placed in the engine
compartment near the battery.
Accessing the fuses
Version 1 (Full)
Box 1
Fuse N° Rating (A)Functions
F14 15 AScreenwash pump.
F15 5 APower steering.
F20 25 AScreenwash pump.
F22 15 AHorn.
F23 15 ARight-hand main beam headlamp.
F24 15 ALeft-hand main beam headlamp.
Box 2 Fuse N° Rating (A)Functions
F8 30 ADiesel emissions control system (AdBlue)
F12 15 AAutomatic gearbox.
F14 5 AAutomatic gearbox.
Page 234 of 308
, DAB
/ FM auto
tracking, RadioText (T")
232
Bluetooth® audio system
When the radio station is displayed in the
screen , press "OK" to display the
contextual menu.
(Frequency search (RDS), DAB
/ FM auto
tracking, RadioText (TXT) display, Information
on the station, etc.)
DAB / FM station tracking
"DAB" does not have 100% coverage of
the country.
When the digital signal is weak, "DAB
/ FM
auto tracking" allows you to continue
listening to the same station, by automatically
switching to the corresponding analogue FM
station (if it exists).
When the "DAB
/ FM auto tracking" is active,
the DAB station will be selected automatically.
Press the MENU button.
Select "Multimedia" and confirm.
Select "DAB / FM auto tracking" and
confirm.
If "DAB / FM auto tracking" tracking is
enabled, there is a lag of a few seconds
when the system switches to the analogue
FM station sometimes with a change in
volume.
If the "DAB" station you are listening to is
not available on FM (" DAB/FM" option
struck out), or if "DAB
/ FM auto tracking" is
not on, the sound will be cut when the digital
signal is too weak.
Media
USB port
Insert the USB memory stick into the USB
port or connect the USB device to the
USB port using a suitable cable (not supplied).
The system changes automatically to "USB"
source.
To protect the system, do not use a USB hub.
Any additional devices connected to the system must comply with the standard
applicable to the product and/or the standard
IEC 60950-1.
The system builds playlists (in temporary
memory); this operation can take from a
few seconds to several minutes at the first
connection.
Reduce the number of non-music files and the
number of folders to reduce the waiting time.
Playlists are updated every time a new USB
memory stick is connected.
When the USB port is used, the portable
device charges automatically.
Play mode
The play modes available are:
– Normal : the tracks are played in order,
depending on the classification of the selected
files.
–
Random
: the tracks in an album or folder are
played in a random order.
–
Random on all media : all of the tracks saved
in the media are played in random order
.
–
Repeat
: the tracks played are only those from
the current album or folder.
Press this button to display the contextual
menu for the Media function.
Press this button to select the chosen
play mode.
Press this button to confirm.
The choice made is displayed at the top of the
screen.
Choosing a track to play
Press one of these buttons to go to the
previous / next track.
Press one of these buttons to go to the
previous / next folder.
File classification
Make a long press on this button to
display the different classifications.
Select by "Folder" / " Artist" / "Genre" /
"Playlist".
Depending on availability and type of device
used.
Press OK to select the desired
classification, then press OK again to
confirm.
Playing files
Make a short press on this button to
display the chosen classification.
Navigate in the list using the left / right
and up / down buttons.
Confirm the selection by pressing OK.
Press one of these buttons to go to the
previous / next track in the list.
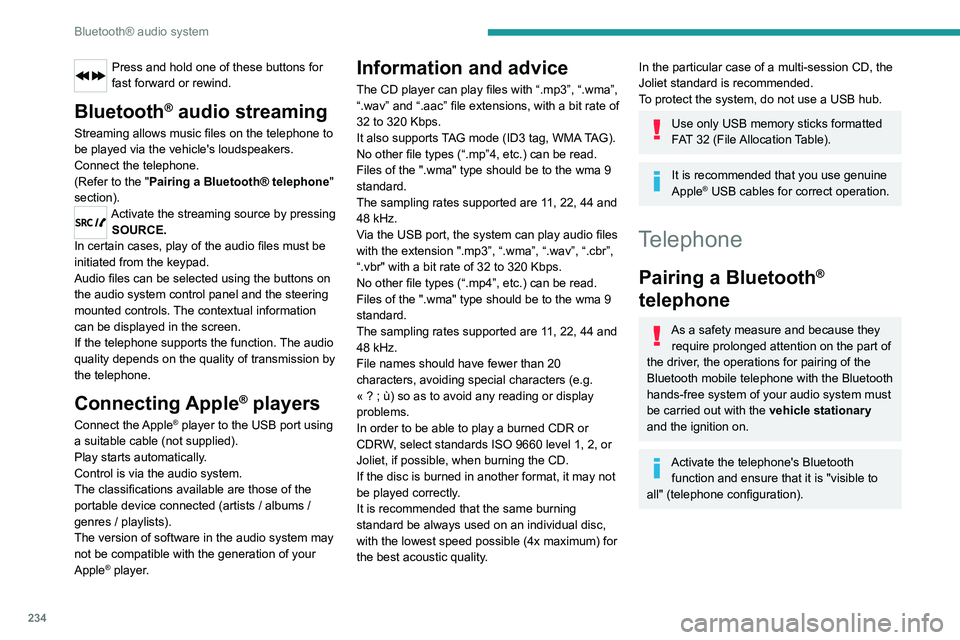
Press and hold one of these buttons for fast
forward or rewind.
Press one of these buttons to go to the
previous / next "Folder" / " Artist" /
"Genre" / "Playlist"* in the list.
Input AUX socket (AUX)
Depending on equipmentConnect a portable device (MP3 player,
etc.) to the auxiliary jack socket using an
audio cable (not supplied).
Any additional devices connected to the system must comply with the standard
* Depending on availability and the type of device used.
Page 235 of 308

233
Bluetooth® audio system
10Select by "Folder" / "Artist" / "Genre" /
"Playlist".
Depending on availability and type of device
used.
Press OK to select the desired
classification, then press OK again to
confirm.
Playing files
Make a short press on this button to
display the chosen classification.
Navigate in the list using the left / right
and up / down buttons.
Confirm the selection by pressing OK.
Press one of these buttons to go to the
previous / next track in the list.
Press and hold one of these buttons for fast
forward or rewind.
Press one of these buttons to go to the
previous / next "Folder" / " Artist" /
"Genre" / "Playlist"* in the list.
Input AUX socket (AUX)
Depending on equipmentConnect a portable device (MP3 player,
etc.) to the auxiliary jack socket using an
audio cable (not supplied).
Any additional devices connected to the system must comply with the standard
* Depending on availability and the type of device used.
applicable to the product and/or the standard
IEC 60950-1.
Press the SOURCE button several times
in succession and select " AUX".
First adjust the volume on your portable device
(to a high level). Then adjust the volume on your
audio system. Controls are managed via the
portable device.
Do not connect the same device to both
the auxiliary jack socket and the USB
port at the same time.
CD player
Insert circular compact discs only.
Some anti-pirating systems, on original discs
or CDs copied using a personal recorder, may
cause faults which are no reflection on the
quality of the original player.
Insert a CD in the player, play begins
automatically.
External CD players connected via the
USB port are not recognised by the
system.
To play a disc which has already been inserted, press the SOURCE button
several times in succession and select " CD".
Press one of the buttons to select a track
on the CD.
Press the LIST button to display the list of
tracks on the CD.
Press and hold one of these buttons for
fast forward or rewind.
Playing an MP3 compilation
Insert an MP3 compilation in the CD player.
The audio equipment searches for all of the
music tracks, which may take anything between
a few seconds and several tens of seconds,
before play begins.
On a single disc, the CD player can read
up to 255 MP3 files spread over 8
directory levels.
However, it is advisable to keep to a limit of
two levels to reduce the access time before
the CD is played.
The folder structure is not observed during
playback.
All of the files are displayed on a single level.
To play a disc which has already been inserted, press the SOURCE button
several times in succession and select " CD".
Press one of the buttons to select a folder
on the CD.
Press one of the buttons to select a track
on the CD.
Press the LIST button to display the list of
directories of the MP3 compilation.
Page 236 of 308
234
Bluetooth® audio system
Press and hold one of these buttons for
fast forward or rewind.
Bluetooth® audio streaming
Streaming allows music files on the telephone to
be played via the vehicle's loudspeakers.
Connect the telephone.
(Refer to the "Pairing a Bluetooth® telephone"
section).
Activate the streaming source by pressing SOURCE.
In certain cases, play of the audio files must be
initiated from the keypad.
Audio files can be selected using the buttons on
the audio system control panel and the steering
mounted controls. The contextual information
can be displayed in the screen.
If the telephone supports the function. The audio
quality depends on the quality of transmission by
the telephone.
Connecting Apple® players
Connect the Apple® player to the USB port using
a suitable cable (not supplied).
Play starts automatically.
Control is via the audio system.
The classifications available are those of the
portable device connected (artists / albums /
genres / playlists).
The version of software in the audio system may
not be compatible with the generation of your
Apple
® player.
Information and advice
The CD player can play files with “.mp3”, “.wma”,
“.wav” and “.aac” file extensions, with a bit rate of
32 to 320 Kbps.
It also supports TAG mode (ID3 tag, WMA TAG).
No other file types (“.mp”4, etc.) can be read.
Files of the ".wma" type should be to the wma 9
standard.
The sampling rates supported are 11, 22, 44 and
48 kHz.
Via the USB port, the system can play audio files
with the extension ".mp3”, “.wma”, “.wav”, “.cbr”, \
“.vbr" with a bit rate of 32 to 320 Kbps.
No other file types (“.mp4”, etc.) can be read.
Files of the ".wma" type should be to the wma 9
standard.
The sampling rates supported are 11, 22, 44 and
48 kHz.
File names should have fewer than 20
characters, avoiding special characters (e.g.
«
? ; ù) so as to avoid any reading or display
problems.
In order to be able to play a burned CDR or
CDRW, select standards ISO 9660 level 1, 2, or
Joliet, if possible, when burning the CD.
If the disc is burned in another format, it may not
be played correctly.
It is recommended that the same burning
standard be always used on an individual disc,
with the lowest speed possible (4x maximum) for
the best acoustic quality.
In the particular case of a multi-session CD, the
Joliet standard is recommended.
To protect the system, do not use a USB hub.
Use only USB memory sticks formatted
FAT 32 (File Allocation Table).
It is recommended that you use genuine
Apple® USB cables for correct operation.
Telephone
Pairing a Bluetooth®
telephone
As a safety measure and because they
require prolonged attention on the part of
the driver, the operations for pairing of the
Bluetooth mobile telephone with the Bluetooth
hands-free system of your audio system must
be carried out with the vehicle stationary
and the ignition on.
Activate the telephone's Bluetooth function and ensure that it is "visible to
all" (telephone configuration).
The services available depend on the network, the SIM card and the
compatibility of the Bluetooth telephone used.
Check the instructions for your telephone and
with your service provider for the services to
which you have access.
Procedure from the telephone
Select the name of the system in the list
of devices detected.
Procedure from the system
Press the MENU button.
Select "Connections".
Confirm with OK.
Select "Search for a device".
Confirm with OK.
A window is displayed with a search in progress
message.
In the list of devices detected, select a telephone
to pair. Only one telephone can be paired at a
time.
Completing the pairing
To complete the pairing, whichever procedure is used (from the telephone or