2020 PEUGEOT 5008 sensor
[x] Cancel search: sensorPage 82 of 308
80
Lighting and visibility
Headlamp beam height
adjustment
Manual adjustment of the
halogen headlamps
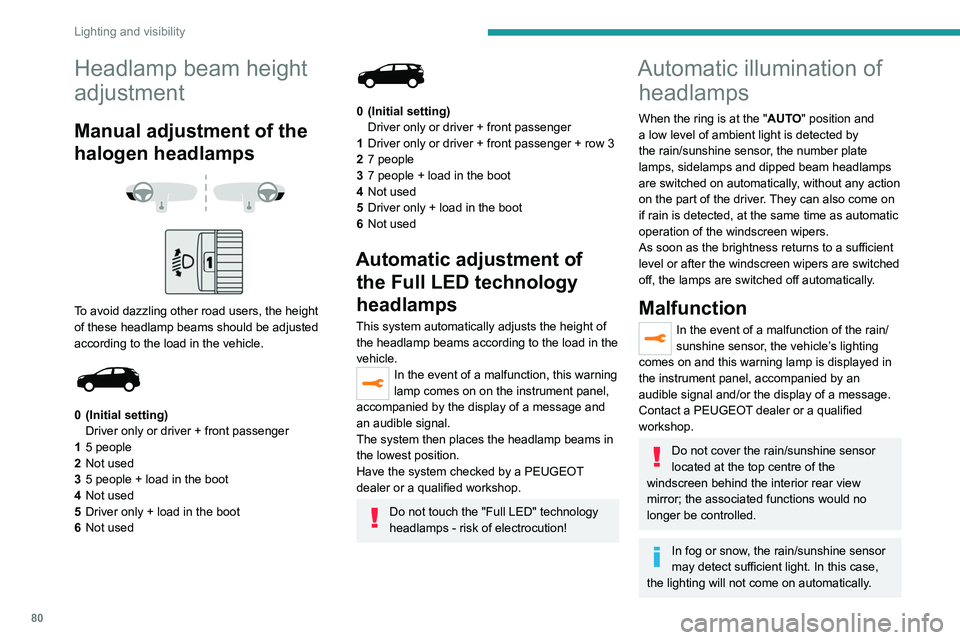
To avoid dazzling other road users, the height
of these headlamp beams should be adjusted
according to the load in the vehicle.
0 (Initial setting) Driver only or driver + front passenger
1 5 people
2 Not used
3 5 people + load in the boot
4 Not used
5 Driver only + load in the boot
6 Not used
0 (Initial setting)
Driver only or driver + front passenger
1 Driver only or driver + front passenger + row 3
2 7 people
3 7 people + load in the boot
4 Not used
5 Driver only + load in the boot
6 Not used
Automatic adjustment of
the Full LED technology
headlamps
This system automatically adjusts the height of
the headlamp beams according to the load in the
vehicle.
In the event of a malfunction, this warning
lamp comes on on the instrument panel,
accompanied by the display of a message and
an audible signal.
The system then places the headlamp beams in
the lowest position.
Have the system checked by a PEUGEOT
dealer or a qualified workshop.
Do not touch the "Full LED" technology
headlamps - risk of electrocution!
Automatic illumination of headlamps
When the ring is at the "AUTO" position and
a low level of ambient light is detected by
the rain/sunshine sensor
, the number plate
lamps,
sidelamps and dipped beam headlamps
are switched on automatically, without any action
on the part of the driver. They can also come on
if rain is detected, at the same time as automatic
operation of the windscreen wipers.
As soon as the brightness returns to a sufficient
level or after the windscreen wipers are switched
off, the lamps are switched off automatically.
Malfunction
In the event of a malfunction of the rain/
sunshine sensor, the vehicle’s lighting
comes on and this warning lamp is displayed in
the instrument panel, accompanied by an
audible signal and/or the display of a message.
Contact a PEUGEOT dealer or a qualified
workshop.
Do not cover the rain/sunshine sensor
located at the top centre of the
windscreen behind the interior rear view
mirror; the associated functions would no
longer be controlled.
In fog or snow, the rain/sunshine sensor
may detect sufficient light. In this case,
the lighting will not come on automatically.
Guide-me-home and
welcome lighting
Guide-me-home lighting
Automatic
With the ring in the "AUTO" position, when the
light is poor, the dipped beam headlamps come
on automatically when the ignition is switched
off.
You can activate/deactivate this function and adjust the guide-me-
home lighting duration in the vehicle
configuration menu.
Manual
► With the ignition off, pull the lighting control
stalk toward you ("headlamp flash") to activate/
deactivate the function.
Manual guide-me-home lighting goes off
automatically after a period of time.
Page 87 of 308
85
Lighting and visibility
4Before removing a windscreen wiper blade
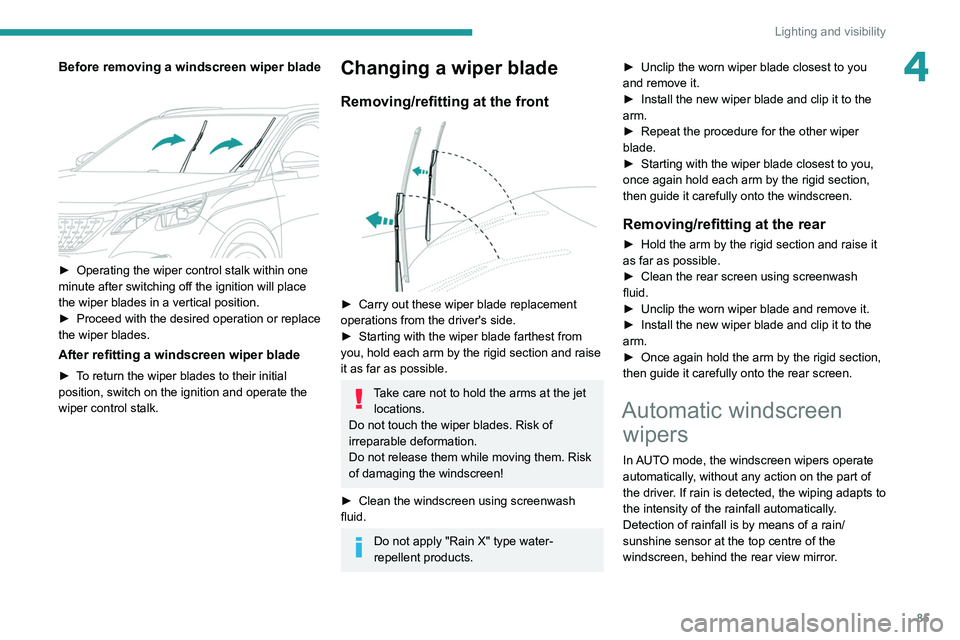
► Operating the wiper control stalk within one
minute after switching off the ignition will place
the wiper blades in a vertical position.
►
Proceed with the desired operation or replace
the wiper blades.
After refitting a windscreen wiper blade
► To return the wiper blades to their initial
position, switch on the ignition and operate the
wiper control stalk.
Changing a wiper blade
Removing/refitting at the front
► Carry out these wiper blade replacement
operations from the driver's side.
►
Starting with the wiper blade farthest from
you, hold each arm by the rigid section and raise
it as far as possible.
Take care not to hold the arms at the jet locations.
Do not touch the wiper blades. Risk of
irreparable deformation.
Do not release them while moving them. Risk
of damaging the windscreen!
►
Clean the windscreen using screenwash
fluid.
Do not apply "Rain X" type water-
repellent products. ►
Unclip the worn wiper blade closest to you
and remove it.
►
Install the new wiper blade and clip it to the
arm.
►
Repeat the procedure for the other wiper
blade.
►
Starting with the wiper blade closest to you,
once again hold each arm by the rigid section,
then guide it carefully onto the windscreen.
Removing/refitting at the rear
► Hold the arm by the rigid section and raise it
as far as possible.
►
Clean the rear screen using screenwash
fluid.
►
Unclip the worn wiper blade and remove it.
►
Install the new wiper blade and clip it to the
arm.
►
Once again hold the arm by the rigid section,
then guide it carefully onto the rear screen.
Automatic windscreen wipers
In AUTO mode, the windscreen wipers operate
automatically, without any action on the part of
the driver. If rain is detected, the wiping adapts to
the intensity of the rainfall automatically.
Detection of rainfall is by means of a rain/
sunshine sensor at the top centre of the
windscreen, behind the rear view mirror.
Page 88 of 308
86
Lighting and visibility
Do not cover the rain/sunshine sensor.
When using an automatic car wash,
switch off the automatic wipers and the
ignition.
In winter, wait until the windscreen is
completely clear of ice before activating the
automatic wipers.
Switching on
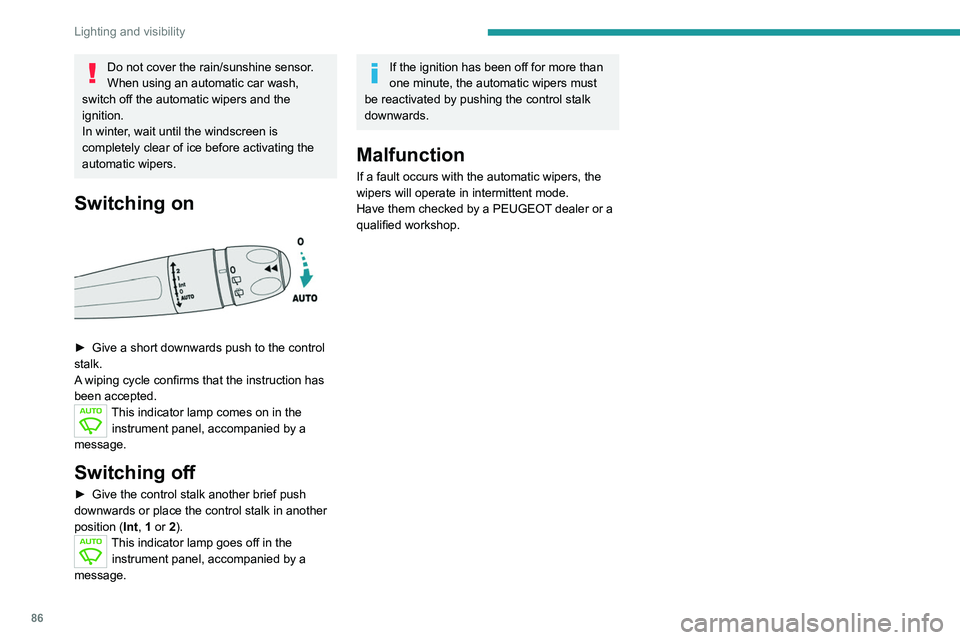
► Give a short downwards push to the control
stalk.
A
wiping cycle confirms that the instruction has
been accepted.
This indicator lamp comes on in the instrument panel, accompanied by a
message.
Switching off
► Give the control stalk another brief push
downwards or place the control stalk in another
position ( Int
, 1 or 2).
This indicator lamp goes off in the instrument panel, accompanied by a
message.
If the ignition has been off for more than
one minute, the automatic wipers must
be reactivated by pushing the control stalk
downwards.
Malfunction
If a fault occurs with the automatic wipers, the
wipers will operate in intermittent mode.
Have them checked by a PEUGEOT dealer or a
qualified workshop.
Page 102 of 308
100
Safety
– a child alone and unattended in a vehicle,
– a child or an animal in a vehicle which is
exposed to the sun, with the windows closed,
– the keys within reach of children inside the
vehicle.
Child seat at the rear
"Forward facing" or "Rearward
facing"
► Move the vehicle's front seat forward and
straighten the backrest so that the legs of the
child in the "forward facing" child seat or the
"rearward facing" child seat itself do not touch
the vehicle's front seat.
► Verify that the backrest of the "forward facing"
child seat is as close as possible to the backrest
of the vehicle's rear seat, and is ideally in contact
with it.
In the presence of a dog guard, it
is essential that booster seat type
Do not sit with the upper part of the body any
nearer to the door than necessary.
The vehicle's front door panels include side
impact sensors.
A damaged door or any unauthorised or
incorrectly executed work (modification or
repair) on the front doors or their interior trim
could compromise the operation of these
sensors - risk of malfunction of the lateral
airbags!
Such work must only be done by a PEUGEOT
dealer or a qualified workshop.
Curtain airbags
Do not fix or attach anything to the roof,
as this could cause head injuries when the
curtain airbag is deployed.
Do not remove the grab handles installed on
the roof, as they play a part in securing the
curtain airbags.
Child seats
The regulations on carrying children are specific to each country. Refer to the
legislation in force in your country.
For maximum safety, please observe the
following recommendations:
–
In accordance with European regulations, all
children under the age of 12 or less than 4
ft 1
1” (150 cm) tall must travel in approved
child seats suited to their weight , on seats
fitted with a seat belt or ISOFIX mountings.
–
Statistically
, the safest seats in your
vehicle for carrying children are the rear
seats.
–
Children weighing less than 9 kg must
travel in the "rear facing" position, whether in
the front or rear of the vehicle.
It is recommended that children travel
on the rear seats of the vehicle:
–
‘rear facing’ up to the age of 3,
–
‘forward facing’ over the age of 3.
Make sure that the seat belt is correctly
positioned and tightened.
For child seats with a support leg, ensure that
the support leg is in firm and steady contact
with the floor.
Advice
An incorrectly installed child seat compromises the child's safety in the
event of an accident.
Ensure that there is no seat belt or seat belt
buckle under the child seat, as this could
destabilise it.
Remember to fasten the seat belts or the
harness of child seats, keeping the slack
relative to the child's body to a minimum,
even for short journeys.
When installing a child seat using the seat
belt, ensure that the seat belt is tightened
correctly on the child seat and that it secures
the child seat firmly on the seat of the vehicle.
If the passenger seat is adjustable, move it
forwards if necessary.
Remove the head restraint before
installing a child seat with a backrest on a
passenger seat.
Ensure that the head restraint is stored or
attached securely to prevent it from being
thrown around the vehicle in the event of
sharp braking. Refit the head restraint once
the child seat has been removed.
Installing a booster seat
The chest part of the seat belt must be
positioned on the child's shoulder without
touching the neck.
Ensure that the lap part of the seat belt
passes correctly over the child's thighs.
Use a booster seat with backrest, equipped
with a belt guide at shoulder level.
Additional protections
To prevent accidental opening of the
doors and rear windows, use the "Child lock".
Take care not to open the rear windows by
more than one third.
To protect young children from the rays of the
sun, fit side blinds on the rear windows.
As a safety precaution, do not leave:
Page 116 of 308
11 4
Driving
Once the state of charge of the battery drops to
the reserve level, the system switches to energy
economy mode : the power supply is cut off
automatically to preserve the remaining battery
charge.
Starting the engine
With the parking brake applied:
► With a manual gearbox, place the gear lever
in neutral then fully depress the clutch pedal.
► With an automatic gearbox, place the gear
selector in mode N or P then fully depress the
brake pedal.
► Insert the key into the ignition switch; the
system recognises the code.
► Unlock the steering column by simultaneously
turning the steering wheel and the key.
In certain cases, you may have to apply
significant force to move the steering
wheel (wheels on full lock, for example).
► With a petrol engine , operate the starter
motor by turning the key to position 3 without
pressing the accelerator pedal, until the engine
starts. Once the engine starts, release the key.
With petrol engines , after a cold start,
preheating the catalytic converter can
cause noticeable engine vibrations for
anything up to 2 minutes while stationary with
the engine running (accelerated idle speed).
If the outside temperature is high, let the
engine idle for 1 to 2 minutes after the
vehicle comes to a stop, to help it to cool.
Before setting off
Nose weight
► Distribute the load in the trailer so that the
heaviest items are as close as possible to the
axle and the nose weight (at the point where it
joins your vehicle) approaches the maximum
permitted without exceeding it.
Tyres
► Check the tyre pressures of the towing
vehicle and of the trailer , observing the
recommended pressures.
Lighting
► Check the electrical signalling on the trailer
and the headlamp beam height of your vehicle.
If a genuine PEUGEOT towing device is
used, the rear parking sensors will be
deactivated automatically to avoid the audible
signal.
When driving
Cooling
Towing a trailer uphill causes the coolant
temperature to increase. The maximum towable
load depends on the gradient and the exterior temperature. The fan’s cooling capacity does not
increase with engine speed.
►
Reduce speed and lower the engine speed to
limit heating up.
In all cases, pay attention to the coolant
temperature.
If this warning lamp and the STOP
warning lamp come on, stop the
vehicle and switch off the engine as soon as
possible.
Brakes
Braking distances are increased when towing a
trailer. To avoid overheating the brakes, the use
of engine braking is recommended.
Side wind
Bear in mind that the vehicle will be more
susceptible to wind when towing.
Anti-theft protection
Electronic immobiliser
The keys include an electronic engine
immobiliser system, whose secret code must be
recognised in order for starting to be possible.
If the system malfunctions, indicated by the
display of a message, the engine will not start.
Contact a PEUGEOT dealer.
Starting / Switching off the
engine with the key
Key ignition switch
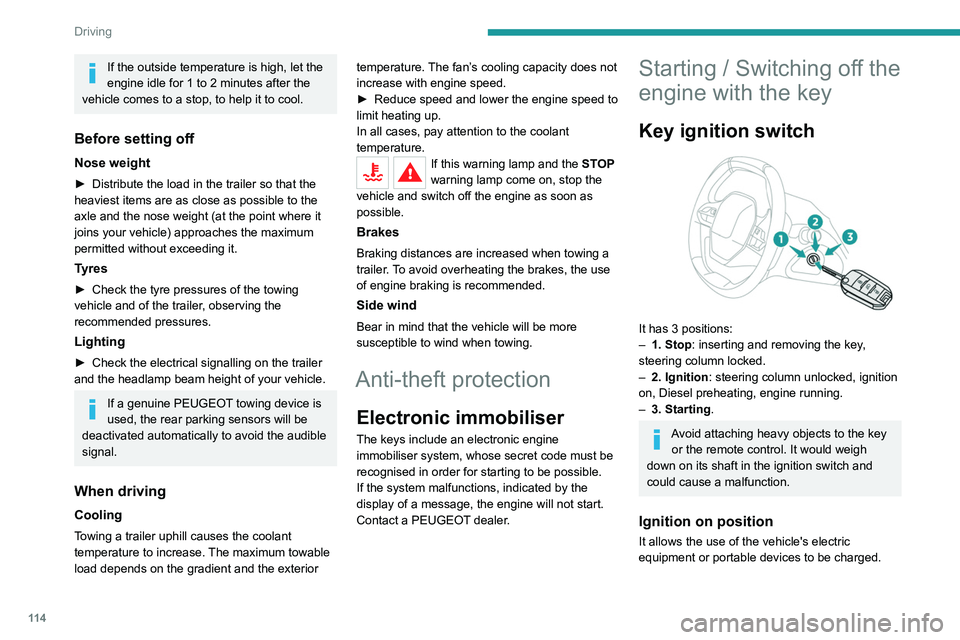
It has 3 positions:
– 1. Stop: inserting and removing the key ,
steering column locked.
–
2. Ignition : steering column unlocked, ignition
on, Diesel preheating, engine running.
–
3. Starting
.
Avoid attaching heavy objects to the key or the remote control. It would weigh
down on its shaft in the ignition switch and
could cause a malfunction.
Ignition on position
It allows the use of the vehicle's electric
equipment or portable devices to be charged.
Page 131 of 308

129
Driving
6Restarting the engine (START mode)
The engine automatically restarts as soon as the
driver indicates the intention of moving off again.
–
W
ith a manual gearbox: with the clutch pedal
fully depressed.
–
W
ith an automatic gearbox:
•
With the selector in position D
or M: with the
brake pedal released.
•
With the selector in position N
and the brake
pedal released: with the selector at D or M.
•
With the selector in position P
and the brake
pedal depressed: with the selector at R, N,
D or M.
Special cases
The engine will restart automatically if all
conditions for operation are met again and in the
following cases.
–
V
ehicle speed exceeds 16 mph (25 km/h) on
2.0 BlueHDi versions with automatic gearbox in
mode D, or 2 mph (3 km/h) on other versions.
–
The electric parking brake is being applied.
In these cases, this indicator lamp flashes
for a few seconds, then goes off.
Malfunctions
In the event of a malfunction, this warning
lamp flashes for a few moments, then
remains on, accompanied by an onscreen
message.
Have the vehicle checked by a PEUGEOT
dealer or a qualified workshop.
The vehicle stalls in STOP mode
All of the instrument panel warning lamps come
on if there is a fault.
►
Switch off the ignition then start the engine
again with the key or the " ST
ART/STOP" button.
The Stop & Start system requires a 12 V
battery of specific technology and
specification.
All work concerning the battery must be
carried out only by a PEUGEOT
dealer or a
qualified workshop.
Under-inflation detection
This system automatically checks the pressures of the tyres while driving.
It compares the information given by the wheel
speed sensors with reference values, which
must be reinitialised every time the tyre
pressures are adjusted or a wheel changed.
The system triggers an alert as soon as it
detects a drop in the inflation pressure of one or
more tyres.
Under-inflation detection does not
replace the need for vigilance on the part
of the driver.
This system does not avoid the need to
regularly check the tyre pressures (including
the spare wheel), especially before a long
journey.
Driving with under-inflated tyres, particularly
in adverse conditions (heavy load, high
speed, long journey):
–
worsens road-holding.
–
lengthens braking distances.
–
causes premature wear of the tyres.
–
increases energy consumption.
The inflation pressures defined for the vehicle can be found on the tyre pressure
label.
For more information on the Identification
markings, refer to the corresponding section.
Checking tyre pressures
This check should be done when the
tyres are "cold" (vehicle stopped for 1 hour or
after a journey of less than 6 miles (10
km) at
moderate speeds).
Otherwise, add 0.3 bar to the pressures
shown on the label.
Snow chains
The system does not have to be
reinitialised after fitting or removing snow
chains.
Under-inflation alert
This is signalled by the fixed illumination of this warning lamp, accompanied by an
Page 133 of 308
131
Driving
6The systems cannot exceed the limits of the
laws of physics.
Driving aids
You should hold the steering wheel
with both hands, always use the interior and
exterior rear view mirrors, always keep the
feet close to the pedals and take a break
every two hours.
Manoeuvring aids
The driver must always check the
surroundings of the vehicle before and during
the whole manoeuvre, in particular using the
mirrors.
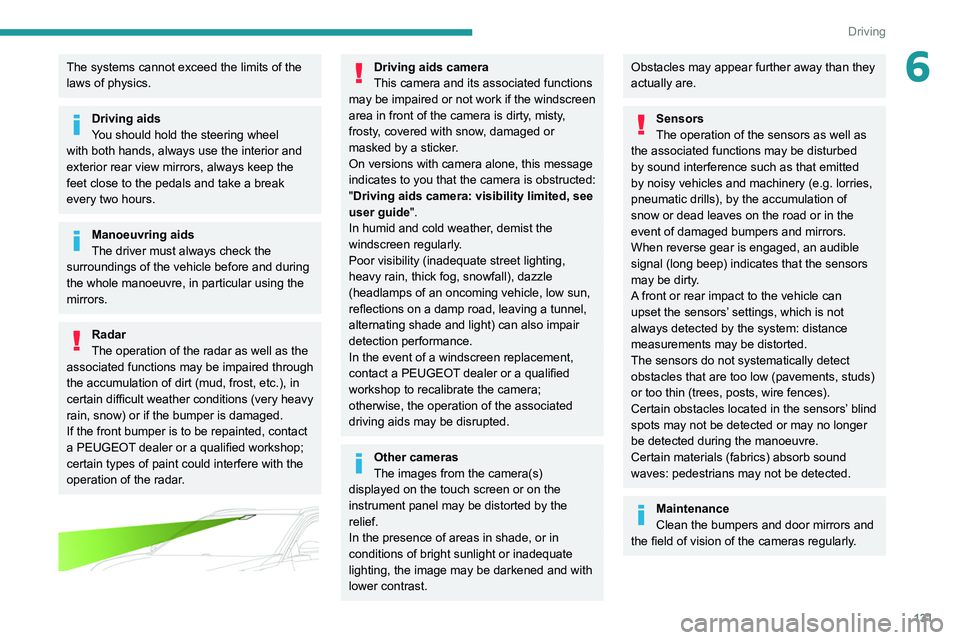
Radar
The operation of the radar as well as the
associated functions may be impaired through
the accumulation of dirt (mud, frost, etc.), in
certain difficult weather conditions (very heavy
rain, snow) or if the bumper is damaged.
If the front bumper is to be repainted, contact
a PEUGEOT dealer or a qualified workshop;
certain types of paint could interfere with the
operation of the radar.
Driving aids camera
This camera and its associated functions
may be impaired or not work if the windscreen
area in front of the camera is dirty, misty,
frosty, covered with snow, damaged or
masked by a sticker.
On versions with camera alone, this message
indicates to you that the camera is obstructed:
"Driving aids camera: visibility limited, see
user guide".
In humid and cold weather, demist the
windscreen regularly.
Poor visibility (inadequate street lighting,
heavy rain, thick fog, snowfall), dazzle
(headlamps of an oncoming vehicle, low sun,
reflections on a damp road, leaving a tunnel,
alternating shade and light) can also impair
detection performance.
In the event of a windscreen replacement,
contact a PEUGEOT dealer or a qualified
workshop to recalibrate the camera;
otherwise, the operation of the associated
driving aids may be disrupted.
Other cameras
The images from the camera(s)
displayed on the touch screen or on the
instrument panel may be distorted by the
relief.
In the presence of areas in shade, or in
conditions of bright sunlight or inadequate
lighting, the image may be darkened and with
lower contrast.
Obstacles may appear further away than they
actually are.
Sensors
The operation of the sensors as well as
the associated functions may be disturbed
by sound interference such as that emitted
by noisy vehicles and machinery (e.g. lorries,
pneumatic drills), by the accumulation of
snow or dead leaves on the road or in the
event of damaged bumpers and mirrors.
When reverse gear is engaged, an audible
signal (long beep) indicates that the sensors
may be dirty.
A front or rear impact to the vehicle can
upset the sensors’ settings, which is not
always detected by the system: distance
measurements may be distorted.
The sensors do not systematically detect
obstacles that are too low (pavements, studs)
or too thin (trees, posts, wire fences).
Certain obstacles located in the sensors’ blind
spots may not be detected or may no longer
be detected during the manoeuvre.
Certain materials (fabrics) absorb sound
waves: pedestrians may not be detected.
Maintenance
Clean the bumpers and door mirrors and
the field of vision of the cameras regularly.
Page 134 of 308
132
Driving
For the system to operate correctly when
you change country, the units for speed in
the instrument panel must be those for the
country you are driving in.
The automatic reading of road signs is a driving aid system and does not always
display speed limits correctly.
The speed limit signs present on the road
always take priority over the display by the
system.
The system is designed to detect signs that
conform to the Vienna Convention on road
signs.
Specific speed limits, such as those for
heavy goods vehicles, are not displayed.
The display of the speed limit in the
instrument panel is updated as you pass
a speed limit sign intended for cars (light
vehicles).
Activation / Deactivation
By default, the system is automatically activated
at every engine start.
It is set via the vehicle
configuration menu.
When washing your vehicle at high pressure,
direct the spray from at least 3M = cm away
from the radar, sensors and cameras.
Mats
The use of mats not approved by
PEUGEOT may interfere with the operation of
the speed limiter or cruise control.
To avoid any risk of jamming the pedals:
►
ensure that the mat is secured correctly
,
►
never fit one mat on top of another
.
Units of speed
Ensure that the units of speed displayed
on the instrument panel (mph or km/h) are
those for the country you are driving in.
If this is not the case, when the vehicle is
stationary, set the display to the required
units of speed so that it complies with what is
authorised locally.
In case of doubt, contact a PEUGEOT dealer
or a qualified workshop.
Memorising speeds
This function, used only for the speed limiter
and programmable cruise control, lets you
save speed settings that will subsequently be
proposed for the purpose of configuring these
two systems.
You can memorise multiple speed settings for
each of the two systems.
By default, some speed settings are already
memorised.
As a safety measure, the driver must only change speed settings when stationary.
Changing a speed setting
Speed settings can be activated,
deactivated, selected and changed in the
Driving
/ Vehicle touch screen menu.
"MEM" button
With this button, you can select a memorised
speed setting to use with the speed limiter or the
programmable cruise control.
For more information on the Speed limiter
or Cruise control, refer to the corresponding
section.
Speed Limit Recognition
and Recommendation
Refer to the General recommendations on the
use of driving and manoeuvring aids .
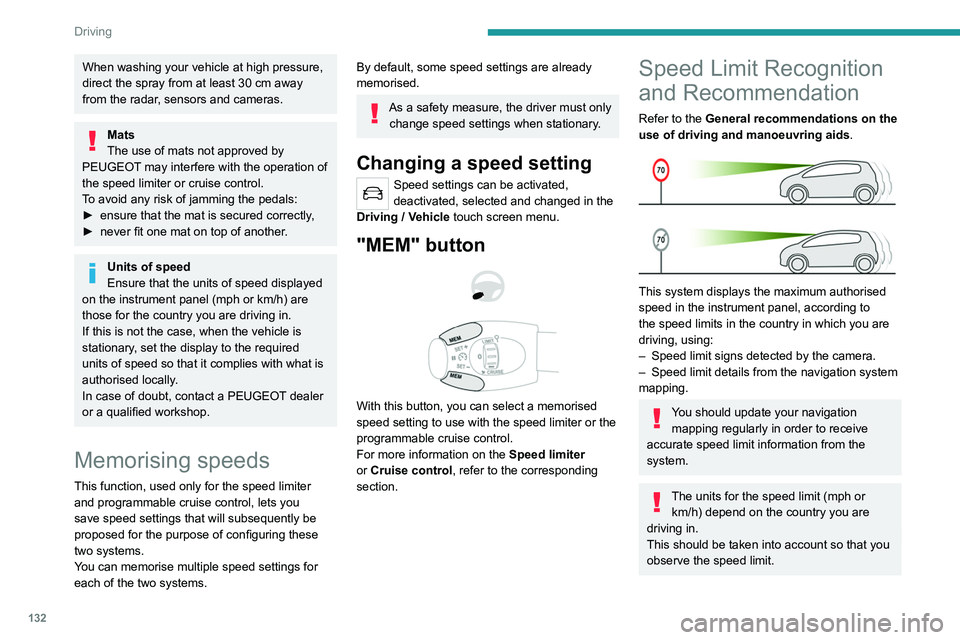
This system displays the maximum authorised
speed in the instrument panel, according to
the speed limits in the country in which you are
driving, using:
–
Speed limit signs detected by the camera.
–
Speed limit details from the navigation system
mapping.
You should update your navigation mapping regularly in order to receive
accurate speed limit information from the
system.
The units for the speed limit (mph or km/h) depend on the country you are
driving in.
This should be taken into account so that you
observe the speed limit.