2020 PEUGEOT 5008 audio
[x] Cancel search: audioPage 69 of 308
67
Ease of use and comfort
3USB socket
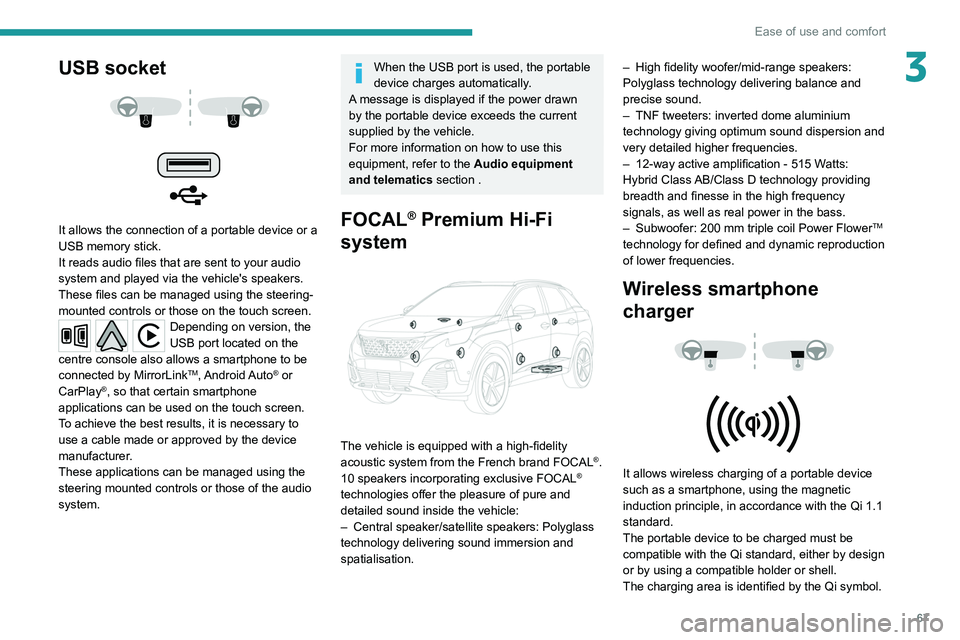
It allows the connection of a portable device or a
USB memory stick.
It reads audio files that are sent to your audio
system and played via the vehicle's speakers.
These files can be managed using the steering-
mounted controls or those on the touch screen.
Depending on version, the
USB port located on the
centre console also allows a smartphone to be
connected by MirrorLink
TM, Android Auto® or
CarPlay®, so that certain smartphone
applications can be used on the touch screen.
To achieve the best results, it is necessary to
use a cable made or approved by the device
manufacturer.
These applications can be managed using the
steering mounted controls or those of the audio
system.
When the USB port is used, the portable
device charges automatically.
A message is displayed if the power drawn
by the portable device exceeds the current
supplied by the vehicle.
For more information on how to use this
equipment, refer to the Audio equipment
and telematics section .
FOCAL® Premium Hi-Fi
system
The vehicle is equipped with a high-fidelity
acoustic system from the French brand FOCAL®.
10 speakers incorporating exclusive FOCAL®
technologies offer the pleasure of pure and
detailed sound inside the vehicle:
–
Central speaker/satellite speakers: Polyglass
technology delivering sound immersion and
spatialisation. –
High fidelity woofer/mid-range speakers:
Polyglass technology delivering balance and
precise sound.
–
TNF tweeters: inverted dome aluminium
technology giving optimum sound dispersion and
very detailed higher frequencies.
–
12-way active amplification - 515 W
atts:
Hybrid Class AB/Class D technology providing
breadth and finesse in the high frequency
signals, as well as real power in the bass.
–
Subwoofer: 200
mm triple coil Power Flower
TM
technology for defined and dynamic reproduction
of lower frequencies.
Wireless smartphone
charger
It allows wireless charging of a portable device
such as a smartphone, using the magnetic
induction principle, in accordance with the Qi 1.1
standard.
The portable device to be charged must be
compatible with the Qi standard, either by design
or by using a compatible holder or shell.
The charging area is identified by the Qi symbol.
Page 117 of 308
11 5
Driving
6Once the state of charge of the battery drops to
the reserve level, the system switches to energy
economy mode : the power supply is cut off
automatically to preserve the remaining battery
charge.
Starting the engine
With the parking brake applied:
► With a manual gearbox, place the gear lever
in neutral then fully depress the clutch pedal.
►
With an
automatic gearbox, place the gear
selector in mode N or P then fully depress the
brake pedal.
►
Insert the key into the ignition switch; the
system recognises the code.
►
Unlock
the steering column by simultaneously
turning the steering wheel and the key.
In certain cases, you may have to apply
significant force to move the steering
wheel (wheels on full lock, for example).
►
With a
petrol engine , operate the starter
motor by turning the key to position 3 without
pressing the accelerator pedal, until the engine
starts. Once the engine starts, release the key.
With petrol engines , after a cold start,
preheating the catalytic converter can
cause
noticeable engine vibrations for
anything up to 2 minutes while stationary with
the engine running (accelerated idle speed).
► With a Diesel engine, turn the key to position
2, ignition on, to operate the engine preheating
system.
Wait until this warning lamp goes off in the
instrument panel, then operate the starter
motor by turning the key to position 3 without
pressing the accelerator pedal, until the engine
starts. Once the engine starts, release the key.
In wintry conditions, the warning lamp
may stay on for a longer period. When
the engine is hot, the warning lamp does not
come on.
If the engine does not start straight away,
switch off the ignition. Wait a few
seconds before operating the starter motor
again. If the engine does not start after a few
attempts, do not keep trying - risk of
damaging the starter motor and the engine.
Contact a PEUGEOT dealer or a qualified
workshop.
In mild conditions, do not leave the
engine at idle to warm up but move off
straight away and drive at moderate speed.
Switching off the engine
► Immobilise the vehicle.
► With the engine at idle, turn the key to
position 1
.
►
Remove the key from the ignition switch.
► To lock the steering column, turn the steering
wheel until it locks.
To facilitate unlocking of the steering column, it is recommended that the
wheels be returned to the straight ahead
position before switching off the engine.
Never switch off the ignition before the
complete immobilisation of the vehicle.
With the engine off, the braking and steering
assistance systems are also cut off - risk of
loss of control of the vehicle!
Check that the parking brake is correctly
applied, particularly on sloping ground.
When leaving the vehicle, keep the key in
your possession and lock the vehicle.
Energy economy mode
After the engine has stopped (position 1. Stop),
for a maximum combined duration of about thirty
minutes, you can still use functions such as the
audio and telematics system, courtesy lamps,
windscreen wipers, dipped beam headlamps,
etc.
For more information on Energy
economy mode, refer to the
corresponding section.
Page 119 of 308
11 7
Driving
6When the vehicle starts in electric mode,
it makes no noise.
Pay particular attention to pedestrians and
cyclists who may not hear the vehicle coming
despite the pedestrian horn.
Switching off
► Immobilise the vehicle, with the engine at
idle.
►
With a
manual gearbox, ideally put the gear
lever into neutral.
►
With an
automatic gearbox, ideally select
mode
P or N.
►
Press the "
START/STOP" button..
►
For hybrid vehicles, before leaving the
vehicle, check that the
READY warning lamp is
switched off.
In some circumstances, it is necessary to turn
the steering wheel to lock the steering column.
On certain versions with an automatic gearbox
(EAT6 / EAT8), the steering column does not
lock, but the gearbox locks in mode P.
If the vehicle is not immobilised, the
engine will not switch off.
With the engine off, the braking and
steering assistance systems are also cut
off - risk of loss of control of the vehicle!
Never leave your vehicle with the
electronic key still inside.
Switching on the ignition
without starting the engine
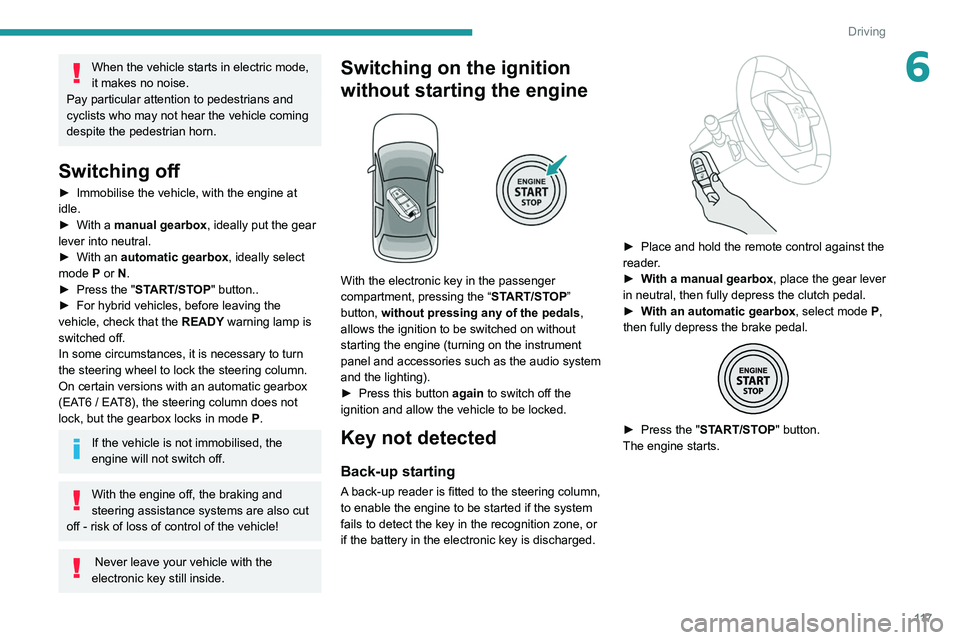
With the electronic key in the passenger
compartment, pressing the “ START/STOP”
button, without pressing any of the pedals ,
allows the ignition to be switched on without
starting the engine (turning on the instrument
panel and accessories such as the audio system
and the lighting).
►
Press this button
again to switch off the
ignition and allow the vehicle to be locked.
Key not detected
Back-up starting
A back-up reader is fitted to the steering column,
to enable the engine to be started if the system
fails to detect the key in the recognition zone, or
if the battery in the electronic key is discharged.
► Place and hold the remote control against the
reader .
►
W
ith a manual gearbox, place the gear lever
in neutral, then fully depress the clutch pedal.
►
W
ith an automatic gearbox, select mode P,
then fully depress the brake pedal.
► Press the " START/STOP" button.
The engine starts.
Page 180 of 308
178
Practical information
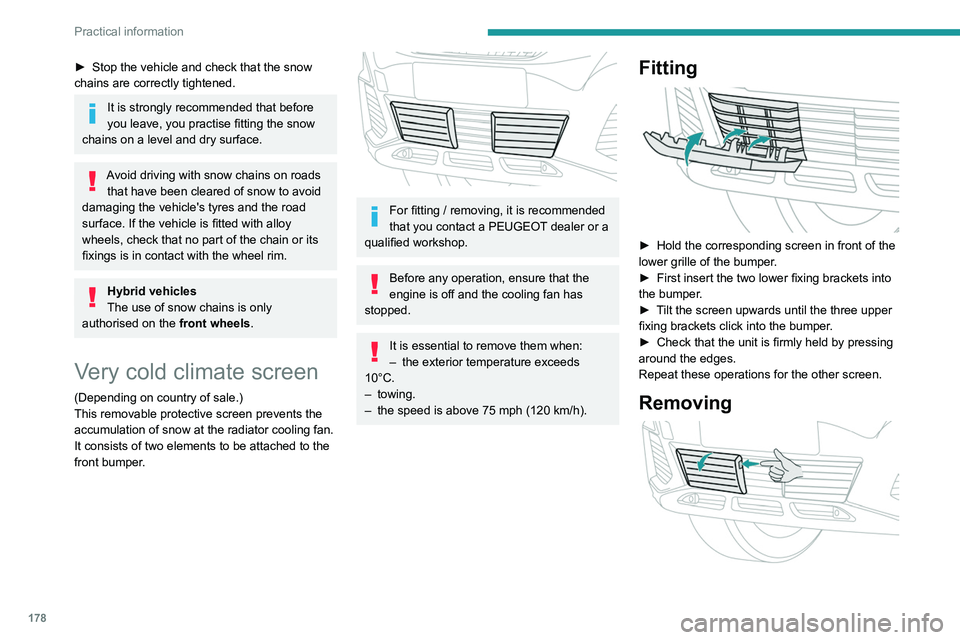
► Insert a finger into the notch in the upper part
of the screen.
► Pull towards you to unclip the unit.
Repeat these operations for the other screen.
Energy economy mode
This system manages the duration of use of
certain functions, in order to conserve a sufficient
level of charge in the battery with the ignition off.
After switching off the engine, you can still
use functions such as the audio and telematic
system, the wipers and the dipped beam
headlamps or courtesy lamps, for a combined
duration of approximately 40 minutes.
Selecting the mode
A confirmation message is displayed when
energy economy mode is entered, and the active
functions are placed on standby.
If a telephone call is in progress at the
time, it will be maintained for around 10
minutes via the audio system’s hands-free
system.
Exiting the mode
These functions are automatically reactivated the
next time the vehicle is used.
To restore the use of these functions
immediately, start the engine and let it run:
– For less than 10 minutes, to use the
equipment for approximately 5 minutes.
► Stop the vehicle and check that the snow
chains are correctly tightened.
It is strongly recommended that before
you leave, you practise fitting the snow
chains on a level and dry surface.
Avoid driving with snow chains on roads that have been cleared of snow to avoid
damaging the vehicle's tyres and the road
surface. If the vehicle is fitted with alloy
wheels, check that no part of the chain or its
fixings is in contact with the wheel rim.
Hybrid vehicles
The use of snow chains is only
authorised on the front wheels.
Very cold climate screen
(Depending on country of sale.)
This removable protective screen prevents the
accumulation of snow at the radiator cooling fan.
It consists of two elements to be attached to the
front bumper.
For fitting / removing, it is recommended
that you contact a PEUGEOT dealer or a
qualified workshop.
Before any operation, ensure that the
engine is off and the cooling fan has
stopped.
It is essential to remove them when:
– the exterior temperature exceeds
10°C.
–
towing.
–
the speed is above 75 mph (120
km/h).
Fitting
► Hold the corresponding screen in front of the
lower grille of the bumper .
►
First insert the two lower fixing brackets into
the bumper
.
►
T
ilt the screen upwards until the three upper
fixing brackets click into the bumper.
►
Check that the unit is firmly held by pressing
around the edges.
Repeat these operations for the other screen.
Removing
Page 181 of 308
179
Practical information
7► Insert a finger into the notch in the upper part
of the screen.
►
Pull towards you to unclip the unit.
Repeat these operations for the other screen.
Energy economy mode
This system manages the duration of use of
certain functions, in order to conserve a sufficient
level of charge in the battery with the ignition off.
After switching off the engine, you can still
use functions such as the audio and telematic
system, the wipers and the dipped beam
headlamps or courtesy lamps, for a combined
duration of approximately 40 minutes.
Selecting the mode
A confirmation message is displayed when
energy economy mode is entered, and the active
functions are placed on standby.
If a telephone call is in progress at the
time, it will be maintained for around 10
minutes via the audio system’s hands-free
system.
Exiting the mode
These functions are automatically reactivated the
next time the vehicle is used.
To restore the use of these functions
immediately, start the engine and let it run:
–
For less than 10 minutes, to use the
equipment for approximately 5 minutes.
– For more than 10 minutes, to use the
equipment for approximately 30 minutes.
Let the engine run for the specified duration to
ensure that the battery charge is sufficient.
T
o recharge the battery, avoid repeatedly or
continuously restarting the engine.
A flat battery prevents the engine from starting.
For more information on the 12
V battery,
refer to the corresponding section.
Load reduction mode
This system manages the use of certain
functions according to the level of charge
remaining in the battery.
When the vehicle is being driven, the load
reduction function temporarily deactivates certain
functions, such as the air conditioning and the
heated rear screen.
The deactivated functions are reactivated
automatically as soon as conditions permit.
Bonnet
Stop & Start
Before doing anything under the bonnet,
you must switch off the ignition to avoid any
risk of injury resulting from an automatic
change to START mode.
Hybrid vehicles
Before any work is carried out under the
bonnet, it is essential to switch off the ignition
and check that the READY indicator lamp is
off in the instrument panel - risk of serious
injury!
The location of the interior bonnet release lever prevents the bonnet being
opened when the left-hand front door is
closed.
When the engine is hot, handle the
exterior safety catch and the bonnet stay
with care (risk of burns), using the protected
area.
When the bonnet is open, take care not to
damage the safety catch.
Do not open the bonnet under very windy
conditions.
Cooling of the engine when stopped
The engine cooling fan may start after
the engine has been switched off.
Page 208 of 308

206
In the event of a breakdown
► Open the glove box.
► Press on the central handle of the fusebox
cover
.
►
Lower the cover completely
.
►
T
ake the tweezers from their housing.
Changing a fuse
Before changing a fuse:
► Identify the cause of the fault and fix it.
►
Stop all power consumption.
►
Immobilise the vehicle and switch the ignition
off.
►
Identify the defective fuse using the current
allocation tables and diagrams.
T
o replace a fuse, it is essential to:
►
Use the special tweezers to extract the fuse
from its housing and check the condition of its
filament.
►
Always replace the failed fuse with a fuse of
the same rating (same colour); use of a different
rating may cause malfunctions - risk of fire!
If the fault recurs after replacing a fuse, have
the electrical system checked by a PEUGEOT
dealer or a qualified workshop.
The fuse allocation tables and the corresponding diagrams are available
from a PEUGEOT dealer or from a qualified
workshop.
The replacement of a fuse not shown in the allocation tables may cause a serious
malfunction of your vehicle. Contact a
PEUGEOT dealer or a qualified workshop.
Good
Failed
Tweezers
Installing electrical accessories
Your vehicle's electrical system is
designed to operate with standard or optional
equipment.
Before installing other electrical equipment
or accessories on your vehicle, contact a
PEUGEOT dealer or a qualified workshop.
PEUGEOT accepts no responsibility for
the cost incurred in repairing your vehicle
or for rectifying malfunctions resulting from
the installation of accessories not supplied
and not recommended by PEUGEOT and not
installed in accordance with specifications, in
particular when the combined power
consumption of all of the additional equipment
connected exceeds 10 milliamperes.
Fuses in the dashboard
The fusebox is located in the lower dashboard
(left-hand side).
To access the fuses, follow the same procedure
as described for accessing the fuse replacement
tools.
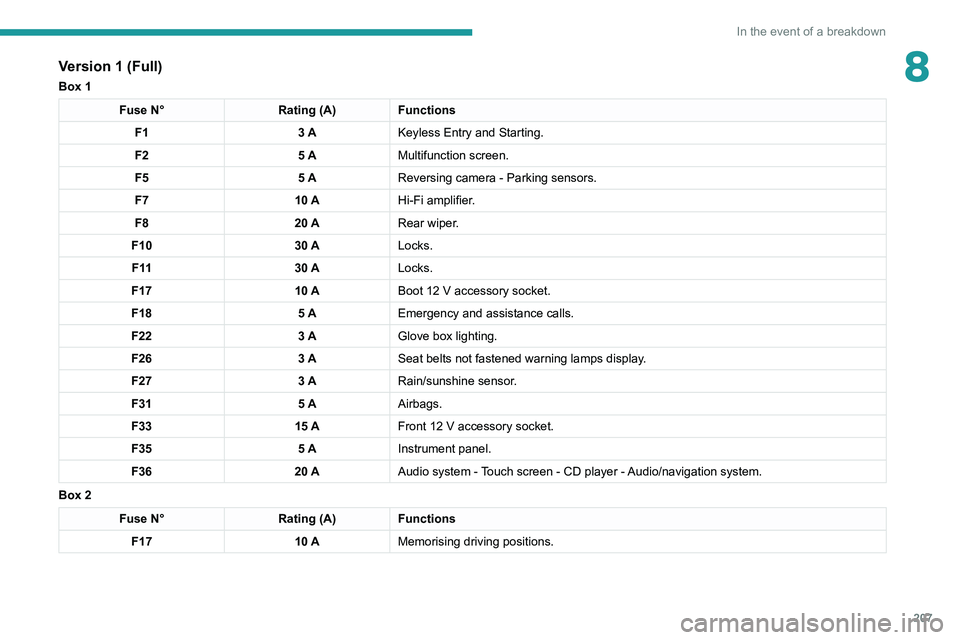
Version 1 (Full)
Box 1
Fuse N° Rating (A)Functions
F1 3 AKeyless Entry and Starting.
F2 5 AMultifunction screen.
F5 5 AReversing camera - Parking sensors.
F7 10 AHi-Fi amplifier.
F8 20 ARear wiper.
F10 30 ALocks.
F 11 30 ALocks.
F17 10 ABoot 12 V accessory socket.
F18 5 AEmergency and assistance calls.
F22 3 AGlove box lighting.
F26 3 ASeat belts not fastened warning lamps display.
F27 3 ARain/sunshine sensor.
F31 5 AAirbags.
F33 15 AFront 12 V accessory socket.
F35 5 AInstrument panel.
F36 20 AAudio system - Touch screen - CD player - Audio/navigation system.
Box 2 Fuse N° Rating (A)Functions
F17 10 AMemorising driving positions.
Page 209 of 308
207
In the event of a breakdown
8Version 1 (Full)
Box 1
Fuse N°Rating (A)Functions
F1 3 AKeyless Entry and Starting.
F2 5 AMultifunction screen.
F5 5 AReversing camera - Parking sensors.
F7 10 AHi-Fi amplifier.
F8 20 ARear wiper.
F10 30 ALocks.
F 11 30 ALocks.
F17 10 ABoot 12
V accessory socket.
F18 5 AEmergency and assistance calls.
F22 3 AGlove box lighting.
F26 3 ASeat belts not fastened warning lamps display.
F27 3 ARain/sunshine sensor.
F31 5 AAirbags.
F33 15 AFront 12
V accessory socket.
F35 5 AInstrument panel.
F36 20 AAudio system - Touch screen - CD player - Audio/navigation system.
Box 2
Fuse N° Rating (A)Functions
F17 10 AMemorising driving positions.
Page 210 of 308
208
In the event of a breakdown
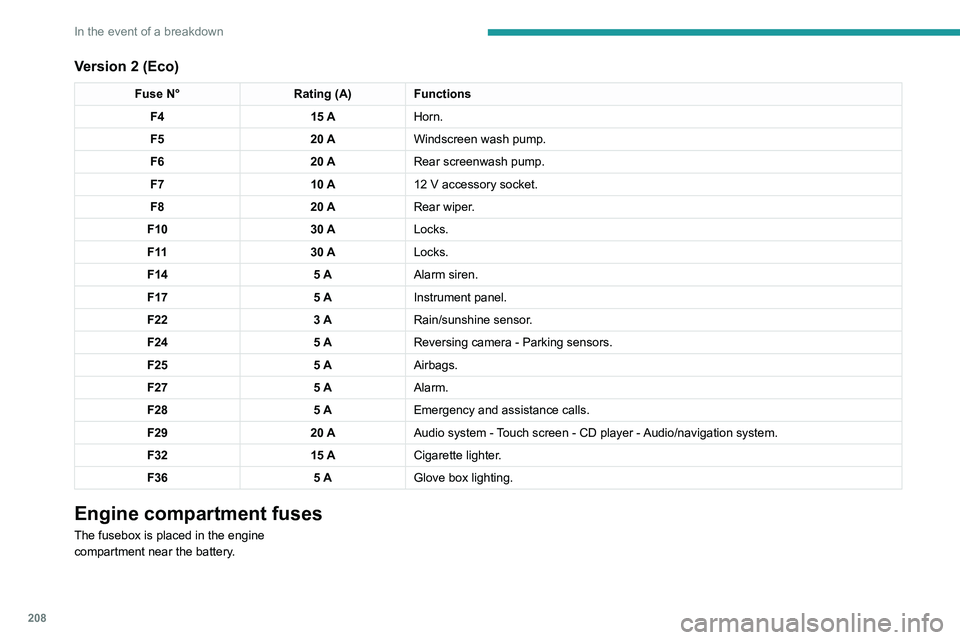
Version 2 (Eco)
Fuse N°Rating (A)Functions
F4 15 AHorn.
F5 20 AWindscreen wash pump.
F6 20 ARear screenwash pump.
F7 10 A12
V accessory socket.
F8 20 ARear wiper.
F10 30 ALocks.
F 11 30 ALocks.
F14 5 AAlarm siren.
F17 5 AInstrument panel.
F22 3 ARain/sunshine sensor.
F24 5 AReversing camera - Parking sensors.
F25 5 AAirbags.
F27 5 AAlarm.
F28 5 AEmergency and assistance calls.
F29 20 AAudio system - Touch screen - CD player - Audio/navigation system.
F32 15 ACigarette lighter.
F36 5 AGlove box lighting.
Engine compartment fuses
The fusebox is placed in the engine
compartment near the battery.
Accessing the fuses
Version 1 (Full)
Box 1
Fuse N° Rating (A)Functions
F14 15 AScreenwash pump.
F15 5 APower steering.
F20 25 AScreenwash pump.
F22 15 AHorn.
F23 15 ARight-hand main beam headlamp.
F24 15 ALeft-hand main beam headlamp.
Box 2 Fuse N° Rating (A)Functions
F8 30 ADiesel emissions control system (AdBlue)
F12 15 AAutomatic gearbox.
F14 5 AAutomatic gearbox.