2020 PEUGEOT 5008 display
[x] Cancel search: displayPage 165 of 308
163
Driving
6When several successive spaces are
found, the vehicle will be directed
towards the last one.
► Move forwards slowly until a message
is displayed, accompanied by an audible
signal, asking you to engage reverse gear
.
► Engage reverse gear, release the
steering wheel and move without
exceeding the speed of 5 mph (7 km/h).
The assisted parking manoeuvre is in progress.
7► Without exceeding 5 mph (7 km/h),
follow the instructions and the warnings
from the "Parking sensors" system, until the end
of the manoeuvre is indicated.
The end of the manoeuvre is confirmed by a message and an audible signal.
The system is deactivated: it is possible to retake
control.
During a "bay" parking manoeuvre, the
Park Assist system is automatically
deactivated once the rear of the vehicle is
within 50
cm of an obstacle.
Assistance with "parallel" parking exit manoeuvres
► To leave a "parallel" parking space, switch
the engine on.
► With the vehicle stationary , select
"Park Assist" in the Driving/Vehicle
touch screen menu to activate the function.
► Press " Exit parking slot " on the touch
screen.
► Operate the direction indicator for the
exit side chosen.
► Engage reverse or forward gear
and release the steering wheel.
The assisted parking manoeuvre is in progress.
5► Without exceeding 3 mph (5 km/h),
move forwards and backwards, aided by
the warnings from the "Parking sensors" system,
until the end of the manoeuvre is indicated.
The manoeuvre is complete when the vehicle's
front wheels are clear of the parking space.
The end of the manoeuvre is confirmed by a message and an audible signal.
The system is deactivated: it is possible to retake
control.
Deactivation
The system is deactivated via the Driving /
V ehicle touch screen menu.
The system is automatically deactivated:
–
when the ignition is switched off.
–
if the engine stalls.
–
if the driver's seat belt is not fastened.
–
on opening the driver's door
.
–
if no manoeuvre is performed within 5 minutes
of selecting the type of manoeuvre.
– after a prolonged stop of the vehicle during a
manoeuvre.
–
if the wheel anti-slip regulation (ASR) is
triggered.
–
if the speed of the vehicle exceeds the
authorised limit.
–
when the driver interrupts the rotation of the
steering wheel.
–
after 4 manoeuvring cycles.
–
if one of the front wheels encounters an
obstacle.
Deactivation is confirmed by a message and an
audible signal.
The driver should then take back control of the
vehicle's steering.
If the system is deactivated during a
manoeuvre, the driver should reactivate
it to repeat the measurement.
Deactivation
The system is automatically deactivated:
– when towing a trailer , connected electrically;
–
if the driver's door is opened;
–
if the speed of the vehicle is above 43 mph
(70 km/h).
T
o switch the system off for a prolonged period,
contact a PEUGEOT dealer or a qualified
workshop.
Page 166 of 308
164
Driving
Malfunctions
If the parking sensor malfunction occurs
during use, indicated by this warning lamp
coming on, it causes the function to deactivate.
In the event of a malfunction, have the system
checked by a PEUGEOT dealer or a qualified
workshop.
In the event of a power steering
malfunction, this warning lamp is
displayed on the instrument panel, accompanied
by a warning message.
You must stop as soon as it is safe to do so.
Contact a PEUGEOT dealer or a qualified
workshop.
Page 173 of 308
171
Practical information
7
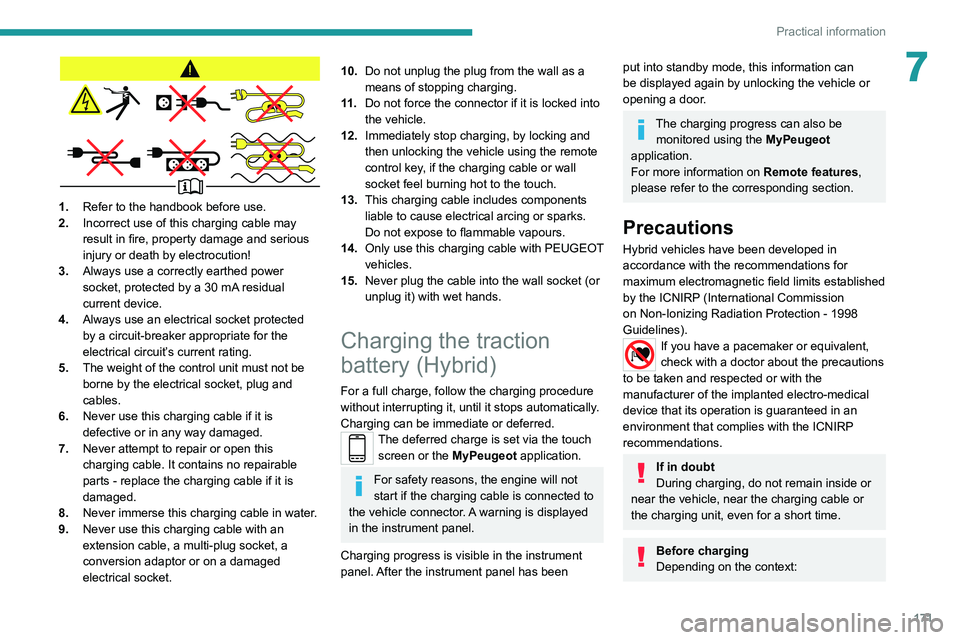
1.Refer to the handbook before use.
2. Incorrect use of this charging cable may
result in fire, property damage and serious
injury or death by electrocution!
3. Always use a correctly earthed power
socket, protected by a 30
mA residual
current device.
4. Always use an electrical socket protected
by a circuit-breaker appropriate for the
electrical circuit’s current rating.
5. The weight of the control unit must not be
borne by the electrical socket, plug and
cables.
6. Never use this charging cable if it is
defective or in any way damaged.
7. Never attempt to repair or open this
charging cable. It contains no repairable
parts - replace the charging cable if it is
damaged.
8. Never immerse this charging cable in water.
9. Never use this charging cable with an
extension cable, a multi-plug socket, a
conversion adaptor or on a damaged
electrical socket.
10.Do not unplug the plug from the wall as a
means of stopping charging.
11 . Do not force the connector if it is locked into
the vehicle.
12. Immediately stop charging, by locking and
then unlocking the vehicle using the remote
control key, if the charging cable or wall
socket feel burning hot to the touch.
13. This charging cable includes components
liable to cause electrical arcing or sparks.
Do not expose to flammable vapours.
14. Only use this charging cable with PEUGEOT
vehicles.
15. Never plug the cable into the wall socket (or
unplug it) with wet hands.
Charging the traction
battery (Hybrid)
For a full charge, follow the charging procedure
without interrupting it, until it stops automatically.
Charging can be immediate or deferred.
The deferred charge is set via the touch
screen or the MyPeugeot application.
For safety reasons, the engine will not
start if the charging cable is connected to
the vehicle connector. A warning is displayed
in the instrument panel.
Charging progress is visible in the instrument
panel. After the instrument panel has been
put into standby mode, this information can
be displayed again by unlocking the vehicle or
opening a door.
The charging progress can also be monitored using the MyPeugeot
application.
For more information on Remote features,
please refer to the corresponding section.
Precautions
Hybrid vehicles have been developed in
accordance with the recommendations for
maximum electromagnetic field limits established
by the ICNIRP (International Commission
on Non-Ionizing Radiation Protection - 1998
Guidelines).
If you have a pacemaker or equivalent,
check with a doctor about the precautions
to be taken and respected or with the
manufacturer of the implanted electro-medical
device that its operation is guaranteed in an
environment that complies with the ICNIRP
recommendations.
If in doubt
During charging, do not remain inside or
near the vehicle, near the charging cable or
the charging unit, even for a short time.
Before charging
Depending on the context:
Page 180 of 308
178
Practical information
► Insert a finger into the notch in the upper part
of the screen.
► Pull towards you to unclip the unit.
Repeat these operations for the other screen.
Energy economy mode
This system manages the duration of use of
certain functions, in order to conserve a sufficient
level of charge in the battery with the ignition off.
After switching off the engine, you can still
use functions such as the audio and telematic
system, the wipers and the dipped beam
headlamps or courtesy lamps, for a combined
duration of approximately 40 minutes.
Selecting the mode
A confirmation message is displayed when
energy economy mode is entered, and the active
functions are placed on standby.
If a telephone call is in progress at the
time, it will be maintained for around 10
minutes via the audio system’s hands-free
system.
Exiting the mode
These functions are automatically reactivated the
next time the vehicle is used.
To restore the use of these functions
immediately, start the engine and let it run:
– For less than 10 minutes, to use the
equipment for approximately 5 minutes.
► Stop the vehicle and check that the snow
chains are correctly tightened.
It is strongly recommended that before
you leave, you practise fitting the snow
chains on a level and dry surface.
Avoid driving with snow chains on roads that have been cleared of snow to avoid
damaging the vehicle's tyres and the road
surface. If the vehicle is fitted with alloy
wheels, check that no part of the chain or its
fixings is in contact with the wheel rim.
Hybrid vehicles
The use of snow chains is only
authorised on the front wheels.
Very cold climate screen
(Depending on country of sale.)
This removable protective screen prevents the
accumulation of snow at the radiator cooling fan.
It consists of two elements to be attached to the
front bumper.
For fitting / removing, it is recommended
that you contact a PEUGEOT dealer or a
qualified workshop.
Before any operation, ensure that the
engine is off and the cooling fan has
stopped.
It is essential to remove them when:
– the exterior temperature exceeds
10°C.
–
towing.
–
the speed is above 75 mph (120
km/h).
Fitting
► Hold the corresponding screen in front of the
lower grille of the bumper .
►
First insert the two lower fixing brackets into
the bumper
.
►
T
ilt the screen upwards until the three upper
fixing brackets click into the bumper.
►
Check that the unit is firmly held by pressing
around the edges.
Repeat these operations for the other screen.
Removing
Page 181 of 308
179
Practical information
7► Insert a finger into the notch in the upper part
of the screen.
►
Pull towards you to unclip the unit.
Repeat these operations for the other screen.
Energy economy mode
This system manages the duration of use of
certain functions, in order to conserve a sufficient
level of charge in the battery with the ignition off.
After switching off the engine, you can still
use functions such as the audio and telematic
system, the wipers and the dipped beam
headlamps or courtesy lamps, for a combined
duration of approximately 40 minutes.
Selecting the mode
A confirmation message is displayed when
energy economy mode is entered, and the active
functions are placed on standby.
If a telephone call is in progress at the
time, it will be maintained for around 10
minutes via the audio system’s hands-free
system.
Exiting the mode
These functions are automatically reactivated the
next time the vehicle is used.
To restore the use of these functions
immediately, start the engine and let it run:
–
For less than 10 minutes, to use the
equipment for approximately 5 minutes.
– For more than 10 minutes, to use the
equipment for approximately 30 minutes.
Let the engine run for the specified duration to
ensure that the battery charge is sufficient.
T
o recharge the battery, avoid repeatedly or
continuously restarting the engine.
A flat battery prevents the engine from starting.
For more information on the 12
V battery,
refer to the corresponding section.
Load reduction mode
This system manages the use of certain
functions according to the level of charge
remaining in the battery.
When the vehicle is being driven, the load
reduction function temporarily deactivates certain
functions, such as the air conditioning and the
heated rear screen.
The deactivated functions are reactivated
automatically as soon as conditions permit.
Bonnet
Stop & Start
Before doing anything under the bonnet,
you must switch off the ignition to avoid any
risk of injury resulting from an automatic
change to START mode.
Hybrid vehicles
Before any work is carried out under the
bonnet, it is essential to switch off the ignition
and check that the READY indicator lamp is
off in the instrument panel - risk of serious
injury!
The location of the interior bonnet release lever prevents the bonnet being
opened when the left-hand front door is
closed.
When the engine is hot, handle the
exterior safety catch and the bonnet stay
with care (risk of burns), using the protected
area.
When the bonnet is open, take care not to
damage the safety catch.
Do not open the bonnet under very windy
conditions.
Cooling of the engine when stopped
The engine cooling fan may start after
the engine has been switched off.
Page 208 of 308

206
In the event of a breakdown
► Open the glove box.
► Press on the central handle of the fusebox
cover
.
►
Lower the cover completely
.
►
T
ake the tweezers from their housing.
Changing a fuse
Before changing a fuse:
► Identify the cause of the fault and fix it.
►
Stop all power consumption.
►
Immobilise the vehicle and switch the ignition
off.
►
Identify the defective fuse using the current
allocation tables and diagrams.
T
o replace a fuse, it is essential to:
►
Use the special tweezers to extract the fuse
from its housing and check the condition of its
filament.
►
Always replace the failed fuse with a fuse of
the same rating (same colour); use of a different
rating may cause malfunctions - risk of fire!
If the fault recurs after replacing a fuse, have
the electrical system checked by a PEUGEOT
dealer or a qualified workshop.
The fuse allocation tables and the corresponding diagrams are available
from a PEUGEOT dealer or from a qualified
workshop.
The replacement of a fuse not shown in the allocation tables may cause a serious
malfunction of your vehicle. Contact a
PEUGEOT dealer or a qualified workshop.
Good
Failed
Tweezers
Installing electrical accessories
Your vehicle's electrical system is
designed to operate with standard or optional
equipment.
Before installing other electrical equipment
or accessories on your vehicle, contact a
PEUGEOT dealer or a qualified workshop.
PEUGEOT accepts no responsibility for
the cost incurred in repairing your vehicle
or for rectifying malfunctions resulting from
the installation of accessories not supplied
and not recommended by PEUGEOT and not
installed in accordance with specifications, in
particular when the combined power
consumption of all of the additional equipment
connected exceeds 10 milliamperes.
Fuses in the dashboard
The fusebox is located in the lower dashboard
(left-hand side).
To access the fuses, follow the same procedure
as described for accessing the fuse replacement
tools.
Version 1 (Full)
Box 1
Fuse N° Rating (A)Functions
F1 3 AKeyless Entry and Starting.
F2 5 AMultifunction screen.
F5 5 AReversing camera - Parking sensors.
F7 10 AHi-Fi amplifier.
F8 20 ARear wiper.
F10 30 ALocks.
F 11 30 ALocks.
F17 10 ABoot 12 V accessory socket.
F18 5 AEmergency and assistance calls.
F22 3 AGlove box lighting.
F26 3 ASeat belts not fastened warning lamps display.
F27 3 ARain/sunshine sensor.
F31 5 AAirbags.
F33 15 AFront 12 V accessory socket.
F35 5 AInstrument panel.
F36 20 AAudio system - Touch screen - CD player - Audio/navigation system.
Box 2 Fuse N° Rating (A)Functions
F17 10 AMemorising driving positions.
Page 209 of 308
207
In the event of a breakdown
8Version 1 (Full)
Box 1
Fuse N°Rating (A)Functions
F1 3 AKeyless Entry and Starting.
F2 5 AMultifunction screen.
F5 5 AReversing camera - Parking sensors.
F7 10 AHi-Fi amplifier.
F8 20 ARear wiper.
F10 30 ALocks.
F 11 30 ALocks.
F17 10 ABoot 12
V accessory socket.
F18 5 AEmergency and assistance calls.
F22 3 AGlove box lighting.
F26 3 ASeat belts not fastened warning lamps display.
F27 3 ARain/sunshine sensor.
F31 5 AAirbags.
F33 15 AFront 12
V accessory socket.
F35 5 AInstrument panel.
F36 20 AAudio system - Touch screen - CD player - Audio/navigation system.
Box 2
Fuse N° Rating (A)Functions
F17 10 AMemorising driving positions.
Page 214 of 308
212
In the event of a breakdown
► At the end of the charging operation, switch
off charger B
before disconnecting the cables
from battery A.
24v 12v
If this label is present, use only a 12 V
charger to avoid causing irreversible
damage to the electrical components related
to the Stop & Start system.
Never try to charge a frozen battery - risk
of explosion!
If the battery has frozen, have it checked by a
PEUGEOT dealer or by a qualified workshop
who will verify that the internal components
have not been damaged and that the case
has not cracked, which would mean a risk of
toxic and corrosive acid leaking.
Some functions, including Stop & Start,
are not available if the battery is not
sufficiently charged.
Disconnecting the battery
In order to maintain an adequate state of charge
for starting the engine, it is recommended that
the battery be disconnected if the vehicle is
taken out of service for a long period. Before disconnecting the battery:
►
Close all openings (doors, boot, windows,
roof).
►
Switch off all electrical consumers (audio
system, wipers, lighting, etc.).
►
Switch off the ignition and wait for 4
minutes.
At the battery, it is only necessary to disconnect
the (+) terminal.
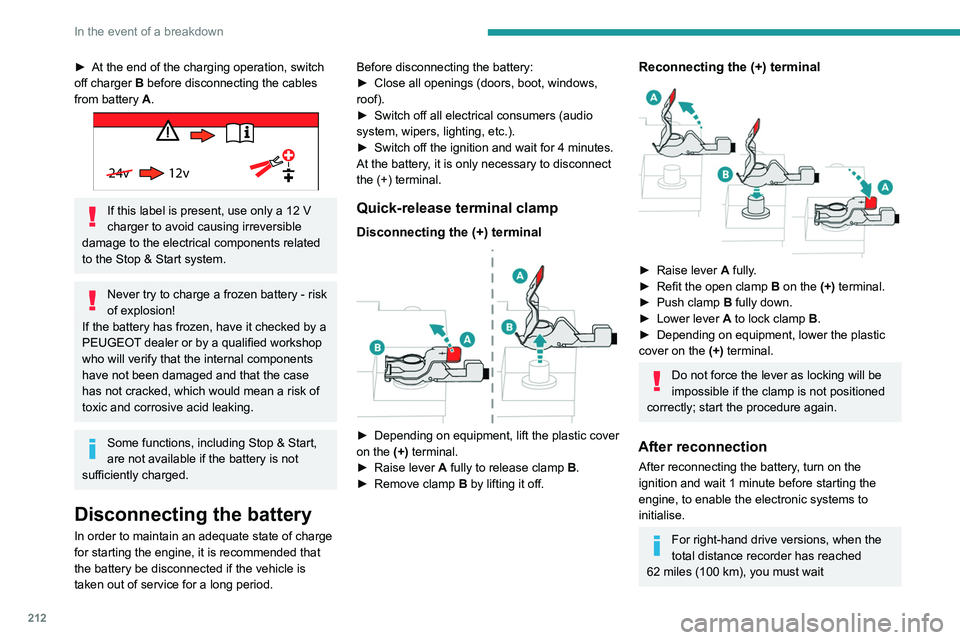
Quick-release terminal clamp
Disconnecting the (+) terminal
► Depending on equipment, lift the plastic cover
on the (+) terminal.
►
Raise lever
A
fully to release clamp
B
.
►
Remove clamp
B
by lifting it off.
Reconnecting the (+) terminal
► Raise lever A fully.
► Refit the open clamp B on the (+) terminal.
►
Push clamp
B fully down.
►
Lower lever
A
to lock clamp B.
►
Depending on equipment, lower the plastic
cover on the
(+) terminal.
Do not force the lever as locking will be
impossible if the clamp is not positioned
correctly; start the procedure again.
After reconnection
After reconnecting the battery, turn on the
ignition and wait 1 minute before starting the
engine, to enable the electronic systems to
initialise.
For right-hand drive versions, when the
total distance recorder has reached
62
miles (100 km), you must wait
approximately 15 minutes before starting the
engine.
If minor problems nevertheless persist following
this operation, contact a PEUGEOT dealer or a
qualified workshop.
Referring to the relevant section, reset certain
equipment:
– Remote control key or electronic key
(depending on version).
– Sunroof and electric sun blind.
– Electric windows.
– Date and time.
– Preset radio stations.
After reconnection of the battery, the
“Collision risk detection system fault”
message is displayed on the instrument panel
when the ignition is switched on. This
operation is perfectly normal. The message
will disappear while driving.
The Stop & Start system may not be operational during the trip following the
first engine start.
In this case, the system will only be available
again after a continuous period with the
vehicle immobilised, the duration of which
depends on the exterior temperature and the
state of charge of the battery (up to about 8
hours).