2020 PEUGEOT 3008 boot
[x] Cancel search: bootPage 77 of 308
75
Ease of use and comfort
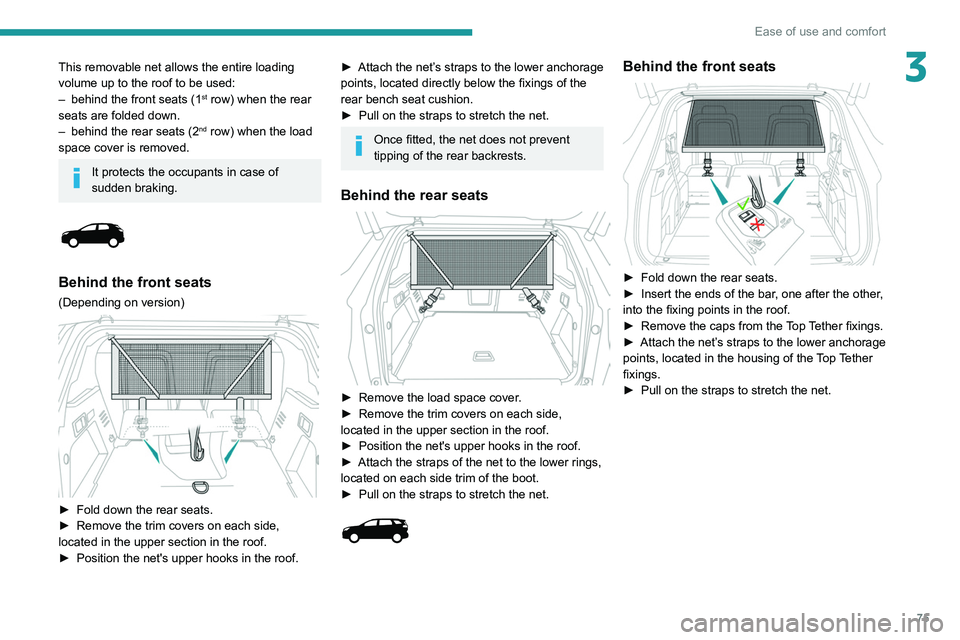
3This removable net allows the entire loading
volume up to the roof to be used:
–
behind the front seats (1st row) when the rear
seats are folded down.
–
behind the rear seats (2nd row) when the load
space cover is removed.
It protects the occupants in case of
sudden braking.
Behind the front seats
(Depending on version)
► Fold down the rear seats.
► Remove the trim covers on each side,
located in the upper section in the roof.
►
Position the net's upper hooks in the roof.
► Attach the net’s straps to the lower anchorage
points, located directly below the fixings of the
rear bench seat cushion.
►
Pull on the straps to stretch the net.
Once fitted, the net does not prevent
tipping of the rear backrests.
Behind the rear seats
► Remove the load space cover .
► Remove the trim covers on each side,
located in the upper section in the roof.
►
Position the net's upper hooks in the roof.
►
Attach the straps of the net to the lower rings,
located on each side trim of the boot.
►
Pull on the straps to stretch the net.
Behind the front seats
► Fold down the rear seats.
► Insert the ends of the bar , one after the other,
into the fixing points in the roof.
►
Remove the caps from the
Top Tether fixings.
►
Attach
the net’s straps to the lower anchorage
points, located in the housing of the Top Tether
fixings.
►
Pull on the straps to stretch the net.
Page 78 of 308
76
Ease of use and comfort
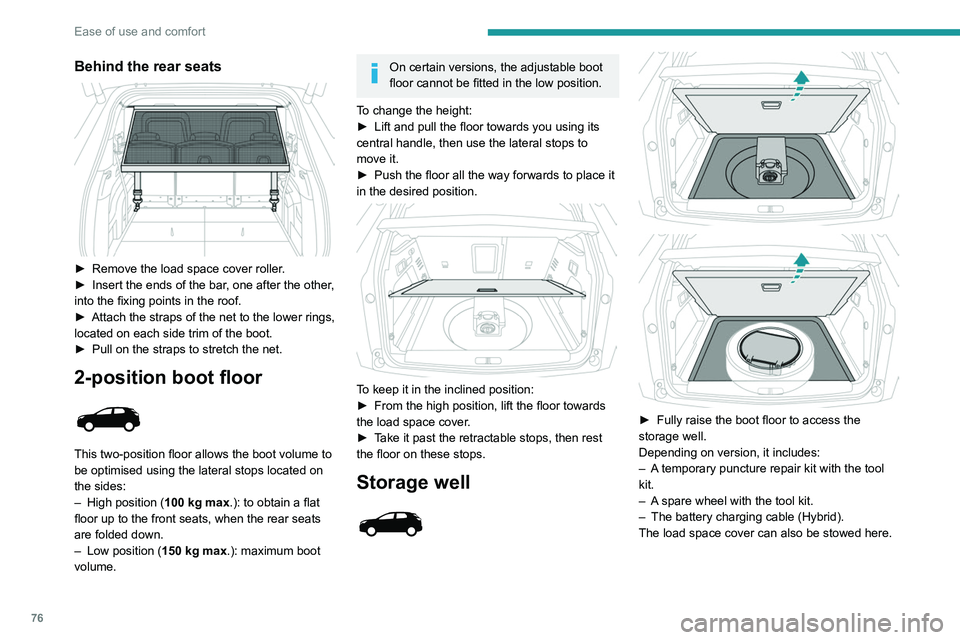
Behind the rear seats
► Remove the load space cover roller.
► Insert the ends of the bar , one after the other,
into the fixing points in the roof.
►
Attach the straps of the net to the lower rings,
located on each side trim of the boot.
►
Pull on the straps to stretch the net.
2-position boot floor
This two-position floor allows the boot volume to
be optimised using the lateral stops located on
the sides:
–
High position ( 100
kg max.): to obtain a flat
floor up to the front seats, when the rear seats
are folded down.
–
Low position ( 150
kg max.): maximum boot
volume.
On certain versions, the adjustable boot
floor cannot be fitted in the low position.
To change the height:
►
Lift and pull the floor towards you using its
central handle, then use the lateral stops to
move it.
►
Push the floor all the way forwards to place it
in the desired position.
To keep it in the inclined position:
► From the high position, lift the floor towards
the load space cover
.
►
T
ake it past the retractable stops, then rest
the floor on these stops.
Storage well
► Fully raise the boot floor to access the
storage well.
Depending on version, it includes:
–
A
temporary puncture repair kit with the tool
kit.
–
A
spare wheel with the tool kit.
–
The battery charging cable (Hybrid).
The load space cover can also be stowed here.
12 V accessory socket
► To connect a 12 V accessory (maximum
power: 120 W), lift the cover and plug in a
suitable adaptor.
► Switch on the ignition.
The connection of an electrical device
not approved by PEUGEOT, such as a
USB charger, may adversely affect the
operation of vehicle electrical systems,
causing faults such as poor radio reception or
interference with displays in the screens.
Boot lamp
It comes on automatically when the boot is
opened and goes off automatically when the
boot is closed.
The lighting time varies according to the
circumstances:
– When the ignition is off, approximately 10
minutes.
– In energy saving mode, approximately 30
seconds.
– With the engine running, unlimited.
Page 79 of 308
77
Ease of use and comfort
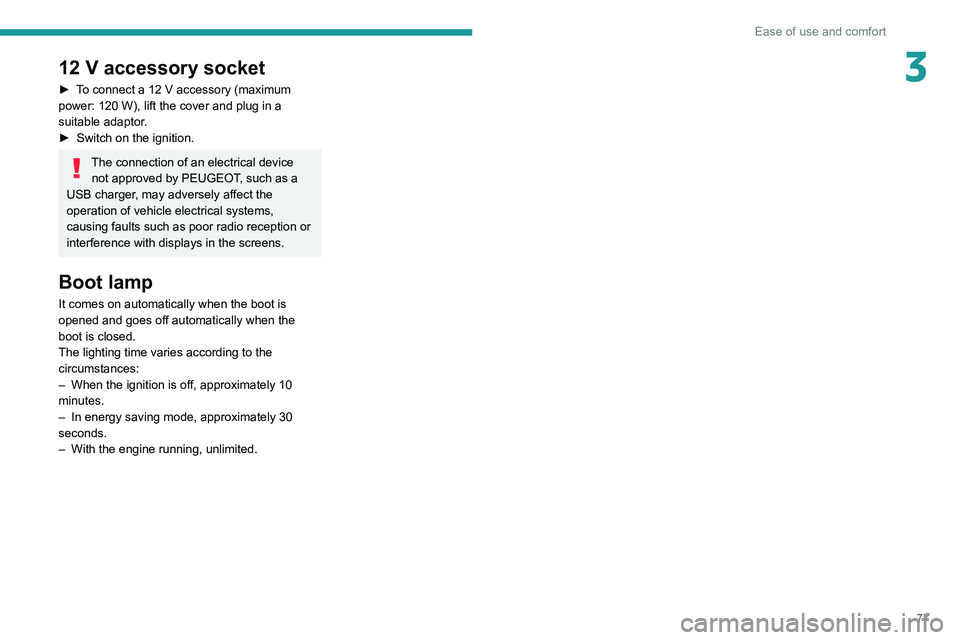
312 V accessory socket
► To connect a 12 V accessory (maximum
power: 120 W), lift the cover and plug in a
suitable adaptor.
►
Switch on the ignition.
The connection of an electrical device not approved by PEUGEOT, such as a
USB charger, may adversely affect the
operation of vehicle electrical systems,
causing faults such as poor radio reception or
interference with displays in the screens.
Boot lamp
It comes on automatically when the boot is
opened and goes off automatically when the
boot is closed.
The lighting time varies according to the
circumstances:
–
When the ignition is off, approximately 10
minutes.
–
In energy saving mode, approximately 30
seconds.
–
With the engine running, unlimited.
Page 82 of 308
80
Lighting and visibility
Headlamp beam height
adjustment
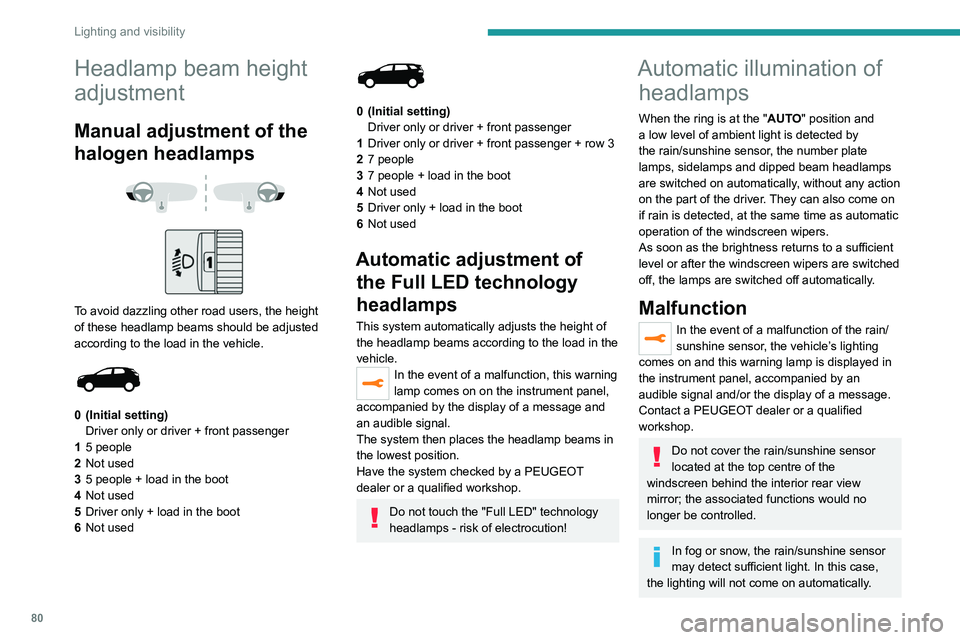
Manual adjustment of the
halogen headlamps
To avoid dazzling other road users, the height
of these headlamp beams should be adjusted
according to the load in the vehicle.
0 (Initial setting) Driver only or driver + front passenger
1 5 people
2 Not used
3 5 people + load in the boot
4 Not used
5 Driver only + load in the boot
6 Not used
0 (Initial setting)
Driver only or driver + front passenger
1 Driver only or driver + front passenger + row 3
2 7 people
3 7 people + load in the boot
4 Not used
5 Driver only + load in the boot
6 Not used
Automatic adjustment of
the Full LED technology
headlamps
This system automatically adjusts the height of
the headlamp beams according to the load in the
vehicle.
In the event of a malfunction, this warning
lamp comes on on the instrument panel,
accompanied by the display of a message and
an audible signal.
The system then places the headlamp beams in
the lowest position.
Have the system checked by a PEUGEOT
dealer or a qualified workshop.
Do not touch the "Full LED" technology
headlamps - risk of electrocution!
Automatic illumination of headlamps
When the ring is at the "AUTO" position and
a low level of ambient light is detected by
the rain/sunshine sensor
, the number plate
lamps,
sidelamps and dipped beam headlamps
are switched on automatically, without any action
on the part of the driver. They can also come on
if rain is detected, at the same time as automatic
operation of the windscreen wipers.
As soon as the brightness returns to a sufficient
level or after the windscreen wipers are switched
off, the lamps are switched off automatically.
Malfunction
In the event of a malfunction of the rain/
sunshine sensor, the vehicle’s lighting
comes on and this warning lamp is displayed in
the instrument panel, accompanied by an
audible signal and/or the display of a message.
Contact a PEUGEOT dealer or a qualified
workshop.
Do not cover the rain/sunshine sensor
located at the top centre of the
windscreen behind the interior rear view
mirror; the associated functions would no
longer be controlled.
In fog or snow, the rain/sunshine sensor
may detect sufficient light. In this case,
the lighting will not come on automatically.
Guide-me-home and
welcome lighting
Guide-me-home lighting
Automatic
With the ring in the "AUTO" position, when the
light is poor, the dipped beam headlamps come
on automatically when the ignition is switched
off.
You can activate/deactivate this function and adjust the guide-me-
home lighting duration in the vehicle
configuration menu.
Manual
► With the ignition off, pull the lighting control
stalk toward you ("headlamp flash") to activate/
deactivate the function.
Manual guide-me-home lighting goes off
automatically after a period of time.
Page 98 of 308

96
Safety
Not fastened at the rear
When the ignition is switched on, with the engine
running or the vehicle moving at a speed below
12 mph (20 km/h), the warning lamp and the
corresponding indicator lamps light up for around
thirty seconds, if one or more rear seat belts are
not fastened.
Unfastened
After the ignition is switched on, the warning
lamp and the corresponding indicator lamps light
up if the driver and/or one or more passengers
unfasten their seat belts.
At a speed greater than 12 mph (20 km/h), these
warning lamps flash, accompanied by an audible
signal for approximately two minutes. After this
time, these warning lamps remain on as long as
the seatbelts are not refastened.
Advice
The driver must ensure that passengers use the seat belts correctly and that they
are all fastened before setting off.
Wherever seated in the vehicle, you must
always fasten the seat belt, even for short
journeys.
Do not interchange the seat belt buckles, as
they will not fulfil their role fully.
Before and after use, ensure that the seat belt
is reeled in correctly.
Installation
► Pull the strap and insert tongue A into the
right-hand buckle.
►
Insert tongue
B into the left-hand buckle.
►
Check that each buckle is fastened correctly
by pulling the strap.
Removal and storage
► Press the red button on buckle B , then the
black button on buckle A.
►
Guide the strap as it reels in and take tongue
B
, then A to the magnet at the anchoring point
on the roof.
Rear third row seat belts
Installation
► Pull the strap then insert the tongue in the
buckle.
►
Check that the seat belt is fastened correctly
by pulling the strap.
Removal and storage
► Press the red button on the buckle.
► Guide the seat belt as it reels in.
►
Flatten the seat belt strap against the boot
side trim using the magnetic retaining system.
Ensure seat belts are always fixed when
not in use.
Seat belt not fastened /
unfastened alerts
Not fastened / unfastened warning lamp
It comes on in red in both the instrument panel
and the front passenger airbag and seat belts
warning lamps display, once the system detects
that a seat belt is not fastened or is unfastened.
Seat belts not fastened / unfastened
identification warning lamp
The red indicator lamps on the display indicate
the location of the seat belts which are not
fastened or unfastened.
Not fastened at the front
When the ignition is switched on, the warning
lamp and the corresponding indicator lamps light
up if the driver and/or the front passenger have
not fastened their seat belts.
At a speed greater than 12 mph (20 km/h),
these warning lamps flash, accompanied by an
increasing audible signal for approximately two
minutes. After two minutes, these warning lamps
remain on as long as the front seatbelts are not
fastened.
Page 144 of 308
142
Driving
Malfunction
If the cruise control malfunctions,
dashes are displayed instead of
the cruise control speed setting.
If this warning lamp comes on,
accompanied by an alert message and an
audible signal, this confirms the malfunction.
Have the system checked by a PEUGEOT
dealer or a qualified workshop.
Lane positioning assist
Refer to the General recommendations on the
use of driving and manoeuvring aids .
Only available on versions with electric
automatic gearbox (Hybrid).
Using a camera located at the top of the
windscreen, the system identifies lane markings
and steers the vehicle inside this lane, keeping it
in the lateral position chosen by the driver.
This function is primarily suitable for driving on
motorways and main roads.
Conditions for operation
– Adaptive Cruise Control active.
Stop & Go function
"To move off again, press the
accelerator pedal or press
the
II
button” (button 4).
The system has brought the vehicle to a
complete stop.
Within 3 seconds, the vehicle gradually and
automatically begins moving again.
After 3 seconds, the driver must accelerate or
press button 4 to move off again.
While the vehicle is immobilised, the
following recommendations apply:
–
The driver should not leave the vehicle.
–
Do not open the boot.
–
Do not drop off or pick up passengers.
–
Do not engage reverse gear
.
When moving off again, watch out for
cyclists, pedestrians and animals, as
they may not be detected properly.
Operating limits
Cruise control operates by day and night, in fog
or moderate rainfall.
Certain situations cannot be managed by the
system and require driver intervention.
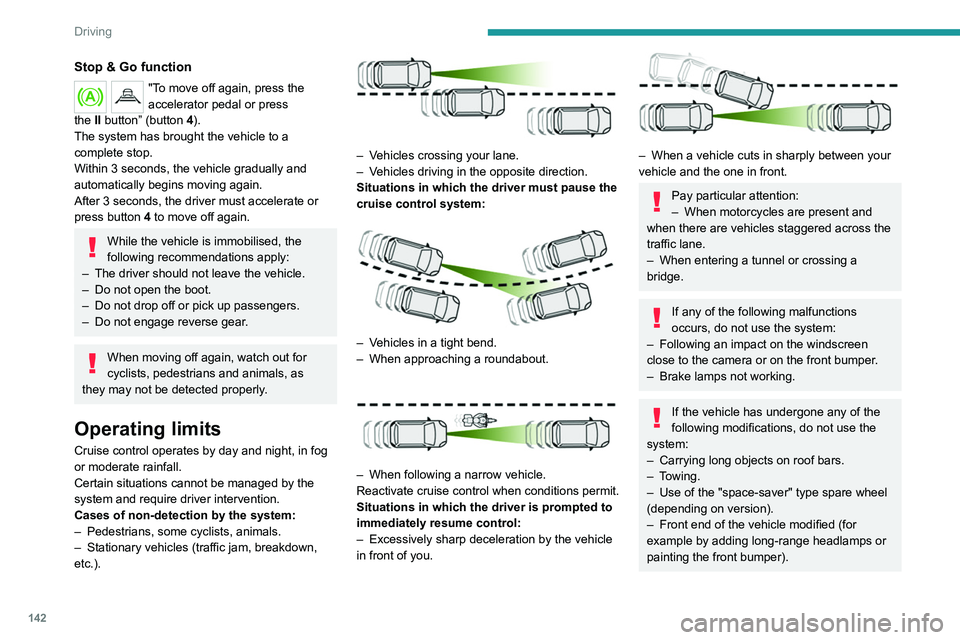
Cases of non-detection by the system:
–
Pedestrians, some cyclists, animals.
–
Stationary vehicles (traffic jam, breakdown,
etc.).
– Vehicles crossing your lane.
– V ehicles driving in the opposite direction.
Situations in which the driver must pause the
cruise control system:
– Vehicles in a tight bend.
– When approaching a roundabout.
– When following a narrow vehicle.
Reactivate cruise control when conditions permit.
Situations in which the driver is prompted to
immediately resume control:
–
Excessively sharp deceleration by the vehicle
in front of you.
– When a vehicle cuts in sharply between your
vehicle and the one in front.
Pay particular attention:
– When motorcycles are present and
when there are vehicles staggered across the
traffic lane.
–
When entering a tunnel or crossing a
bridge.
If any of the following malfunctions
occurs, do not use the system:
–
Following an impact on the windscreen
close to the camera or on the front bumper
.
–
Brake lamps not working.
If the vehicle has undergone any of the
following modifications, do not use the
system:
–
Carrying long objects on roof bars.
–
Towing.
–
Use of the "space-saver" type spare wheel
(depending on version).
–
Front end of the vehicle modified (for
example by adding long-range headlamps or
painting the front bumper).
Page 158 of 308
156
Driving
Contact a PEUGEOT dealer or a qualified
workshop to have the system checked.
Visiopark 1 - Visiopark 2
Refer to the General recommendations on the
use of driving and manoeuvring aids.
With the engine running, these systems allow
views of your vehicle’s close surroundings to
be displayed on the touch screen using one
camera for the Visiopark 1 and two cameras for
Visiopark 2.
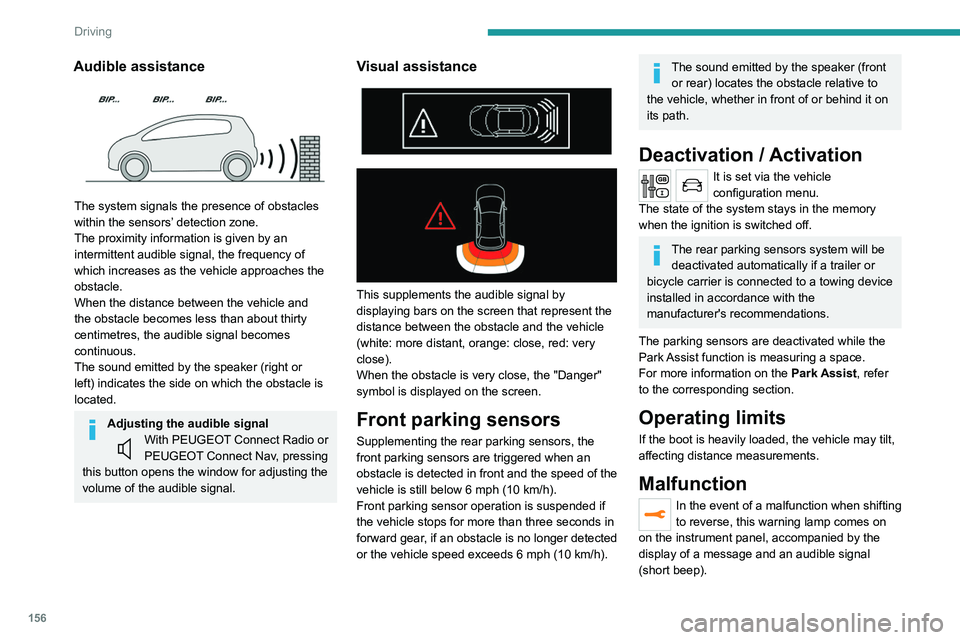
Audible assistance
The system signals the presence of obstacles
within the sensors’ detection zone.
The proximity information is given by an
intermittent audible signal, the frequency of
which increases as the vehicle approaches the
obstacle.
When the distance between the vehicle and
the obstacle becomes less than about thirty
centimetres, the audible signal becomes
continuous.
The sound emitted by the speaker (right or
left) indicates the side on which the obstacle is
located.
Adjusting the audible signalWith PEUGEOT Connect Radio or
PEUGEOT Connect Nav, pressing
this button opens the window for adjusting the
volume of the audible signal.
Visual assistance
This supplements the audible signal by
displaying bars on the screen that represent the
distance between the obstacle and the vehicle
(white: more distant, orange: close, red: very
close).
When the obstacle is very close, the "Danger"
symbol is displayed on the screen.
Front parking sensors
Supplementing the rear parking sensors, the
front parking sensors are triggered when an
obstacle is detected in front and the speed of the
vehicle is still below 6 mph (10 km/h).
Front parking sensor operation is suspended if
the vehicle stops for more than three seconds in
forward gear, if an obstacle is no longer detected
or the vehicle speed exceeds 6
mph (10 km/h).
The sound emitted by the speaker (front or rear) locates the obstacle relative to
the vehicle, whether in front of or behind it on
its path.
Deactivation / Activation
It is set via the vehicle
configuration menu.
The state of the system stays in the memory
when the ignition is switched off.
The rear parking sensors system will be deactivated automatically if a trailer or
bicycle carrier is connected to a towing device
installed in accordance with the
manufacturer's recommendations.
The parking sensors are deactivated while the
Park Assist function is measuring a space.
For more information on the Park Assist, refer
to the corresponding section.
Operating limits
If the boot is heavily loaded, the vehicle may tilt,
affecting distance measurements.
Malfunction
In the event of a malfunction when shifting
to reverse, this warning lamp comes on
on the instrument panel, accompanied by the
display of a message and an audible signal
(short beep).
Page 178 of 308
176
Practical information
Fitting directly to the roof
You must only attach the transverse bars to
the four fixing points located on the roof frame.
These points are concealed by the vehicle doors
when the doors are closed.
The roof bar fixings have a stud which must be
inserted into the opening of each fixing point.
Maximum load distributed over the
transverse roof bars, for a loading height
not exceeding 40 cm (except bicycle carrier):
80 kg.
As this value may change, please verify the
maximum load quoted in the guide supplied
with the roof bars.
If the height exceeds 40 cm, adapt the speed
of the vehicle to the profile of the road to
avoid damaging the roof bars and the fixings
on the vehicle.
► Insert the key into the lock 7.
► Open the lock using the key .
► Hold the towball 5 firmly in one hand; using
the other hand, pull and turn the wheel 6 fully in
a clockwise direction; do not release the wheel.
►
Extract the towball from the bottom of its
carrier
1.
►
Release the wheel; it automatically stops in
the unlocked position (position B
).
► Refit the protective plug 2 to the carrier 1.
► Stow the towball in its bag away from knocks
and dirt.
Maintenance
Correct operation is only possible if the towball
and its carrier are kept clean.
Before cleaning the vehicle with a high-pressure
jet wash, the towball must be removed and the
protective plug fitted to the carrier.
Affix the enclosed label in a clearly visible location, close to the carrier or in the
boot.
Contact a PEUGEOT dealer or a qualified
workshop for any work on the towball system.
Roof bars
As a safety measure and to avoid damaging the roof, it is essential to use
the transverse bars approved for the vehicle.
Observe the instructions on fitting and use
contained in the guide supplied with the roof
bars.
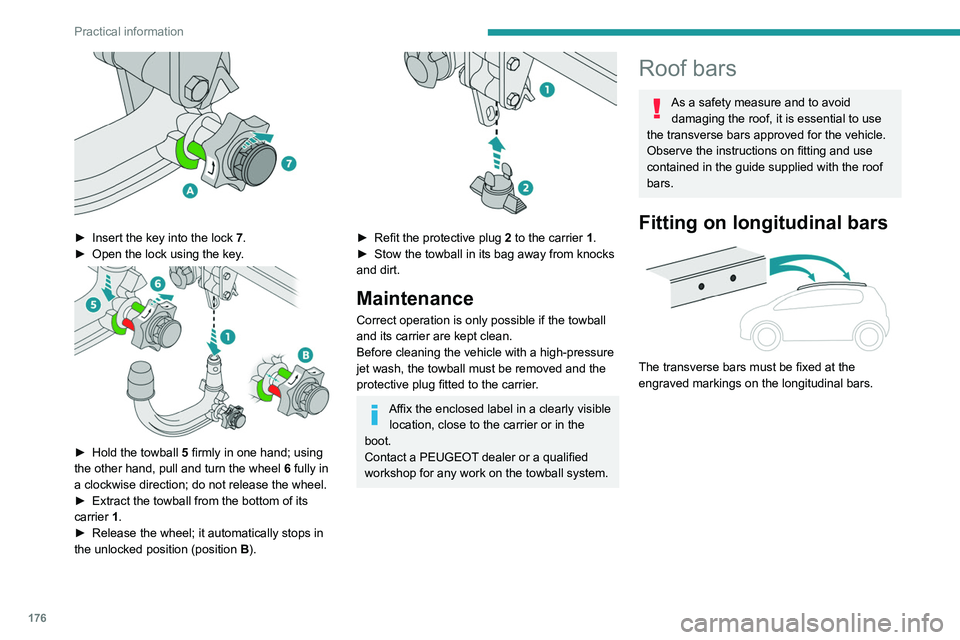
Fitting on longitudinal bars
The transverse bars must be fixed at the
engraved markings on the longitudinal bars.