Page 169 of 308

167
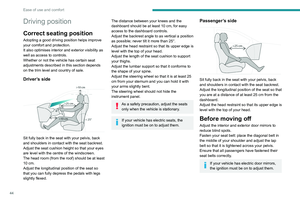
Practical information
7
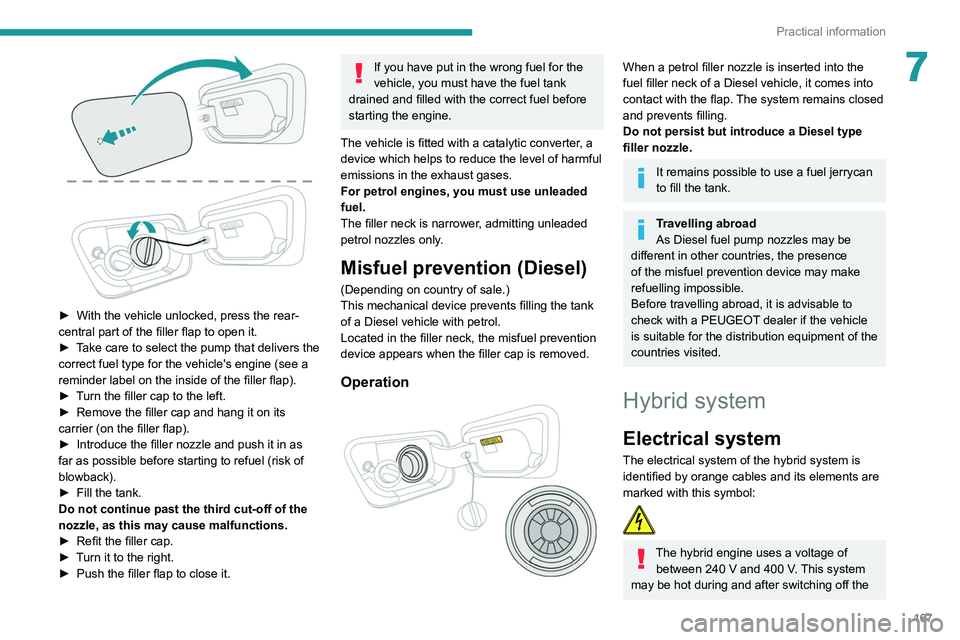
► With the vehicle unlocked, press the rear-
central part of the filler flap to open it.
►
T
ake care to select the pump that delivers the
correct fuel type for the vehicle's engine (see a
reminder label on the inside of the filler flap).
►
T
urn the filler cap to the left.
►
Remove the filler cap and hang it on its
carrier (on the filler flap).
►
Introduce the filler nozzle and push it in as
far as possible before starting to refuel (risk of
blowback).
►
Fill the tank.
Do not continue past the third cut-off of the
nozzle, as this may cause malfunctions.
►
Refit the filler cap.
►
T
urn it to the right.
►
Push the filler flap to close it.
If you have put in the wrong fuel for the
vehicle, you must have the fuel tank
drained and filled with the correct fuel before
starting the engine.
The vehicle is fitted with a catalytic converter, a
device which helps to reduce the level of harmful
emissions in the exhaust gases.
For petrol engines, you must use unleaded
fuel.
The filler neck is narrower, admitting unleaded
petrol nozzles only.
Misfuel prevention (Diesel)
(Depending on country of sale.)
This mechanical device prevents filling the tank
of a Diesel vehicle with petrol.
Located in the filler neck, the misfuel prevention
device appears when the filler cap is removed.
Operation
When a petrol filler nozzle is inserted into the
fuel filler neck of a Diesel vehicle, it comes into
contact with the flap. The system remains closed
and prevents filling.
Do not persist but introduce a Diesel type
filler nozzle.
It remains possible to use a fuel jerrycan
to fill the tank.
Travelling abroad
As Diesel fuel pump nozzles may be
different in other countries, the presence
of the misfuel prevention device may make
refuelling impossible.
Before travelling abroad, it is advisable to
check with a PEUGEOT dealer if the vehicle
is suitable for the distribution equipment of the
countries visited.
Hybrid system
Electrical system
The electrical system of the hybrid system is
identified by orange cables and its elements are
marked with this symbol:
The hybrid engine uses a voltage of between 240 V and 400 V. This system
may be hot during and after switching off the
Page 170 of 308

168
Practical information
ignition. Observe the warning messages on
the labels in the vehicle, especially in the flap.
Any work on or modification to the vehicle's
electrical system (battery, connectors, orange
cables and components visible from inside or
outside) is strictly prohibited due to the risk of
serious burns or electrical shock that can lead
to death.
In the event of a problem, always contact a
PEUGEOT dealer or a qualified workshop.
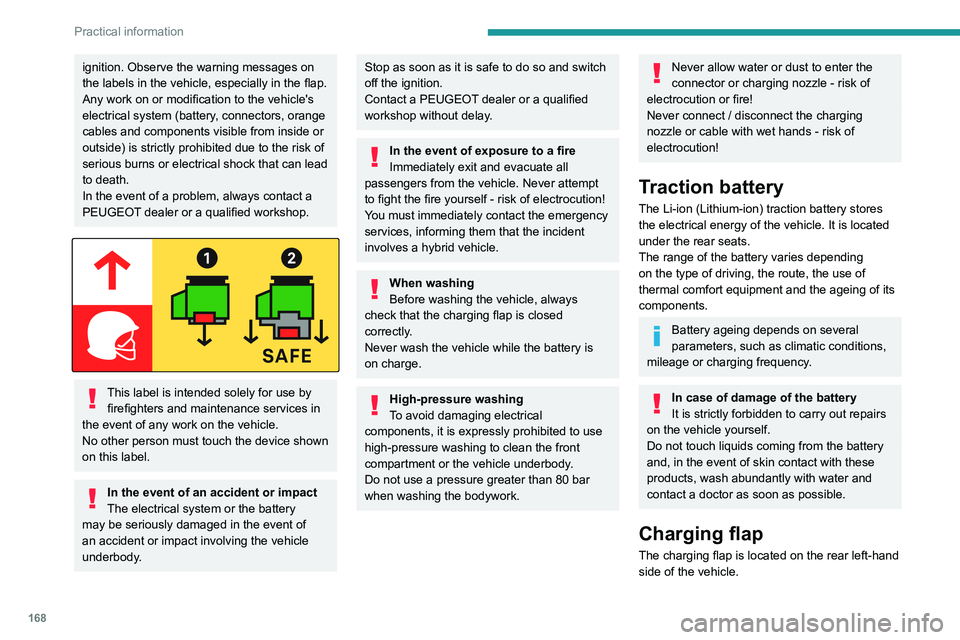
This label is intended solely for use by firefighters and maintenance services in
the event of any work on the vehicle.
No other person must touch the device shown
on this label.
In the event of an accident or impact
The electrical system or the battery
may be seriously damaged in the event of
an accident or impact involving the vehicle
underbody.
Stop as soon as it is safe to do so and switch
off the ignition.
Contact a PEUGEOT dealer or a qualified
workshop without delay.
In the event of exposure to a fire
Immediately exit and evacuate all
passengers from the vehicle. Never attempt
to fight the fire yourself - risk of electrocution!
You must immediately
contact the emergency
services, informing them that the incident
involves a hybrid vehicle.
When washing
Before washing the vehicle, always
check that the charging flap is closed
correctly.
Never wash the vehicle while the battery is
on charge.
High-pressure washing
To avoid damaging electrical
components, it is expressly prohibited to use
high-pressure washing to clean the front
compartment or the vehicle underbody.
Do not use a pressure greater than 80 bar
when washing the bodywork.
Never allow water or dust to enter the
connector or charging nozzle - risk of
electrocution or fire!
Never connect / disconnect the charging
nozzle or cable with wet hands - risk of
electrocution!
Traction battery
The Li-ion (Lithium-ion) traction battery stores
the electrical energy of the vehicle. It is located
under the rear seats.
The range of the battery varies depending
on the type of driving, the route, the use of
thermal comfort equipment and the ageing of its
components.
Battery ageing depends on several
parameters, such as climatic conditions,
mileage or charging frequency.
In case of damage of the battery
It is strictly forbidden to carry out repairs
on the vehicle yourself.
Do not touch liquids coming from the battery
and, in the event of skin contact with these
products, wash abundantly with water and
contact a doctor as soon as possible.
Charging flap
The charging flap is located on the rear left-hand
side of the vehicle.
Page 171 of 308

169
Practical information
7
1.Deferred charge activation button
2. Nozzle locking indicator lamp
Red: nozzle positioned correctly and locked
in the connector.
3. Charging connector
4. Light guides
Status of light
guides Meaning
Fixed white Welcome lighting when flap
is opened.
Fixed blue Deferred charge.
Flashing green Charging.
Fixed green Charging finished.
Fixed red Malfunction.
In case of impact, even light, against the
charging flap, do not use it.
Do not remove or modify the charging
connector - risk of fire!
Contact a PEUGEOT dealer or a qualified
workshop.
Charging cable
The battery can be charged using several types
of cables.
The charging cable supplied with the vehicle is
compatible with the electrical installations of the
country of sale. If you are travelling abroad, refer
to the following table to check the compatibility
of local electrical installations with the charging
cable.
Contact a PEUGEOT dealer or a qualified
workshop to obtain the appropriate charging
cable(s).
Cable type CompatibilitySpecifications
Mode 2 charging cable with integrated control
unit
Conventional electrical socket.
Vehicle can be recharged overnight (6.5 hours to
7 hours).
Charge limited to a maximum of 8 A.
“Green Up” type socket.
Vehicle can be recharged in half a day (3.5 hours
to 4 hours).
Charge limited to a maximum of 14
A.
Page 172 of 308

170
Practical information
Cable typeCompatibilitySpecifications
Mode 3 charging cable
Wallbox accelerated charging unit
Vehicle can be recharged in 1.5 hours to 1.75
hours (with 6.6 kW charger).
Charge limited to a maximum of 32
A.
Charging times are given for
information purposes only; they may
vary according to different factors such as the
exterior temperature or the quality of the
electrical network. If the exterior temperature
is below -10°C, it is recommended to connect
the vehicle as soon as possible as the
charging time may increase significantly.
Mode 2 charging cable with integrated
control unit
It is essential to avoid damaging the cable
and to keep it intact.
In the event of damage, do not use it and
contact a PEUGEOT dealer or a qualified
workshop to replace it.
Wallbox accelerated charging unit
(mode 3)
Do not disassemble or modify the charging
unit - risk of electrocution and/or fire!
Refer to the charging unit user manual for the
operating instructions.
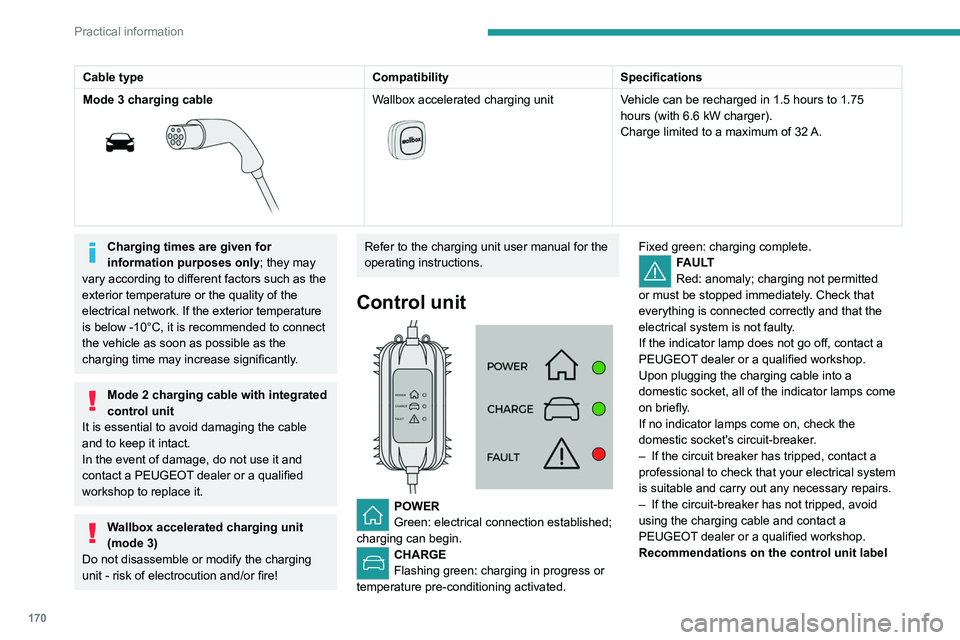
Control unit
POWER
Green: electrical connection established;
charging can begin.
CHARGE
Flashing green: charging in progress or
temperature pre-conditioning activated. Fixed green: charging complete.
FAULT
Red: anomaly; charging not permitted
or must be stopped immediately. Check that
everything is connected correctly and that the
electrical system is not faulty.
If the indicator lamp does not go off, contact a
PEUGEOT dealer or a qualified workshop.
Upon plugging the charging cable into a
domestic socket, all of the indicator lamps come
on briefly.
If no indicator lamps come on, check the
domestic socket's circuit-breaker.
–
If the circuit breaker has tripped, contact a
professional to check that your electrical system
is suitable and carry out any necessary repairs.
–
If the circuit-breaker has not tripped, avoid
using the charging cable and contact a
PEUGEOT
dealer or a qualified workshop.
Recommendations on the control unit label
Page 173 of 308

171
Practical information
7
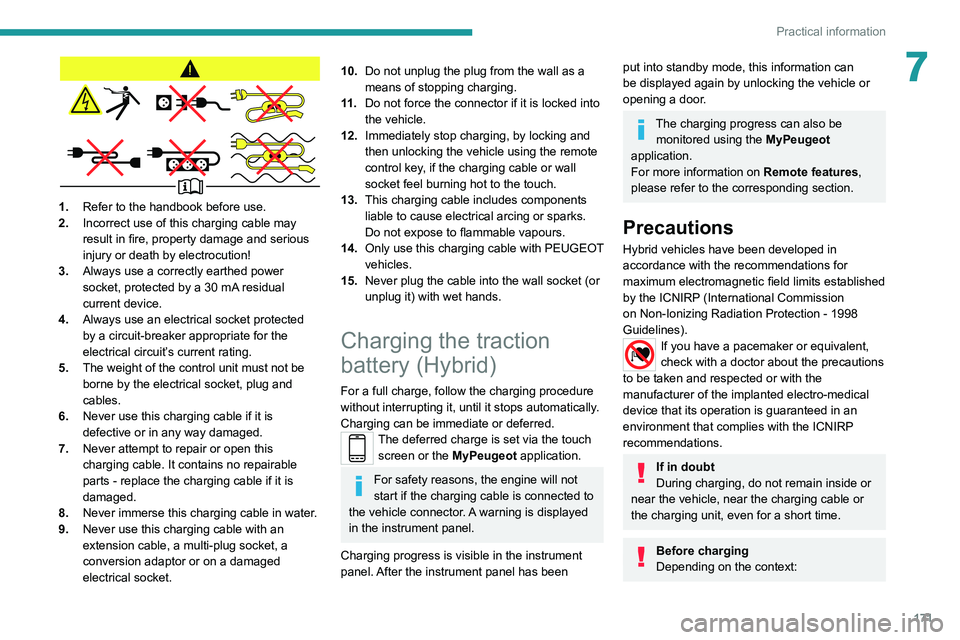
1.Refer to the handbook before use.
2. Incorrect use of this charging cable may
result in fire, property damage and serious
injury or death by electrocution!
3. Always use a correctly earthed power
socket, protected by a 30
mA residual
current device.
4. Always use an electrical socket protected
by a circuit-breaker appropriate for the
electrical circuit’s current rating.
5. The weight of the control unit must not be
borne by the electrical socket, plug and
cables.
6. Never use this charging cable if it is
defective or in any way damaged.
7. Never attempt to repair or open this
charging cable. It contains no repairable
parts - replace the charging cable if it is
damaged.
8. Never immerse this charging cable in water.
9. Never use this charging cable with an
extension cable, a multi-plug socket, a
conversion adaptor or on a damaged
electrical socket.
10.Do not unplug the plug from the wall as a
means of stopping charging.
11 . Do not force the connector if it is locked into
the vehicle.
12. Immediately stop charging, by locking and
then unlocking the vehicle using the remote
control key, if the charging cable or wall
socket feel burning hot to the touch.
13. This charging cable includes components
liable to cause electrical arcing or sparks.
Do not expose to flammable vapours.
14. Only use this charging cable with PEUGEOT
vehicles.
15. Never plug the cable into the wall socket (or
unplug it) with wet hands.
Charging the traction
battery (Hybrid)
For a full charge, follow the charging procedure
without interrupting it, until it stops automatically.
Charging can be immediate or deferred.
The deferred charge is set via the touch
screen or the MyPeugeot application.
For safety reasons, the engine will not
start if the charging cable is connected to
the vehicle connector. A warning is displayed
in the instrument panel.
Charging progress is visible in the instrument
panel. After the instrument panel has been
put into standby mode, this information can
be displayed again by unlocking the vehicle or
opening a door.
The charging progress can also be monitored using the MyPeugeot
application.
For more information on Remote features,
please refer to the corresponding section.
Precautions
Hybrid vehicles have been developed in
accordance with the recommendations for
maximum electromagnetic field limits established
by the ICNIRP (International Commission
on Non-Ionizing Radiation Protection - 1998
Guidelines).
If you have a pacemaker or equivalent,
check with a doctor about the precautions
to be taken and respected or with the
manufacturer of the implanted electro-medical
device that its operation is guaranteed in an
environment that complies with the ICNIRP
recommendations.
If in doubt
During charging, do not remain inside or
near the vehicle, near the charging cable or
the charging unit, even for a short time.
Before charging
Depending on the context:
Page 174 of 308

172
Practical information
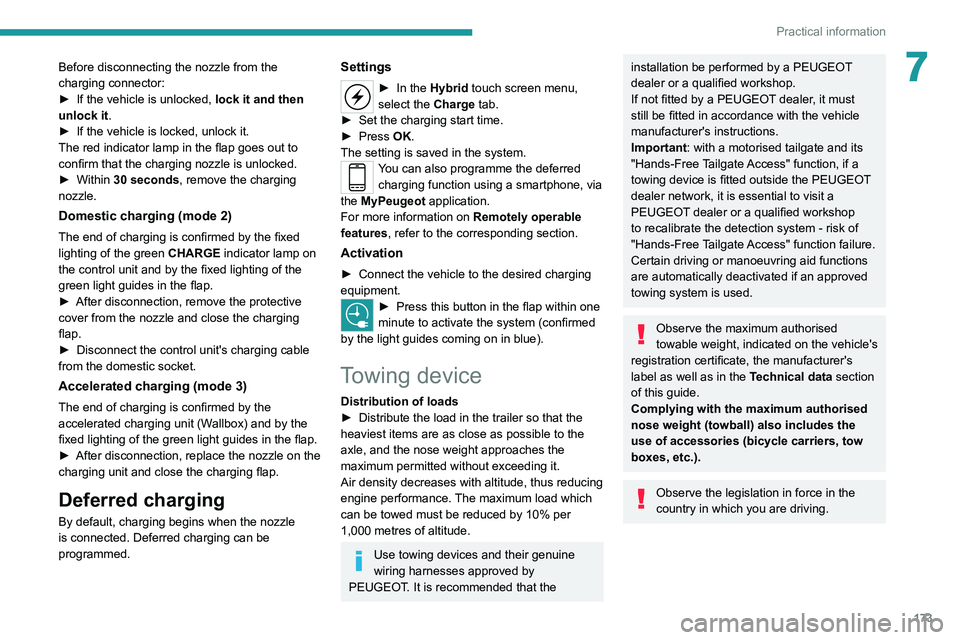
Before disconnecting the nozzle from the
charging connector:
► If the vehicle is unlocked, lock it and then
unlock it .
► If the vehicle is locked, unlock it.
The red indicator lamp in the flap goes out to
confirm that the charging nozzle is unlocked.
► Within 30 seconds, remove the charging
nozzle.
Domestic charging (mode 2)
The end of charging is confirmed by the fixed
lighting of the green CHARGE indicator lamp on
the control unit and by the fixed lighting of the
green light guides in the flap.
► After disconnection, remove the protective
cover from the nozzle and close the charging
flap.
► Disconnect the control unit's charging cable
from the domestic socket.
Accelerated charging (mode 3)
The end of charging is confirmed by the
accelerated charging unit (Wallbox) and by the
fixed lighting of the green light guides in the flap.
► After disconnection, replace the nozzle on the
charging unit and close the charging flap.
Deferred charging
By default, charging begins when the nozzle
is connected. Deferred charging can be
programmed.
► Have a professional check that the
electrical system to be used complies with
applicable standards and is compatible with
the vehicle.
►
Have a professional electrician install
a dedicated domestic power socket or
accelerated charging unit (W
allbox)
compatible with the vehicle.
Use the charging cable supplied with the
vehicle.
(During charging)
Never work under the bonnet:
–
Some areas remain very hot, even an hour
after charging ends - risk of burns!
–
The fan may start at any time - risk of cuts
or strangulation!
After charging
Check that the charging flap is closed.
Do not leave the cable connected to the
domestic power socket - risk of short-circuit
or electrocution in the event of contact with or
immersion in water!
Charging procedure
Connection
► Before charging, check that the gear selector
is in mode P and the ignition is off, otherwise
charging is impossible. ►
Open the charging flap by pressing the push
button and make sure that there are no foreign
bodies on the charging connector
.
The light guides in the flap light up in white.
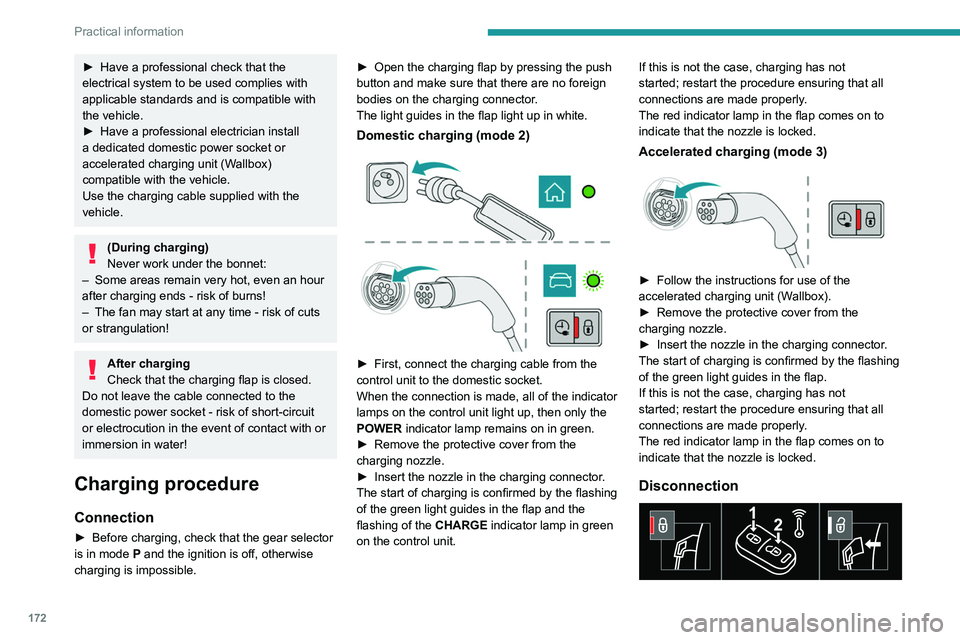
Domestic charging (mode 2)
► First, connect the charging cable from the
control unit to the domestic socket.
When the connection is made, all of the indicator
lamps on the control unit light up, then only the
POWER
indicator lamp remains on in green.
►
Remove the protective cover from the
charging nozzle.
►
Insert the nozzle in the charging connector
.
The start of charging is confirmed by the flashing
of the green light guides in the flap and the
flashing of the
CHARGE indicator lamp in green
on the control unit. If this is not the case, charging has not
started; restart the procedure ensuring that all
connections are made properly.
The red indicator lamp in the flap comes on to
indicate that the nozzle is locked.
Accelerated charging (mode 3)
► Follow the instructions for use of the
accelerated charging unit (W allbox).
►
Remove the protective cover from the
charging nozzle.
►
Insert the nozzle in the charging connector
.
The start of charging is confirmed by the flashing
of the green light guides in the flap.
If this is not the case, charging has not
started; restart the procedure ensuring that all
connections are made properly.
The red indicator lamp in the flap comes on to
indicate that the nozzle is locked.
Disconnection
Page 175 of 308

173
Practical information
7Before disconnecting the nozzle from the
charging connector:
►
If the vehicle is unlocked, lock it and then
unlock it .
►
If the vehicle is locked, unlock it.
The red indicator lamp in the flap goes out to
confirm that the charging nozzle is unlocked.
►
Within
30 seconds, remove the charging
nozzle.
Domestic charging (mode 2)
The end of charging is confirmed by the fixed
lighting of the green CHARGE indicator lamp on
the control unit and by the fixed lighting of the
green light guides in the flap.
►
After disconnection, remove the protective
cover from the nozzle and close the charging
flap.
►
Disconnect the control unit's charging cable
from the domestic socket.
Accelerated charging (mode 3)
The end of charging is confirmed by the
accelerated charging unit (Wallbox) and by the
fixed lighting of the green light guides in the flap.
►
After disconnection, replace the nozzle on the
charging unit and close the charging flap.
Deferred charging
By default, charging begins when the nozzle
is connected. Deferred charging can be
programmed.
Settings
► In the Hybrid touch screen menu,
select the Charge tab.
►
Set the charging start time.
►
Press
OK.
The setting is saved in the system.
You can also programme the deferred charging function using a smartphone, via
the MyPeugeot
application.
For more information on Remotely operable
features , refer to the corresponding section.
Activation
► Connect the vehicle to the desired charging
equipment.
► Press this button in the flap within one
minute to activate the system (confirmed
by the light guides coming on in blue).
Towing device
Distribution of loads
► Distribute the load in the trailer so that the
heaviest items are as close as possible to the
axle, and the nose weight approaches the
maximum permitted without exceeding it.
Air density decreases with altitude, thus reducing
engine performance.
The maximum load which
can be towed must be reduced by 10% per
1,000
metres of altitude.
Use towing devices and their genuine
wiring harnesses approved by
PEUGEOT. It is recommended that the
installation be performed by a PEUGEOT
dealer or a qualified workshop.
If not fitted by a PEUGEOT dealer, it must
still be fitted in accordance with the vehicle
manufacturer's instructions.
Important: with a motorised tailgate and its
"Hands-Free Tailgate Access" function, if a
towing device is fitted outside the PEUGEOT
dealer network, it is essential to visit a
PEUGEOT dealer or a qualified workshop
to recalibrate the detection system - risk of
"Hands-Free Tailgate Access" function failure.
Certain driving or manoeuvring aid functions
are automatically deactivated if an approved
towing system is used.
Observe the maximum authorised
towable weight, indicated on the vehicle's
registration certificate, the manufacturer's
label as well as in the Technical data section
of this guide.
Complying with the maximum authorised
nose weight (towball) also includes the
use of accessories (bicycle carriers, tow
boxes, etc.).
Observe the legislation in force in the
country in which you are driving.
Page 176 of 308

174
Practical information
After use
When travelling without a trailer or
load carrier, remove the towball and fit the
protective plug into the carrier, to provide
clear visibility of the number plate and/or its
lighting.
Fitting the towball
► Below the rear bumper, remove the protective
plug 2 from the carrier 1.
► Insert the end of the towball 5 into the carrier
1 and push it upwards; it will lock into position
automatically.
Vehicle equipped with motorised
tailgate with "Hands-Free Tailgate
Access" function
To avoid unwanted opening of the tailgate
when using the towing device:
–
deactivate this function in advance in your
vehicle's configuration menu,
–
or move the electronic key away from the
recognition zone, with the tailgate closed.
Towing device with quickly detachable towball
Presentation
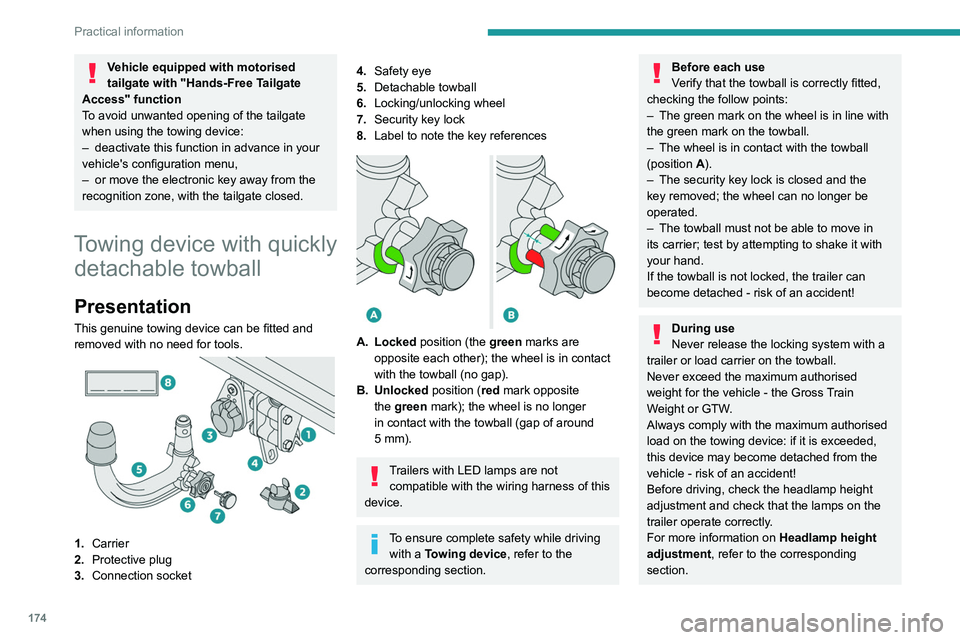
This genuine towing device can be fitted and
removed with no need for tools.
1. Carrier
2. Protective plug
3. Connection socket
4.Safety eye
5. Detachable towball
6. Locking/unlocking wheel
7. Security key lock
8. Label to note the key references
A. Locked position (the green marks are
opposite each other); the wheel is in contact
with the towball (no gap).
B. Unlocked position (red mark opposite the green mark); the wheel is no longer
in contact with the towball (gap of around
5
mm).
Trailers with LED lamps are not compatible with the wiring harness of this
device.
To ensure complete safety while driving with a Towing device , refer to the
corresponding section.
Before each use
Verify that the towball is correctly fitted,
checking the follow points:
–
The green mark on the wheel is in line with
the green mark on the towball.
–
The wheel is in contact with the towball
(position A
).
–
The security key lock is closed and the
key removed; the wheel can no longer be
operated.
–
The towball must not be able to move in
its carrier; test by attempting to shake it with
your hand.
If the towball is not locked, the trailer can
become detached - risk of an accident!
During use
Never release the locking system with a
trailer or load carrier on the towball.
Never exceed the maximum authorised
weight for the vehicle - the Gross Train
Weight or GTW.
Always comply with the maximum authorised
load on the towing device: if it is exceeded,
this device may become detached from the
vehicle - risk of an accident!
Before driving, check the headlamp height
adjustment and check that the lamps on the
trailer operate correctly.
For more information on Headlamp height
adjustment, refer to the corresponding
section.