Page 97 of 305
Instruments and controls95Windscreen wiper with rain
sensorHI:fastLO:slowAUTO:automatic wiping with rain
sensorOFF:off
In AUTO position, the rain sensor
detects the amount of water on the
windscreen and automatically
regulates the frequency of the
windscreen wiper.
For a single wipe when the
windscreen wiper is off, press the
lever downwards to position 1x.
Do not use if the windscreen is frozen.
Switch off in car washes.
Adjustable sensitivity of the rain
sensor
Wiper lever in position AUTO.
Turn the adjuster wheel to adjust the
sensitivity of the rain sensor.
Keep the sensor free from dust, dirt
and ice.
Rain sensor function can be activated or deactivated in the Vehicle
personalisation.
Select the relevant setting in Settings
I Vehicle in the Info Display.
Info Display 3 121.
Vehicle personalisation 3 124.
Page 98 of 305
96Instruments and controlsWindscreen washer
Pull lever. Washer fluid is sprayed
onto the windscreen and the wiper
wipes a few times.
Washer fluid 3 227.
Rear window wiper and
washer
Rear window wiperOFF:offINT:intermittent operationON:continuous operation
Do not use if the rear window is
frozen.
Switch off in car washes.
The rear window wiper comes on
automatically when the windscreen
wiper is switched on and reverse gear
is engaged.
Activation or deactivation of this
function can be changed in the menu Settings in the Info Display.
Vehicle personalisation 3 124.
Rear window washer
Push lever.
Washer fluid is sprayed onto the rear
window and the wiper wipes a few
times.
The rear window washer system is
deactivated when the fluid level is
low.
Washer fluid 3 227.
Page 99 of 305
Instruments and controls97Outside temperatureA drop in temperature is indicated
immediately and a rise in temperature
after a time delay.
Illustration shows an example.
If outside temperature drops to 3 °C,
a warning message is displayed in the Driver Information Centre.
9 Warning
The road surface may already be
icy even though the display
indicates a few degrees above
0 °C.
Clock
Date and time are shown in the
Info Display.
Info Display 3 121.
Graphic Info Display
Press MENU to open the respective
audio menu.
Select Time and Date .
Set Time
Select Set Time to enter the
respective submenu.
Select Auto Set at the bottom of the
screen. Activate either On - RDS or
Off (Manual) .
If Off (Manual) is selected, adjust
hours and minutes.
Repeatedly select 12-24 HR at the
bottom of the screen to choose a time mode.
If the 12-hour mode is selected, a
third column for AM and PM selection
is displayed. Select the desired
option.
Page 100 of 305

98Instruments and controlsSet Date
Select Set Date to enter the
respective submenu.
Select Auto Set at the bottom of the
screen. Activate either On - RDS or
Off (Manual) .
If Off (Manual) is selected, adjust the
date settings.
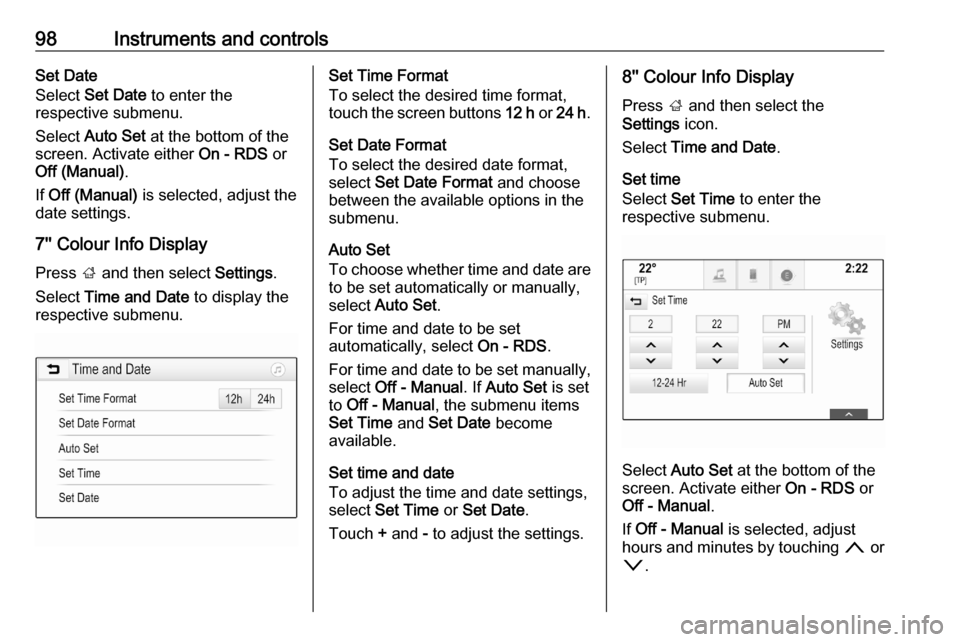
7'' Colour Info Display
Press ; and then select Settings.
Select Time and Date to display the
respective submenu.Set Time Format
To select the desired time format,
touch the screen buttons 12 h or 24 h .
Set Date Format
To select the desired date format,
select Set Date Format and choose
between the available options in the
submenu.
Auto Set
To choose whether time and date are
to be set automatically or manually,
select Auto Set .
For time and date to be set
automatically, select On - RDS.
For time and date to be set manually, select Off - Manual . If Auto Set is set
to Off - Manual , the submenu items
Set Time and Set Date become
available.
Set time and date
To adjust the time and date settings, select Set Time or Set Date .
Touch + and - to adjust the settings.8'' Colour Info Display
Press ; and then select the
Settings icon.
Select Time and Date .
Set time
Select Set Time to enter the
respective submenu.
Select Auto Set at the bottom of the
screen. Activate either On - RDS or
Off - Manual .
If Off - Manual is selected, adjust
hours and minutes by touching n or
o .
Page 101 of 305

Instruments and controls99Touch 12-24 Hr on the right side of the
screen to select a time mode.
If 12-hour mode is selected, a third
column for AM and PM setting is
displayed. Select the desired option.
Set date
Select Set Date to enter the
respective submenu.
Note
If date information is automatically
provided, this menu item is not
available.
Select Auto Set at the bottom of the
screen. Activate either On - RDS or
Off - Manual .
If Off - Manual is selected, adjust the
date by touching n or o.
Clock display
Select Clock Display to enter the
respective submenu.
To turn off the digital clock display in
the menus, select Off.Power outlets
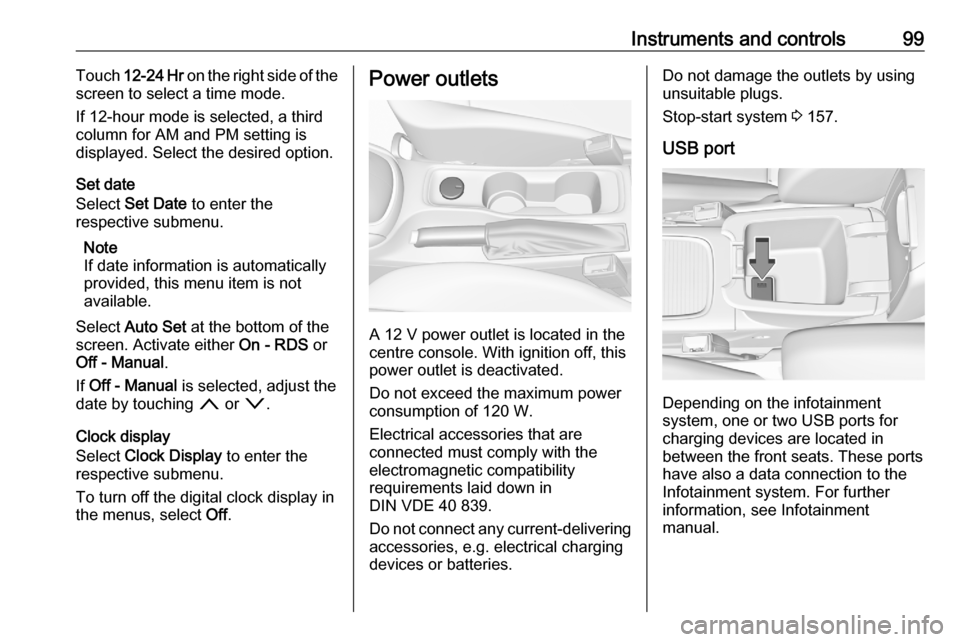
A 12 V power outlet is located in the
centre console. With ignition off, this
power outlet is deactivated.
Do not exceed the maximum power
consumption of 120 W.
Electrical accessories that are
connected must comply with the
electromagnetic compatibility
requirements laid down in
DIN VDE 40 839.
Do not connect any current-delivering
accessories, e.g. electrical charging
devices or batteries.
Do not damage the outlets by using
unsuitable plugs.
Stop-start system 3 157.
USB port
Depending on the infotainment
system, one or two USB ports for
charging devices are located in
between the front seats. These ports
have also a data connection to the
Infotainment system. For further
information, see Infotainment
manual.
Page 102 of 305
100Instruments and controlsUSB charging port
Two USB ports for charging devices
only are located in the back of the
centre console.
Each socket provides 2.1 A at 5 V.
Note
The sockets must always be kept
clean and dry.
Inductive charging9 Warning
Inductive charging can affect the
operation of implanted
pacemakers or other medical
devices. If applicable, seek
medical advice before using the
inductive charging device.
9 Warning
Remove any metal objects from
the charging device before
charging a mobile device, as these objects could become very hot.
To charge a device, the ignition must
be switched on.
The charging slot is located below the
front armrest.
To charge a mobile device: 1. Remove all objects from the charging slot otherwise the
system may not charge.
2. Insert the mobile device with the display facing to the rear in the
charging slot. Charging status is
indicated in the Info display 0 and
shows if mobile device is properly positioned.
Page 103 of 305
Instruments and controls101If 0 is not displayed, remove mobile
device from the slot. Turn mobile
device 180 degrees and wait three
seconds before inserting mobile
device again.
PMA, Qi and A4WP compatible
mobile devices can be charged
inductively.
On some mobile devices, a back
cover with an integrated coil or a
jacket may be required to use
inductive charging.
The mobile device must be smaller
than 8 cm in width and 15 cm in length
to fit into the charging device.
Protective cover for the mobile device
could have impact on the inductive
charging.
AshtraysCaution
To be used only for ash and not forcombustible rubbish.
A portable ashtray can be placed in
the cupholders.
Warning lights, gauges
and indicators
Instrument cluster
Depending on the version, two
instrument clusters are available:
● Baselevel
● Uplevel
Uplevel instrument cluster can be
displayed as Sport mode or Tour
mode.
Baselevel instrument cluster
Page 104 of 305
102Instruments and controlsUplevel instrument cluster, Sport mode