2020 NISSAN MURANO ECU
[x] Cancel search: ECUPage 403 of 518

4. Lower the vehicle slowly until the tiretouches the ground. Then, with the
wheel nut wrench, tighten the wheel
nuts securely in the sequence illustrated
(
OA,OB,OC,OD,OE). Lower the vehicle
completely.
5. Securely store the jack and tools back in their storage compartment. Ensure the
jack is expanded and tools snapped into
place to prevent rattle noise from hap-
pening while driving.
WARNING
• Incorrect wheel nuts or improperly
tightened wheel nuts can cause the
wheel to become loose or come off.
This could cause an accident.
• Do not use oil or grease on the wheel
studs or nuts. This could cause the
nuts to become loose.
• Retighten the wheel nuts when the
vehicle has been driven for 621 miles
(1,000 km) (also in cases of a flat tire,
etc.). As soon as possible, tighten the wheel
nuts to the specified torque with a
torque wrench.
Wheel nut tightening torque:
83 f t-lb (113 N·m)
The wheel nuts must be kept tightened
to specification at all times. It is recom-
mended that wheel nuts be tightened to
specifications at each lubrication inter-
val.
Adjust tire pressure to the COLD pres-
sure.
COLD pressure: Af ter vehicle has been
parked for 3 hours or more or driven less
than 1 mile (1.6 km).
COLD tire pressures are shown on the tire
and loading information label affixed to
the driver side center pillar. To start your engine with a booster battery,
the instructions and precautions below
must be followed.
WARNING
• If done incorrectly, jump starting can
lead to a battery explosion, resulting
in severe injury or death. It could also
damage your vehicle.
• Explosive hydrogen gas is always
present in the vicinity of the battery.
Keep all sparks and flames away
from the battery.
• Do not allow battery fluid to come
into contact with eyes, skin, clothing
or painted surfaces. Battery fluid is a
corrosive sulfuric acid solution which
can cause severe burns. If the fluid
should come into contact with any-
thing, immediately flush the con-
tacted area with water.
• Keep battery out of the reach of
children.
• The booster battery must be rated at
12 volts. Use of an improperly rated
battery can damage your vehicle.
JUMP STARTING
In case of emergency6-9
Page 408 of 518

Two-Wheel Drive models with
Continuously Variable
Transmission (CVT)
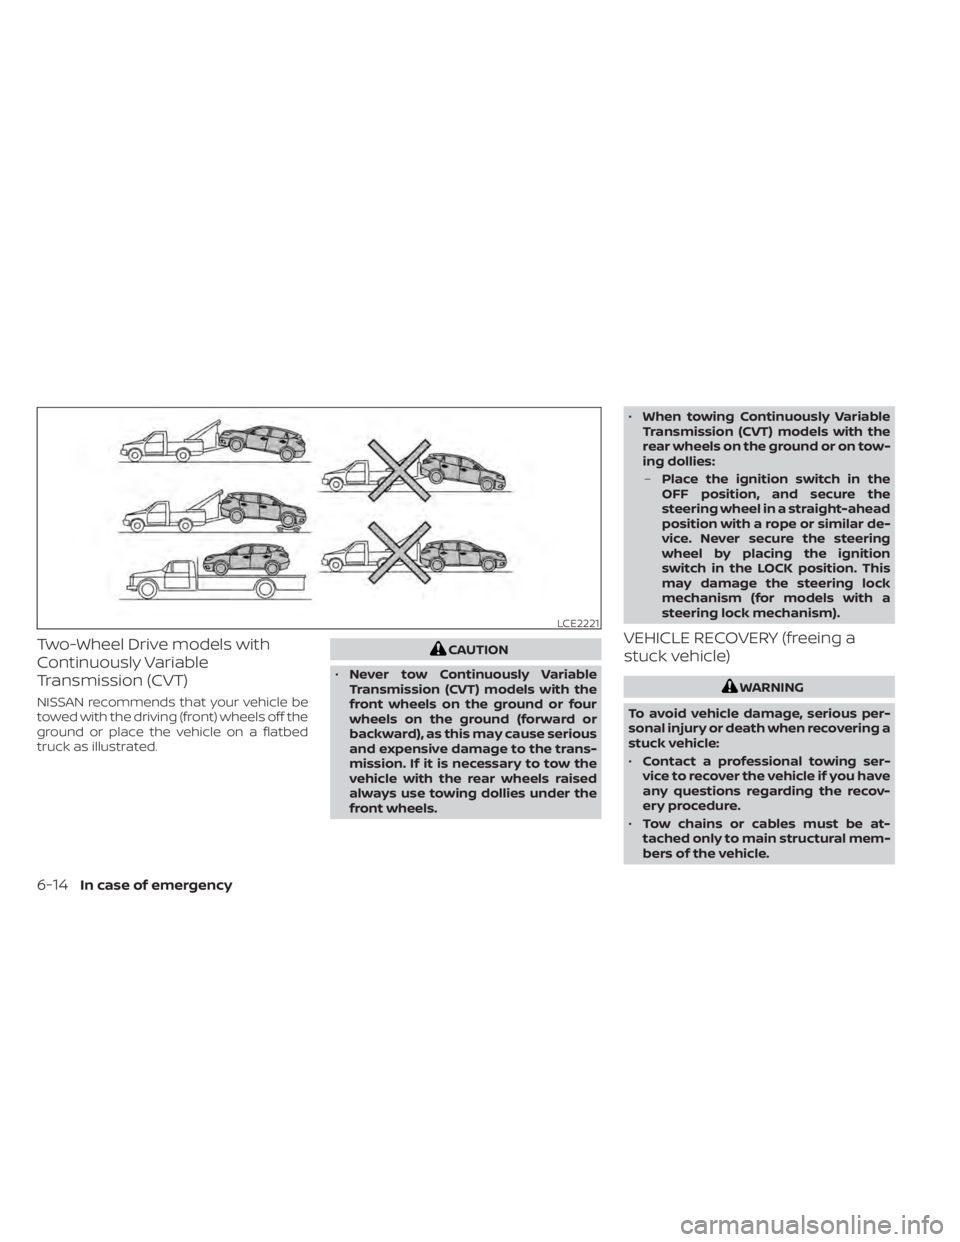
NISSAN recommends that your vehicle be
towed with the driving (front) wheels off the
ground or place the vehicle on a flatbed
truck as illustrated.
CAUTION
• Never tow Continuously Variable
Transmission (CVT) models with the
front wheels on the ground or four
wheels on the ground (forward or
backward), as this may cause serious
and expensive damage to the trans-
mission. If it is necessary to tow the
vehicle with the rear wheels raised
always use towing dollies under the
front wheels. •
When towing Continuously Variable
Transmission (CVT) models with the
rear wheels on the ground or on tow-
ing dollies:
– Place the ignition switch in the
OFF position, and secure the
steering wheel in a straight-ahead
position with a rope or similar de-
vice. Never secure the steering
wheel by placing the ignition
switch in the LOCK position. This
may damage the steering lock
mechanism (for models with a
steering lock mechanism).VEHICLE RECOVERY (freeing a
stuck vehicle)
WARNING
To avoid vehicle damage, serious per-
sonal injury or death when recovering a
stuck vehicle:
• Contact a professional towing ser-
vice to recover the vehicle if you have
any questions regarding the recov-
ery procedure.
• Tow chains or cables must be at-
tached only to main structural mem-
bers of the vehicle.
LCE2221
6-14In case of emergency
Page 416 of 518

•Properly position the mats in the
floorwell using the floor mat posi-
tioning hook. For additional informa-
tion, refer to "Floor mat installation"
in this section.
• Make sure the floor mat does not in-
terfere with pedal operation.
• Periodically check the floor mats to
make sure they are properly
installed.
• Af ter cleaning the vehicle interior,
check the floor mats to make sure
they are properly installed.
The use of Genuine NISSAN floor mats can
extend the life of your vehicle carpet and
make it easier to clean the interior. Mats
should be maintained with regular clean-
ing and replaced if they become exces-
sively worn.
Floor mat installation
Your vehicle is equipped with floor mat po-
sitioning hook(s). The number and shape of
the floor mat positioning hooks for each
seating position varies depending on the
vehicle. When installing Genuine NISSAN floor mats,
follow the installation instructions provided
with the mat and the following:
1. With the ignition in the OFF position, the
shif t lever in P (Park) position and with
the parking brake fully applied, position
the floor mat in the floorwell so that the
floor mat grommet holes are aligned
with the hook(s).
2. Secure the grommet holes into the hook(s) and ensure that the floor mat is
properly positioned.
3. Make sure the floor mat does not inter- fere with pedal operation. With the igni-
tion still in the OFF position, the shif t le-
ver in the P (Park) position and with the
parking brake applied, fully apply and re-
lease all pedals. The floor mat must not
interfere with pedal operation or prevent
the pedal from returning to its normal
position.
It is recommended that you visit a NISSAN
dealer for details about installing the floor
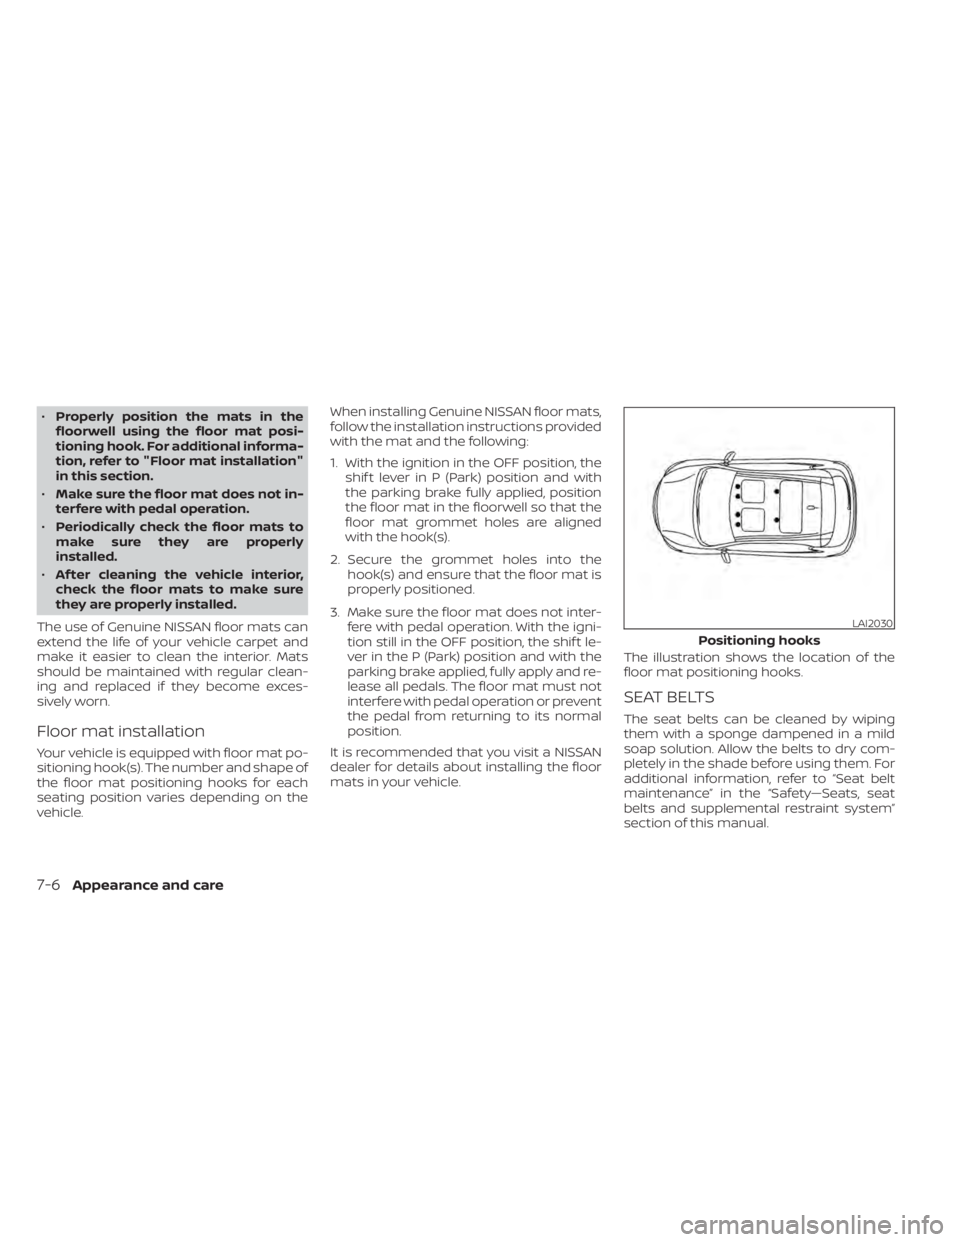
mats in your vehicle. The illustration shows the location of the
floor mat positioning hooks.
SEAT BELTS
The seat belts can be cleaned by wiping
them with a sponge dampened in a mild
soap solution. Allow the belts to dry com-
pletely in the shade before using them. For
additional information, refer to “Seat belt
maintenance” in the “Safety—Seats, seat
belts and supplemental restraint system”
section of this manual.
LAI2030
Positioning hooks
7-6Appearance and care
Page 420 of 518

When performing any inspection or main-
tenance work on your vehicle, always take
care to prevent serious accidental injury to
yourself or damage to the vehicle. The fol-
lowing are general precautions which
should be closely observed.
WARNING
• Park the vehicle on a level surface,
apply the parking brake securely and
block the wheels to prevent the ve-
hicle from moving. Move the shif t le-
ver to P (Park).
• Be sure the ignition switch is in the
OFF or LOCK position when perform-
ing any parts replacement or repairs.
• If you must work with the engine run-
ning, keep your hands, clothing, hair
and tools away from moving fans,
belts and any other moving parts.
• It is advisable to secure or remove
any loose clothing and remove any
jewelry, such as rings, watches, etc.
before working on your vehicle.
• Always wear eye protection when-
ever you work on your vehicle.
•
Your vehicle is equipped with an auto-
matic engine cooling fan. It may come
on at any time without warning, even if the ignition switch is in the OFF posi-
tion and the engine is not running. To
avoid injury, always disconnect the
negative battery cable before working
near the fan.
•
If you must run the engine in an en-
closed space such as a garage, be
sure there is proper ventilation for
exhaust gases to escape.
• Never get under the vehicle while it is
supported only by a jack. If it is nec-
essary to work under the vehicle,
support it with safety stands.
• Keep smoking materials, flame and
sparks away from the fuel tank and
battery.
• Because the fuel lines on gasoline
engine models are under high pres-
sure even when the engine is off, it is
recommended that you visit a
NISSAN dealer for service of the fuel
filter or fuel lines.
CAUTION
• Do not work under the hood while
the engine is hot. Turn the engine off
and wait until it cools down. •
Avoid contact with used engine oil and
coolant. Improperly disposed engine
oil, engine coolant and/or other ve-
hicle fluids can damage the environ-
ment. Always conform to local regula-
tions for disposal of vehicle fluid.
• Never leave the engine or Continu-
ously Variable Transmission (CVT) re-
lated component harnesses discon-
nected while the ignition switch is in
the ON position.
• Never connect or disconnect the bat-
tery or any transistorized compo-
nent while the ignition switch is in
the ON position.
This “Do-it-yourself ” section gives instruc-
tions regarding only those items which are
relatively easy for an owner to perform.
A Genuine NISSAN service manual is also
available. For additional information, refer
to “Owner's Manual/Service Manual order
information” in the “Technical and con-
sumer information” section of this manual.
You should be aware that incomplete or
improper servicing may result in operating
difficulties or excessive emissions, and
could affect warranty coverage. If in doubt
about any servicing, it is recommended
that you have it done by a NISSAN dealer.
MAINTENANCE PRECAUTIONS
8-2Do-it-yourself
Page 428 of 518

6. Coat the gasket on the new filter withclean engine oil.
7. Screw in the oil filter clockwise until a slight resistance is felt, then tighten addi-
tionally more than 2/3 turn.
Oil filter tightening torque: 11 to 15 f t-lb (14.7 to 20.6 N·m)
8. Clean and re-install the drain plug with a new washer. Securely tighten the drain
plug with a wrench. Do not use exces-
sive force.
Drain plug tightening torque: 22 to 29 f t-lb (29.4 to 39.2 N·m)
9. Refill the engine with the recommended oil through the oil filler opening, and in-
stall the oil filler cap securely.
For additional information about drain and
refill capacity, refer to “Recommended
fluids/lubricants and capacities” in the
“Technical and consumer information” sec-
tion of this manual. The drain and refill ca-
pacity depends on the oil temperature and
drain time. Use these specifications for ref-
erence only. Always use the dipstick to de-
termine the proper amount of oil in the
engine. 10. Start the engine and check for leakage
around the drain plug and the oil filter.
Correct as required. Turn the engine off
and wait more than 15 minutes. Check
the oil level with the dipstick. Add en-
gine oil if necessary.
Af ter the operation
1. Reinstall engine protectors in reverse or-der of removal.
2. Lower the vehicle carefully to the ground.
3. Reset oil and oil filter maintenance re- minder. For additional information, refer
to “Vehicle information display” in the “In-
struments and controls” section of this
manual.
• Dispose of waste oil and filter properly.
• Check your local regulations.
CAUTION
• NISSAN recommends using Genuine
NISSAN CVT Fluid NS-3 (or equiva-
lent) ONLY in NISSAN CVTs. Do not mix
with other fluids.
• Do not use Automatic Transmission
Fluid (ATF) or manual transmission
fluid in a NISSAN CVT, as it may dam-
age the CVT. Damage caused by the
use of fluids other than as recom-
mended is not covered under
NISSAN's New Vehicle Limited
Warranty.
• Using fluids that are not equivalent
to Genuine NISSAN CVT Fluid NS-3
may also damage the CVT. Damage
caused by the use of fluids other than
as recommended is not covered un-
der NISSAN's New Vehicle Limited
Warranty.
When checking or replacement of CVT fluid
is required, we recommend a NISSAN
dealer for servicing.
CONTINUOUSLY VARIABLE
TRANSMISSION (CVT) FLUID
8-10Do-it-yourself
Page 432 of 518

• If the battery is labeled “do not open” it ismaintenance free and battery fluid
should not be checked. It is recom-
mended that you visit a NISSAN dealer or
a qualified specialist workshop to con-
firm the battery’s performance.
• Keep the battery surface clean and dry. Clean the battery with a solution of bak-
ing soda and water.
• Make certain the terminal connections are clean and securely tightened.
• If the vehicle is not to be used for 30 days or longer, disconnect the negative (-) bat-
tery terminal cable to prevent discharge.
NOTE:
Care should be taken to avoid situations
that can lead to potential battery dis-
charge and potential no-start conditions
such as:
1. Installation or extended use of elec-
tronic accessories that consume bat-
tery power when the engine is not run-
ning (Phone chargers, GPS, DVD
players, etc.)
2. Vehicle is not driven regularly and/or
only driven short distances.
In these cases, the battery may need to
be charged to maintain battery health.
WARNING
• Do not expose the battery to flames,
an electrical spark or a cigarette. Hy-
drogen gas generated by the battery
is explosive. Explosive gases can
cause blindness or injury. Do not al-
low battery fluid to contact your skin,
eyes, fabrics or painted surfaces. Sul-
furic acid can cause blindness or in-
jury. Af ter touching a battery or bat-
tery cap, do not touch or rub your
eyes. Thoroughly wash your hands. If
the acid contacts your eyes, skin or
clothing, immediately flush with wa-
ter for at least 15 minutes and seek
medical attention.
• When working on or near a battery,
always wear suitable eye protection
and remove all jewelry.
• Battery posts, terminals and related
accessories contain lead and lead
compounds. Wash hands af ter
handling.
• Keep battery out of the reach of
children.
• Do not tip the battery.
NOTE:
Do not try to open the top of the battery.
This battery is not equipped with remov-
able vent caps.
JUMP STARTING
If jump starting is necessary, refer to “Jump
starting” in the “In case of emergency” sec-
tion of this manual. If the engine does not
start by jump starting, the battery may
have to be replaced. It is recommended
that you visit a NISSAN dealer for this
service.
LDI3302
8-14Do-it-yourself
Page 434 of 518

WARNING
Be sure the engine and ignition switch
are off and that the parking brake is
engaged securely.
CAUTION
Be sure to use the correct socket to re-
move the spark plugs. An incorrect
socket can damage the spark plugs.
If replacement is required, it is recom-
mended that you visit a NISSAN dealer for
this service. The air cleaner filter should not be cleaned
and reused. Replace it according to the
maintenance log shown in the "Mainte-
nance and schedules" section of this
manual.
To remove the air cleaner filter:
1. Unlatch the retaining clips
OA.
2. Move the air cleaner cover upwards.
3. Remove the air cleaner filter. Wipe the inside of the air cleaner filter housing
and the cover with a damp cloth, then
replace air cleaner filter.
NOTE:
Af ter installing a new air cleaner filter,
make sure the air cleaner cover is seated
in the housing and latch the clips.
WARNING
• Operating the engine with the air
cleaner removed can cause you or
others to be burned. The air cleaner
not only cleans the air, it stops the
flame if the engine backfires. If it isn't
there, and the engine backfires, you
could be burned. Do not drive with
the air cleaner removed, and be care-
ful when working on the engine with
the air cleaner removed.
• Never pour fuel into the throttle body
or attempt to start the engine with
the air cleaner removed. Doing so
could result in serious injury.
IN-CABIN MICROFILTER
The in-cabin microfilter restricts the entry
of airborne dust and pollen particles and
reduces some objectionable outside
odors. The filter is located behind the glove
box. For additional information, refer to the
“Maintenance and schedules” section of
this manual for change intervals.
LDI2553
AIR CLEANER
8-16Do-it-yourself
Page 437 of 518

Under some driving or climate conditions,
occasional brake squeak, squeal or other
noise may be heard. Occasional brake
noise during light to moderate stops is nor-
mal and does not affect the function or
performance of the brake system.
Proper brake inspection intervals should
be followed.For additional information re-
garding brake inspections, refer to the ap-
propriate maintenance schedule informa-
tion in the "Maintenance and schedules"
section of this manual.
If any electrical equipment does not oper-
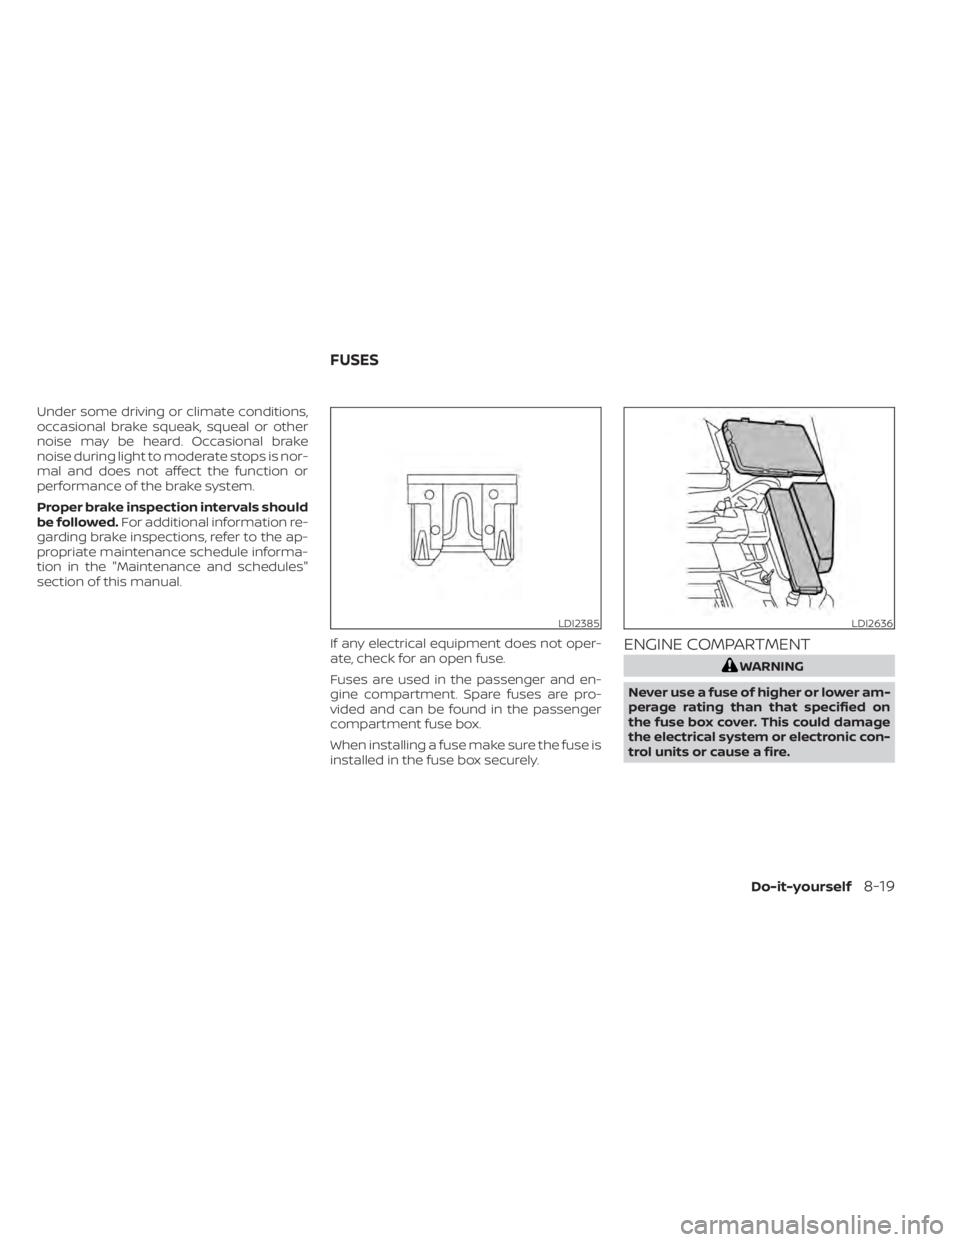
ate, check for an open fuse.
Fuses are used in the passenger and en-
gine compartment. Spare fuses are pro-
vided and can be found in the passenger
compartment fuse box.
When installing a fuse make sure the fuse is
installed in the fuse box securely.
ENGINE COMPARTMENT
WARNING
Never use a fuse of higher or lower am-
perage rating than that specified on
the fuse box cover. This could damage
the electrical system or electronic con-
trol units or cause a fire.
LDI2385LDI2636
FUSES
Do-it-yourself8-19