2020 NISSAN KICKS warning
[x] Cancel search: warningPage 183 of 500
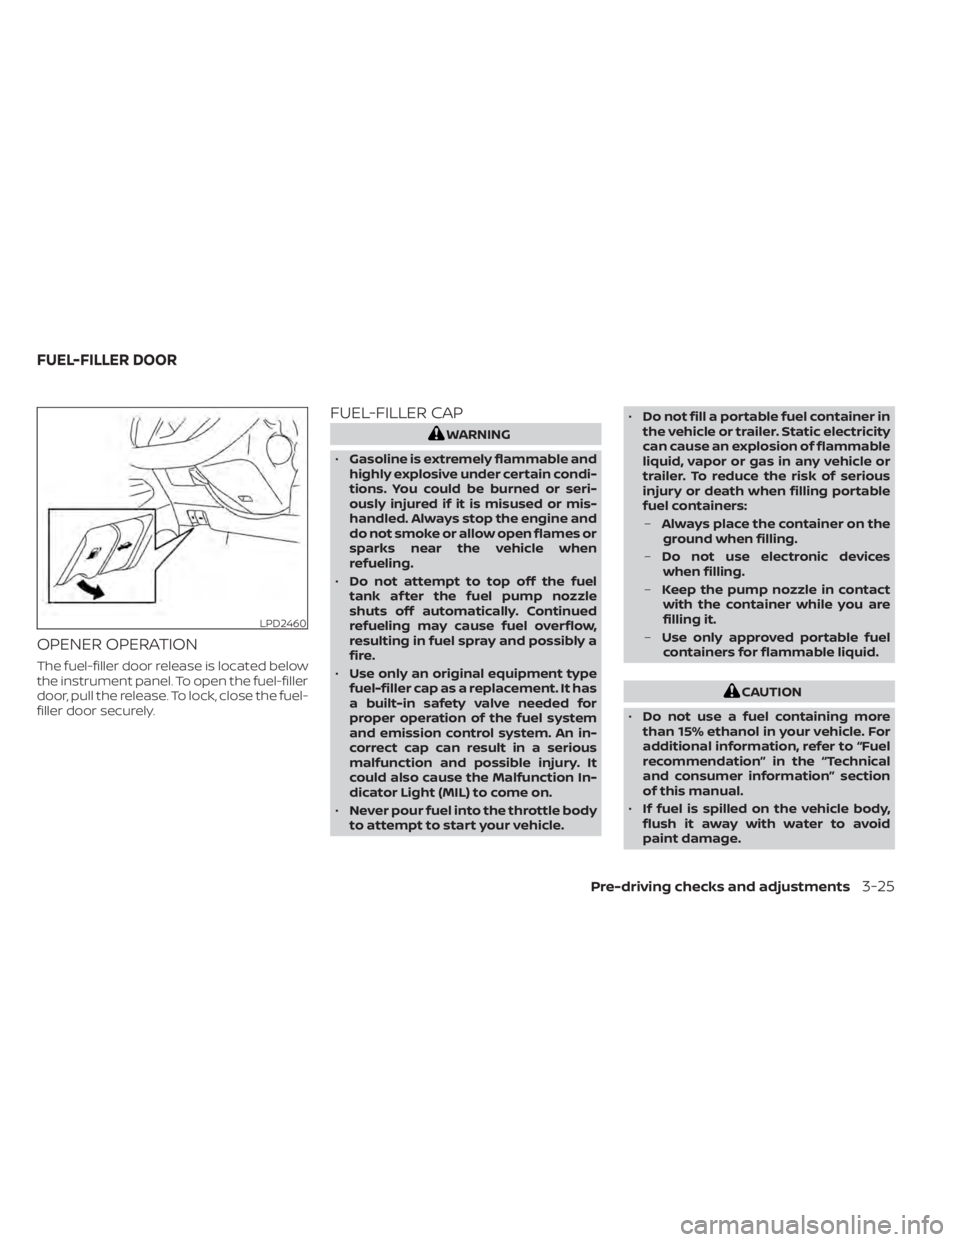
OPENER OPERATION
The fuel-filler door release is located below
the instrument panel. To open the fuel-filler
door, pull the release. To lock, close the fuel-
filler door securely.
FUEL-FILLER CAP
WARNING
• Gasoline is extremely flammable and
highly explosive under certain condi-
tions. You could be burned or seri-
ously injured if it is misused or mis-
handled. Always stop the engine and
do not smoke or allow open flames or
sparks near the vehicle when
refueling.
• Do not attempt to top off the fuel
tank af ter the fuel pump nozzle
shuts off automatically. Continued
refueling may cause fuel overflow,
resulting in fuel spray and possibly a
fire.
• Use only an original equipment type
fuel-filler cap as a replacement. It has
a built-in safety valve needed for
proper operation of the fuel system
and emission control system. An in-
correct cap can result in a serious
malfunction and possible injury. It
could also cause the Malfunction In-
dicator Light (MIL) to come on.
• Never pour fuel into the throttle body
to attempt to start your vehicle. •
Do not fill a portable fuel container in
the vehicle or trailer. Static electricity
can cause an explosion of flammable
liquid, vapor or gas in any vehicle or
trailer. To reduce the risk of serious
injury or death when filling portable
fuel containers:
– Always place the container on the
ground when filling.
– Do not use electronic devices
when filling.
– Keep the pump nozzle in contact
with the container while you are
filling it.
– Use only approved portable fuel
containers for flammable liquid.
CAUTION
• Do not use a fuel containing more
than 15% ethanol in your vehicle. For
additional information, refer to “Fuel
recommendation” in the “Technical
and consumer information” section
of this manual.
• If fuel is spilled on the vehicle body,
flush it away with water to avoid
paint damage.
LPD2460
FUEL-FILLER DOOR
Pre-driving checks and adjustments3-25
Page 184 of 500

To remove the fuel-filler cap:
1. Turn the fuel-filler cap counterclockwiseto remove.
2. Loop the tether strap around the hook
O1while refueling.
To install the fuel-filler cap:
1. Insert the fuel-filler cap straight into the fuel-filler tube.
2. Turn the fuel-filler cap clockwise until a single click is heard.
WARNING
• Do not adjust the steering wheel
while driving. You could lose control
of your vehicle and cause an
accident.
• Do not adjust the steering wheel any
closer to you than is necessary for
proper steering operation and com-
fort. The driver's air bag inflates with
great force. If you are unrestrained,
leaning forward, sitting sideways or
out of position in any way, you are at
greater risk of injury or death in a
crash. You may also receive serious
or fatal injuries from the air bag if you
are up against it when it inflates. Al-
ways sit back against the seatback
and as far away as practical from the
steering wheel. Always use the seat
belts.
MANUAL OPERATION
Tilt and telescopic operation
Pull the lock leverO1down:
• Adjust the steering wheel up or down in direction
O2to the desired position.
• Adjust the steering wheel forward or backward in direction
O3to the desired
position.
Push the lock lever
O1up firmly to lock the
steering wheel in place.
LCE2260LPD2448
STEERING WHEEL
3-26Pre-driving checks and adjustments
Page 186 of 500
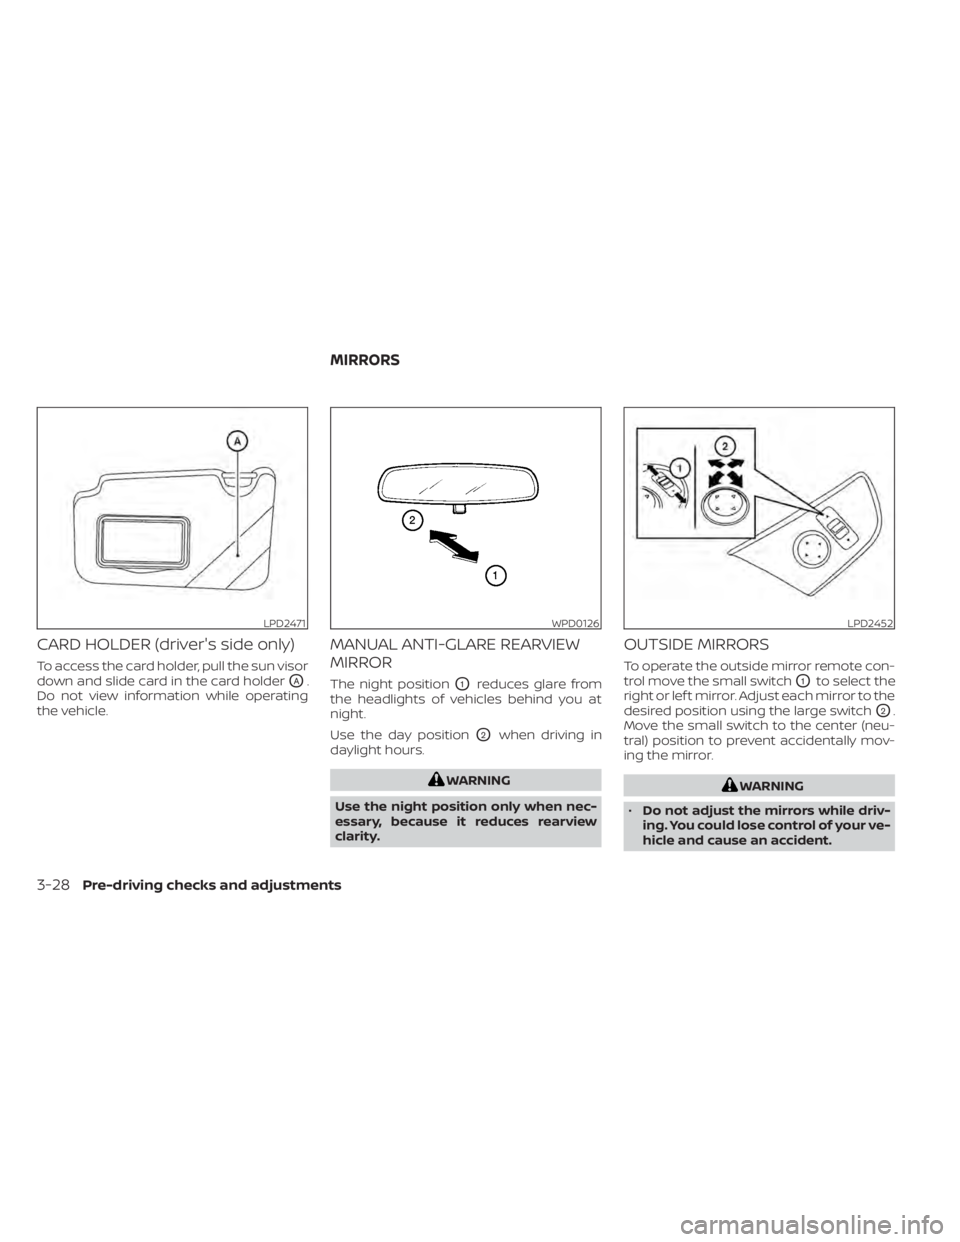
CARD HOLDER (driver's side only)
To access the card holder, pull the sun visor
down and slide card in the card holder
OA.
Do not view information while operating
the vehicle.
MANUAL ANTI-GLARE REARVIEW
MIRROR
The night positionO1reduces glare from
the headlights of vehicles behind you at
night.
Use the day position
O2when driving in
daylight hours.
WARNING
Use the night position only when nec-
essary, because it reduces rearview
clarity.
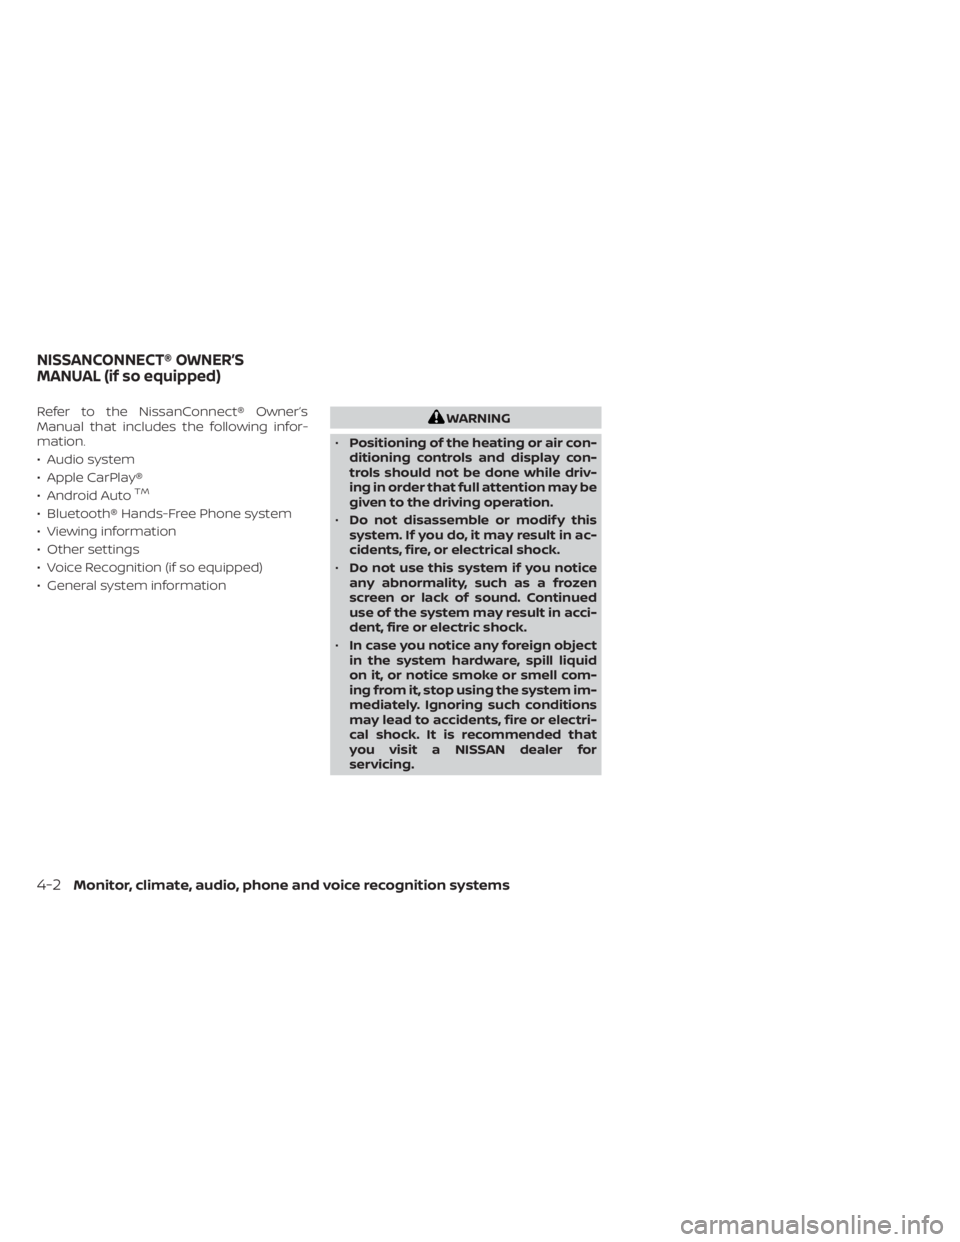
OUTSIDE MIRRORS
To operate the outside mirror remote con-
trol move the small switch
O1to select the
right or lef t mirror. Adjust each mirror to the
desired position using the large switch
O2.
Move the small switch to the center (neu-
tral) position to prevent accidentally mov-
ing the mirror.
WARNING
• Do not adjust the mirrors while driv-
ing. You could lose control of your ve-
hicle and cause an accident.
LPD2471WPD0126LPD2452
MIRRORS
3-28Pre-driving checks and adjustments
Page 190 of 500
Refer to the NissanConnect® Owner’s
Manual that includes the following infor-
mation.
• Audio system
• Apple CarPlay®
• Android Auto
TM
• Bluetooth® Hands-Free Phone system
• Viewing information
• Other settings
• Voice Recognition (if so equipped)
• General system information
WARNING
• Positioning of the heating or air con-
ditioning controls and display con-
trols should not be done while driv-
ing in order that full attention may be
given to the driving operation.
• Do not disassemble or modif y this
system. If you do, it may result in ac-
cidents, fire, or electrical shock.
• Do not use this system if you notice
any abnormality, such as a frozen
screen or lack of sound. Continued
use of the system may result in acci-
dent, fire or electric shock.
• In case you notice any foreign object
in the system hardware, spill liquid
on it, or notice smoke or smell com-
ing from it, stop using the system im-
mediately. Ignoring such conditions
may lead to accidents, fire or electri-
cal shock. It is recommended that
you visit a NISSAN dealer for
servicing.
NISSANCONNECT® OWNER’S
MANUAL (if so equipped)
4-2Monitor, climate, audio, phone and voice recognition systems
Page 192 of 500
HOW TO USE THE TOUCH-SCREEN
CAUTION
• The glass display screen may break if
it is hit with a hard or sharp object. If
the glass screen breaks, do not touch
it. Doing so could result in an injury.
• To clean the display, never use a
rough cloth, alcohol, benzine, thinner
or any kind of solvent or paper towel
with a chemical cleaning agent. They
will scratch or deteriorate the panel.
• Do not splash any liquid such as wa-
ter or car fragrance on the display.
Contact with liquid will cause the sys-
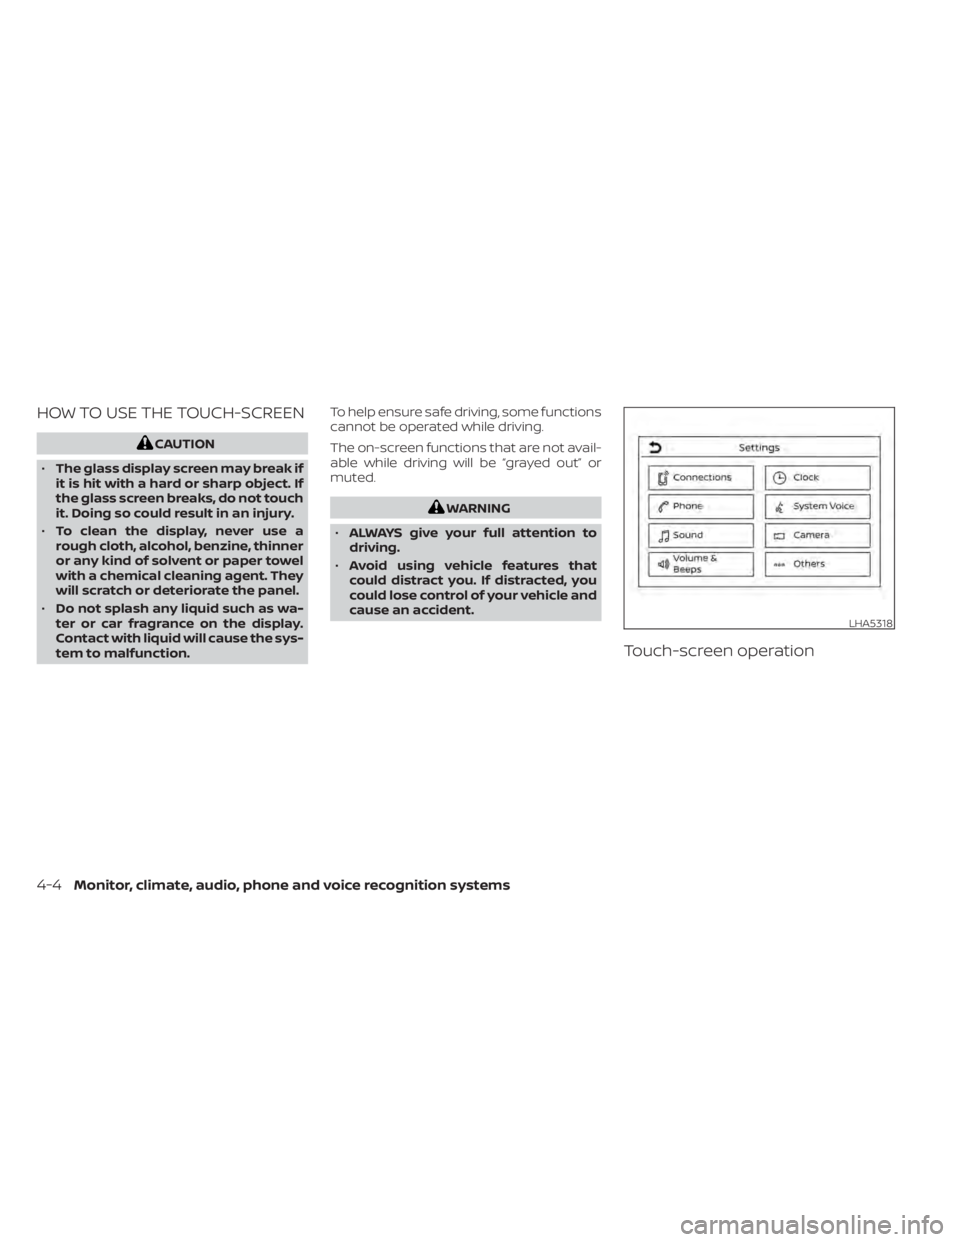
tem to malfunction. To help ensure safe driving, some functions
cannot be operated while driving.
The on-screen functions that are not avail-
able while driving will be “grayed out” or
muted.
WARNING
• ALWAYS give your full attention to
driving.
• Avoid using vehicle features that
could distract you. If distracted, you
could lose control of your vehicle and
cause an accident.
Touch-screen operation
LHA5318
4-4Monitor, climate, audio, phone and voice recognition systems
Page 198 of 500
WARNING
• Failure to follow the warnings and in-
structions for proper use of the Rear-
View Monitor system could result in
serious injury or death.
• RearView Monitor is a convenience
feature and is not a substitute for
proper backing. Always turn and look
out the windows and check mirrors
to be sure that it is safe to move be-
fore operating the vehicle. Always
back up slowly.
• The system is designed as an aid to
the driver in showing large station-
ary objects directly behind the ve-
hicle, to help avoid damaging the
vehicle.
• The distance guide lines and the ve-
hicle width lines should be used as a
reference only when the vehicle is on
a level paved surface. The distance
viewed on the monitor is for refer-
ence only and may be different than
the actual distance between the ve-
hicle and displayed objects.CAUTION
Do not scratch the camera lens when
cleaning dirt or snow from the front of
the camera.
The RearView Monitor system automati-
cally shows a rear view of the vehicle when
the shif t lever is shif ted into the R (Reverse)
position. The radio can still be heard while
the RearView Monitor is active.
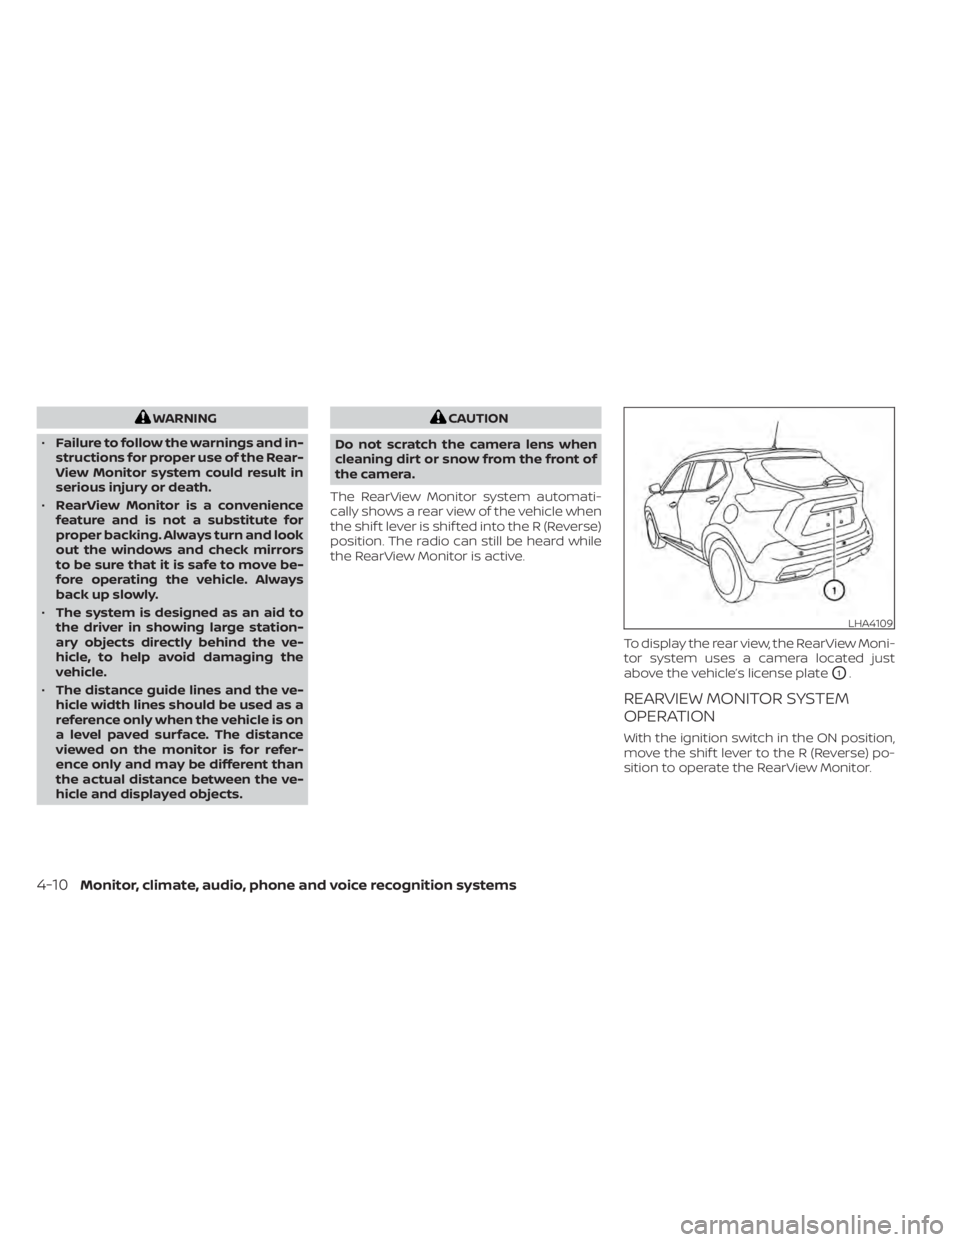
To display the rear view, the RearView Moni-
tor system uses a camera located just
above the vehicle’s license plate
O1.
REARVIEW MONITOR SYSTEM
OPERATION
With the ignition switch in the ON position,
move the shif t lever to the R (Reverse) po-
sition to operate the RearView Monitor.
LHA4109
4-10Monitor, climate, audio, phone and voice recognition systems
Page 201 of 500
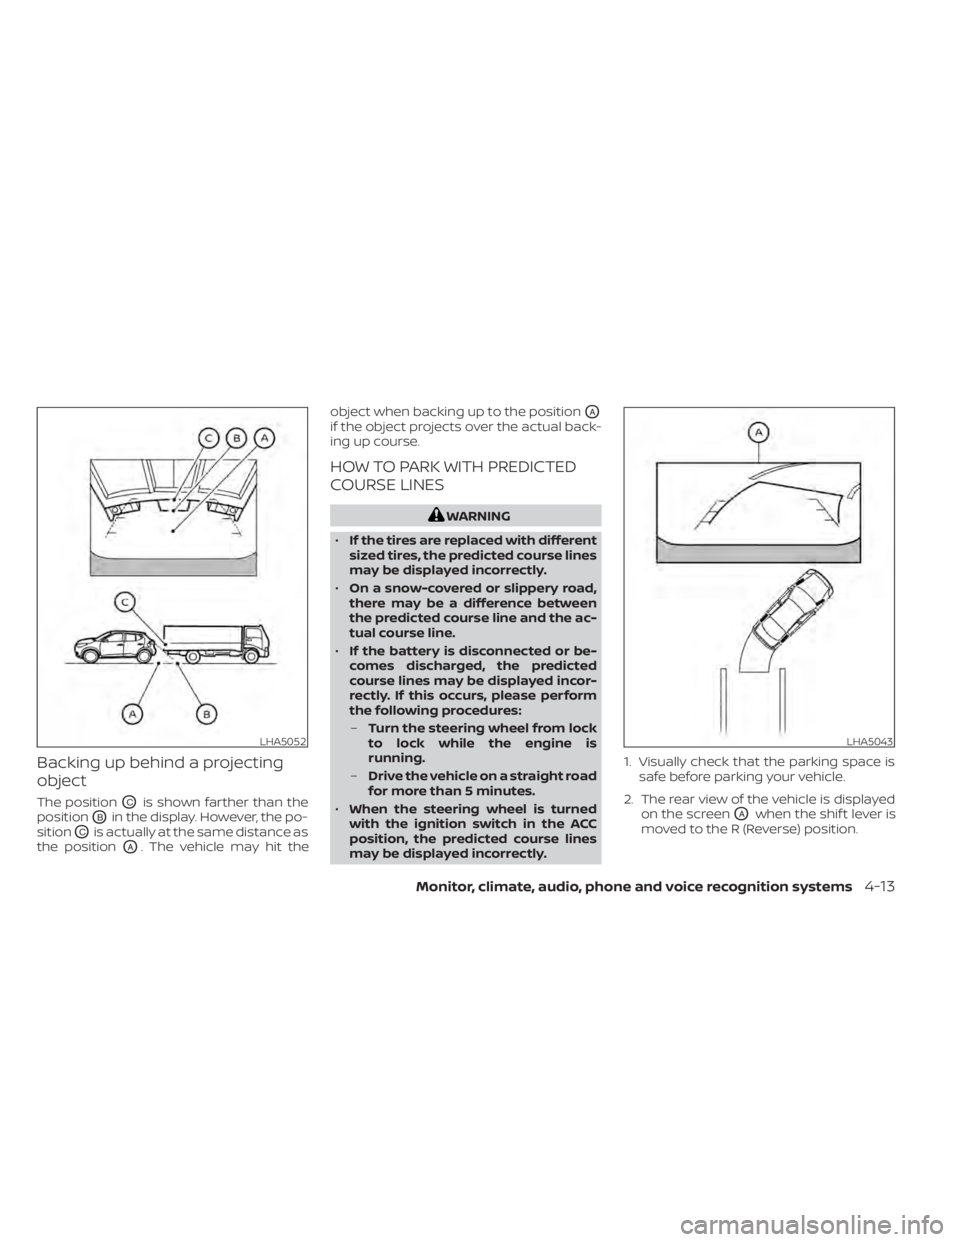
Backing up behind a projecting
object
The positionOCis shown farther than the
position
OBin the display. However, the po-
sition
OCis actually at the same distance as
the position
OA. The vehicle may hit the object when backing up to the position
OA
if the object projects over the actual back-
ing up course.
HOW TO PARK WITH PREDICTED
COURSE LINES
WARNING
• If the tires are replaced with different
sized tires, the predicted course lines
may be displayed incorrectly.
• On a snow-covered or slippery road,
there may be a difference between
the predicted course line and the ac-
tual course line.
• If the battery is disconnected or be-
comes discharged, the predicted
course lines may be displayed incor-
rectly. If this occurs, please perform
the following procedures:
– Turn the steering wheel from lock
to lock while the engine is
running.
– Drive the vehicle on a straight road
for more than 5 minutes.
• When the steering wheel is turned
with the ignition switch in the ACC
position, the predicted course lines
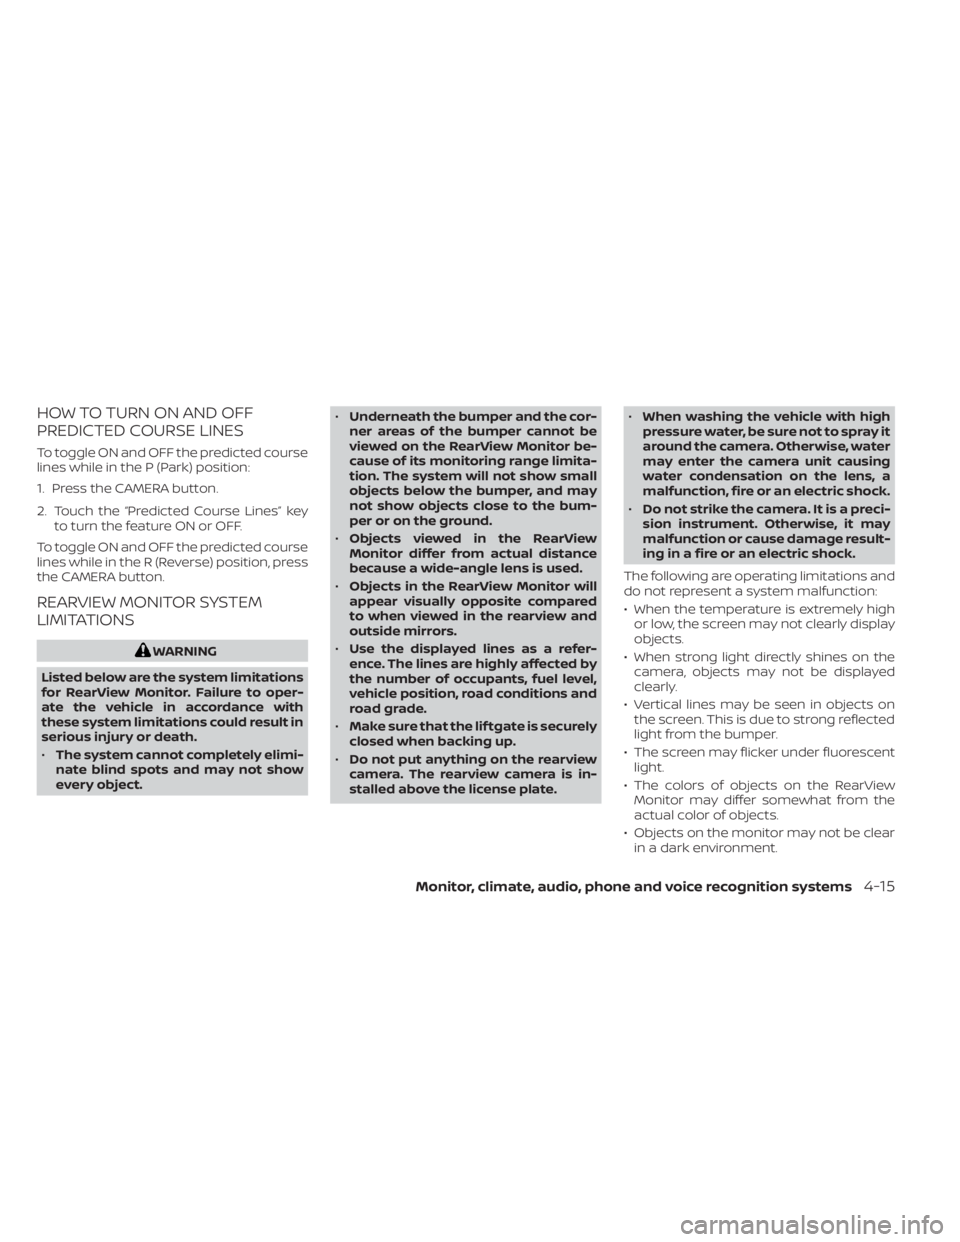
may be displayed incorrectly. 1. Visually check that the parking space is
safe before parking your vehicle.
2. The rear view of the vehicle is displayed on the screen
OAwhen the shif t lever is
moved to the R (Reverse) position.
LHA5052LHA5043
Monitor, climate, audio, phone and voice recognition systems4-13
Page 203 of 500
HOW TO TURN ON AND OFF
PREDICTED COURSE LINES
To toggle ON and OFF the predicted course
lines while in the P (Park) position:
1. Press the CAMERA button.
2. Touch the “Predicted Course Lines” keyto turn the feature ON or OFF.
To toggle ON and OFF the predicted course
lines while in the R (Reverse) position, press
the CAMERA button.
REARVIEW MONITOR SYSTEM
LIMITATIONS
WARNING
Listed below are the system limitations
for RearView Monitor. Failure to oper-
ate the vehicle in accordance with
these system limitations could result in
serious injury or death.
• The system cannot completely elimi-
nate blind spots and may not show
every object. •
Underneath the bumper and the cor-
ner areas of the bumper cannot be
viewed on the RearView Monitor be-
cause of its monitoring range limita-
tion. The system will not show small
objects below the bumper, and may
not show objects close to the bum-
per or on the ground.
• Objects viewed in the RearView
Monitor differ from actual distance
because a wide-angle lens is used.
• Objects in the RearView Monitor will
appear visually opposite compared
to when viewed in the rearview and
outside mirrors.
• Use the displayed lines as a refer-
ence. The lines are highly affected by
the number of occupants, fuel level,
vehicle position, road conditions and
road grade.
• Make sure that the lif tgate is securely
closed when backing up.
• Do not put anything on the rearview
camera. The rearview camera is in-
stalled above the license plate. •
When washing the vehicle with high
pressure water, be sure not to spray it
around the camera. Otherwise, water
may enter the camera unit causing
water condensation on the lens, a
malfunction, fire or an electric shock.
• Do not strike the camera. It is a preci-
sion instrument. Otherwise, it may
malfunction or cause damage result-
ing in a fire or an electric shock.
The following are operating limitations and
do not represent a system malfunction:
• When the temperature is extremely high or low, the screen may not clearly display
objects.
• When strong light directly shines on the camera, objects may not be displayed
clearly.
• Vertical lines may be seen in objects on the screen. This is due to strong reflected
light from the bumper.
• The screen may flicker under fluorescent light.
• The colors of objects on the RearView Monitor may differ somewhat from the
actual color of objects.
• Objects on the monitor may not be clear in a dark environment.
Monitor, climate, audio, phone and voice recognition systems4-15