2020 NISSAN 370Z seat adjustment
[x] Cancel search: seat adjustmentPage 46 of 455
1-24Safety — Seats, seat belts and supplemental restraint system
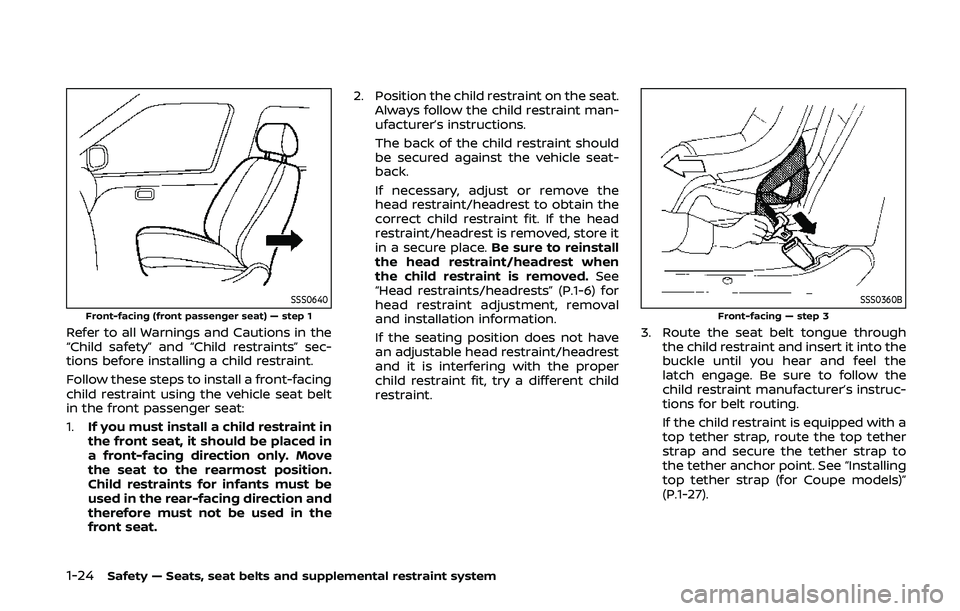
SSS0640Front-facing (front passenger seat) — step 1
Refer to all Warnings and Cautions in the
“Child safety” and “Child restraints” sec-
tions before installing a child restraint.
Follow these steps to install a front-facing
child restraint using the vehicle seat belt
in the front passenger seat:
1.If you must install a child restraint in
the front seat, it should be placed in
a front-facing direction only. Move
the seat to the rearmost position.
Child restraints for infants must be
used in the rear-facing direction and
therefore must not be used in the
front seat. 2. Position the child restraint on the seat.
Always follow the child restraint man-
ufacturer’s instructions.
The back of the child restraint should
be secured against the vehicle seat-
back.
If necessary, adjust or remove the
head restraint/headrest to obtain the
correct child restraint fit. If the head
restraint/headrest is removed, store it
in a secure place. Be sure to reinstall
the head restraint/headrest when
the child restraint is removed. See
“Head restraints/headrests” (P.1-6) for
head restraint adjustment, removal
and installation information.
If the seating position does not have
an adjustable head restraint/headrest
and it is interfering with the proper
child restraint fit, try a different child
restraint.
SSS0360BFront-facing — step 3
3. Route the seat belt tongue through
the child restraint and insert it into the
buckle until you hear and feel the
latch engage. Be sure to follow the
child restraint manufacturer’s instruc-
tions for belt routing.
If the child restraint is equipped with a
top tether strap, route the top tether
strap and secure the tether strap to
the tether anchor point. See “Installing
top tether strap (for Coupe models)”
(P.1-27).
Page 50 of 455
1-28Safety — Seats, seat belts and supplemental restraint system
LRS0455
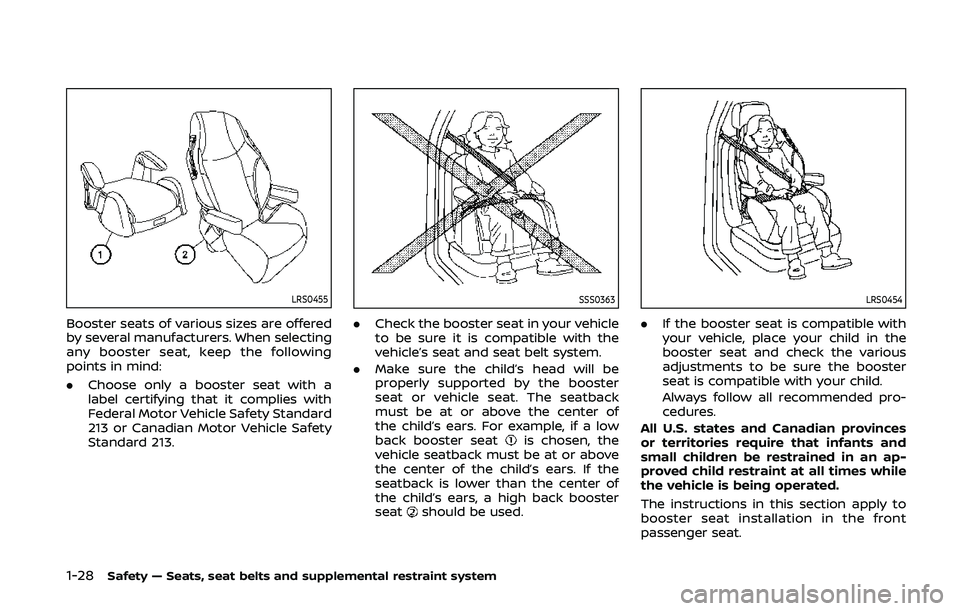
Booster seats of various sizes are offered
by several manufacturers. When selecting
any booster seat, keep the following
points in mind:
.Choose only a booster seat with a
label certifying that it complies with
Federal Motor Vehicle Safety Standard
213 or Canadian Motor Vehicle Safety
Standard 213.
SSS0363
.Check the booster seat in your vehicle
to be sure it is compatible with the
vehicle’s seat and seat belt system.
. Make sure the child’s head will be
properly supported by the booster
seat or vehicle seat. The seatback
must be at or above the center of
the child’s ears. For example, if a low
back booster seat
is chosen, the
vehicle seatback must be at or above
the center of the child’s ears. If the
seatback is lower than the center of
the child’s ears, a high back booster
seat
should be used.
LRS0454
. If the booster seat is compatible with
your vehicle, place your child in the
booster seat and check the various
adjustments to be sure the booster
seat is compatible with your child.
Always follow all recommended pro-
cedures.
All U.S. states and Canadian provinces
or territories require that infants and
small children be restrained in an ap-
proved child restraint at all times while
the vehicle is being operated.
The instructions in this section apply to
booster seat installation in the front
passenger seat.
Page 51 of 455
Booster seat installation
CAUTION
Do not use the lap/shoulder belt
Automatic Locking Retractor (ALR)
mode when using a booster seat
with the seat belts.
Refer to all Warnings and Cautions in the
“Child safety”, “Child restraints” and “Boos-
ter seats” sections earlier in this section
before installing a child restraint.
Follow these steps to install a booster
seat in the front passenger seat:
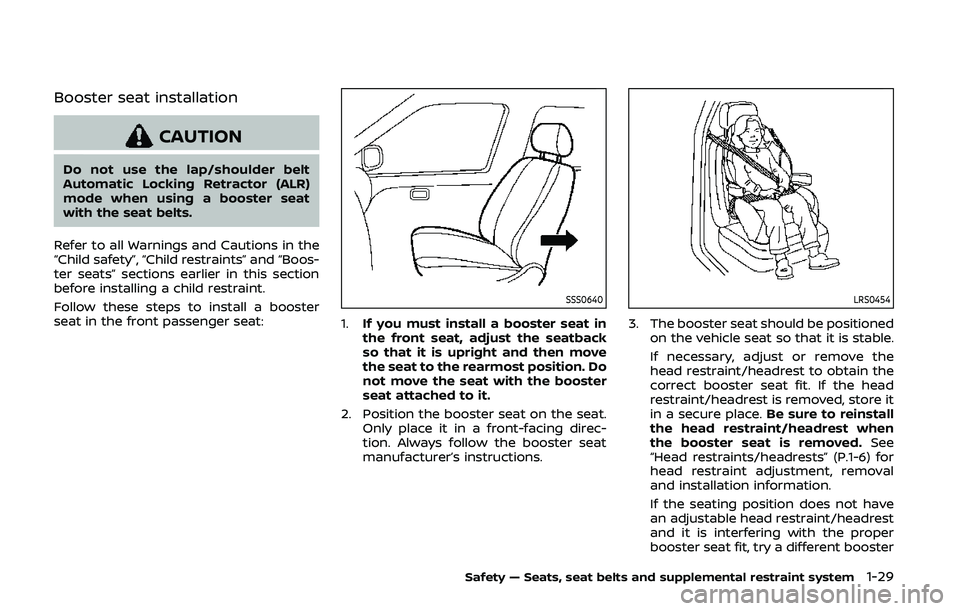
SSS0640
1. If you must install a booster seat in
the front seat, adjust the seatback
so that it is upright and then move
the seat to the rearmost position. Do
not move the seat with the booster
seat attached to it.
2. Position the booster seat on the seat. Only place it in a front-facing direc-
tion. Always follow the booster seat
manufacturer’s instructions.
LRS0454
3. The booster seat should be positioned
on the vehicle seat so that it is stable.
If necessary, adjust or remove the
head restraint/headrest to obtain the
correct booster seat fit. If the head
restraint/headrest is removed, store it
in a secure place. Be sure to reinstall
the head restraint/headrest when
the booster seat is removed. See
“Head restraints/headrests” (P.1-6) for
head restraint adjustment, removal
and installation information.
If the seating position does not have
an adjustable head restraint/headrest
and it is interfering with the proper
booster seat fit, try a different booster
Safety — Seats, seat belts and supplemental restraint system1-29
Page 130 of 455
3-4Pre-driving checks and adjustments
WARNING
.Always have the doors locked
while driving. Along with the use
of seat belts, this provides great-
er safety in the event of an
accident by helping to prevent
persons from being thrown from
the vehicle. This also helps keep
children and others from unin-
tentionally opening the doors,
and will help keep out intruders.
. Before opening any door, always
look for and avoid oncoming
traffic.
. To help avoid risk of injury or
death through unintended opera-
tion of the vehicle and or its
systems, including entrapment
in windows or inadvertent door
lock activation, do not leave chil-
dren, people who require the
assistance of others or pets un-
attended in your vehicle. Addi-
tionally, the temperature inside a
closed vehicle on a warm day can
quickly become high enough to
cause a significant risk of injury
or death to people and pets.
SPA2565A
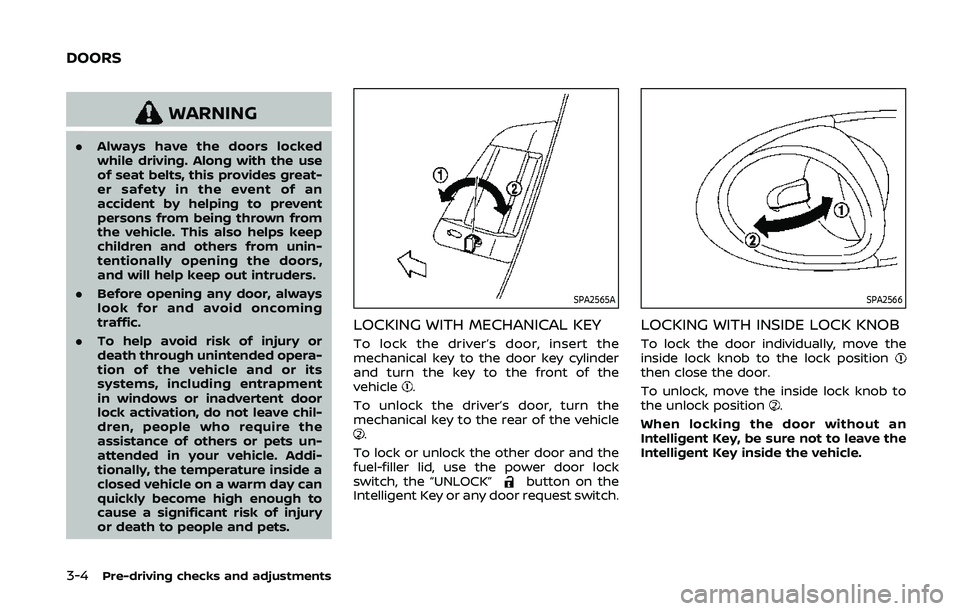
LOCKING WITH MECHANICAL KEY
To lock the driver’s door, insert the
mechanical key to the door key cylinder
and turn the key to the front of the
vehicle
.
To unlock the driver’s door, turn the
mechanical key to the rear of the vehicle
.
To lock or unlock the other door and the
fuel-filler lid, use the power door lock
switch, the “UNLOCK”
button on the
Intelligent Key or any door request switch.
SPA2566
LOCKING WITH INSIDE LOCK KNOB
To lock the door individually, move the
inside lock knob to the lock position
then close the door.
To unlock, move the inside lock knob to
the unlock position
.
When locking the door without an
Intelligent Key, be sure not to leave the
Intelligent Key inside the vehicle.
DOORS
Page 149 of 455
.Do not allow anyone to stand up
or extend any portion of their
body out of the opening while
the vehicle is in motion or while
the top is being operated.
. In an accident you could be
thrown from the vehicle with an
open top. Always use seat belts
and proper child restraints.
CAUTION
.Do not operate the top when the
temperature is below 32°F (0°C).
This may result in damage to the
top material or operating system.
. Remove water drops, snow, ice or
sand from the top, and dry the
surface of the top completely
before opening it.
. Do not open the top when it is
wet or damp. This may cause
interior water damage, stains or
mildew on the top material.
. Be sure to turn off the rear
window defroster switch. Never
turn it on while the top is being
operated or fully opened. The
heat may damage the top mate- rial.SPA2691
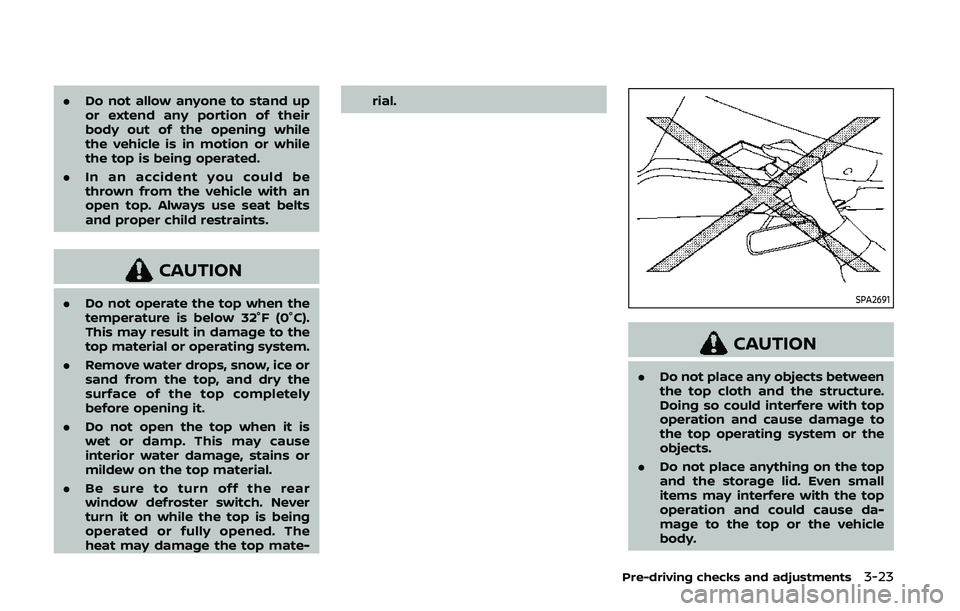
CAUTION
.
Do not place any objects between
the top cloth and the structure.
Doing so could interfere with top
operation and cause damage to
the top operating system or the
objects.
. Do not place anything on the top
and the storage lid. Even small
items may interfere with the top
operation and could cause da-
mage to the top or the vehicle
body.
Pre-driving checks and adjustments3-23
Page 163 of 455
WARNING
.Do not adjust the steering wheel
while driving. You could lose con-
trol of your vehicle and cause an
accident.
. Do not adjust the steering wheel
any closer to you than is neces-
sary for proper steering opera-
tion and comfort. The driver’s air
bag inflates with great force. If
you are unrestrained, leaning for-
ward, sitting sideways or out of
position in any way, you are at
greater risk of injury or death in a
crash. You may also receive ser-
ious or fatal injuries from the air
bag if you are up against it when
it inflates. Always sit back against
the seatback and as far away as
practical from the steering wheel.
Always use the seat belts.
SPA2583
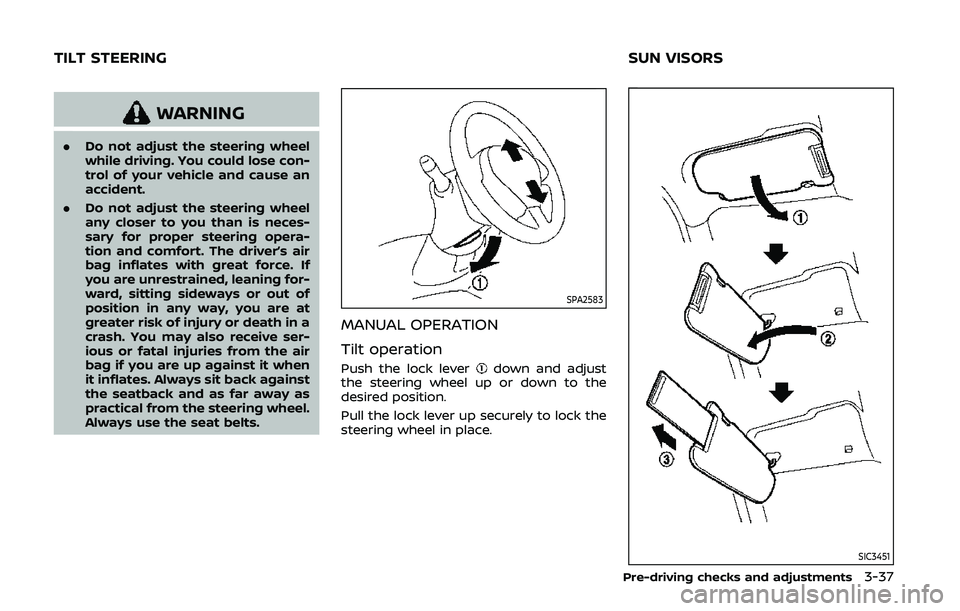
MANUAL OPERATION
Tilt operation
Push the lock leverdown and adjust
the steering wheel up or down to the
desired position.
Pull the lock lever up securely to lock the
steering wheel in place.
SIC3451
Pre-driving checks and adjustments3-37
TILT STEERING SUN VISORS
Page 181 of 455
Ringtone/Incoming Call/Outgoing Call:
For the details of these items, see “Blue-
tooth® hands-free phone system (models
with navigation system)” (P.4-82).
Switch Beeps:
When this item is turned to ON, you will
hear a beep sound when you use a
button.
Guidance Voice:
When this item is turned to ON, you will
hear voice guidance in the navigation
operation or in other operations.
SAA2486
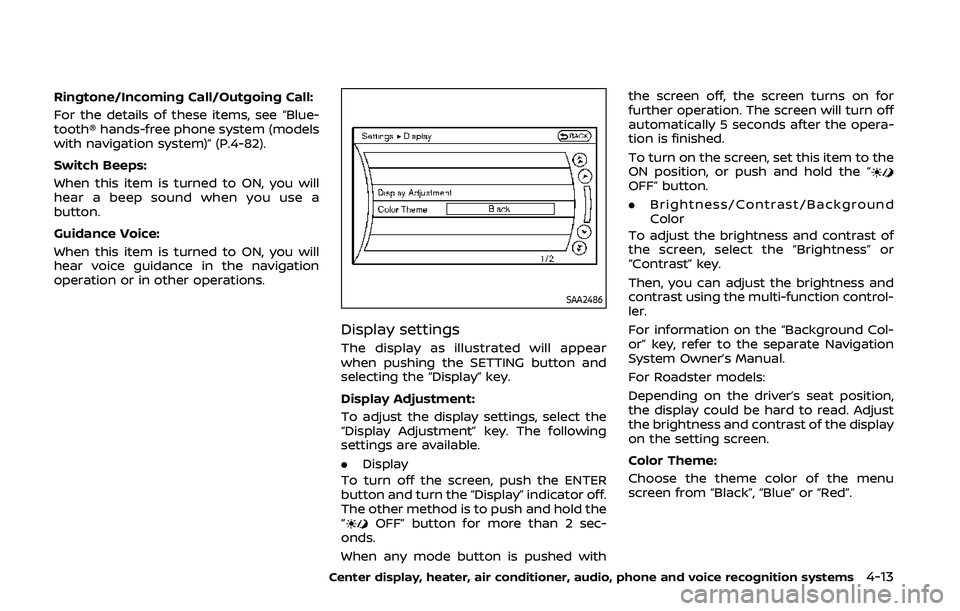
Display settings
The display as illustrated will appear
when pushing the SETTING button and
selecting the “Display” key.
Display Adjustment:
To adjust the display settings, select the
“Display Adjustment” key. The following
settings are available.
.Display
To turn off the screen, push the ENTER
button and turn the “Display” indicator off.
The other method is to push and hold the
“
OFF” button for more than 2 sec-
onds.
When any mode button is pushed with the screen off, the screen turns on for
further operation. The screen will turn off
automatically 5 seconds after the opera-
tion is finished.
To turn on the screen, set this item to the
ON position, or push and hold the “
OFF” button.
.
Brightness/Contrast/Background
Color
To adjust the brightness and contrast of
the screen, select the “Brightness” or
“Contrast” key.
Then, you can adjust the brightness and
contrast using the multi-function control-
ler.
For information on the “Background Col-
or” key, refer to the separate Navigation
System Owner’s Manual.
For Roadster models:
Depending on the driver’s seat position,
the display could be hard to read. Adjust
the brightness and contrast of the display
on the setting screen.
Color Theme:
Choose the theme color of the menu
screen from “Black”, “Blue” or “Red”.
Center display, heater, air conditioner, audio, phone and voice recognition systems4-13
Page 230 of 455
4-62Center display, heater, air conditioner, audio, phone and voice recognition systems
WARNING
.The driver must not attempt to
operate the DVD system or wear
the headphones while the vehicle
is in motion so that full attention
may be given to vehicle opera-
tion.
. Do not attempt to modify the
system to display a movie on the
front screen while the vehicle is
being driven. Doing so may dis-
tract the driver and may cause a
collision and serious personal in-
jury or death.
CAUTION
.Only operate the DVD while the
vehicle engine is running. Operat-
ing the DVD for extended periods
of time with the engine OFF can
discharge the vehicle battery.
. Do not allow the system to get
wet. Excessive moisture such as
spilled liquids may cause the
system to malfunction. .
While playing VIDEO-CD media,
this DVD player does not guaran-
tee complete functionality of all
VIDEO-CD formats.
Display settings
To adjust the front display mode, push
the SETTING button while the DVD is
being played, select the “Others” key and
then select the “Display” key.
To adjust the display ON/OFF, brightness,
tint, color and contrast, select the “Display
Adjustment” key and then select each key.
Then you can adjust each item using the
multi-function controller. After changes
have been made push the BACK button
to save the setting.
SAA2497
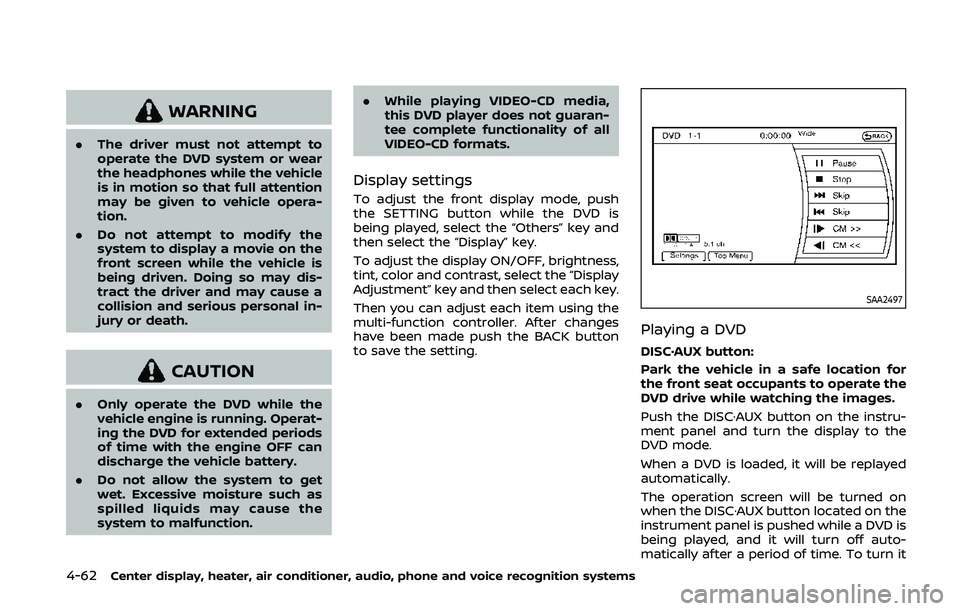
Playing a DVD
DISC·AUX button:
Park the vehicle in a safe location for
the front seat occupants to operate the
DVD drive while watching the images.
Push the DISC·AUX button on the instru-
ment panel and turn the display to the
DVD mode.
When a DVD is loaded, it will be replayed
automatically.
The operation screen will be turned on
when the DISC·AUX button located on the
instrument panel is pushed while a DVD is
being played, and it will turn off auto-
matically after a period of time. To turn it