2020 NISSAN 370Z ESP
[x] Cancel search: ESPPage 218 of 455

4-50Center display, heater, air conditioner, audio, phone and voice recognition systems
SETUP button:
To configure Audio, Clock, Language or
Scroll direction settings, perform the
following procedure:
1. Push the SETUP button.
2. Push the ENTER button.
3. Turn the TUNE/MENU knob clockwiseor counterclockwise, the display will
appear in the following order:
Audio �œClock �œLanguage �œScroll
Direction
After the desired levels have been set,
push either the back button repeatedly,
the SETUP button, or wait for 8 seconds
without pushing any buttons to exit the
menu screen.
Audio adjustments:
Push the SETUP button to enter the setup
menu screen then select Audio by using
TUNE/MENU knob.
Each time the ENTER button is pushed,
the mode will change as follows:
Bass ?Treble ?Fade ?Balance ?AUX
VOL ?SPD VOL ?Audio (setup menu
screen)
Turn the TUNE/MENU knob clockwise or
counterclockwise to adjust the following
items and push the ENTER button to
confirm. Bass control:
Use this control to enhance or attenuate
bass response sound.
Treble control:
Use this control to enhance or attenuate
the treble.
Fade control:
Use this control to adjust the balance of
the volume between the front and rear (if
so equipped) speakers.
Balance control:
Use this control to adjust the balance of
the volume between the left and right
speakers.
AUX VOL (Auxiliary volume) control:
Use this control to adjust the volume
output from the auxiliary source.
SPD VOL (Speed volume) control:
This mode controls the volume output
from the speakers automatically in rela-
tion to vehicle speed.
Adjusting the setting to 0 (zero) turns off
the speed volume feature.
Clock setting:
Push the SETUP button to enter the setup
menu screen then select Clock.
Turn the TUNE/MENU knob, the mode will
change as follows:Set Time
�œON/OFF �œClock Format �œ
Set time
Set Time:
Select Set Time then adjust the clock as
follows:
1. The hour display will start flashing. Turn the TUNE/MENU knob to adjust
the hour and push the ENTER button.
2. The minute display will start flashing. Turn the TUNE/MENU knob to adjust
the minute and push the ENTER
button to finish the clock adjustment.
ON/OFF:
Set the clock display between on or off
when the audio unit is turned off. If set in
the ON position, the clock will be dis-
played when the audio unit is turned off
either by pushing the power button or
when the ignition switch is placed in the
“OFF” position.
Clock Format:
Switch the clock display between 24-hour
mode and 12-hour clock mode.
Language setting:
Push the SETUP button to enter the setup
menu screen then select Language.
Select the appropriate language and
push the ENTER button. Upon completion,
the screen will automatically adapt the
Page 224 of 455
4-56Center display, heater, air conditioner, audio, phone and voice recognition systems
The iPod touch® may not response
quickly with the system in some cases.
Make sure that the iPod® firmware is
updated.
Operating tips:
.iPod Shuffle® and iPod mini® are not
supported.
. Some iPod® operations may not be
available with this system.
USB button:
When the USB button is pushed with the
system off and the iPod® is connected to
the vehicle, the system will turn on.
iPod® main operation:
Interface:
The interface for iPod® operation shown
on the audio system display is similar to
the iPod® interface. Use the TUNE/MENU
knob to play a track on the iPod®.
The following items can be chosen from
the menu list screen.
. Playlists
. Artists
. Albums
. Tracks
. Genres
For further information about each item,
see the iPod® owner’s manual. The following operations are identical to
the audio main operation of the Compact
Disc (CD) operation. For details, see “CD
player operation” (P.4-51).
.
List view
. Quick search
.
. RDM (Random play)
. RPT (Repeat track)
. Folder browsing
DISP button:
While a track with recorded music infor-
mation tags (ID3-tags) is being played, the
title of the played track is displayed. If the
tags are not provided then a notification
message is displayed.
When the DISP button is pushed repeat-
edly, further information about the track
can be displayed along with the track title
as follows:
Track time ?Album ?Artist ?Genre ?
Track time
Track details:
Pushing and holding the DISP button will
turn the display into a detailed overview
and after a few seconds it returns to the
main display, or push the DISP button
briefly.
JVH0936X
AUX (Auxiliary) input
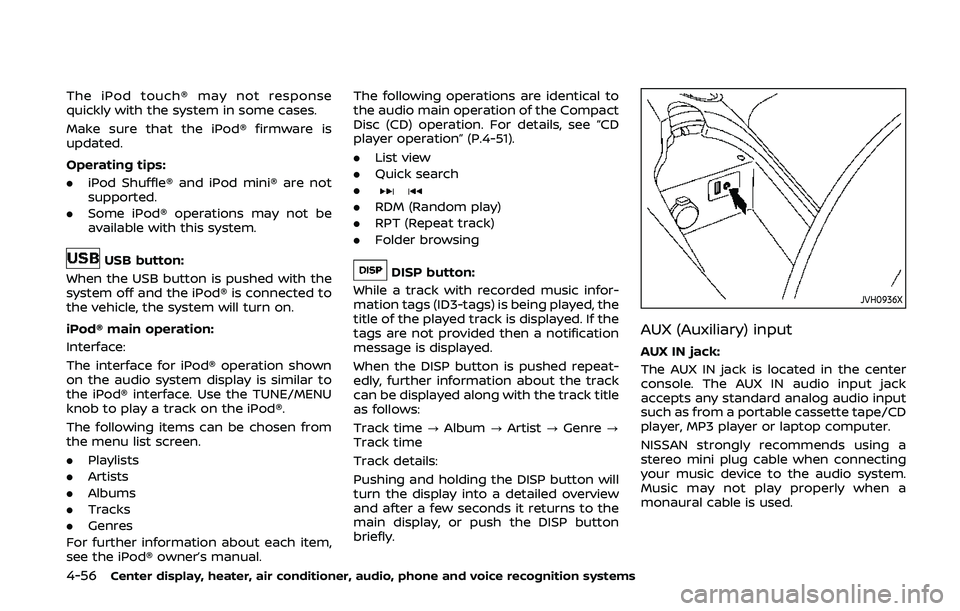
AUX IN jack:
The AUX IN jack is located in the center
console. The AUX IN audio input jack
accepts any standard analog audio input
such as from a portable cassette tape/CD
player, MP3 player or laptop computer.
NISSAN strongly recommends using a
stereo mini plug cable when connecting
your music device to the audio system.
Music may not play properly when a
monaural cable is used.
Page 232 of 455
4-64Center display, heater, air conditioner, audio, phone and voice recognition systems
: Move the cursor to select a DVDmenu.
Enter: Enter the selected menu.
Move: Change the display location by mov- ing the operation key.
Back: Return to the previous screen.
Hide: Hide the operation key.
Title Menu (DVD-VIDEO):
Some menus specific to each disc will be
shown. For details, see the instructions on
the disc.
Title Search (DVD-VIDEO, DVD-VR):
The scene with the specified title will be
displayed each time the “+” side or “−” side
is selected.
Group Search (VIDEO CD):
A scene in the specified group will be
displayed each time the “+” side or “−” side
is selected.
10 Key Search (DVD-VIDEO, VIDEO-CD,
CD-DA, DVD-VR):
Select the “10 Key Search” key to open the
number entry screen. Input the number
to be searched and select the “OK” key.
The specified Title/Chapter or Group/
Track will be played.
Select No. (VIDEO-CD):
Select the “Select No.” key to open the
number entry screen. Input the number to be searched and select the “OK” key.
The specified scene will be played.
Angle (DVD-VIDEO):
If the DVD contains different angles (such
as moving images), the current image
angle can be switched to another one.
Select the “Angle” key. The angle will
change each time the “+” side or “−” side
is selected.
Angle Mark (DVD-VIDEO):
When this item is turned on, an angle
mark will be shown on the bottom of the
screen if the scene can be seen from a
different angle.
Menu Skip (DVD-VIDEO):
DVD menus are automatically configured
and the contents will be played directly
when the “Menu Skip” key is turned on.
Note that some discs may not be played
directly even if this item is turned on.
CM Skip (DVD-VIDEO):
Select the “CM Skip” key. Choose the
setting time from 15, 30 or 60 seconds
by selecting the “+” side or “−” side.
DRC (DVD-VIDEO, DVD-VR):
DRC (Dynamic Range Compression) auto-
matically adjusts the soundtrack volume
level to maintain a more even sound to
the speakers. DVD Language (DVD-VIDEO, VIDEO-CD):
Select the “DVD Language” key to open
the number entry screen. Input the num-
ber corresponding to the preferred lan-
guage and select the “OK” key. The DVD
top menu language will be changed to
the one specified.
Display:
To adjust the image quality of the screen,
select the preferred adjustment items.
Audio:
Select the preferred language for audio.
Subtitle (DVD-VIDEO, DVD-VR):
Select the preferred language for sub-
titles.
Display Mode (DVD-VIDEO, VIDEO-CD,
DVD-VR):
Select from the “Full”, “Wide”, “Normal” or
“Cinema” modes.
Title List (DVD-VR):
Select the preferred title from the list.
Play Mode:
Select the preferred play mode.
PG/PL Mode (DVD-VR):
Select the “PG” or “PL” mode.
Page 259 of 455
TROUBLESHOOTING GUIDE
The system should respond correctly to all voice commands without difficulty. If problems are encountered, try the following
solutions.
Where the solutions are listed by number, try each solution in turn, starting with number 1, until the problem is resolved.
SymptomSolution
The system fails to interpret the
command correctly. 1. Ensure that the command is valid. (See “NISSAN Voice Recognition System (models with navigation system)”
(P.4-105).)
2. Ensure that the command is spoken after the tone.
3. Speak clearly without pausing between words and at a level appropriate to the ambient noise level in the
vehicle.
4. Ensure that the ambient noise level is not excessive (for example, windows open or defroster on). NOTE: If it is
too noisy to use the phone, it is likely that the voice commands will not be recognized.
5. If more than one command was said at a time, try saying the commands separately.
The system consistently selects the
wrong voicetag. 1. Ensure that the voicetag requested matches what was originally stored. (See “Quick Dial” (P.4-85).)
2. Replace one of the names being confused with a new name.
The system cannot be operated. Close the soft top (for Roadster models).
Center display, heater, air conditioner, audio, phone and voice recognition systems4-91
Page 262 of 455
4-94Center display, heater, air conditioner, audio, phone and voice recognition systems
IC Regulatory information
.Operation is subject to the following
two conditions: (1) this device may not
cause interference, and (2) this device
must accept any interference, includ-
ing interference that may cause un-
desired operation of the device.
. This Class B digital apparatus meets
all requirements of the Canadian In-
terference-Causing Equipment Regu-
lations.
Bluetooth® trademark
Bluetooth® is a trademark
owned by Bluetooth SIG,
Inc., and licensed to Visteon
Corporation.
USING THE SYSTEM
The NISSAN Voice Recognition system
allows hands-free operation of the Blue-
tooth® Hands-Free Phone System.
If the vehicle is in motion, some com-
mands may not be available so full
attention may be given to vehicle opera-
tion.
Initialization
When the ignition switch is pushed to the
ON position, NISSAN Voice Recognition is
initialized, which may take up to one
minute. If the
button is pushed before
the initialization completes, the system
will accept any command.
Operating tips
To get the best performance out of the
NISSAN Voice Recognition system, ob-
serve the following:
. Keep the interior of the vehicle as
quiet as possible. Close the windows
to eliminate surrounding noises (traf-
fic noises, vibration sounds, etc.),
which may prevent the system from
recognizing voice commands cor-
rectly.
. Wait until the tone sounds before
speaking a command. Otherwise, the
command will not be received prop-
erly.
. Start speaking a command within 5
seconds after the tone sounds.
. Speak in a natural voice without
pausing between words.
Giving voice command
To operate NISSAN Voice Recognition,
push and release thebutton located
on the steering wheel. After the tone
sounds, speak a command.
The command given is picked up by the
microphone, and voice feedback is given
when the command is accepted.
. If you need to hear the available
commands for the current menu
again, say “Help” and the system will
repeat them.
. If a command is not recognized, the
system announces, “Command not
recognized. Please say again.” Repeat
the command in a clear voice.
. If you want to go back to the previous
command, you can say “Go back” or
“Correction” anytime the system is
waiting for a response.
. You can cancel a command when the
system is waiting for a response by
saying, “Cancel” or “Quit.” The system
announces “Cancel” and ends the VR
session. You can also push and hold
the
button for 5 seconds on the
steering wheel at any time to cancel
the VR session. Whenever the VR
session is cancelled, a double beep is
played to indicate you have exited the
system.
Page 266 of 455
4-98Center display, heater, air conditioner, audio, phone and voice recognition systems
4. Say the number you wish to callstarting with the area code in single
digit format. If the system has trouble
recognizing the correct phone num-
ber, try entering the number in the
following groups: 3-digit area code, 3-
digit prefix and the last 4-digits. For
example, 555-121-3354 can be said as
“five five five” as the 1st group, then
“one two one” as the 2nd group, and
“three three five four” as the 3rd group.
For dialing more than 10 digits or any
special characters, say “Special Num-
ber”. See “How to say numbers” (P.4-
95), for more information.
5. When you have finished speaking the phone number, the system repeats it
back and announces the available
commands.
6. Say: “Dial”
. The system acknowl-
edges the command and makes the
call.
For additional command options, see “List
of voice commands” (P.4-98).
Receiving a call
To receive a call, push thebutton on
the steering wheel when you hear the
ring tone.
Once the call has ended, push the
button on the steering wheel. NOTE:
If you do not wish to take the call when
you hear the ring tone, push the
button on the steering wheel to reject
the call.
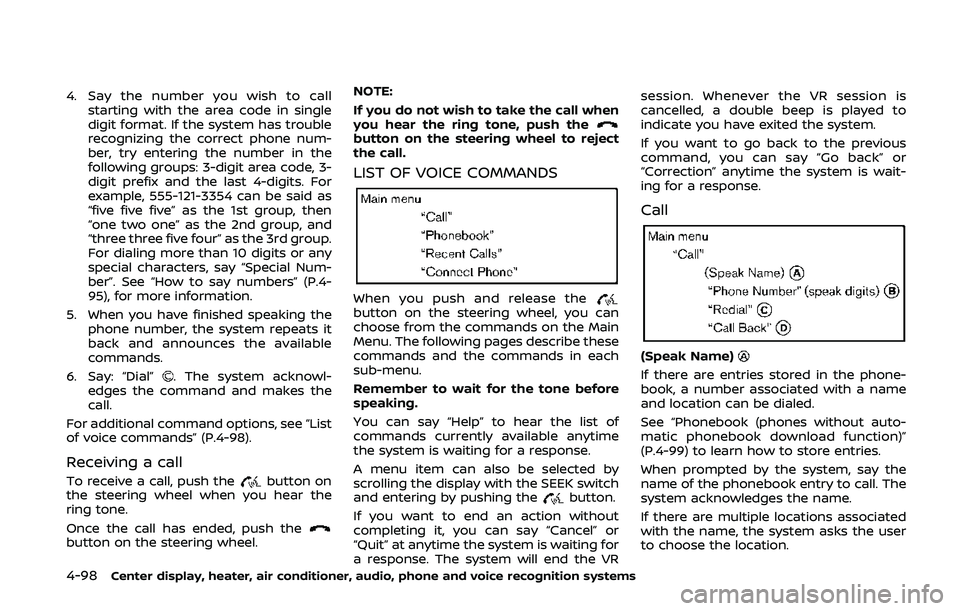
LIST OF VOICE COMMANDS
When you push and release thebutton on the steering wheel, you can
choose from the commands on the Main
Menu. The following pages describe these
commands and the commands in each
sub-menu.
Remember to wait for the tone before
speaking.
You can say “Help” to hear the list of
commands currently available anytime
the system is waiting for a response.
A menu item can also be selected by
scrolling the display with the SEEK switch
and entering by pushing the
button.
If you want to end an action without
completing it, you can say “Cancel” or
“Quit” at anytime the system is waiting for
a response. The system will end the VR session. Whenever the VR session is
cancelled, a double beep is played to
indicate you have exited the system.
If you want to go back to the previous
command, you can say “Go back” or
“Correction” anytime the system is wait-
ing for a response.
Call
(Speak Name)
If there are entries stored in the phone-
book, a number associated with a name
and location can be dialed.
See “Phonebook (phones without auto-
matic phonebook download function)”
(P.4-99) to learn how to store entries.
When prompted by the system, say the
name of the phonebook entry to call. The
system acknowledges the name.
If there are multiple locations associated
with the name, the system asks the user
to choose the location.
Page 272 of 455
4-104Center display, heater, air conditioner, audio, phone and voice recognition systems
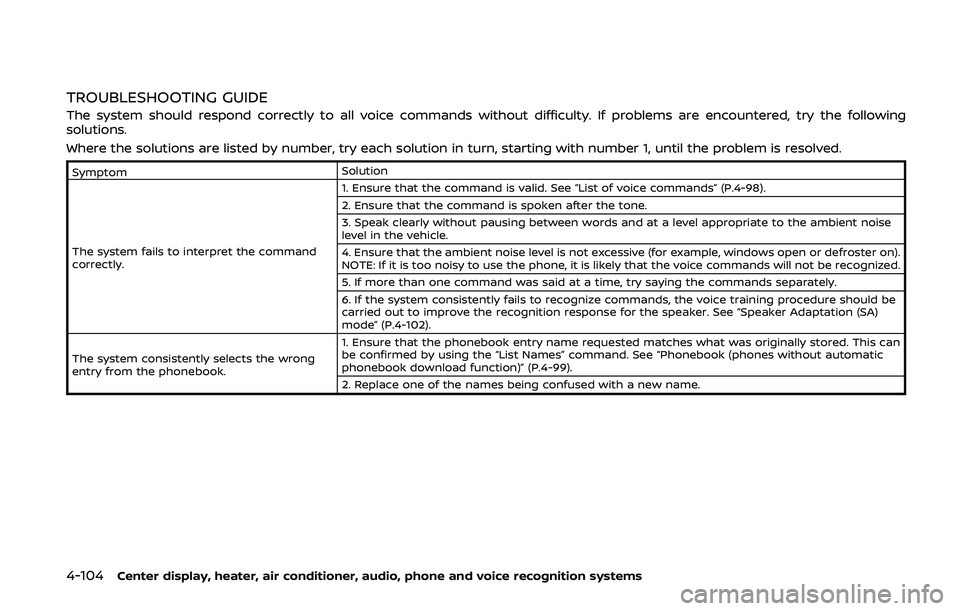
TROUBLESHOOTING GUIDE
The system should respond correctly to all voice commands without difficulty. If problems are encountered, try the following
solutions.
Where the solutions are listed by number, try each solution in turn, starting with number 1, until the problem is resolved.
SymptomSolution
The system fails to interpret the command
correctly. 1. Ensure that the command is valid. See “List of voice commands” (P.4-98).
2. Ensure that the command is spoken after the tone.
3. Speak clearly without pausing between words and at a level appropriate to the ambient noise
level in the vehicle.
4. Ensure that the ambient noise level is not excessive (for example, windows open or defroster on).
NOTE: If it is too noisy to use the phone, it is likely that the voice commands will not be recognized.
5. If more than one command was said at a time, try saying the commands separately.
6. If the system consistently fails to recognize commands, the voice training procedure should be
carried out to improve the recognition response for the speaker. See “Speaker Adaptation (SA)
mode” (P.4-102).
The system consistently selects the wrong
entry from the phonebook. 1. Ensure that the phonebook entry name requested matches what was originally stored. This can
be confirmed by using the “List Names” command. See “Phonebook (phones without automatic
phonebook download function)” (P.4-99).
2. Replace one of the names being confused with a new name.
Page 298 of 455
4-130Center display, heater, air conditioner, audio, phone and voice recognition systems
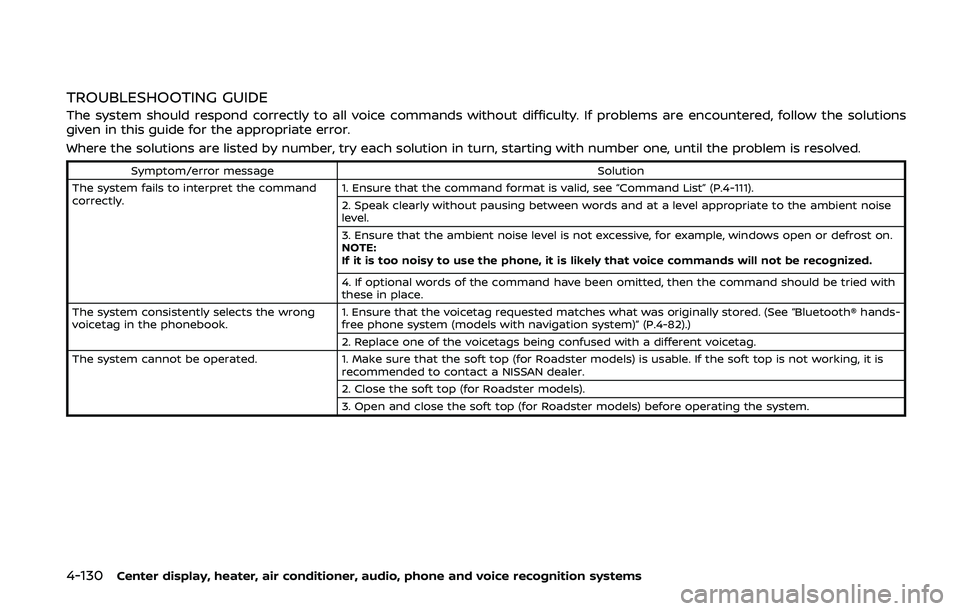
TROUBLESHOOTING GUIDE
The system should respond correctly to all voice commands without difficulty. If problems are encountered, follow the solutions
given in this guide for the appropriate error.
Where the solutions are listed by number, try each solution in turn, starting with number one, until the problem is resolved.
Symptom/error messageSolution
The system fails to interpret the command
correctly. 1. Ensure that the command format is valid, see “Command List” (P.4-111).
2. Speak clearly without pausing between words and at a level appropriate to the ambient noise
level.
3. Ensure that the ambient noise level is not excessive, for example, windows open or defrost on.
NOTE:
If it is too noisy to use the phone, it is likely that voice commands will not be recognized.
4. If optional words of the command have been omitted, then the command should be tried with
these in place.
The system consistently selects the wrong
voicetag in the phonebook. 1. Ensure that the voicetag requested matches what was originally stored. (See “Bluetooth® hands-
free phone system (models with navigation system)” (P.4-82).)
2. Replace one of the voicetags being confused with a different voicetag.
The system cannot be operated. 1. Make sure that the soft top (for Roadster models) is usable. If the soft top is not working, it is
recommended to contact a NISSAN dealer.
2. Close the soft top (for Roadster models).
3. Open and close the soft top (for Roadster models) before operating the system.