2020 MERCEDES-BENZ METRIS Service menu
[x] Cancel search: Service menuPage 17 of 320

Load protection net ...........................
248
Loading guidelines ............................ 242
Loading rails
Maximum tensile strength ............. 314
Loads
Securing ........................................ 244
Transporting .................................. 242
Locking
see Central locking
Locking centrally
see Central locking
Low-beam headlamps
Display messages (vehicle with
steering wheel buttons) ................. 216
Display messages (vehicle with-
out steering wheel buttons) ........... 202
Driving abroad ............................... 141
Replacing bulbs ............................. 106
Switching on/off ........................... 100
Lumbar support ................................... 89M
M+S tires ............................................
280
Maintenance ...................................... 257
Maintenance points under the
hood .................................................... 252
Maximum permissible speed
Speed limitation (tires) .................. 141
Mechanical key
Function/notes ................................ 72
Inserting .......................................... 73
Locking vehicle ................................ 73
Removing ......................................... 72
Media Interface
Connections ..................................... 43
Memory card (audio) ......................... 187
Memory function
Seat ................................................. 97
Mercedes-Benz Commercial Van
Center
see Qualified specialist workshop
Mercedes-Benz Service24h .............. 272
Message memory
On-board computer (vehicle with
steering wheel buttons) ................. 209
On-board computer (vehicle with-
out steering wheel buttons) ........... 195 Messages
see Warning and indicator lamps
Mirrors
Exterior mirrors
................................ 97
Important safety notes .................... 96
Rear-view mirror .............................. 96
see Vanity mirror
Mobile phone
Type approval/frequency .............. 304
Mobile phone
see Telephone
Model series
see Vehicle identification plate
Modifying the programming
(SmartKey) ........................................... 72
Mounting wheels
Lowering the vehicle ...................... 300
Mounting a new wheel ................... 300
Preparing the vehicle ..................... 298
Raising the vehicle ......................... 298
Removing a wheel .......................... 299
Removing and mounting the
spare wheel ................................... 303
Securing the vehicle against roll-
ing away ........................................ 298
MP3
Operation ....................................... 187 N
Navigation Menu (on-board computer) ............
185
Notes on breaking-in a new vehi-
cle ....................................................... 126 O
Occupant Classification System
(OCS) Conditions .......................................
54
Faults ............................................... 57
Operation ......................................... 54
Self-test ........................................... 56
Occupant safety
Air bags ........................................... 51
Automatic measures after an
accident ........................................... 60
Belt warning ..................................... 50
Children in the vehicle ..................... 60 Index
15
Page 18 of 320

Important safety notes .................... 46
Introduction to the restraint sys-
tem ..................................................
46
Occupant Classification System
(OCS) ............................................... 54
PASSENGER AIR BAG OFF indica-
tor lamp ........................................... 47
Pets in the vehicle ........................... 66
Restraint system warning lamp ........ 46
Seat belt .......................................... 47
OCS
Faults ............................................... 57
Operation ......................................... 54
Self-test ........................................... 56
Odometer
Displaying (vehicle with steering
wheel buttons) ............................... 183
Displaying (vehicle without steer-
ing wheel buttons) ......................... 177
Setting the display unit (vehicle
with steering wheel buttons) ......... 192
Setting the display unit (vehicle
without steering wheel buttons) .... 180
Off-road driving
Checklist after driving off-road ...... 146
Important safety notes .................. 144
Rules for driving off-road ............... 145
Oil
see Engine oil
On-board computer (vehicle with
steering wheel buttons)
Assistance menu ........................... 189
Audio menu ................................... 187
Date menu ..................................... 192
Display messages .......................... 209
Factory settings ............................. 194
Important safety notes .................. 174
Instrument cluster menu ............... 192
Lights menu ................................... 193
Menu overview .............................. 183
Message memory .......................... 209
Navigation menu ............................ 185
Operating ....................................... 181
Permanent display ......................... 192
Service menu ................................. 191
Setting the date ............................. 192
Setting the display ......................... 192
Setting the display language .......... 192 Setting the language ...................... 192
Setting the time ............................. 192
Settings menu ............................... 191
Standard display ............................ 183
Telephone menu ............................ 188
Time menu ..................................... 192
Trip menu ...................................... 183
Vehicle menu ................................. 193
On-board computer (vehicle with-
out steering wheel buttons)
Coolant temperature display
menu ............................................. 178
Current fuel consumption menu .... 178
Date menu ..................................... 181
Digital speedometer menu ............. 178
Display messages .......................... 194
Distance menu ............................... 177
Factory settings ............................. 179
Important safety notes .................. 174
Menu overview .............................. 177
Message memory .......................... 195
Operating ....................................... 176
Permanent display ......................... 180
Range menu ................................... 178
Setting the date ............................. 181
Setting the display ......................... 180
Setting the display language .......... 179
Setting the language ...................... 179
Setting the time ............................. 181
Settings menu ............................... 179
Standard display menu .................. 177
Time menu ..................................... 181
Trip computer menu ...................... 177
On-board computer (vehicles
with steering wheel buttons)
Displaying the service message ..... 258
On-board computer (vehicles
without steering wheel buttons)
Displaying the service message ..... 258
On-board diagnostic interface
see Diagnostics connection
Operating Instructions
Before the first journey .................... 27
Limited Warranty ............................. 27
Operating safety
Limited Warranty ............................. 2716
Index
Page 21 of 320

Fuel gauge (vehicle without
steering wheel buttons) .................
176
Refueling procedure (fuel) ............. 137
see Fuel
Remote control
see Key
Replacing bulbs
Important safety notes .................. 105
Replacing bulbs
see Replacing bulbs
Reporting safety defects .................... 32
Rescue card ......................................... 35
Reserve (fuel tank) see Fuel
Reserve fuel
Display messages (vehicle with
steering wheel buttons) ................. 221
Display messages (vehicle with-
out steering wheel buttons) ........... 206
Warning lamp ................................. 233
Residual heat (climate control) ........ 123
Restraint system
Display message (vehicle with
steering wheel buttons) ................. 215
Display message (vehicle without
steering wheel buttons) ................. 201
Important safety notes .................... 46
Introduction ..................................... 46
PASSENGER AIR BAG OFF indica-
tor lamp ........................................... 47
Warning lamp ................................. 232
Warning lamp (function) ................... 46
Reverse warning feature .................. 129
Reversing feature
Electric sliding door ......................... 78
Side windows ................................... 84
Roadside Assistance (breakdown) .... 28
Roof carrier
Maximum payload .......................... 314
Notes ............................................. 249
Roof lining and carpets (cleaning
guidelines) ......................................... 269
Roof load (roof carrier) ..................... 314S
Safety Children in the vehicle
..................... 60 Operating safety and registration .... 30
see Occupant safety
Safety system
see Driving safety systems
Seat
Correct driver's seat position ...........
87
Seat belts
Adjusting the height ......................... 50
Cleaning ......................................... 269
Correct usage .................................. 49
Fastening ......................................... 50
Important safety guidelines ............. 48
Introduction ..................................... 47
Releasing ......................................... 50
Warning lamp ................................. 228
Warning lamp (function) ................... 50
Seat sliders
Problems ......................................... 89
Seats
Adjusting (electrically) ..................... 88
Adjusting (manually) ........................ 88
Adjusting lumbar support ................ 89
Adjusting the head restraint ............ 93
Armrest ............................................ 95
Cleaning the cover ......................... 269
Important safety notes .................... 87
Seat heating .................................... 95
Storing settings (memory func-
tion) ................................................. 97
Selecting a gear
see Automatic transmission
Selector lever
Cleaning ......................................... 269
see Automatic transmission
Sensors (cleaning instructions) ....... 267
Service interval display
Calling up the service due date ...... 258
Hiding service messages ............... 258
Notes ............................................. 257
Service menu (on-board com-
puter) .................................................. 191
Service phone number ...................... 272
Service products
Brake fluid ..................................... 310
Coolant (engine) ............................ 310
Engine oil ....................................... 308
Fuel ................................................ 306
Important safety notes .................. 305 Index
19
Page 112 of 320

Switching the rear window wiper
on/off
1
b To wipe with washer fluid
2 ° Intermittent wipe
3 $ Rear window wiper off
4 b To wipe with washer fluid
X Turn the key to position 1 or 2 in the igni-
tion lock.
X Move the è switch to the corresponding
position.
If the rear window wiper is activated, the
è symbol is shown in the status area of
the display.
The Status Overview in the Assist.
menu then also shows the è symbol for
vehicles with steering wheel buttons
(Y page
189).
X To wipe with washer fluid: press the è
switch beyond the current position as far as
it will go to 1 or press and hold 4.
When you release the è switch, the rear
window wiper continues to wipe for about
another five seconds. The rear window
wiper then wipes according to the original
position 2 or 3.
The rear window wiper switches on automati-
cally if you engage reverse gear and the wind-
shield wipers are on.
If the vehicle is stationary and you open the
tailgate or rear-end door, the rear window
wiper will stop automatically. The rear window
wiper will only resume wiping again when the
tailgate and rear-end door are closed and you
pull away again.
The rear window will no longer be wiped prop-
erly if the wiper blade is worn. This may pre-
vent you from observing the traffic conditions.
Information on replacing the wiper blade can be found under "Replacing wiper blades"
(
Y page
110). Replacing the wiper blades
Important safety notes G
WARNING
If the windshield wipers begin to move while
you are changing the wiper blades, you
could be trapped by the wiper arm. There is
a risk of injury.
Always switch off the windshield wipers and
ignition before changing the wiper blades.
! Never open the hood/tailgate or rear
doors if a windshield wiper arm has been
folded away from the windshield/rear win-
dow.
Never fold a windshield wiper arm without a
wiper blade back onto the windshield/rear
window.
Hold the windshield wiper arm firmly when
you change the wiper blade. If you release
the windshield wiper arm without a wiper
blade and it falls onto the windshield/rear
window, the windshield/rear window may
be damaged by the force of the impact.
Mercedes-Benz recommends that you have
the wiper blades changed at a qualified spe-
cialist workshop.
! Only hold the wiper blade by the wiper
arm. You could otherwise damage the wiper
rubber.
Wiper blades are wear parts. The windshield
will no longer be wiped properly if the wiper
blades are worn. This may prevent you from
observing the traffic conditions.
Please observe the service indicator after
changing the wiper blades of the windshield
wiper.
Service indicator Replacement wiper blades for the windshield
wiper have a service indicator on the tip of the
wiper blade.
Depending on the amount of use, the service
indicator will change color from black to yel-
low.110
Windshield wipers
Lights and windshield wipers
Page 177 of 320

In daylight, the displays in the instrument clus-
ter are illuminated. A dimming function is not
possible in daylight.
On vehicles with steering wheel buttons, the
light sensor in the instrument cluster automat-
ically controls the brightness of the display
lighting.
While the lights are on, the brightness is
dependent upon the brightness of the ambient
light. You can also adjust the brightness of the
instrument lighting and the display lighting:
R by pressing the f and g buttons on the
instrument cluster on vehicles without
steering wheel buttons (not in the Settings
menu)
R by turning brightness control knob : on
vehicles with steering wheel buttons Speedometer
If you change the wheel size on your vehicle,
make sure it is assigned to the correct wheel
size category ( Y page
278). If you change
wheel size category without recoding the con-
trol unit, the speedometer indication will be
inaccurate. The current vehicle speed may
then be higher than the speed displayed in the
speedometer.
The speed can also be shown in the display in
the form of a digital speedometer:
R on vehicles without steering wheel buttons
(Y page 178)
R on vehicles with steering wheel buttons
(Y page 185)
i In some countries, a warning sounds
and/or the display shows a message when
the vehicle reaches the maximum legally
permissible speed limit, e.g. at 75 mph
(120 km/h). Tachometer
! Do not drive in the overrevving range, as
this could damage the engine. H
Environmental note
Avoid driving at high engine speeds. This
unnecessarily increases the fuel consump-
tion of your vehicle and harms the environ-
ment as a result of increased emissions. The red band in the tachometer indicates the
engine's overrevving range.
To protect the engine, the fuel supply is inter-
rupted when the red band is reached.
Outside temperature display
You should pay special attention to road con-
ditions when temperatures are around freezing
point.
Please bear in mind that the outside tempera-
ture display shows the air temperature meas-
ured and not the road temperature.
The display shows the outside temperature in
the header:
R on vehicles without steering wheel buttons
(Y page
176)
R on vehicles with steering wheel buttons
(Y page 183)
Changes in the outside temperature are dis-
played after a short delay. Coolant temperature gauge
G
WARNING
Opening the hood when the engine is over-
heated or when there is a fire in the engine
compartment could expose you to hot gases
or other service products. There is a risk of
injury.
Let an overheated engine cool down before
opening the hood. If there is a fire in the
engine compartment, keep the hood closed
and contact the fire department.
On vehicles without steering wheel buttons,
you can have the coolant temperature shown
in the display
(Y page 178).
On vehicles with steering wheel buttons, an
analog coolant temperature gauge is located
in the tachometer in the instrument cluster
(Y page 40). Under normal driving conditions and at the
correct coolant level, the display may rise to
the letter H or to the red mark. Display and operation
175
On-board computer and displays Z
Page 179 of 320

120 km/h! (only for certain countries)
maximum permissible speed exceeded
= Display panel for display messages, menus
and menu bar
? Transmission position (Y page 132)
A Fuel level
Fuel filler flap location indicator t: the
fuel filler cap is on the left-hand side
B è Rear window wiper
(Y page 110)
Display panel = shows the selected menu or
submenu and display messages. Menu overview
The Settings menu is only displayed when
the vehicle is stationary. You can think of the
order of the menus and functions as a circle.
Press È on the instrument cluster to scroll
through the menus.
If you scroll forward in the Settings menu
using 3, the setting from the previous sub-
menu or function is adopted.
If you press È in a submenu, the submenu or
function is exited without adopting the setting.
The display then shows the start screen of the
Settings menu.
Operation information can be found under
"Operating the on-board computer"
(Y page
176).
Depending on the vehicle equipment, you can
call up the following menus, displays or func-
tions:
R trip odometer and odometer display
(Y page 177)
R trip computer display (Y page 177)
R current range display (Y page 178)
R current fuel consumption display
(Y page 178)
R digital speedometer ( Y page 178)
R coolant temperature gage (Y page 178)
R display messages in the message memory
(Y page 195)
The following menus, displays and functions
are only displayed when the vehicle is station-
ary:
R next service due date display ( Y page 258)
R tire pressure monitor restart (Y page 285)
R Settings menu for setting or activating/
deactivating driving and driver assistance systems as well as display options
(Y page
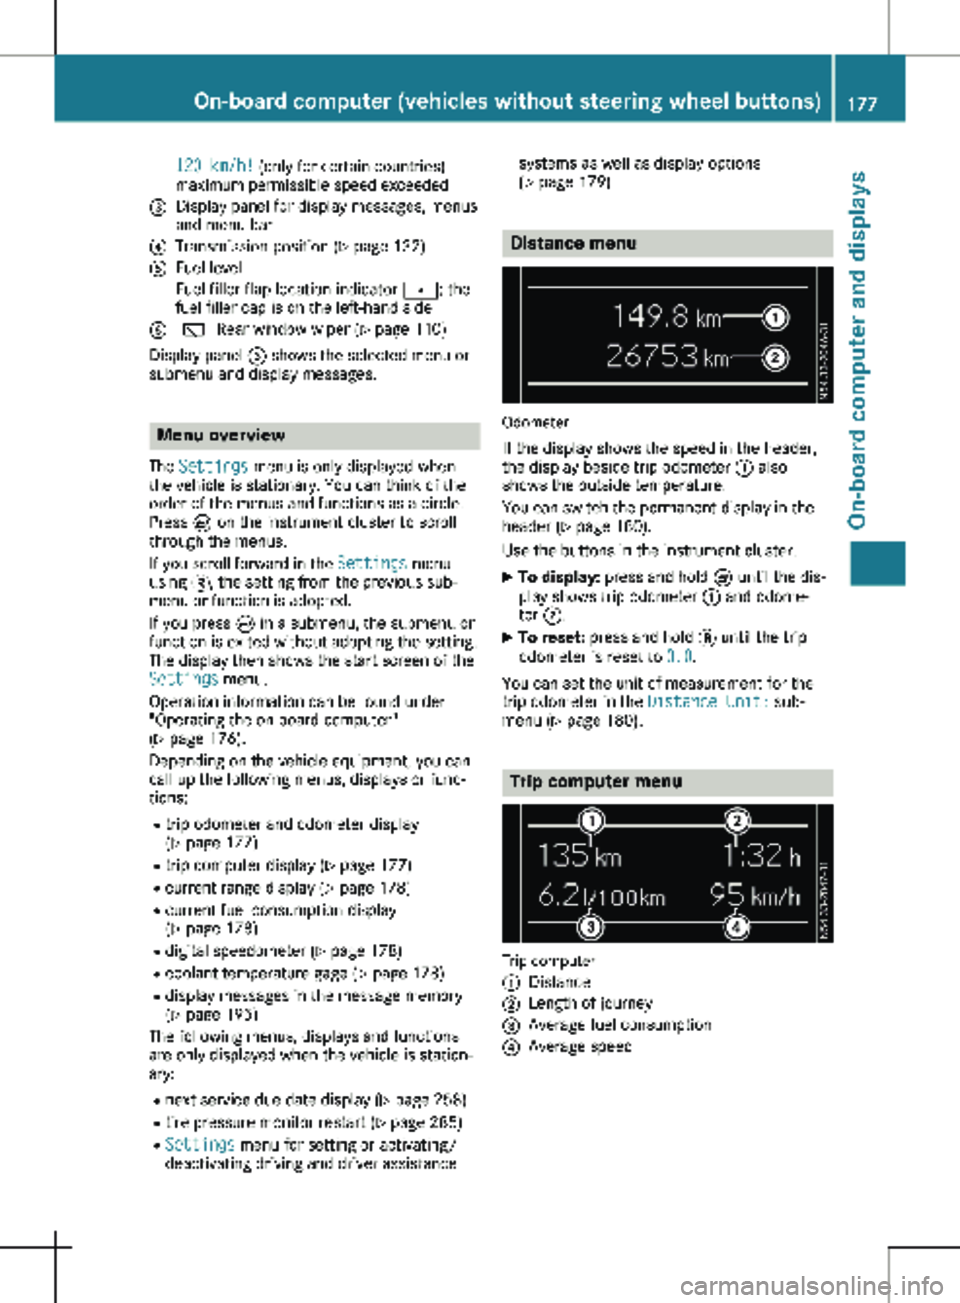
179) Distance menu
Odometer
If the display shows the speed in the header,
the display beside trip odometer : also
shows the outside temperature.
You can switch the permanent display in the
header
(Y page 180).
Use the buttons in the instrument cluster.
X To display: press and hold È until the dis-
play shows trip odometer : and odome-
ter ;.
X To reset: press and hold 3 until the trip
odometer is reset to 0.0.
You can set the unit of measurement for the
trip odometer in the Distance Unit: sub-
menu (Y page
180). Trip computer menu
Trip computer
:
Distance
; Length of journey
= Average fuel consumption
? Average speed On-board computer (vehicles without steering wheel buttons)
177
On-board computer and displays Z
Page 180 of 320

Use the buttons in the instrument cluster.
X To display: press È to select the trip com-
puter display.
The values displayed relate to those meas-
ured since the trip computer was last reset.
X To reset values: press and hold 3 until all
values are reset.
The trip computer is automatically reset if the
value exceeds 9,999 hours or 99,999 miles.
You can set the unit of measurement for con-
sumption and distance in the Distance
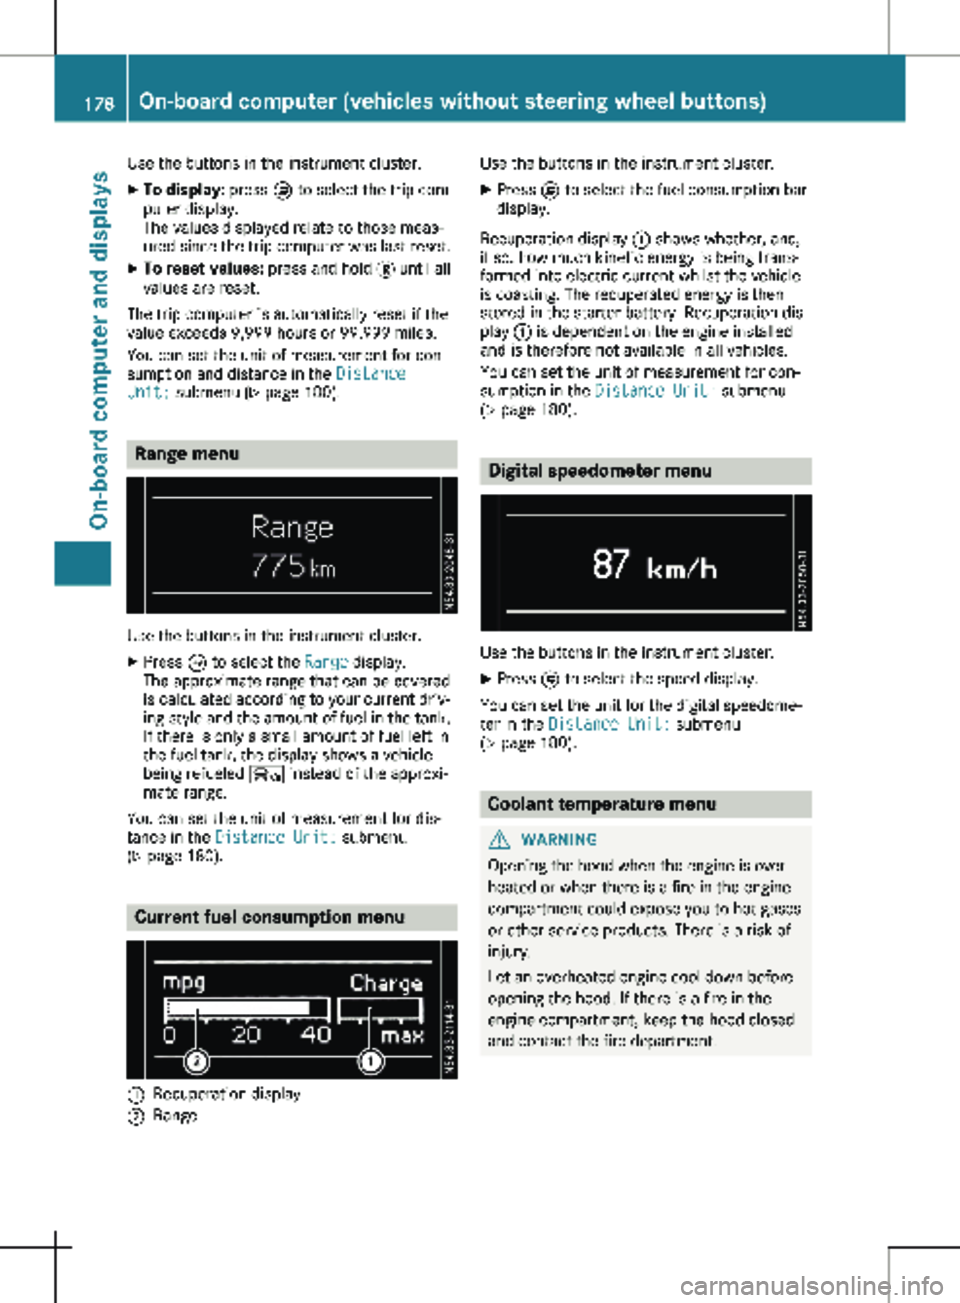
Unit: submenu ( Y page 180).Range menu
Use the buttons in the instrument cluster.
X Press È to select the Range display.
The approximate range that can be covered
is calculated according to your current driv-
ing style and the amount of fuel in the tank.
If there is only a small amount of fuel left in
the fuel tank, the display shows a vehicle
being refueled Ï instead of the approxi-
mate range.
You can set the unit of measurement for dis-
tance in the Distance Unit: submenu
(Y page
180). Current fuel consumption menu
:
Recuperation display
; Range Use the buttons in the instrument cluster.
X Press È to select the fuel consumption bar
display.
Recuperation display : shows whether, and,
if so, how much kinetic energy is being trans-
formed into electric current whilst the vehicle
is coasting. The recuperated energy is then
stored in the starter battery. Recuperation dis-
play : is dependent on the engine installed
and is therefore not available in all vehicles.
You can set the unit of measurement for con-
sumption in the Distance Unit: submenu
(Y page
180). Digital speedometer menu
Use the buttons in the instrument cluster.
X Press È to select the speed display.
You can set the unit for the digital speedome-
ter in the Distance Unit: submenu
(Y page
180). Coolant temperature menu
G
WARNING
Opening the hood when the engine is over-
heated or when there is a fire in the engine
compartment could expose you to hot gases
or other service products. There is a risk of
injury.
Let an overheated engine cool down before
opening the hood. If there is a fire in the
engine compartment, keep the hood closed
and contact the fire department. 178
On-board computer (vehicles without steering wheel buttons)
On-board computer and displays
Page 183 of 320

The vehicle must be stationary. Use the but-
tons in the instrument cluster.
X Press È to select the Settings menu.
X Press 3 to select the Distance Unit:
submenu.
The display indicates the selected setting of
km or Miles.
X Change the setting by pressing f or g.
X Press 3 to confirm.
The display shows the next submenu or the
Settings menu again.
The selected distance units are used for the
displays:
R Digital speedometer
R Odometer and trip odometer
R Trip computer
R Range
R Current consumption
R Cruise control
R Service intervals
Setting the time and date The vehicle must be stationary. Use the but-
tons in the instrument cluster.
X Press È to select the Settings menu.
X Press 3 to select the time and date display.
X Press f or g to set the hours and press
3 to confirm.
X Press f or g to set the minutes and press
3 to confirm.
X Press f or g to set the day and press 3
to confirm.
X Press f or g to set the month and press
3 to confirm.
X Press f or g to set the year and press 3
to confirm.
The display shows the Settings menu
again. On-board computer (vehicles with
steering wheel buttons)
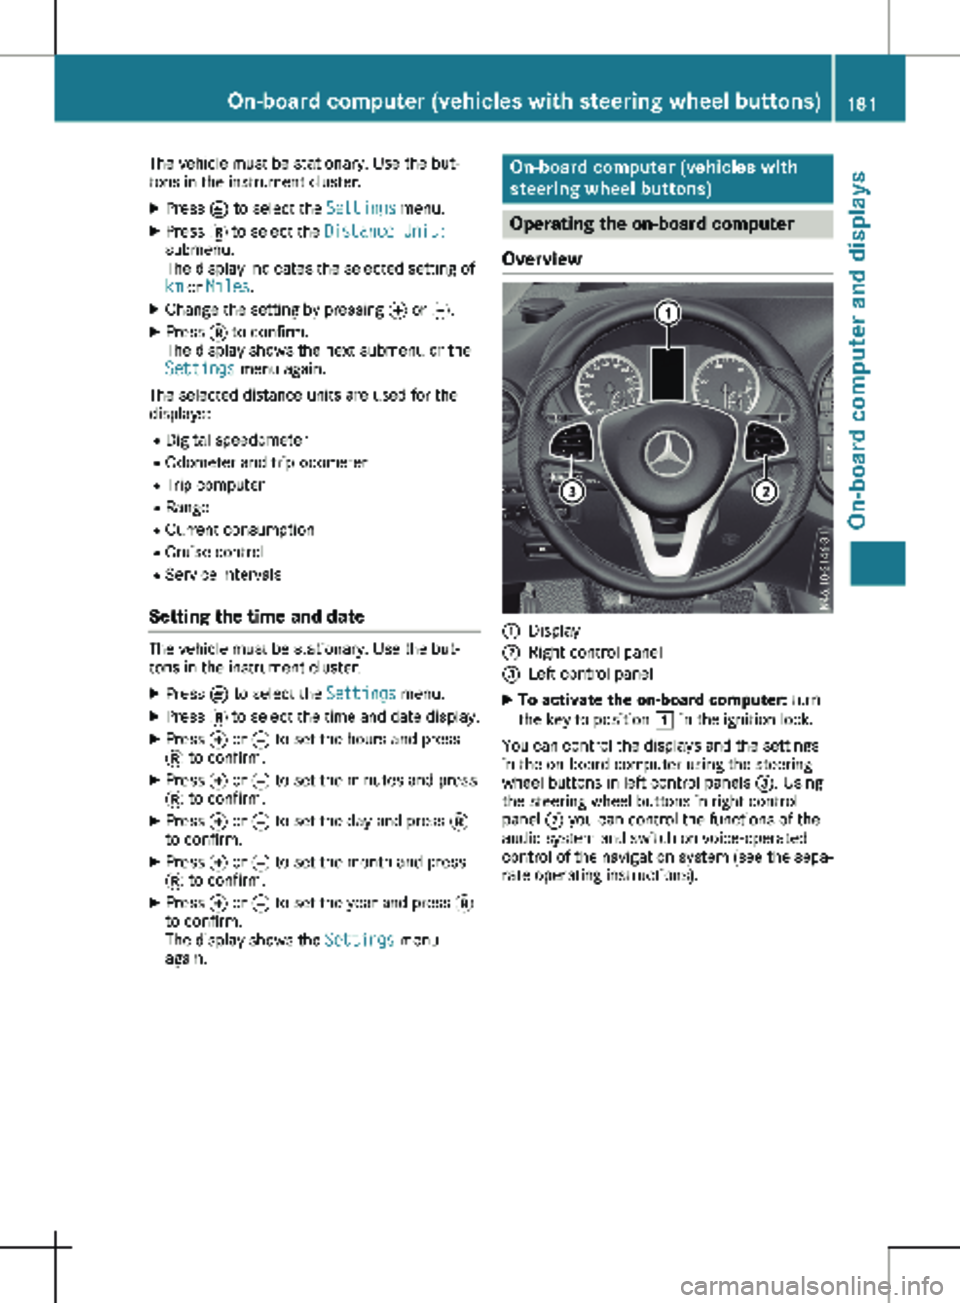
Operating the on-board computer
Overview :
Display
; Right control panel
= Left control panel
X To activate the on-board computer: turn
the key to position 1 in the ignition lock.
You can control the displays and the settings
in the on-board computer using the steering
wheel buttons in left control panels =. Using
the steering wheel buttons in right control
panel ; you can control the functions of the
audio system and switch on voice-operated
control of the navigation system (see the sepa-
rate operating instructions). On-board computer (vehicles with steering wheel buttons)
181On-board computer and displays Z