2020 MERCEDES-BENZ GLE COUPE spare wheel
[x] Cancel search: spare wheelPage 7 of 757
Wheels and tyres
..................................... 556
No tes on noise or unusual handling char‐
acteristics .................................................. .556
No tes on regular lyinspecting wheels and
tyres .......................................................... .556
No tes on snow chains ................................ 557
Ty re pressure .............................................. 557
Wheel change ............................................ .564
Emergency spare wheel .............................. 574
Collapsible spare wheel .............................. 577Te
ch nical data .......................................... 580
No tes on tech nical da ta.............................. 580
On-board electronics .................................. 580
Ra dio operating permits forve hicle com‐
ponents ...................................................... 582
Ve hicle identification plate, VIN and
engine number overview ............................ .615
Operating fluids .......................................... .617
Ve hicle data ................................................ 626
Tr ailer hit ch................................................ 629 Displ
aymessages and warning/indi‐
cator lamps .............................................. 632
Display messages ...................................... .632
Wa rning and indicator lamps ...................... 689 Index
......................................................... 7054
Contents
Page 186 of 757
R
Vehicles with a diesel engine: AdBlue ®
le vel
R Engine oil le vel:fill engine oil up tothe maxi‐
mum le velto ensure full gradeability
(/ page 520).
R Tyre-change tool kit and spare wheel
R Tyres and wheels
% Further information about special all-ter rain
tyres forre trofitting can be ob tained from a
qu alified specialist workshop.
Off-road driving
Re ad this section before driving your vehicle off-
ro ad. Practise bydriving over more gentle off-
ro ad terrain firs t.
R Obse rveth e no tes on the cross-country ABS
(/ page 213).
R Ifnecessa ry, select theF (/page 190)
drive program be fore driving off-road.
R Select a vehicle le vel suitable for off-road ter‐
ra in (/ page249). Toavo id damaging the
ve hicle, make sure there is alw ays suf ficient
ground clearance. R
Alw ayske ep the engine running and in gear
when driving on downhill gradients and
slopes. Obse rveth e no tes on driving in
mountainous terrain.
R Do not drive on unknown terrain that is not
easily visible and stay on mar kedro utes.
R Alw ayske ep the doors and windo wsclosed
while theve hicle is in motion.
R Deactivate Active Dis tance Assi st
DISTRONIC, cruise control and theva riable
limiter.
R Adapt your driving style to thete rrain.
R Do not use the HOLD function on steep
downhill or uphill gradients with slippery or
loose sur faces.
Driving on sand
When driving on sand, also obser vethefo llowing
instructions:
R Select theF drive prog ram.
R Select a higher vehicle le vel.
R Shift toa lo werge ar. R
Drive quickly to overcome thero lling resist‐
ance, otherwise theve hicle may dig itself in.
R Drive in the trac ksofother vehicles if possi‐
ble. Make sure that thefo llowing prerequi‐
sites are me t:
- the tyre ruts are not too deep
- the sand is firm enough
- the ground clearance is suf ficient
Mercedes -AMG vehicles: observeth e no tes in
th e Supplement. You could otherwise failto rec‐
ognise dangers.
Fo rding
Also obser vethefo llowing information when
fo rd ing:
R Drive at no more than 10 km/h.
R Obser vethe maximum permissible ford ing
dep th (/ page 628).
R Switch off automatic climate control
(/ page 161).
R Vehicles with stationary heater/ventila‐
tion: switch thest ationary heater/ ventilation
off (/ page 165). Driving and parking
18 3
Page 540 of 757
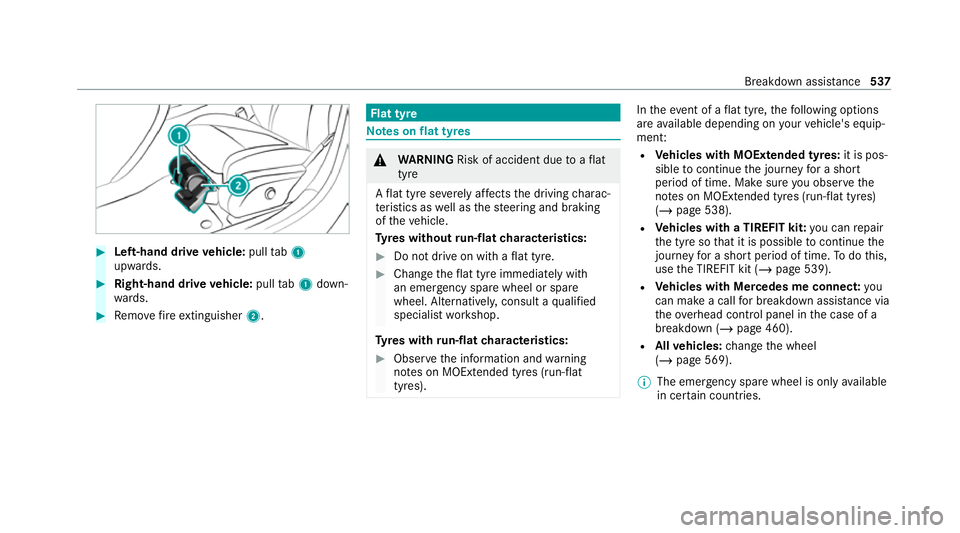
#
Left-hand drive vehicle: pulltab1
upwards. #
Right-hand drive vehicle: pulltab1 down‐
wa rds. #
Remo vefire extinguisher 2. Flat tyre
Note
s onflat tyres &
WARNING Risk of accident due toaflat
tyre
A flat tyre se verely affects the driving charac‐
te rist ics as well as thesteering and braking
of theve hicle.
Ty res without run-flat characteristics: #
Do not drive on with a flat tyre. #
Chan getheflat tyre immediately with
an emer gency spa rewheel or spare
wheel. Alternativel y,consult a qualified
specialist workshop.
Ty res with run-flat characteristics: #
Obse rveth e information and warning
no tes on MOExtended tyres (run-flat
tyres). In
theeve nt of a flat tyre, thefo llowing options
are available depending on your vehicle's equip‐
ment:
R Vehicles with MOExtended tyres: it is pos‐
sible tocontinue the journey for a short
period of time. Make sure you obse rvethe
no tes on MOExtended tyres (run-flat tyres)
(/ page 538).
R Vehicles with a TIREFIT kit: you can repair
th e tyre so that it is possible tocontinue the
jou rney for a short period of time. Todo this,
use the TIREFIT kit (/ page 539).
R Vehicles with Mercedes me connect: you
can make a call for breakdown assi stance via
th eov erhead control panel in the case of a
breakdown (/ page 460).
R Allvehicles: change the wheel
(/ page 569).
% The emer gency spa rewheel is only available
in cer tain countries. Breakdown assis
tance 537
Page 560 of 757
Note
s on snow chains
* NO
TEDama getocomponents of the
ve hicle body or chassis due tofitted
snow chains If
yo ufit snow chains tothe front wheels of
4MATIC vehicles, you may damage co mpo‐
nents of theve hicle body or chassis. #
Onlyfit snow chains tothere ar wheels
of 4MATIC vehicles. R
Snow chains are on ly permissible for cer tain
wheel/tyre combinations. You can obtain
information about this from a Mercedes-Benz
Service Cent re.
R For saf etyre asons, on lyuse sn owchains that
ha ve been specifically appr ovedfo ryo ur
ve hicle byMercedes-Benz, or snow chains
with the same quality standard.
R If sn owchains are fitted, the maximum per‐
missible speed is 50 km/h.
R Vehicles with Active Parking Assis t:do
not use Active Parking Assist when snow
ch ains are fitted. R
Vehicles with AIRMATIC or E- ACTIVE
BO DY CONT ROL:if sn ow ch ains are fitted,
only drive at raised vehicle le vel .
% You can permanently limit the maximum
ve hicle speed for driving with winter tyres
(/ page 229).
% You can deactivate ESP ®
to pull away
( / page 217). This allo wsthe wheels to
spin, achieving an increased driving forc e. Ty
re pressure Note
s on tyre pressure &
WARNING Risk of accident due toinsuf‐
fi cient or excessive tyre pressure
Underinfla ted or overinfla ted tyres pose the
fo llowing risks:
R The tyres may bur st, especially as the
load and vehicle speed increase. R
The tyres may wearexc essively and/or
une venly, which may greatlyimpair tyre
traction.
R The driving characteristics, as well as
st eering and braking, may be greatly
impaired. #
Comply with there commended tyre
pressure and check the tyre pressure of
all tyres including the spare wheel regu‐
larly:
R at least once a month
R when the load changes
R before embarking on a lon ger journey
R if operating conditions change, e.g. off-
ro ad driving #
Adjust the tyre pressure as necessar y. Ty
re pressure which is too high or too low can:
R Shor tenth e service life of the tyres.
R Cause increased tyre damage.
R Adversely af fect driving characteristics and
th us driving saf ety, e.g. due toaquaplaning. Wheels and tyres
557
Page 577 of 757
#
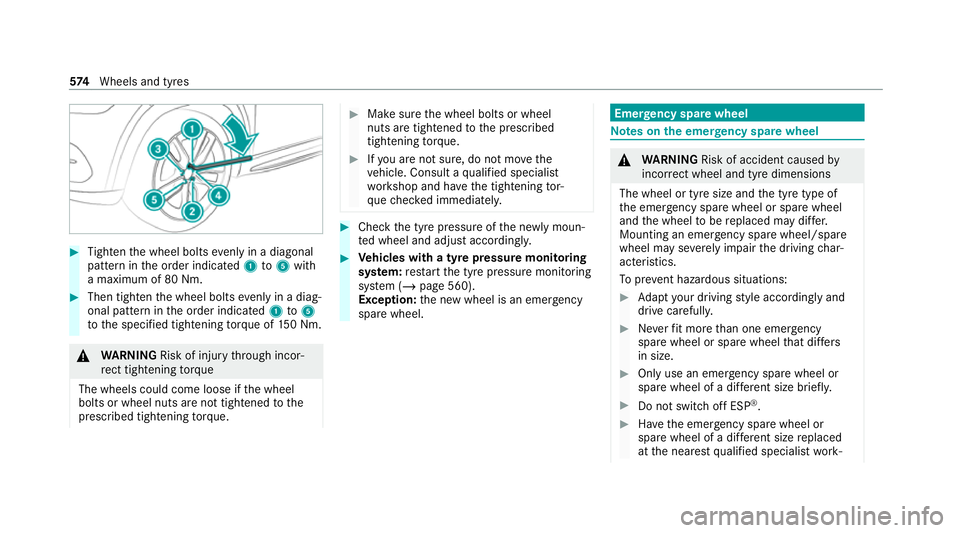
Tighten the wheel bolts evenly in a diagonal
pattern in the order indicated 1to5 with
a maximum of 80 Nm. #
Then tighten the wheel bolts evenly in a diag‐
onal pattern in the order indicated 1to5
to the specified tightening torque of 150 Nm. &
WARNING Risk of inju rythro ugh incor‐
re ct tigh tening torque
The wheels could come loose if the wheel
bolts or wheel nuts are not tightened tothe
prescribed tightening torque. #
Makesure the wheel bolts or wheel
nuts are tightened tothe prescribed
tightening torque. #
Ifyo u are not sure, do not mo vethe
ve hicle. Consult a qualified specialist
wo rkshop and ha vethe tightening tor‐
qu ech ecked immediately. #
Check the tyre pressure of the newly moun‐
te d wheel and adjust according ly. #
Vehicles with a tyre pressure monitoring
sy stem: restart the tyre pressure monitoring
sy stem (/ page 560).
Exception: the new wheel is an emer gency
spa rewheel. Emer
gency spare wheel Note
s onthe emer gency spare wheel &
WARNING Risk of accident caused by
incor rect wheel and tyre dimensions
The wheel or tyre size and the tyre type of
th e emer gency spa rewheel or spare wheel
and the wheel tobe replaced may dif fer.
Mounting an emer gency spa rewheel/spare
wheel may se verely impair the driving char‐
acteristics.
To preve nt hazardous situations: #
Adapt your driving style according lyand
drive carefull y. #
Neverfit more than one emer gency
spa rewheel or spare wheel that dif fers
in size. #
Only use an emer gency spa rewheel or
spare wheel of a dif fere nt size brie fly. #
Do not switch off ESP ®
. #
Have the emer gency spa rewheel or
spare wheel of a dif fere nt size replaced
at the nearest qualified specialist work‐ 574
Wheels and tyres
Page 578 of 757
shop. The new wheel must ha
vethe
cor rect dimensions. Check
the tyre pressure of the emer gency spa re
wheel fitted. Co rrect the pressure as necessar y.
The maximum permissible speed with an emer‐
ge ncy spa rewheel fitted is 80 km/h.
Do not fit th e emer gency spa rewheel with sn ow
ch ains.
Re place the emer gency spa rewheel af ter six
ye ars at the latest, rega rdless of wear.
% Ve
hicles with a tyre pressure monitoring
sy stem: if an emer gency spa rewheel is fit‐
te dth e tyre pressure monitoring sy stem can‐
not function reliabl y.Fo r a few minutes af ter
an emer gency spa rewheel is fitted, the sys‐
te m may still display the tyre pressure of the
re mo ved wheel. Only restart the sy stem
again when the emer gency spa rewheel has
been replaced with a new wheel.
Be sure toalso obse rveth efo llowing fur ther
re lated subjects:
R Notes on tyre pressure (/ page 557)R
Tyre pressure table (/ page 558) Re
moving the eme rgency spa rewheel The eme
rgency spare wheel is located under the
load compartment floor.
% Not for Mercedes-Maybach vehicles. #
Obser vethe information on mounting tyres
(/ page 564). #
Open theta ilgate. #
Open the load compartment floor
(/ page 128). #
Remo vethe emer gency spa rewheel bag with
th e emer gency spa rewheel. #
Open the emer gency spa rewheel bag and
re mo vethe emer gency spa rewheel. Inflating
the emer gency spare wheel *
NO
TEOverheating due tothe tyre infla‐
tion compressor running too long #
Do not runth e tyre inflation compres‐
sor for longer than ten minu tes without
inter ruption. %
Comply with the manufacturer's saf ety no tes
on thest icke r of the emer gency spa rewheel
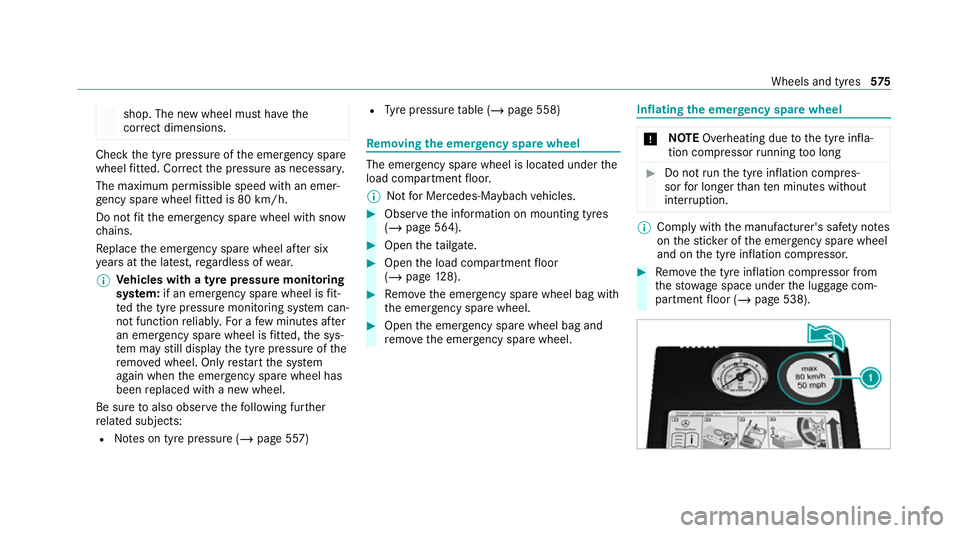
and on the tyre inflation compressor. #
Remo vethe tyre inflation compressor from
th estow age space under the luggage com‐
partment floor (/ page 538). Wheels and tyres
575
Page 580 of 757
Collapsible spa
rewheel Note
s onthe collapsible spa rewheel &
WARNING Risk of accident caused by
incor rect wheel and tyre dimensions
The wheel or tyre size and the tyre type of
th e emer gency spa rewheel or spare wheel
and the wheel tobe replaced may dif fer.
Mounting an emer gency spa rewheel/spare
wheel may se verely impair the driving char‐
acteristics.
To preve nt hazardous situations: #
Adapt your driving style according lyand
drive carefull y. #
Neverfit more than one emer gency
spa rewheel or spare wheel that dif fers
in size. #
Only use an emer gency spa rewheel or
spare wheel of a dif fere nt size brie fly. #
Do not switch off ESP ®
. #
Have the emer gency spa rewheel or
spare wheel of a dif fere nt size replaced
at the nearest qualified specialist work‐ shop. The new wheel must ha
vethe
cor rect dimensions. The collapsible spa
rewheel is an emer gency
spa rewheel which is only suitable for use for a
limi ted period of time and in a restricted manner
in theeve nt of a flat tyre (e.g. until the nearest
wo rkshop).
The tyre side walls are folded when in transpo rt
mode. Before use, the collapsible spare wheel
has tobe inflated with the accompanying com‐
pressor.
Check the tyre pressure of the collapsible spare
wheel once fitted. Co rrect the pressure as nec‐
essar y.
The maximum permissible speed with a collapsi‐
ble spare wheel fitted is 80 km/h.
Do not fit snow chains with the collapsible spare
wheel.
Re place the collapsible spare wheel af ter six
ye ars at the latest, rega rdless of wear.
% Ve
hicles with a tyre pressure monitoring
sy stem: if a collapsible spare wheel is fitted
th e tyre pressure monitoring sy stem cann ot function
reliably. For a few minutes af ter an
emergency spare wheel is fitted, the sy stem
may still display the tyre pressure of the
re mo ved wheel. Only restart the sy stem
again when the collapsible spare wheel has
been replaced with a new wheel.
Be sure toalso obse rveth efo llowing fur ther
re lated subjects:
R Notes on tyre pressure (/ page 557)
R Tyre pressure table (/ page 558)
Note s onvehicles with a Burmes ter sound
sy stem &
WARNING Risk of inju ryor death due to
an unsecured collapsible spare wheel
If th e collapsible spare wheel is not secured
cor rectl y,it can slip, tip over or be thrown
around.
Ve hicle occupants could be hit byan unse‐
cured collapsible spare wheel and be seri‐
ously injured as a result, particularly when
accelerating, braking, abruptly changing
direction or in theeve nt of an accident. Wheels and tyres
577
Page 581 of 757
#
Alw aysst ore the collapsible spare
wheel in the emer gency spa rewheel
bag and attach it tothe brac ket in the
load compartment. #
Alw ays ensure that the lashing stra ps
on the emer gency spa rewheel bag are
safely secured on there ar tie-down
ey es on the load compartment floor. Depending on
theve hicle's equipment, the col‐
lapsible spare wheel is located in an emer gency
spa rewheel bag on a brac ket in the load com‐
partment. The collapsible spare wheel in the
emer gency spa rewheel bag and the brac ket are
lashed wi thstra ps and secured using there ar
tie-down eyes on the load compartment floor. Re
moving the collapsible spare wheel Ve
hicles without a Burmes ter sound sy stem
The collapsible spare wheel is located under the
load compartment floor. #
Obser vethe information on mounting tyres
(/ page 564). #
Open theta ilgate. #
Open the load compartment floor
(/ page 128). #
Remo vethe collapsible spare wheel.
Ve hicles with a Burmes ter sound sy stem
The collapsible spare wheel is secured in the col‐
lapsible spare wheel bag in the load compart‐
ment. #
Obser vethe information on mounting tyres
(/ page 564). #
Open the load compartment. #
Detach the securing stra ps. #
Unhook there taining spring hooks of the
securing stra ps from the brac kets. #
Remo vethe collapsible spare wheel bag
to ge ther with the collapsible spare wheel. #
Open the collapsible spare wheel bag and
re mo vethe collapsible spare wheel. Inflating
the collapsible spa rewheel Re
quirements: R
Mount the collapsible spare wheel as descri‐
bed (/ page572).
R Remo vethe tyre inflation compressor from
th estow age space under the boot floor
(/ page 538).
* NO
TEDama getothe collapsible spare
wheel when lo wering theve hicle Lo
we ring theve hicle without pr eviously
inflating the collapsible spare wheel can
damage its rim. #
Inflate the collapsible spare wheel using
th e tyre inflation compressor before
lo we ring theve hicle. *
NO
TEOverheating due tothe tyre infla‐
tion compressor running too long #
Do not runth e tyre inflation compres‐
sor for longer than ten minu tes without
inter ruption. 578
Wheels and tyres