Page 156 of 757
%
The duration until the colour changes varies
depending on the usage conditions. Re
placing the windsc reen wiper blades
(MAGIC VISION CONT ROL) Moving
the wiper arms into there placement
position #
Switch the ignition off. #
Within around 15seconds, press the00D4
button on the combination switch
(/ page 150).
The wiper arms will mo veinto there place‐
ment position. Re
moving the wiper blades #
Tobring the wiper blade into position to
be remo ved: hold the wiper arm firm ly in
one hand. With th eot her hand, turn the
wiper blade in the direction of ar row1
be yond the point of resis tance.
The wiper blade will engage in there mo val
position with a clic k. #
Toremo vethe wiper blade: pressrelease
knob 2, pull the wiper blade in the direction
of ar row3and remo ve.
Fi tting the wiper blades #
Push the new wiper blade onto the wiper arm
in the direction of ar row1until release
knob 2engages. Light and sight
15 3
Page 157 of 757
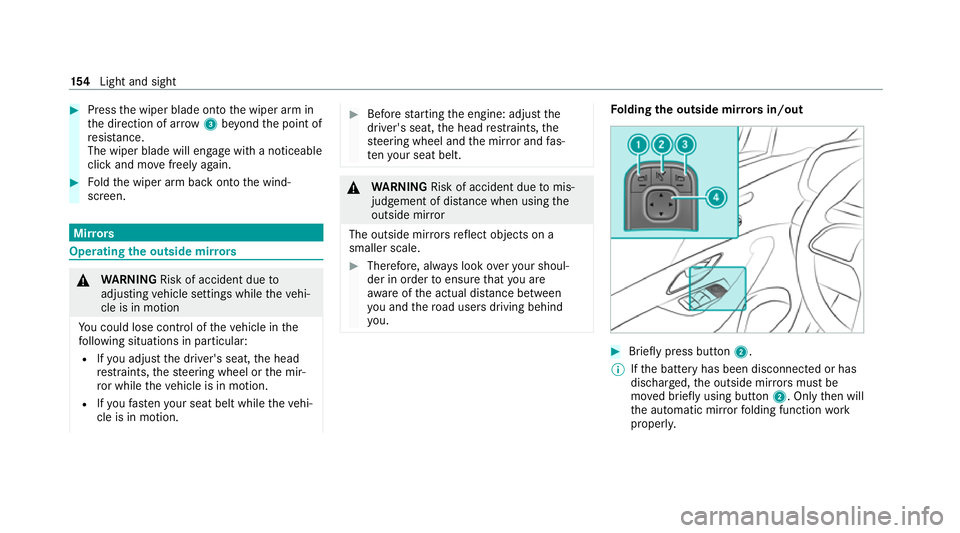
#
Press the wiper blade onto the wiper arm in
th e direction of ar row3beyond the point of
re sis tance.
The wiper blade will engage wi tha noticeable
click and mo vefreely again. #
Foldthe wiper arm back onto the wind‐
screen. Mir
rors Operating
the outside mir rors &
WARNING Risk of accident due to
adjusting vehicle settings while theve hi‐
cle is in motion
Yo u could lose cont rol of theve hicle in the
fo llowing situations in particular:
R Ifyo u adjust the driver's seat, the head
re stra ints, thesteering wheel or the mir‐
ro r while theve hicle is in motion.
R Ifyo ufast enyour seat belt while theve hi‐
cle is in motion. #
Before starting the engine: adjust the
driver's seat, the head restra ints, the
st eering wheel and the mir ror and fas‐
te nyo ur seat belt. &
WARNING Risk of accident due tomis‐
judgement of dis tance when using the
outside mir ror
The outside mir rors reflect objects on a
smaller scale. #
Therefore, alw ays look over your shoul‐
der in order toensure that you are
aw are of the actual dis tance between
yo u and thero ad users driving behind
yo u. Fo
lding the outside mir rors in/out #
Brief lypress button 2.
% Ifth e battery has been disconnected or has
dischar ged, the outside mir rors must be
mo ved briefly using button 2. Onlythen will
th e automatic mir rorfo lding function work
proper ly. 15 4
Light and sight
Page 158 of 757
Ad
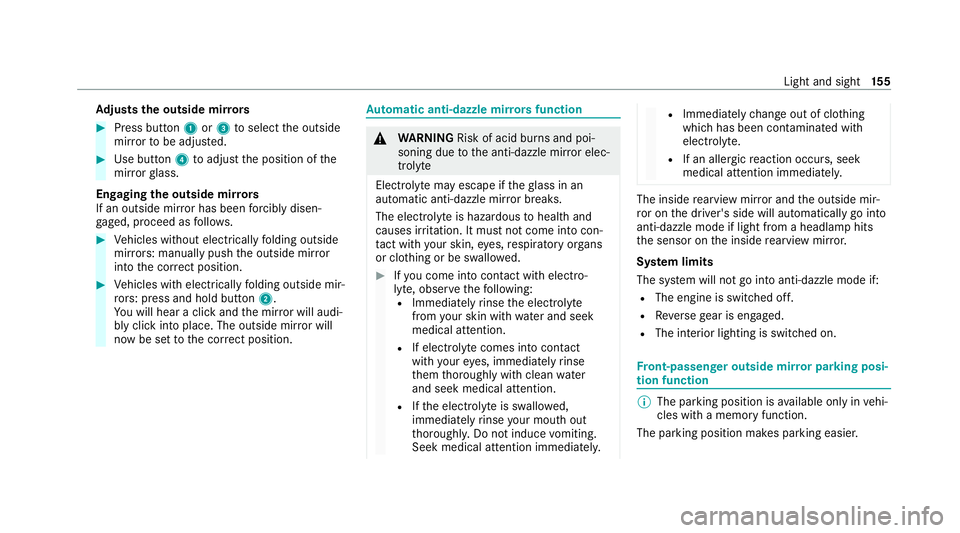
justs the outside mir rors #
Press button 1or3 toselect the outside
mir rorto be adjus ted. #
Use button 4toadjust the position of the
mir rorgl ass.
Engaging the outside mir rors
If an outside mir ror has been forc ibly disen‐
ga ge d, proceed as follo ws. #
Vehicles without electrically folding outside
mir rors: manually push the outside mir ror
into the cor rect position. #
Vehicles with electrically folding outside mir‐
ro rs: press and hold button 2.
Yo u will hear a click and the mir ror will audi‐
bly click into place. The outside mir ror will
now be set tothe cor rect position. Au
tomatic anti-dazzle mir rors function &
WARNING Risk of acid bu rns and poi‐
soning due tothe anti-dazzle mir ror elec‐
trolyte
Electrolyte may escape if theglass in an
automatic anti-dazzle mir ror breaks.
The electrolyte is hazardous tohealth and
causes ir rita tion. It mu stnot come into con‐
ta ct wi thyour skin, eyes,respiratory or gans
or clo thing or be swallo wed. #
Ifyo u come into contact with electro‐
ly te , obser vethefo llowing:
R Immediately rinse the electrolyte
from your skin with water and seek
medical attention.
R If electrolyte comes into contact
with your eyes, immediately rinse
th em thoroughly with clean water
and seek medical attention.
R Ifth e electrolyte is swallo wed,
immediately rinse your mouth out
th oroughl y.Do not induce vomiting.
Seek medical attention immediately. R
Immedia tely ch ange out of clo thing
which has been con taminated with
electrolyte.
R If an allergic reaction occurs, seek
medical attention immediatel y. The inside
rearview mir ror and the outside mir‐
ro r on the driver's side will automatically go into
anti-dazzle mode if light from a headlamp hits
th e sensor on the inside rearview mir ror.
Sy stem limits
The sy stem will not go into anti-dazzle mode if:
R The engine is switched off.
R Reversege ar is engaged.
R The interior lighting is swit ched on. Fr
ont-passenger outside mir ror parking posi‐
tion function %
The pa rking position is available on ly invehi‐
cles with a memory function.
The parking position makes parking easier. Light and sight
15 5
Page 159 of 757
In
thefo llowing situations, the front-passen ger
outside mir ror will swivel down wards in the
direction of there ar wheel on the front passeng‐
er's side:
R the parking position is stored (/ page156)
R The fron t-passenger mi rror is selected
R Reversege ar is engaged.
The front-passenger outside mir ror will mo ve
back toits original position in thefo llowing sit‐
uations:
R You shift the transmission toano ther trans‐
mission position
R You are tr avelling at speeds greater than
15 km/h
R You press the button forth e outside mir ror
on the driver's side St
oring and calling up the pa rking position of
th e front-passenger outside mir ror Sto
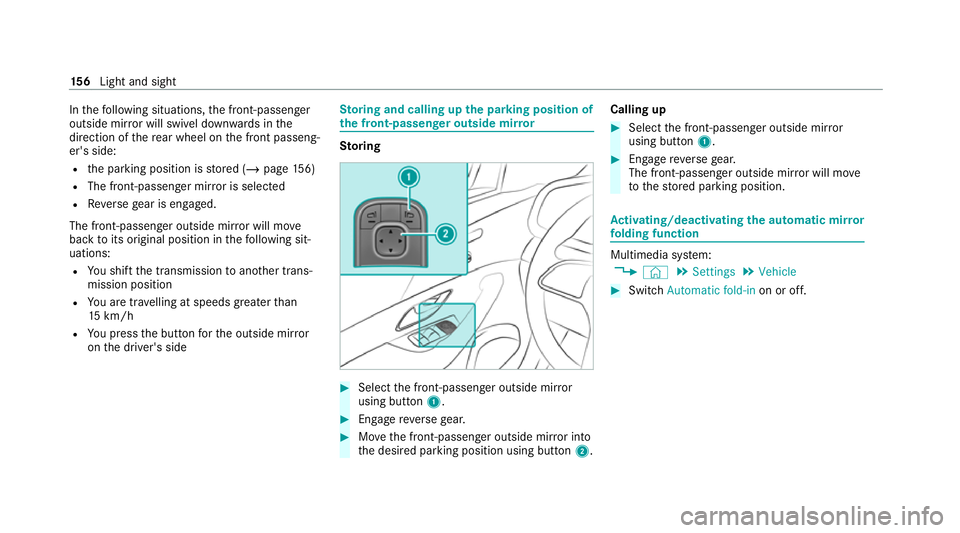
ring #
Select the front-passen ger outside mir ror
using but ton1. #
Engage reve rsege ar. #
Movethe front-passen ger outside mir ror into
th e desired parking position using button 2.Calling up #
Select the front-passen ger outside mir ror
using but ton1. #
Engage reve rsege ar.
The front-passenger outside mir ror will mo ve
to thestored parking position. Ac
tivating/deactivating the automatic mir ror
fo lding function Multimedia sy
stem:
4 © 5
Settings 5
Vehicle #
Switch Automatic fold-in on or off.15 6
Light and sight
Page 160 of 757
Operating
the sun visors
Using the single sun visor #
Glarefrom the front: fold sun visor 1
down. #
Glare from the side: release the catch and
swing the sun visor 1tothe side. #
Vehicles with an extendable sun visor: slide
sun visor 1horizontal lyas requ ired.
Using the additional sun visor #
Vehicles with an additional sun visor: fold
additional sun visor 2down. Area permeable
to radiowav es on the
windscreen Ra
dio-contro lled equipment, such as toll sys‐
te ms, can be mounted only on areas 1ofthe
windscreen that are permeable toradio wav es.
Areas permeable toradio wav es1 are best visi‐
ble from outside theve hicle when the wind‐
screen is illuminated with an extern al light
source. Light and sight
157
Page 161 of 757
No
tethis position forve hicles with:
R Windsc reen heating
R Infra redre flective windscreen Infrared-reflective windscreen function
The infrared-reflective windscreen is coated and
re duces the build-up of heat in theve hicle inte‐
ri or.
The coating shields theve hicle interior from
ra dio wav es. 15 8
Light and sight
Page 170 of 757
#
Set the desired temp erature using the0082
button. #
Press button 1.
The red or blue indicator lamp on button 1
will light up or go out.
Indicator lamp colours: R blue: stationary ventilation is switched on.
R red: thest ationary heater is swit ched on.
R yello w: the departure time is preselected.
The stationary heater/ ventilation will switch off
au tomatical lyafte r 50 minutes.
Operation using the app: thest ationary
heater/ ventilation can also be operated via the
Mercedes me connect app. Further information
can be found in the separate Owner's Manual at
http://manuals.daimler.com/baix/cars/
connectme/en_GB/index.html.
Setting thest ationary heater/stationary ven‐
tilation via the multimedia sy stem #
Call up the air conditioning menu
(/ page 161). #
Select Auxiliary heating. Selecting the departure time #
Select the time TIME A: XX, TIME B: XXor
TIME C: XX.
Setting the departu retime #
Select the time TIME A: XX, TIME B: XXor
TIME C: XX. #
Select the pen beside the time. #
Set a time.
Setting thest ationary heater/stationary ven‐
tilation via remo tecont rol
Re quirements:
R the fuel tank is su fficiently filled. Switching on immedia
tely #
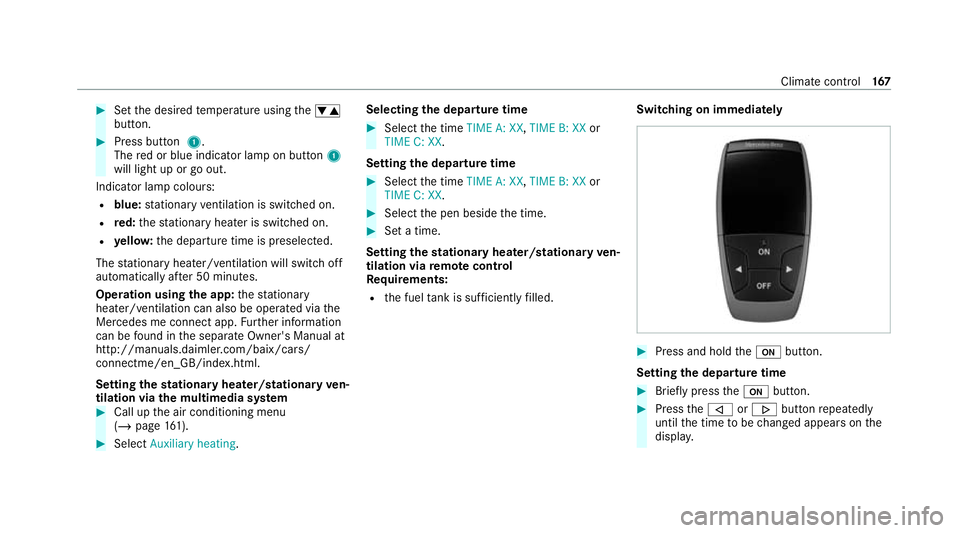
Press and hold the008B button.
Setting the departu retime #
Brie fly press the008B button. #
Press the006A or0066 button repeatedly
until the time tobe changed appears on the
displa y. Climate cont
rol167
Page 177 of 757
R
you press but ton1 twice more. #
Toswitch on the ignition: press button 1
twice.
The indicator lamps in the instrument clus ter
light up.
The ignition is switched off again if one of the
fo llowing conditions is me t:
R you do not start theve hicle within
15 minutes and the transmission is in posi‐
tion 005Dorthe electric parking brake is
applied.
R you press but ton1 once. St
arting theve hicle St
arting theve hicle with thest art/s top but‐
ton &
DANG ER Risk of death caused by
ex haust gases
Combustion engines emit poisonous exhaust
ga ses such as carbon monoxide. Inhaling th
ese exhaust gases is hazardous tohealth
and leads topoisoning. #
Never lea vethe engine or, if present,
th e auxiliary heating running in an
enclosed space wi thout suf ficient venti‐
lation. &
WARNING Risk offire due toflammable
material in the engine compartment or
th eex haust sy stem
Flammable materials brought in byeither ani‐
mals or environmen tal influences may ignite
if th ey come into contact wi thhot parts of
th e engine or exhaust sy stem. #
Therefore, check regularly that there
are no flammable materials in the
engine compartment or on theex haust
sy stem. Re
quirements:
R theke y is located in theve hicle and thekey
battery is not dischar ged. R
or: a Digital Vehicle Key is located in the
mar ked space (/ page175). #
Shift the transmission toposition 005Dor005C. #
Depress the brake pedal and press button
1 once. #
Ifth eve hicle does not star t:switch off non-
essential consumers and press button 1
once.
If th eve hicle still does not start, one of thefo l‐
lowing display messages appears in the multi‐
function display: #
Place the key in the marked space See Own-
er's Manual :St arting theve hicle with thekey
in the mar ked space (emer gency operation
mode) (/ page 176).
or #
Key not detected Place smartphone in charg-
ing bracket: place the mobile phone in the
mar ked space (/ page138). 174
Driving and pa rking