2020 MERCEDES-BENZ CLS COUPE wheel size
[x] Cancel search: wheel sizePage 332 of 469
To
o low a tyre pressure can lead tothe tyres
bur sting. #
Examine the tyres forfo re ign objects. #
Check whe ther the tyre has a puncture
or theva lve has a leak. #
Ifyo u are unable torectify the damage,
conta ct aqualified specialist workshop. Information on
there commended tyre pressure
fo rth eve hicle's factor y-fitted tyres can be found
on the tyre pressure table on the inside of the
fuel filler flap (/ page 329).
Use a suitable pressure gauge tocheck the tyre
pressure. The outer appearance of a tyre does
not permit any reliable conclusion about the tyre
pressure.
Only cor rect tyre pressures when the tyres are
cold. Conditions for cold tyres:
R The vehicle has been par ked with the tyres
out of direct sunlight for at least thre e hours.
R The vehicle has tr avelled less than 1.6 km. The
vehicle's tyres heat up when driving. As the
te mp erature of the tyres increases, so too does
th e tyre pressure.
Ve hicles with tyre pressure monitoring sys‐
te ms: you can also see the tyre pressure in the
driver's displa y.
Note s on trailer operation
Alw ays inflate there ar axle tyres tothere com‐
mended tyre pressures on the tyre pressure
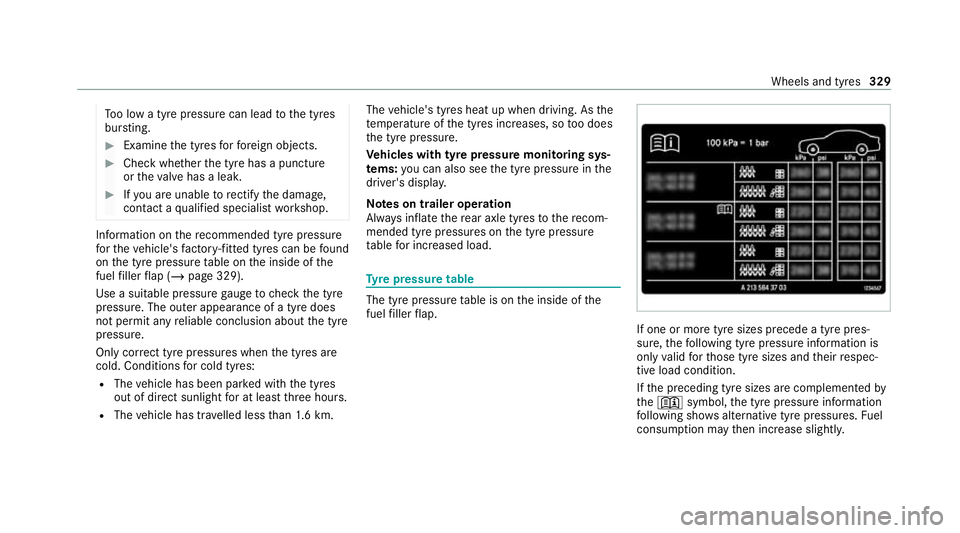
ta ble for increased load. Ty
re pressure table The tyre pressure
table is on the inside of the
fuel filler flap. If one or more tyre sizes precede a tyre pres‐
sure, thefo llowing tyre pressure information is
only valid forth ose tyre sizes and their respec‐
tive load condition.
If th e preceding tyre sizes are complemented by
th e+ symbol, the tyre pressure information
fo llowing sho wsalternative tyre pressures. Fuel
consum ption may then increase slightl y. Wheels and tyres
329
Page 335 of 469
R
driving with a high load
The tyre pressure loss warning sy stem is only an
aid. It is the driver's responsibility toset the tyre
pressure tothere commended cold tyre pressure
suitable forth e operating situation and tocheck
it.
Be sure toalso obse rveth efo llowing fur ther
re lated subjects:
R Notes on tyre pressure (/ page 328)
R Display messages about the tyres
(/ page 404)
Rest arting the ty repressure loss warning
sy stem
Requ irements:
R The recommended tyre pressure is cor rectly
set forth ere spective operating status on all
wheels.
Re start the tyre pressure loss warning sy stem in
th efo llowing situations:
R The tyre pressure has changed.
R The wheels or tyres ha vebeen changed or
newly fitted. On-boa
rdcompu ter:
4 Service 5
Tyres #
Swipe down wards on Touch Control on the
left-hand side of thesteering wheel.
The Run Flat Indicator active Restart mes‐
sage is shown in the multifunction displa y. #
Tobegin restart, press Touch Control on the
left-hand side of thesteering wheel.
The Tyre pressure now OK? message is
shown in the multifunction displa y. #
Select Yes. #
Toconfirm restart, press Touch Control on
th e left-hand side of thesteering wheel.
The Run Flat Indicator restarted message is
shown in the multifunction displa y.
Af teryo u ha vedriven for a few minutes, the
tyre pressu reloss warning sy stem monitors
th e set tyre pressures of all the tyres.
Be sure toalso pay attention tothefo llowing
re lated topic:
R Notes on tyre pressure (/ page 328) Wheel
change Note
s on selecting, fitting and replacing
tyres *
NO
TEMercedes-AMG vehicles #
Obser vethe no tes in the Supplement.
Yo u could otherwise failto recognise
dangers. &
WARNING Risk of accident due toincor‐
re ct dimensions of wheels and tyres
If wheels and tyres of the wrong size are
used, the wheel brakes or wheel suspension
components may become damaged. #
Alw aysre place wheels and tyres with
th ose that fulfil the specifications of the
original part.
When replacing wheels, make sure tofit the
cor rect:
R Designation
R Type 332
Wheels and tyres
Page 336 of 469
When
replacing tyres, make sure tofit the
cor rect:
R Designation
R Manufactu rer
R Type &
WARNING Risk of inju rythro ugh exceed‐
ing the specified tyre load-bearing capa‐
city or the permissible speed rating
Exceeding the load-bearing capacity of the
tyres can lead totyre dama geand could
cause the tyres toexplode. #
Therefore, only use tyre types and sizes
appr ovedfo ryo ur vehicle model. #
Obser vethe tyre load-bearing capacity
ra ting and speed rating requ iredfor
yo ur vehicle. *
NO
TEVehicle and tyre damage thro ugh
tyre types and sizes that ha venot been
appr oved Fo
r saf etyre asons, on lyuse tyres, wheels
and accessories which ha vebeen specially
appr ovedby Mercedes-Benz foryo ur vehicle.
These tyres are specially adap tedto the con‐
trol sy stems, such as ABS, ESP ®
and
4MATIC, and mar ked as follo ws:
R MO = Mercedes-Benz Original
R MOE = Mercedes-Benz Original Extended
(run-flat tyres only for cer tain wheels)
R MO1 = Mercedes-Benz Original (only cer‐
tain AMG tyres)
Cer tain characteristics, such as handling,
ve hicle noise emissions, consum ption, etc.
may otherwise be adversely af fected. Fur‐
th ermore, other tyre sizes could result in the
tyres rubbing against the body and axle com‐
ponents when loaded. This could result in
damage tothe tyre or theve hicle. Only use tyres, wheels and accessories
that
ha ve been checked and recommended by
Mercedes-Benz. *
NO
TERisk todriving saf ety from retrea‐
ded tyres Re
treaded tyres are nei ther tested nor rec‐
ommended byMercedes-Benz, since pr evi‐
ous damage cannot alw ays be de tected on
re treaded tyres.
Fo rth is reason driving saf ety cannot be guar‐
anteed. #
Do not use used tyres if you ha veno
information about their pr evious usage. *
NO
TEPossible damage towheels or
tyres when driving over obs tacles Lar
gewheels ha vea lo wer tyre section width.
The lo werth e tyre section width, the greater
is therisk of damage towheels or tyres when
driving over obs tacles. Wheels and tyres
333
Page 338 of 469

R
Only fit wheels of the same size on one axle
(left and right).
It is only permissible tofit a di fferent wheel
size in theeve nt of a flat tyre in order to
drive tothe specialist workshop.
R Do not make any modifications tothe brake
sy stem, the wheels or the tyres.
The use of shims or brake dust shields is not
permitted and may in validate theve hicle's
ge neral operating pe rmit.
R Vehicles with a tyre pressure monitoring
sy stem: allfitted wheels mu stbe equipped
with functioning sensors forth e tyre pres‐
sure monitoring sy stem.
R Attemp eratures below 7 °C use winter tyres
or all-season tyres mar kedi M+Sfor all
wheels.
Wi nter tyres pr ovide the best possible grip in
wintry road conditions.
R Fori M+S tyres, only use tyres with the
same tread.
R Obser vethe maximum permissible speed for
th ei M+S tyres fitted. If
th e tyre's maximum speed is below that of
th eve hicle, this must be indicated byan
appropriate label in the driver's field of
vision.
R Run in new tyres at moderate speeds forthe
fi rs t10 0 km.
R Replace the tyres af ter six years at the latest,
re ga rdless of wear.
R When replacing with tyres that do not
fe ature run-flat characteristics: vehicles
with MOExtended tyres are not equipped
with a TIREFIT kit at thefa ctor y.Equip the
ve hicle with a TIREFIT kit af terre placing with
tyres that do not feature run-flat characteris‐
tics, e.g. winter tyres.
% You can permanently limit the maximum
ve hicle speed for driving with winter tyres
(/ page 190).
Fo r more information on wheels and tyres, con‐
ta ct a qualified specialist workshop.
Be sure toalso obse rveth efo llowing fur ther
re lated subjects:
R Notes on tyre pressure (/ page 328)R
Tyre pressure table (/ page 329)
R Notes on the emer gency spa rewheel
(/ page 342) Note
s on inter changing wheels &
WARNING Risk of inju rythro ugh dif fer‐
ent wheel sizes
Inter changing the front and rear wheels can
se verely impair the driving characteristics.
The disk brakes or wheel suspension compo‐
nents may also be damaged. #
Onlyinter change the front and rear
wheels if the wheels and tyres ha vethe
same dimensions. Inter
changing the front and rear wheels if the
wheels or tyres ha vediffere nt dimensions can
re nder thege neral operating pe rmit in valid.
The wear pat tern s on the front and rear wheels
dif fer:
R front wheels wear more on the tyre shoulder Wheels and tyres
335
Page 339 of 469
R
rear wheels wear more in the cent reofthe
tyre
Do not drive wi thtyres that ha vetoo little tread
dep th. This significantly reduces traction on wet
ro ads (aquaplaning).
On vehicles with the same front and rear wheel
size, you can inter change the wheels every
5000 to10,000 km, depending on thewe ar.
Ensure the direction of rotation is maintained for
th e wheels.
Obser vethe instructions and saf ety no tes on
"Changing a wheel" when doing so
(/ page 337). Note
s onstoring wheels When
storing wheels, obser vethefo llowing
no tes:
R Afterre moving wheels, store them in a cool,
dry and preferably dark place.
R Protect the tyres from conta ct withoil,
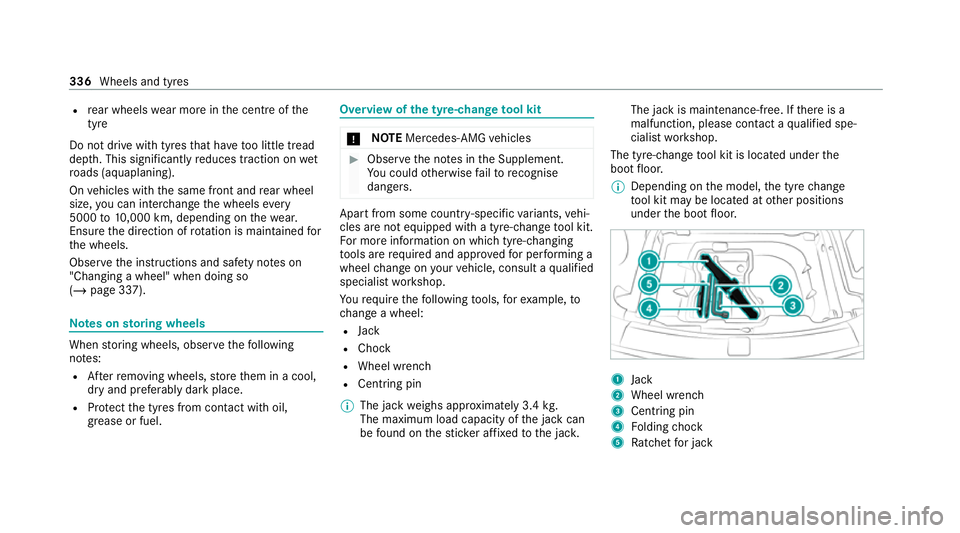
grease or fuel. Overview of
the ty re-change tool kit *
NO
TEMercedes-AMG vehicles #
Obser vethe no tes in the Supplement.
Yo u could otherwise failto recognise
dangers. Apa
rtfrom some countr y-specific variants, vehi‐
cles are not equipped with a tyre-change tool kit.
Fo r more information on which tyre-changing
to ols are required and appr oved for per form ing a
wheel change on your vehicle, consult a qualified
specialist workshop.
Yo ure qu ire thefo llowing tools, forex ample, to
ch ange a wheel:
R Jack
R Chock
R Wheel wrench
R Cent ring pin
% The jack weighs appr oximately 3.4 kg.
The maximum load capacity of the jack can
be found on thest icke r af fixe dto the jac k. The jack is maintenance-free. If
there is a
malfunction, please conta ct aqualified spe‐
cialist workshop.
The tyre-change tool kit is located under the
boot floor.
% Depending on the model, the tyre change
to ol kit may be located at other positions
under the boot floor. 1
Jack
2 Wheel wrench
3 Centring pin
4 Folding chock
5 Ratchet for jack 336
Wheels and tyres
Page 345 of 469
#
Vehicles with a tyre pressure monitoring
sy stem: restart the tyre pressure monitoring
sy stem (/ page 331).
Exception: the new wheel is an emer gency
spa rewheel. Emer
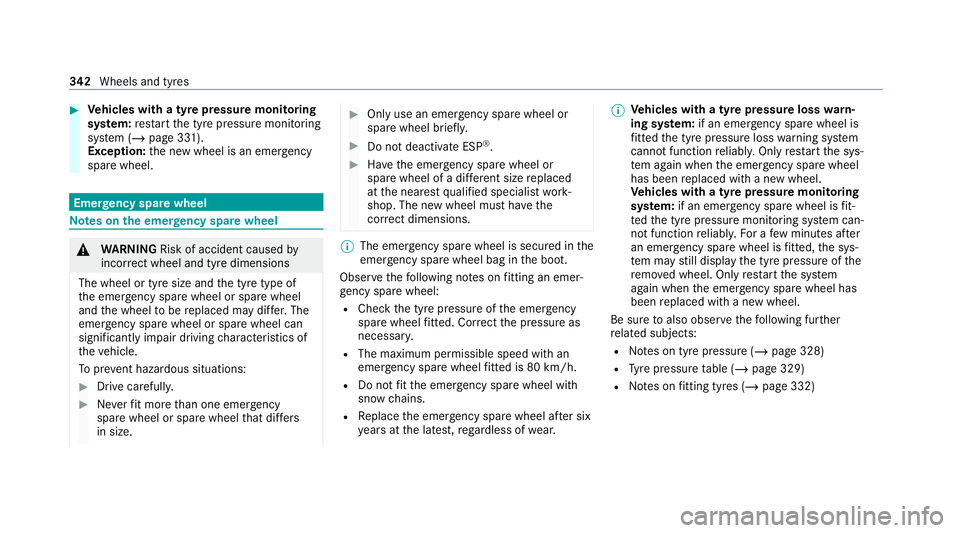
gency spare wheel Note
s onthe emer gency spare wheel &
WARNING Risk of accident caused by
incor rect wheel and tyre dimensions
The wheel or tyre size and the tyre type of
th e emer gency spa rewheel or spare wheel
and the wheel tobe replaced may dif fer. The
emer gency spa rewheel or spare wheel can
significantly impair driving characteristics of
th eve hicle.
To preve nt hazardous situations: #
Drive carefully. #
Neverfit more than one emer gency
spa rewheel or spare wheel that dif fers
in size. #
Only use an emer gency spa rewheel or
spare wheel brief ly. #
Do not deacti vate ESP ®
. #
Have the emer gency spa rewheel or
spare wheel of a dif fere nt size replaced
at the nearest qualified specialist work‐
shop. The new wheel must ha vethe
cor rect dimensions. %
The emergency spa rewheel is secured in the
emer gency spa rewheel bag in the boot.
Obser vethefo llowing no tes on fitting an emer‐
ge ncy spa rewheel:
R Check the tyre pressure of the emer gency
spa rewheel fitted. Co rrect the pressure as
necessar y.
R The maximum permissible speed with an
emer gency spa rewheel fitted is 80 km/h.
R Do not fit th e emer gency spa rewheel with
sn ow ch ains.
R Replace the emer gency spa rewheel af ter six
ye ars at the latest, rega rdless of wear. %
Ve
hicles with a tyre pressure loss warn‐
ing sy stem: if an emer gency spa rewheel is
fi tted the tyre pressure loss warning sy stem
cann otfunction reliabl y.Only restart the sys‐
te m again when the emer gency spa rewheel
has been replaced with a new wheel.
Ve hicles with a tyre pressure monitoring
sy stem: if an emer gency spa rewheel is fit‐
te dth e tyre pressure monitoring sy stem can‐
not function reliabl y.Fo r a few minutes af ter
an emer gency spa rewheel is fitted, the sys‐
te m may still display the tyre pressure of the
re mo ved wheel. Only restart the sy stem
again when the emer gency spa rewheel has
been replaced with a new wheel.
Be sure toalso obse rveth efo llowing fur ther
re lated subjects:
R Notes on tyre pressure (/ page 328)
R Tyre pressure table (/ page 329)
R Notes on fitting tyres (/ page 332) 342
Wheels and tyres
Page 437 of 469
Pa
int wo rk ............................................ 301
Plastic trim .......................................... 304
Re alwo od/trim elements ...................3 04
Re versing camera ................................ 302
Ro of lining ...........................................3 04
Seat belt .............................................. 304
Seat co ver ........................................... 304
Sensors ............................................... 302
St eering wheel .................................... 304
Ta ilpipes .............................................. 302
Tr ailer hit ch......................................... 302
Wa shing byhand ................................. 301
Wheels/rims ....................................... 302
Wi ndo ws .............................................. 302
Wi per blades .......................................3 02
Carpet (Care) .......................................... .304
Changing gears ........................................ 16 4
Manually ..............................................1 64
Changing hub caps .................................. 337
Changing the lights
Driving abroad (symm etrical low
beam) .................................................. 12 0
Cha rging
Bat tery (vehicle) ...................................3 18USB port ..............................................1
16
Chassis Damping characteristics ...................... 214
DY NA MIC BODY CONTROL .................. 214
Chassis le vel (AIR BODY CONT ROL)
Setting ................................................ .215
Child saf ety lock
Re ar door .............................................. 68
Re ar side wind ows................................. 70
Child seat Appr oval categories .............................. .56
At tach ing (no tes) ................................... 55
Basic instructions ..................................51
Fr ont passenger seat (no tes) ................. 66
Fr ont passenger seat (without auto‐
matic airbag shutoff) ............................. 66
ISOFIX/i-Size (fitting) ............................59
No tes on risks and dangers ...................52
Re commended child restra int sys‐
te ms ...................................................... 54
Seats suitable for belt-secu redch ild
re stra int sy stems ................................... 63
Seats suitable for i‑Size child
re stra int sy stems ................................... 59 Seats suitable
for ISOFIX child
re stra int sy stems ................................... 58
Securing on the co-driver seat ............... 67
Secu ring on there ar seat ...................... 64
To pTe ther ..............................................61
Child ren
Av oiding dangers in theve hicle .............52
Basic instructions .................................. 51
Chock ...................................................... .336
St orage location ..................................3 36
Cho ck
see Chock
City lighting ..............................................1 25
Cleaning see Care
Climate control ........................................ 137
Ac tivating/deactivating the A/C
function (cont rol panel) ...................... .138
Ac tivating/deactivating the A/C
function (MBUX multimedia sy stem) ... 13 8
Ac tivating/deactivating the synchro‐
nisation function (cont rol panel) .......... 13 9434
Index