2020 MERCEDES-BENZ AMG GT R-ROADSTER buttons
[x] Cancel search: buttonsPage 104 of 441
Overview of climate control sy
stems Note
s on climate control An interior air
filter in combination with the pre‐
fi lter in the engine compartment must alw ays be
used so that the air conditioning sy stem, pollu‐
tion le vel monitoring and the air filtration work
cor rectl y.Make sure that thefilter is ins talled
cor rectly and thefilter housing in the engine
compartment is closed cor rectly using the cap
and alw ays tightly sealed when in operation. Use
fi lters recommended and appr ovedby
Mercedes-Benz. Alw ays ha veservice workcar‐
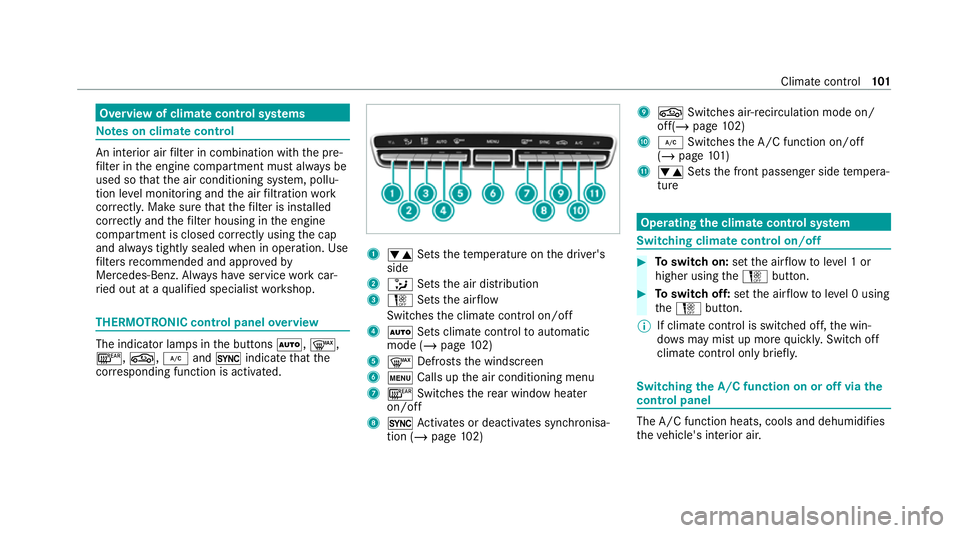
ri ed out at a qualified specialist workshop. THERMOTRONIC control panel
overview The indicator lamps in
the buttons Ã,¬,
¤, g,¿and0 indicate that the
cor responding function is activated. 1
w Setsthete mp erature on the driver's
side
2 _ Setsthe air distribution
3 H Setsthe air flow
Switches the climate control on/off
4 Ã Sets climate control toautomatic
mode (/ page102)
5 ¬ Defrosts the windscreen
6 t Calls up the air conditioning menu
7 ¤ Switches there ar wind owheater
on/off
8 0 Activates or deacti vates synchronisa‐
tion (/ page102) 9
g Switches ai r-re circulation mode on/
off(/ page 102)
A ¿ Switches the A/C function on/off
(/ page 101)
B w Setsthe front passenger side temp era‐
ture Operating
the clima tecont rol sy stem Switching clima
tecont rol on/off #
Toswitch on: setthe air flow toleve l 1 or
higher using theH button. #
Toswitch off: setthe air flow toleve l 0 using
th eH button.
% If climate control is switched off, the win‐
do ws may mist up more quickl y.Switch off
climate control only brie fly. Switching
the A/C function on or off via the
cont rol panel The A/C function heats, cools and dehumidifies
th
eve hicle's interior air. Climate control
101
Page 121 of 441
-
theve hicle exhibits driving characteristics
suited forth era cetrac k.
- allvehicle sy stems are set for maximum
sportiness.
- the automatic transmission shifts up
later.
- the suspension exhibits particular lyfirm
springing and damping settings.
- glide mode is not available.
- the sporty sound characteristic of the
ex haust sy stem is activated.
% You can call up vehicle characteristics via
th ePe rformance menu in the on-board com‐
puter .
% You can adjust the agility functions of AMG
Dynamics using the AMG steering-wheel but‐
to ns.
Yo u can also change thefo llowing vehicle char‐
acteristics using the buttons in the cent recon‐
sole:
R position of theex haust gasflaps
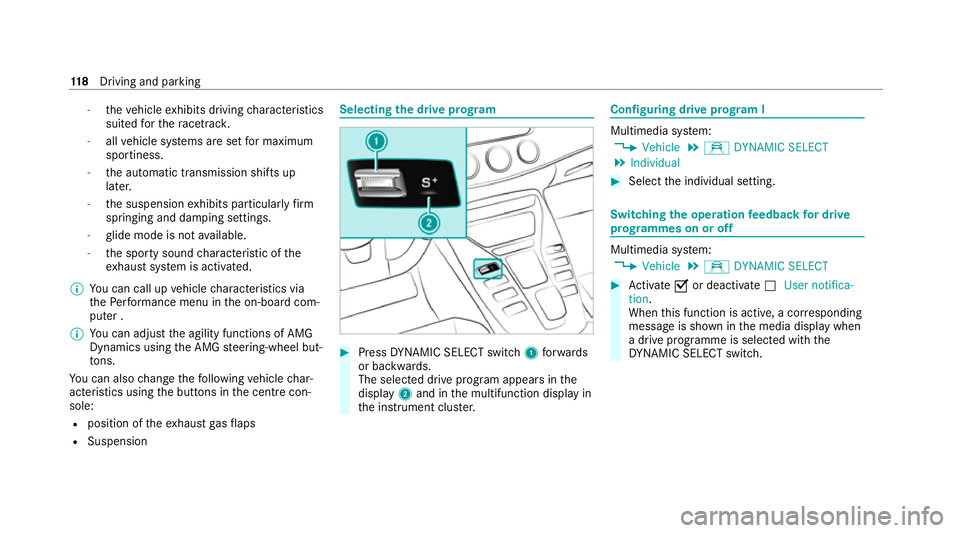
R Suspension Selecting
the drive prog ram #
Press DYNA MIC SELECT switch 1forw ards
or backwards.
The selec ted drive program appears in the
display 2and in the multifunction display in
th e instrument clus ter. Configuring drive prog
ram I Multimedia sy
stem:
4 Vehicle 5
e DYNAMIC SELECT
5 Individual #
Select the individual setting. Switching
the operation feedba ckfor drive
prog rammes on or off Multimedia sy
stem:
4 Vehicle 5
e DYNAMIC SELECT #
Activate Oor deacti vate ª User notifica-
tion.
When this function is active, a cor responding
message is shown in the media display when
a drive prog ramme is selected with the
DY NA MIC SELECT switch. 11 8
Driving and pa rking
Page 129 of 441
#
In particula r,do not park on dry grass‐
land or har vested grain fields. &
WARNING Risk of accident and inju ry
due tochildren left unat tended in the
ve hicle
If ch ildren are left unsupervised in theve hi‐
cle, they could, in part icular:
R open doors, thereby endangering other
persons or road users.
R get out and be stru ck byoncoming traf‐
fi c.
R ope rate ve hicle equipment and become
trapped, forex ample.
In addition, thech ildren could also set the
ve hicle in motion, forex ample by:
R releasing the parking brake.
R change the transmission position.
R start theve hicle. #
Never lea vechildren unat tended in the
ve hicle. #
When leaving theve hicle, alw aysta ke
th eke y with you and lock theve hicle. #
Keep theke y out of reach of children. *
NO
TEDama getotheve hicle due toit
ro lling away #
Alw ays secure theve hicle against roll‐
ing away. #
Bring theve hicle toast andstill byapplying
th e brake pedal. #
On gradients, turn the front wheels so that
th eve hicle will rollto wa rdsth eke rb if it
st arts moving. #
App lythe electric parking brake. #
Enga getransmission position jin a station‐
ary vehicle with the brake pedal applied
(/ page 120). #
Switch off the engine and the ignition by
pressing the1 button. #
Release the service brake slowl y. #
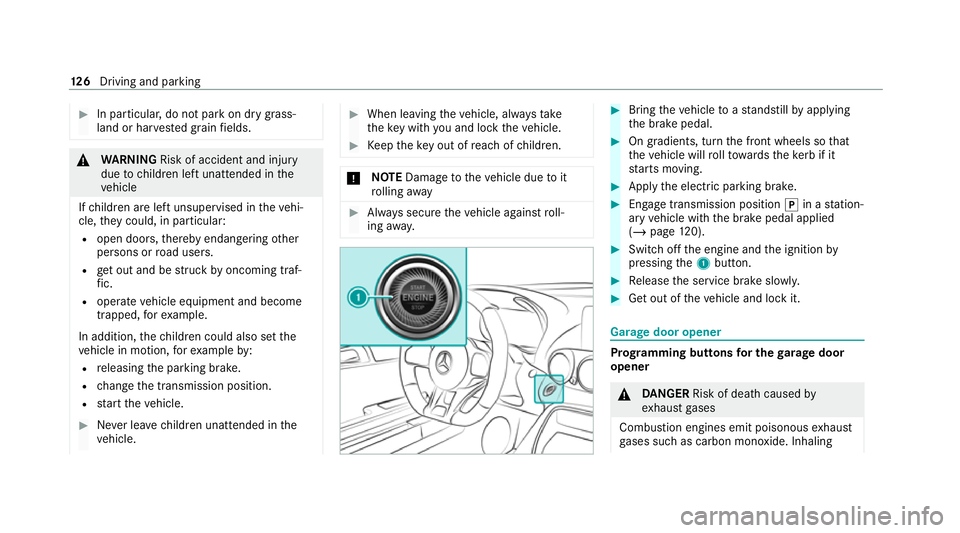
Get out of theve hicle and lock it. Garage door opener
Prog
ramming buttons for the garage door
opener &
DANG ER Risk of death caused by
ex haust gases
Combustion engines emit poisonous exhaust
ga ses such as carbon monoxide. Inhaling 12 6
Driving and pa rking
Page 130 of 441
th
ese exhaust gases is hazardous tohealth
and leads topoisoning. #
Never lea vethe engine or, if present,
th e auxiliary heating running in an
enclosed space wi thout suf ficient venti‐
lation. &
WARNING Risk of injury when opening
or closing a door with thega rage door
opener
When you operate or program the door with
th e integrated garage door opener, persons
in thera nge of mo vement of the door may
become trapped or be stru ck bythe door. #
Alw ays make sure that nobody is within
th era nge of mo vement of the door. Re
quirements:
R The vehicle has been par ked outside the
ga rage and outside thera nge of mo vement
of the door.
R The engine is switched off.
R The ignition is switched on. %
The garage door opener function is alw ays
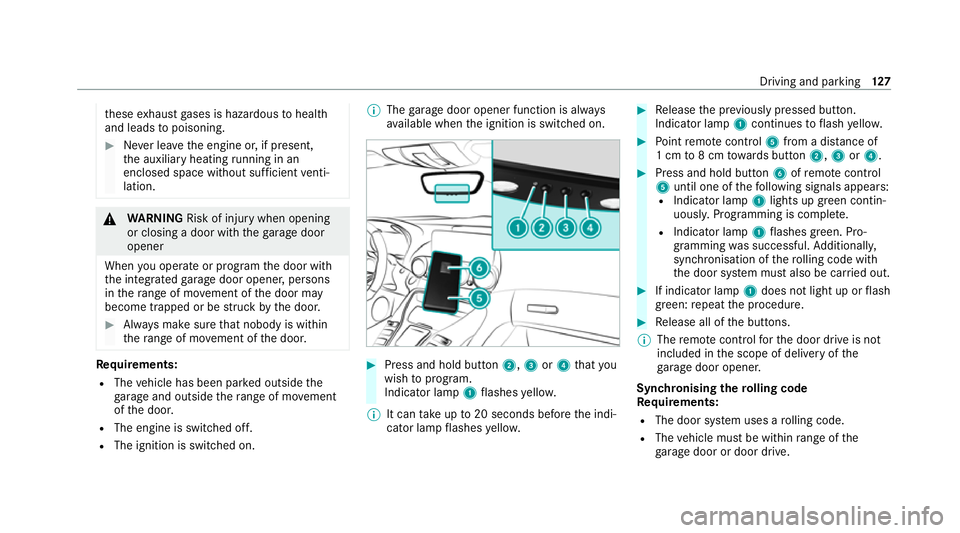
av ailable when the ignition is switched on. #
Press and hold button 2,3or4 that you
wish toprog ram.
Indicator lamp 1flashes yello w.
% It can take up to20 seconds before the indi‐
cator lamp flashes yello w. #
Release the pr eviously pressed button.
Indicator lamp 1continues toflash yello w. #
Point remo tecontrol 5from a dist ance of
1 cm to8 cm towa rds button 2,3or4. #
Press and hold button 6ofremo tecontrol
5 until one of thefo llowing signals appears:
R Indicator lamp 1lights up green contin‐
uousl y.Programming is comple te.
R Indicator lamp 1flashes green. Pro‐
gramming was successful. Additionall y,
synchronisation of thero lling code with
th e door sy stem must also be car ried out. #
If indicator lamp 1does not light up or flash
green: repeat the procedure. #
Release all of the buttons.
% The remo tecontrol forth e door drive is not
included in the scope of delivery of the
ga rage door opener.
Synchronising thero lling code
Re quirements:
R The door sy stem uses a rolling code.
R The vehicle must be within range of the
ga rage door or door drive. Driving and parking
127
Page 131 of 441
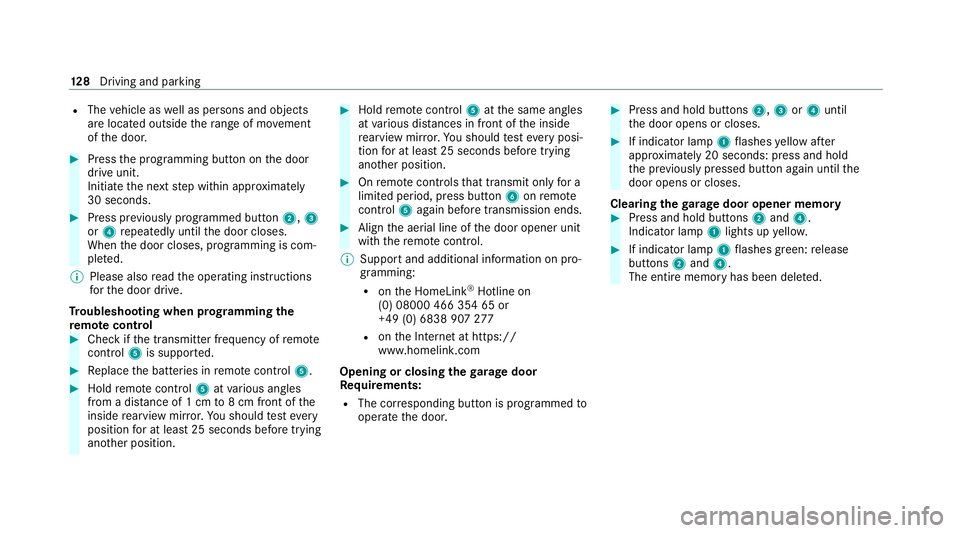
R
The vehicle as well as persons and objects
are located outside thera nge of mo vement
of the door. #
Press the programming button on the door
drive unit.
Initiate the next step within appr oximately
30 seconds. #
Press pr eviously prog rammed button 2,3
or 4 repeatedly until the door closes.
When the door closes, programming is com‐
ple ted.
% Please also read the operating instructions
fo rth e door drive.
Tr oubleshooting when prog ramming the
re mo tecont rol #
Check if the transmit ter frequency of remo te
control 5is support ed. #
Replace the batteries in remo tecontrol 5. #
Hold remo tecontrol 5atvarious angles
from a dis tance of 1 cm to8 cm front of the
inside rearview mir ror.Yo u should test eve ry
position for at least 25 seconds before trying
ano ther position. #
Hold remo tecontrol 5atthe same angles
at various dis tances in front of the inside
re arview mir ror.Yo u should test eve ryposi‐
tion for at least 25 seconds before trying
ano ther position. #
Onremo tecontrols that transmit on lyfor a
limi ted period, press button 6onremo te
control 5again before transmission ends. #
Align the aerial line of the door opener unit
with there mo tecontrol.
% Support and additional information on pro‐
gramming:
R onthe HomeLink ®
Hotline on
(0) 08000 466 354 65 or
+49 (0) 6838 907 277
R onthe Internet at https://
www.homelin k.com
Opening or closing the garage door
Re quirements:
R The cor responding button is programmed to
operate the door. #
Press and hold buttons 2,3or4 until
th e door opens or closes. #
If indicator lamp 1flashes yellow af ter
appr oximately 20 seconds: press and hold
th e pr eviously pressed button again until the
door opens or closes.
Clearing thega rage door opener memo ry #
Press and hold buttons 2and 4.
Indicator lamp 1lights up yello w. #
If indicator lamp 1flashes green: release
buttons 2and 4.
The entire memo ryhas been dele ted. 12 8
Driving and pa rking
Page 141 of 441
Setting
Active Brake Assi stMultimedia sy
stem:
4 Vehicle 5
k Assistance
5 Active Brake Assist #
Activate or deacti vate the function.
% It is recommended that you alw ays lea ve
Ac tive Brake Assi stactivated.
% IfAc tive Brake Assi stis deactivated, the
æ symbol appears inthest atus bar of the
multifunction displa y.Fu
nction of Adaptive Brake Lights Ad
aptive Brake Lights warnfollowing traf fic in an
emergency braking situation with th efo llowing
actions:
R Byflashing the brake lamps
R By activating the hazard warning lights
If th eve hicle is braked sharply from speeds
abo ve50 km/h, the brake lamps flash rapidl y.
This pr ovides traf fic tr avelling behind you with an
ev en more noticeable warning. If
th eve hicle is tr avelling at speeds of more than
70 km/h at the beginning of the brake applica‐
tion, the hazard warning lights switch on once
th eve hicle is stationar y.When you pull away
again, the hazard warning lights will switch off
automatically at appr oximately 10km/h. Yo u
can also switch off the hazard warning lights
using the hazard warning button. Cruise control and limiter
Fu
nction of cruise control
Cruise contro lre gulates the speed totheva lue
selec tedby the driver.
If yo u accelerate toove rtake, forex ample, the
st ored speed is not dele ted. If youre mo veyour
fo ot from the accelera tor pedal af terov ertak ing,
cruise control will resume speed regulation back
to thestored speed.
Cruise contro l is operated using the cor respond‐
ing steering wheel buttons. You can store any
speed abo ve30 km/h up tothe maximum
design speed or up tothe set winter tyre limit. Obser
vethe no tes on driving sy stems and your
re sponsibility; you may otherwise failto recog‐
nise dangers (/ page 131).
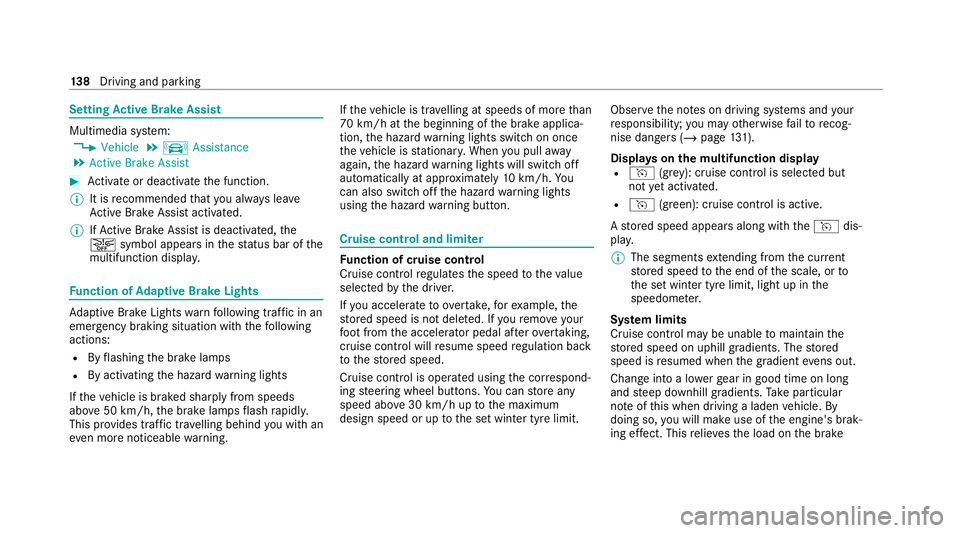
Displa yson the multifunction display
R h (grey): cruise control is selected but
not yet acti vated.
R h (green): cruise control is active.
A stored speed appears along with theh dis‐
pla y.
% The segments extending from the cur rent
st ored speed tothe end of the scale, or to
th e set winter tyre limit, light up in the
speedome ter.
Sy stem limits
Cruise control may be unable tomaintain the
st ored speed on uphill gradients. The stored
speed is resumed when the gradient evens out.
Change into a lo werge ar in good time on long
and steep downhill gradients. Take particular
no te ofthis when driving a laden vehicle. By
doing so, you will make use of the engine's brak‐
ing ef fect. This relie vesth e load on the brake 13 8
Driving and pa rking
Page 142 of 441
sy
stem and pr events the brakes from overheat‐
ing and wearing tooqu ickl y.
Do not use cruise control in thefo llowing situa‐
tions:
R In traf fic situations whi chrequ ire frequent
ch anges of speed, e.g. in heavy traf fic, on
winding roads.
R On slippe ryroads. Accelerating can cause
th e drive wheels tolose traction and the
ve hicle could then skid.
R Ifyo u are driving when visibility is poor.
Fu nction of the limiter
The limiter restricts the speed of theve hicle. To
re duce the speed tothe set speed, the limiter
applies the brakes automaticall y.
Yo u can limit the speed as follo ws:
R Variable: for speed restrictions, e.g. in built-
up areas.
R Perm anen t:for long-term speed restrictions,
e.g. when driving in winter tyre mode.
The variable limiter is operated using the cor re‐
sponding steering wheel buttons. You can store any
road speed from 30 km/h to250 km/h or
up tothe set winter tyre limit. You can also per‐
fo rm settings while theve hicle is stationary if
th eve hicle has been star ted.
Obser vethe no tes on driving sy stems and your
re sponsibility; you may otherwise failto recog‐
nise dangers (/ page 131).
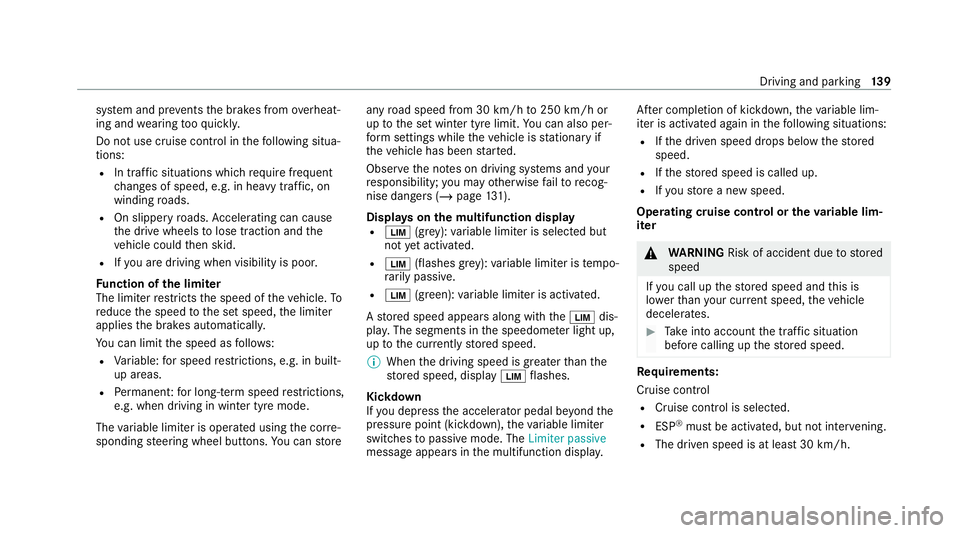
Dis playson the multifunction display
R È (gre y): variable limiter is selec ted but
not yet acti vated.
R È (flashes gr ey):va riable limiter is temp o‐
ra rily passive.
R È (green): variable limiter is activated.
A stored speed appears along with theÈ dis‐
pla y.The segments in the speedome ter light up,
up tothe cur rently stored speed.
% When the driving speed is greater than the
st ored speed, display Èflashes.
Kickd own
If yo u depress the accelerator pedal be yond the
pressure point (kickdown), theva riable limiter
swit ches topassive mode. The Limiter passive
message appears in the multifunction displa y.Af
ter completion of kickdown, theva riable lim‐
iter is activated again in thefo llowing situations:
R Ifth e driven speed drops below thestored
speed.
R Ifth estored speed is called up.
R Ifyo ustore a new speed.
Operating cruise control or theva riable lim‐
iter &
WARNING Risk of accident due tostored
speed
If yo u call up thestored speed and this is
lo we rth an your cur rent speed, theve hicle
decelerates. #
Take into account the tra ffic situation
before calling up thestored speed. Re
quirements:
Cruise control
R Cruise control is selected.
R ESP ®
must be activated, but not inter vening.
R The driven speed is at least 30 km/h. Driving and pa
rking 13 9
Page 151 of 441
#
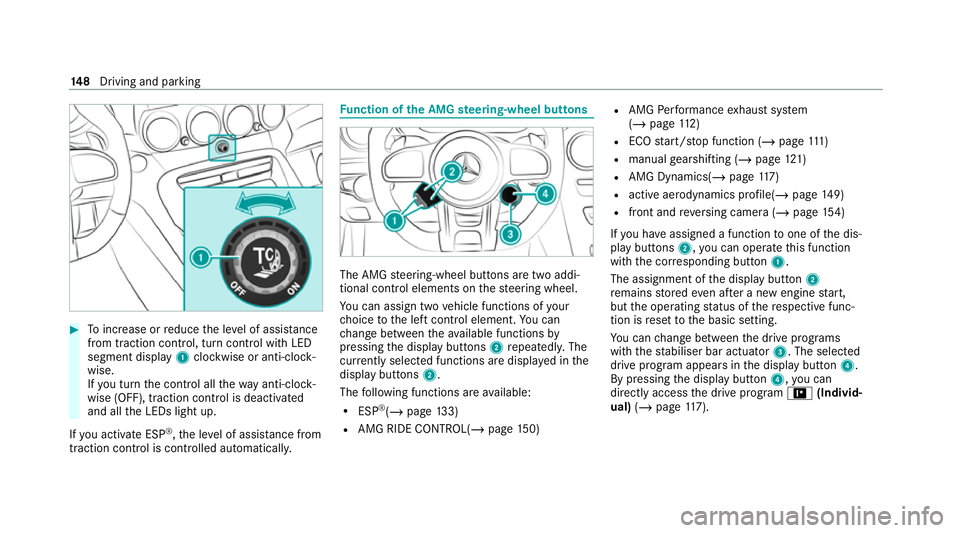
Toinc rease or reduce the le vel of assis tance
from traction control, turn control wi thLED
segment display 1clockwise or anti-clock‐
wise.
If yo u turn the control all thewa y anti-clo ck‐
wise (OFF), traction control is deactivated
and all the LEDs light up.
If yo u activate ESP ®
,th e le vel of assis tance from
traction control is controlled auto matically. Fu
nction of the AMG steering-wheel but tons The AMG
steering-wheel buttons are two addi‐
tional control elements on thesteering wheel.
Yo u can assign two vehicle functions of your
ch oice tothe left control element. You can
ch ange between theav ailable functions by
pressing the display buttons 2repeatedl y.The
cur rently selected functions are displ ayed in the
display buttons 2.
The following functions are available:
R ESP ®
(/ page 133)
R AMG RIDE CONTROL(/ page150) R
AMG Performance exhaust sy stem
(/ page 112)
R ECO start/ stop function (/ page111 )
R manual gearshifting (/ page121)
R AMG Dynamics( /page 117)
R active ae rodynamics profile(/ page149)
R front and reve rsing camera (/ page154)
If yo u ha veassigned a function toone of the dis‐
play buttons 2,you can operate this function
with the cor responding button 1.
The assignment of the display button 2
re mains stored even af ter a new engine start,
but the operating status of there spective func‐
tion is reset tothe basic setting.
Yo u can change between the drive prog rams
with thest abiliser bar actuator 3. The selected
drive program appears in the display button 4.
By pressing the display button 4,you can
direct lyaccess the drive prog ram = (Individ‐
ual) (/page 117). 14 8
Driving and pa rking