2020 MERCEDES-BENZ AMG GT COUPE brake
[x] Cancel search: brakePage 328 of 433
#
Position hub cap 1and turn until it is in the
ri ght position. #
Position soc ket2 on hub cap 1. #
Position wheel wrench 3on soc ket2 and
tighten hub cap 1.
Speci fied tigh tening torq ue: 25 Nm. Ra
ising theve hicle when changing a wheel Re
quirements:
R There are no persons in theve hicle.
R The vehicle has been prepared for a wheel
ch ange (/ page 324).
Important no tes on using the jack:
R Use only a vehicle-specific jack that has
been appr ovedby Mercedes-Benz toraise
th eve hicle.
R The jack is only designed forra ising and
holding theve hicle for a short time while a
wheel is being changed and not for mainte‐
nance workunder theve hicle. R
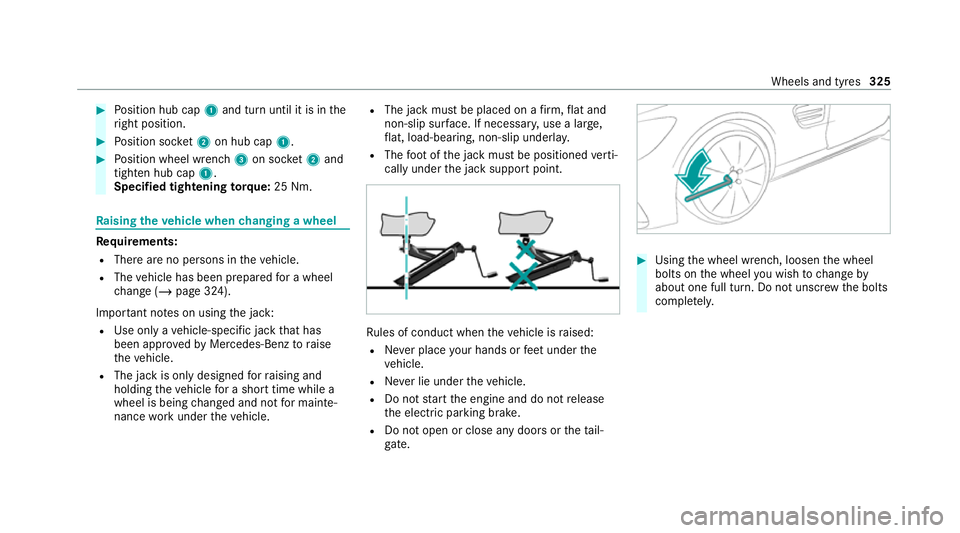
The jack must be placed on a firm ,fl at and
non-slip sur face. If necessar y,use a lar ge,
fl at, load-bearing, non-slip unde rlay.
R The foot ofthe jack must be positioned verti‐
cally under the jack support point. Ru
les of conduct when theve hicle is raised:
R Never place your hands or feet under the
ve hicle.
R Never lie under theve hicle.
R Do not start the engine and do not release
th e electric parking brake.
R Do not open or close any doors or theta il‐
gate. #
Using the wheel wrench, loosen the wheel
bolts on the wheel you wish tochange by
about one full turn. Do not unscr ewthe bolts
comple tely. Wheels and tyres
325
Page 330 of 433
#
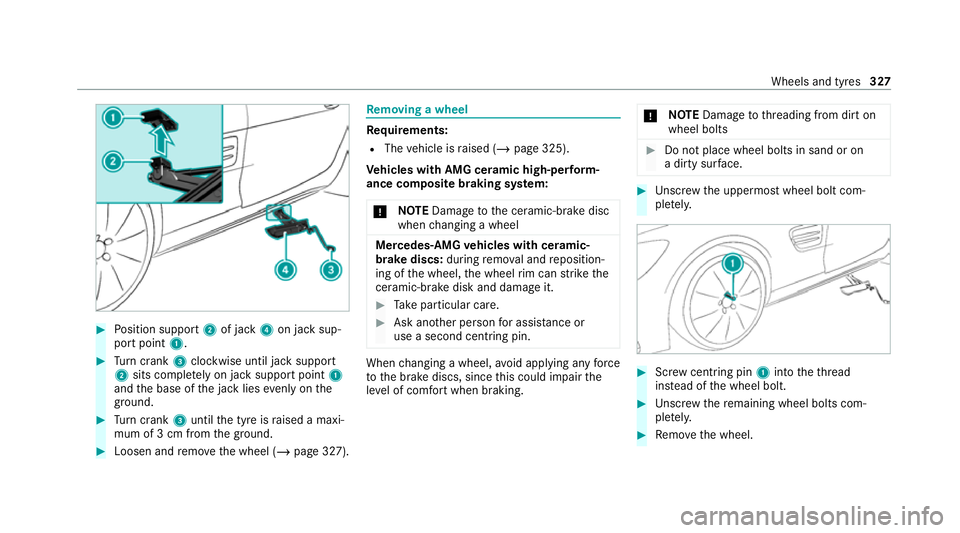
Position support 2of jack 4on jack sup‐
port point 1. #
Turn crank 3clockwise until jack suppo rt
2 sits comple tely on jack support point 1
and the base of the jack lies evenly on the
ground. #
Turn crank 3until the tyre is raised a maxi‐
mum of 3 cm from the ground. #
Loosen and remo vethe wheel (/ page 327). Re
moving a wheel Re
quirements:
R The vehicle is raised (/ page 325).
Ve hicles with AMG cera mic high-perform‐
ance composite braking sy stem:
* NO
TEDama getothe ceramic-brake disc
when changing a wheel Mercedes
-AMG vehicles with cera mic-
brake discs: during remo val and reposition‐
ing of the wheel, the wheel rim can strike the
ceramic-brake disk and damage it. #
Take particular care. #
Ask ano ther person for assi stance or
use a second centring pin. When
changing a wheel, avoid applying any force
to the brake discs, since this could impair the
le ve l of com fort when braking. *
NO
TEDama getothre ading from dirt on
wheel bolts #
Do not place wheel bolts in sand or on
a dirty sur face. #
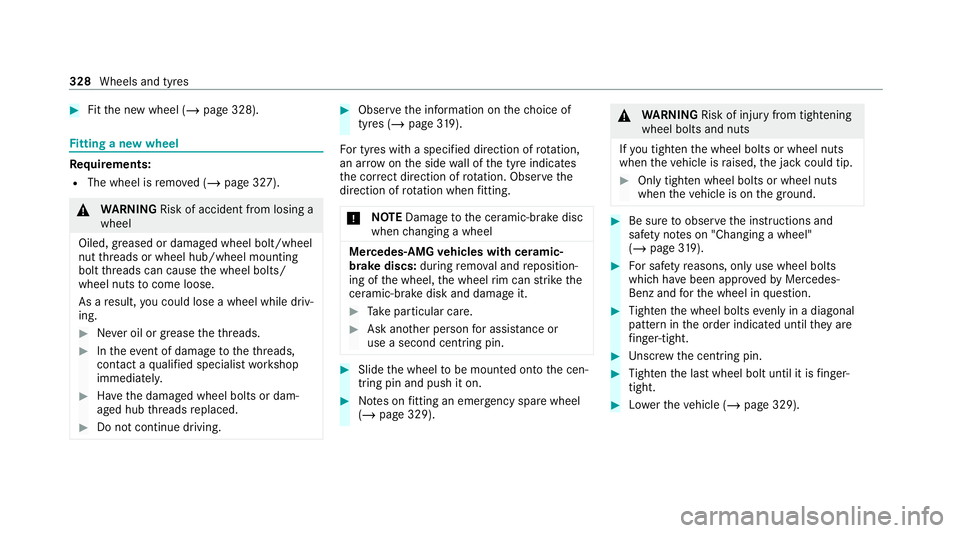
Unscr ew the uppermost wheel bolt com‐
ple tely. #
Screw centring pin 1into theth re ad
ins tead of the wheel bolt. #
Unscr ew there maining wheel bolts com‐
ple tely. #
Remo vethe wheel. Wheels and tyres
327
Page 331 of 433
#
Fitthe new wheel (/ page 328).Fi
tting a new wheel Re
quirements:
R The wheel is remo ved (/ page 327). &
WARNING Risk of accident from losing a
wheel
Oiled, greased or damaged wheel bolt/wheel
nut thre ads or wheel hub/wheel mounting
bolt thre ads can cause the wheel bolts/
wheel nuts tocome loose.
As a result, you could lose a wheel while driv‐
ing. #
Never oil or grease theth re ads. #
Intheeve nt of damage totheth re ads,
con tact a qualified specialist workshop
immediatel y. #
Have the damaged wheel bolts or dam‐
aged hub thre ads replaced. #
Do not continue driving. #
Obser vethe information on thech oice of
tyres (/ page319).
Fo r tyres with a specified direction of rotation,
an ar row on the side wall of the tyre indicates
th e cor rect dire ction of rotation. Obse rvethe
direction of rotation when fitting.
* NO
TEDama getothe ceramic-brake disc
when changing a wheel Mercedes
-AMG vehicles with cera mic-
brake discs: during remo val and reposition‐
ing of the wheel, the wheel rim can strike the
ceramic-brake disk and damage it. #
Take particular care. #
Ask ano ther person for assi stance or
use a second centring pin. #
Slide the wheel tobe mounted onto the cen‐
tring pin and push it on. #
Notes on fitting an eme rgency spare wheel
(/ page 329). &
WARNING Risk of injury from tightening
wheel bolts and nuts
If yo u tighten the wheel bolts or wheel nuts
when theve hicle is raised, the jack could tip. #
Only tighten wheel bolts or wheel nuts
when theve hicle is on the ground. #
Be sure toobser vethe instructions and
saf ety no tes on "Changing a wheel"
(/ page 319). #
For saf etyre asons, only use wheel bolts
which ha vebeen appr ovedby Mercedes-
Benz and forth e wheel in question. #
Tighten the wheel bolts evenly in a diagonal
pattern in the order indicated until they are
fi nger-tight. #
Unscr ew the cent ring pin. #
Tighten the last wheel bolt until it is finger-
tight. #
Lowe rth eve hicle (/ page 329). 328
Wheels and tyres
Page 337 of 433
Operating
fluids Note
s on operating fluids &
WARNING Risk of injury from operating
fl uids harmful to your health
Operating fluids may be poisonous and harm‐
ful to yo ur health. #
Obser vethete xt on the original con‐
ta iners when using, storing or disposing
of operating fluids. #
Alw aysst ore operating fluids sealed in
th eir original conta iners.#
Alw ayske ep children away from operat‐
ing fluids. +
ENVIRONMEN
TALNO TEEnvironmental
pollution caused byenvironmen tally ir re‐
sponsible disposal #
Dispose of operating fluids in an envi‐
ro nmentally responsible manner. Operating
fluids include thefo llowing:
R fuels
R lubricants
R coolant
R brake fluid
R windsc reen washer fluid
R climate cont rol sy stem refrigerant
Only use products app rove dby Mercedes-Benz.
Damage caused bythe use of products that ha ve
not been appr oved is not co veredby the
Mercedes-Benz warranty or goodwill gestures.
Yo u can identify operating fluids appr ovedby
Mercedes-Benz bythefo llowing insc ript ions on
th e conta iner:
R MB- Freigabe (e.g. MB-Fr eigabe 229.51 )
R MB-Appr oval (e.g. MB-App rova l 229.51)
Fu rther information on appr oved operating fluids
is available at thefo llowing locations:
R inthe Mercedes-Benz Specifications for
Operating Fluids byentering the designation
- at https://be vo.mercedes-benz.com -
inthe Mercedes-Benz BeVo app
R at a qualified specialist workshop &
WARNING Risk offire or explosion from
fuel
Fu els are highly flammable. #
Fire, naked flames, smoking and crea‐
tion of spar ksmust be avoided. #
Swit choff the ignition and, if available,
th est ationary heater, before and while
re fuelling theve hicle. &
WARNING Risk of injury from fuels
Fu els are poisonous and hazardous to your
health. #
Do not swallow fuel or let it come into
contact with skin, eyes or clo thing. #
Do not inhale fuel vapour. #
Keep children away from fuel. #
Keep doors and windo wsclosed du ring
th ere fuelling process. 334
Tech nical da ta
Page 340 of 433
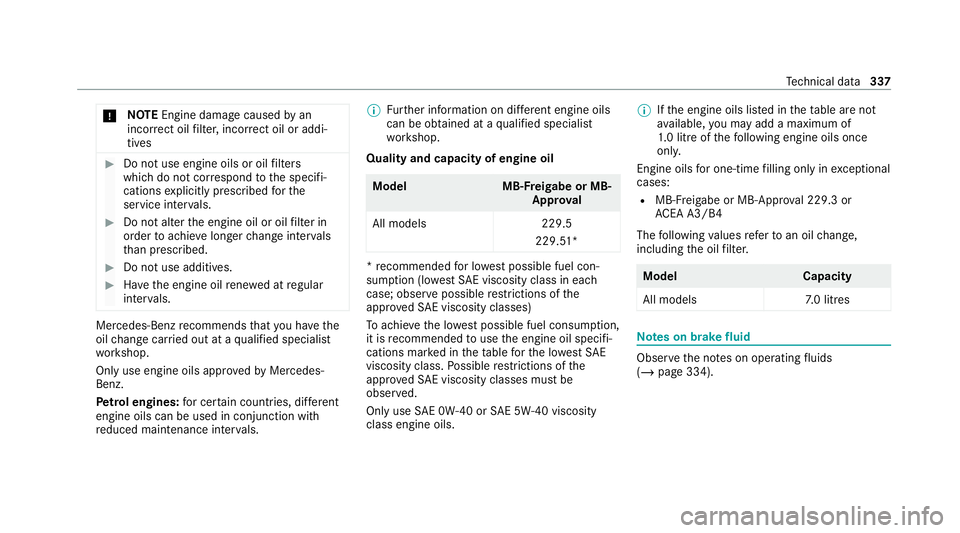
*
NO
TEEngine damage causedbyan
incor rect oil filter, incor rect oil or addi‐
tives #
Do not use engine oils or oil filters
which do not cor respond tothe specifi‐
cations explicitly prescribed forthe
service inter vals. #
Do not alter the engine oil or oil filter in
order toachie velonger change inter vals
th an presc ribed. #
Do not use additives. #
Have the engine oil rene we d at regular
inter vals. Mercedes-Benz
recommends that you ha vethe
oil change car ried out at a qualified specialist
wo rkshop.
Only use engine oils appr oved byMercedes-
Benz.
Pe trol engines: for cer tain countries, dif fere nt
engine oils can be used in conjunction with
re duced maintenance inter vals. %
Further information on dif fere nt engine oils
can be ob tained at a qualified specialist
wo rkshop.
Quality and capacity of engine oil Model
MB-Freigabe or MB-
Appr oval
All models 229.5
229.51* *
re commended for lo west possible fuel con‐
sum ption (lo westSA E viscosity class in ea ch
case; obser vepossible restrictions of the
appr ovedSA E viscosity classes)
To achie vethe lo west possible fuel consum ption,
it is recommended touse the engine oil specifi‐
cations mar ked in theta ble forth e lo west SAE
viscosity class. Possible restrictions of the
appr ovedSA E viscosity classes mu stbe
obser ved.
Only use SAE 0W-40 or SAE 5W-40 viscosity
class engine oils. %
Ifth e engine oils lis ted in theta ble are not
av ailable, you may add a maximum of
1. 0 litr e ofthefo llowing engine oils once
onl y.
Engine oils for one-time filling only in exceptional
cases:
R MB-F reigabe or MB-Appr oval 229.3 or
AC EA A3/B4
The following values referto an oil change,
including the oil filter. Model
Capacity
All models 7.0 litres Note
s on brake fluid Obser
vethe no tes on operating fluids
(/ page 334). Te
ch nical da ta337
Page 341 of 433
&
WARNING Risk of an accident due to
va pour poc kets form ing in the brake sys‐
tem
The brake fluid constantly absorbs moisture
from the air. This lo wersthe boiling point of
th e brake fluid. If the boiling point is too lo w,
va pour poc kets may form inthe brake sys‐
te m when the brakes are applied hard.
This impairs the braking ef fect. #
Have the brake fluid rene we d at the
specified inter vals. Ha
ve the brake fluid regularly replaced at a
qu alified specialist workshop.
Only use a brake fluid appr ovedby Mercedes-
Benz according toMB-F reigabe or MB-Appr oval
33 1.0. Coolant
Note
s on coolant
Obser vethe no tes on operating fluids
(/ page 334). &
WARNING Risk offire ‑ and inju ryfrom
antifreeze
If antifreeze comes into contact with hot
component parts in the engine compart‐
ment, it may ignite. #
Allow the engine tocool down before
yo uto p up the antif reeze. #
Make sure that no antifreeze spills out
next tothefiller opening. #
Thoroughly clean the antif reeze from
component parts before starting the
ve hicle. *
NO
TEDama gecaused byincor rect cool‐
ant #
Only use coolant that has been pre‐
mixed with therequ ired antifreeze pro‐
te ction. Information on coolant is
available at thefo l‐
lowing locations:
R inthe Mercedes-Benz Specification for
Operating Fluids 310.1
- at https://be vo.mercedes-benz.com
- inthe Mercedes-Benz BeVo app
R at a qualified specialist workshop *
NO
TEOverheating at high outside tem‐
peratures If an inapp
ropriate coolant is used, the
engine cooling sy stem is not suf ficiently pro‐
te cted against overheating and cor rosion at
high outside temp eratures. #
Alw ays use coolant appr ovedby
Mercedes-Benz. #
Obser vethe instructions in the
Mercedes-Benz Specifications for Oper‐
ating Fluids 310.1. Ha
ve the coolant regularly replaced at a qualified
specialist workshop. 338
Tech nical da ta
Page 359 of 433
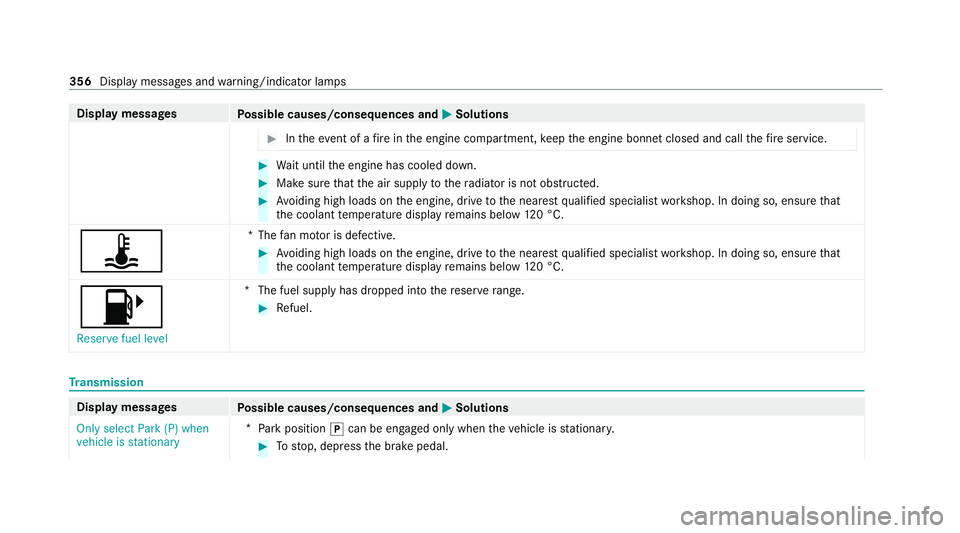
Display messages
Possible causes/consequences and M MSolutions #
Intheeve nt of a fire inthe engine compartment, keep the engine bonn etclosed and call thefire service. #
Wait until the engine has cooled down. #
Make sure that the air supply tothera diator is not obstructed. #
Avoiding high loads on the engine, drive tothe nearest qualified specialist workshop. In doing so, ensure that
th e coolant temp erature display remains below 120 °C.
ÿ *T
hefan mo tor is defective. #
Avoiding high loads on the engine, drive tothe nearest qualified specialist workshop. In doing so, ensure that
th e coolant temp erature display remains below 120 °C.
8
Reserve fuel level *T
he fuel supply has dropped into there ser verange. #
Refuel. Tr
ansmission Display messages
Possible causes/consequences and M MSolutions
Only select Park (P) when
vehicle is stationary *
Pa rk position jcan be engaged only when theve hicle is stationar y. #
Tostop, depress the brake pedal. 356
Display messages and warning/indicator lamps
Page 360 of 433
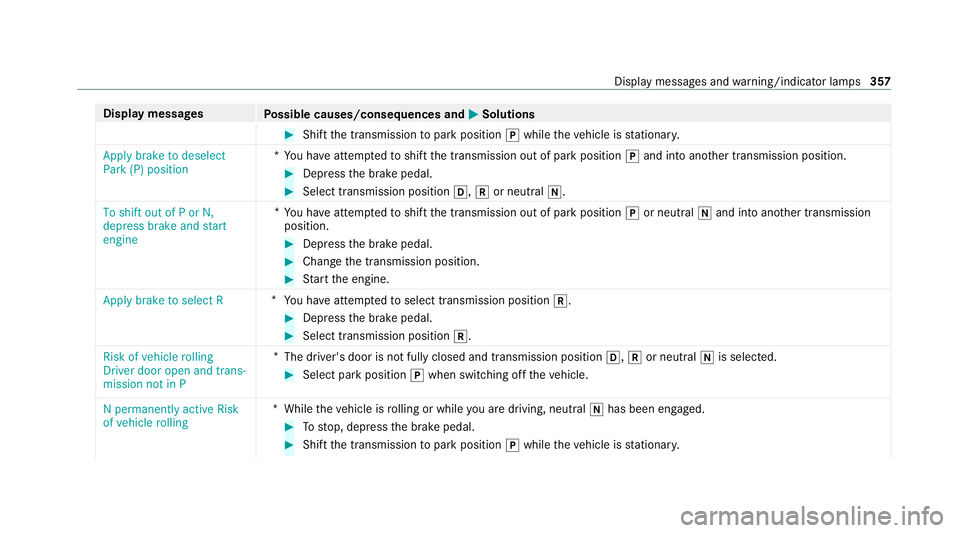
Display messages
Possible causes/consequences and M MSolutions #
Shift the transmission topark position jwhile theve hicle is stationar y.
Apply brake to deselect
Park (P) position *
Yo u ha veattem ptedto shift the transmission out of park position jand into ano ther transmission position. #
Depress the brake pedal. #
Select transmission position h,kor neutral i.
To shift out of P or N,
depress brake and start
engine *
Yo u ha veattem ptedto shift the transmission out of park position jor neutral iand into ano ther transmission
position. #
Depress the brake pedal. #
Change the transmission position. #
Start the engine.
Apply brake to select R *
You ha veattem ptedto select transmission position k. #
Depress the brake pedal. #
Select transmission position k.
Risk of vehicle rolling
Driver door open and trans-
mission not in P *
The driver's door is not fully closed and transmission position h,kor neutral iis selected. #
Select park position jwhen switching off theve hicle.
N permanently active Risk
of vehicle rolling *
While theve hicle is rolling or while you are driving, neutral ihas been en gage d. #
Tostop, depress the brake pedal. #
Shift the transmission topark position jwhile theve hicle is stationar y. Displ
aymessa ges and warning/indicator lamps 357