2020 MASERATI GRANTURISMO buttons
[x] Cancel search: buttonsPage 146 of 286

• left-hand/right-hand vent air
distribution;
• fan speed (stepless change);
• compressor activation;
• air recirculation.
All the functions listed above can be
modified manually, i.e. the user can
select one or more of these functions
as desired, using the control panel.
The manual selections always have
priority over the automatic ones and
are memorized until the user chooses
the automatic control again.
When a function has been set
manually, the other automatic
functions will not be affected.
The following parameters/functions
can be set/modified manually:
• left-hand/right-hand side air
temperature;
• fan speed;
• air distribution on 7 positions
(left-hand/ right-hand);
• compressor activation;
• single/dual-zone distribution priority;
• defrosting/defogging function (MAX
DEF);
• air recirculation;
• automatic/manual control of the
system;
• heated rear window;• system deactivation;
• opening/closing of air duct leading
to rear vents.
Activation
The system can be started up in a
number of ways. It is however
advisable to begin by pressing one of
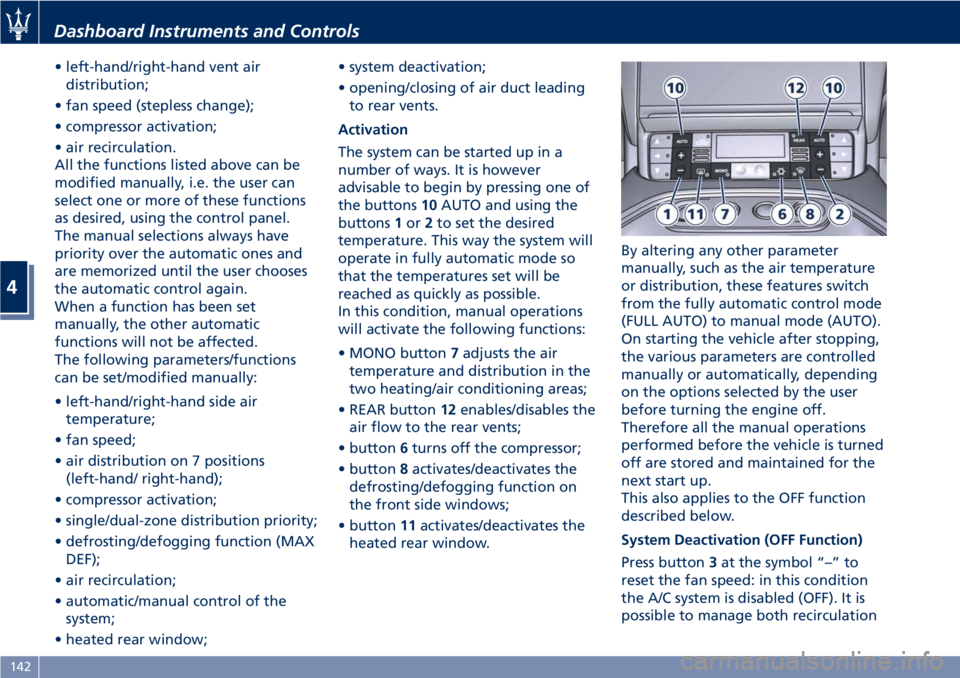
the buttons10AUTO and using the
buttons1or2to set the desired
temperature. This way the system will
operate in fully automatic mode so
that the temperatures set will be
reached as quickly as possible.
In this condition, manual operations
will activate the following functions:
• MONO button7adjusts the air
temperature and distribution in the
two heating/air conditioning areas;
• REAR button12enables/disables the
air flow to the rear vents;
• button6turns off the compressor;
• button8activates/deactivates the
defrosting/defogging function on
the front side windows;
• button11activates/deactivates the
heated rear window.By altering any other parameter
manually, such as the air temperature
or distribution, these features switch
from the fully automatic control mode
(FULL AUTO) to manual mode (AUTO).
On starting the vehicle after stopping,
the various parameters are controlled
manually or automatically, depending
on the options selected by the user
before turning the engine off.
Therefore all the manual operations
performed before the vehicle is turned
off are stored and maintained for the
next start up.
This also applies to the OFF function
described below.
System Deactivation (OFF Function)
Press button3at the symbol “–” to
reset the fan speed: in this condition
the A/C system is disabled (OFF). It is
possible to manage both recirculation
Dashboard Instruments and Controls
4
142
Page 148 of 286

• compressor enabled (the LED on the
button is illuminated);
• defrosting/defogging function (MAX
DEF) deactivated (the LED on the
button is off);
• heated rear window deactivated (the
LED on the button is off);
• open recirculation (the LED on the
button is off);
• air ventilation and distribution are
set by the system;
• REAR disabled (the LED on the
button is off), the air flows to the
rear vents.
A/C Filter
The climate control system filters
outside air containing dust, pollen and
some odors. Strong odors cannot be
totally removed by A/C filter at the
entrance of the air climate system. See
“Maintenance Procedures” in section
“Maintenance and Care” for filter
replacement instructions.
Phone and Voice Controls
on Steering Wheel
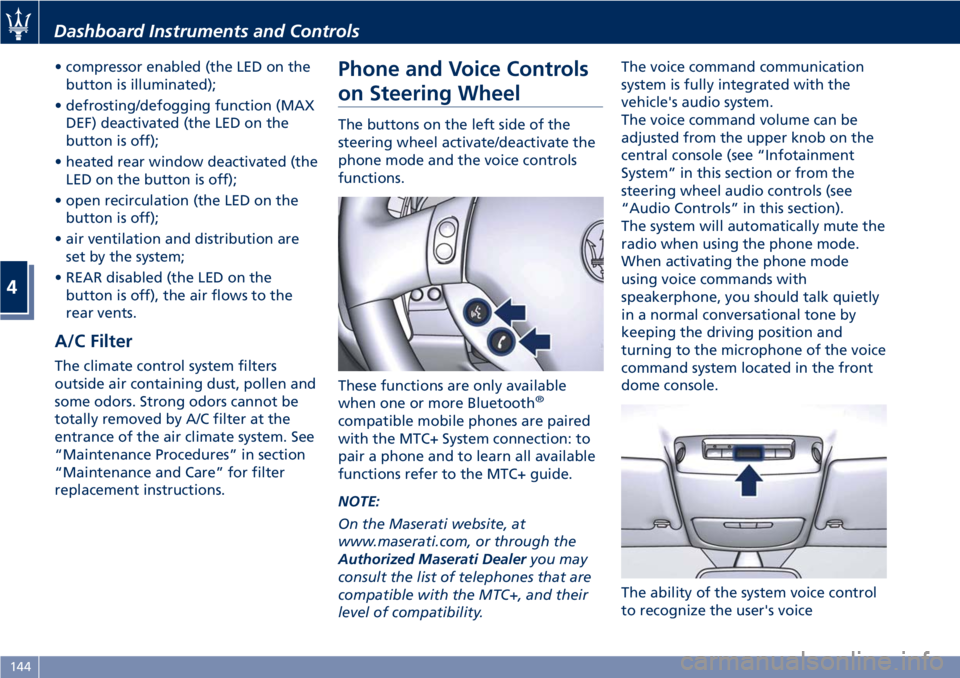
The buttons on the left side of the
steering wheel activate/deactivate the
phone mode and the voice controls
functions.
These functions are only available
when one or more Bluetooth
®
compatible mobile phones are paired
with the MTC+ System connection: to
pair a phone and to learn all available
functions refer to the MTC+ guide.
NOTE:
On the Maserati website, at
www.maserati.com, or through the
Authorized Maserati Dealeryou may
consult the list of telephones that are
compatible with the MTC+, and their
level of compatibility.The voice command communication
system is fully integrated with the
vehicle's audio system.
The voice command volume can be
adjusted from the upper knob on the
central console (see “Infotainment
System” in this section or from the
steering wheel audio controls (see
“Audio Controls” in this section).
The system will automatically mute the
radio when using the phone mode.
When activating the phone mode
using voice commands with
speakerphone, you should talk quietly
in a normal conversational tone by
keeping the driving position and
turning to the microphone of the voice
command system located in the front
dome console.
The ability of the system voice control
to recognize the user's voice
Dashboard Instruments and Controls
4
144
Page 163 of 286

Drive Mode
Controls Preview
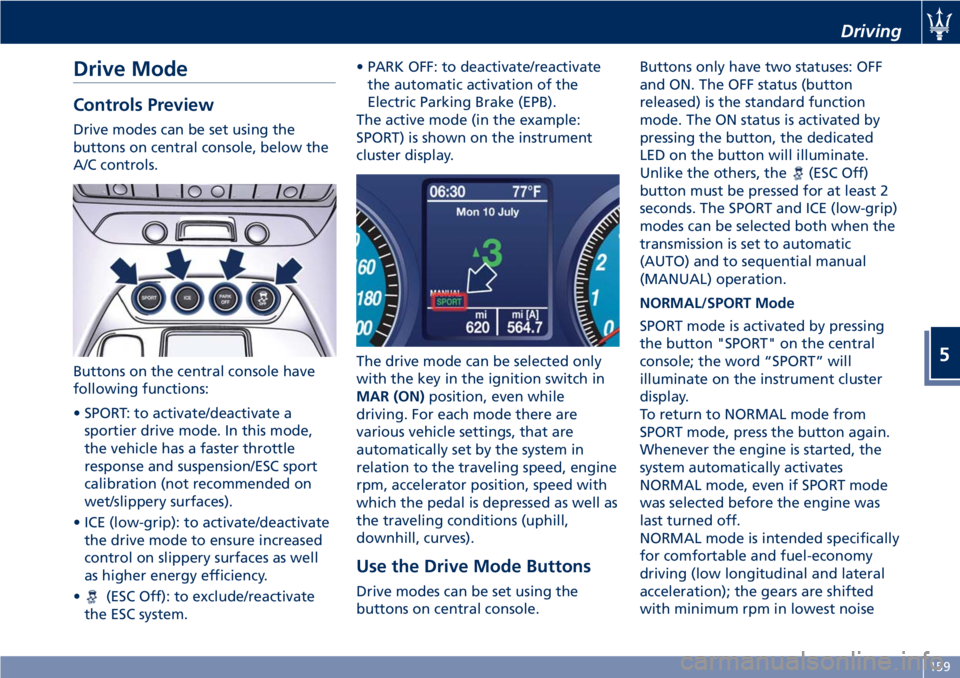
Drive modes can be set using the
buttons on central console, below the
A/C controls.
Buttons on the central console have
following functions:
• SPORT: to activate/deactivate a
sportier drive mode. In this mode,
the vehicle has a faster throttle
response and suspension/ESC sport
calibration (not recommended on
wet/slippery surfaces).
• ICE (low-grip): to activate/deactivate
the drive mode to ensure increased
control on slippery surfaces as well
as higher energy efficiency.
•
(ESC Off): to exclude/reactivate
the ESC system.• PARK OFF: to deactivate/reactivate
the automatic activation of the
Electric Parking Brake (EPB).
The active mode (in the example:
SPORT) is shown on the instrument
cluster display.
The drive mode can be selected only
with the key in the ignition switch in
MAR (ON)position, even while
driving. For each mode there are
various vehicle settings, that are
automatically set by the system in
relation to the traveling speed, engine
rpm, accelerator position, speed with
which the pedal is depressed as well as
the traveling conditions (uphill,
downhill, curves).
Use the Drive Mode Buttons
Drive modes can be set using the
buttons on central console.Buttons only have two statuses: OFF
and ON. The OFF status (button
released) is the standard function
mode. The ON status is activated by
pressing the button, the dedicated
LED on the button will illuminate.
Unlike the others, the
(ESC Off)
button must be pressed for at least 2
seconds. The SPORT and ICE (low-grip)
modes can be selected both when the
transmission is set to automatic
(AUTO) and to sequential manual
(MANUAL) operation.
NORMAL/SPORT Mode
SPORT mode is activated by pressing
the button "SPORT" on the central
console; the word “SPORT” will
illuminate on the instrument cluster
display.
To return to NORMAL mode from
SPORT mode, press the button again.
Whenever the engine is started, the
system automatically activates
NORMAL mode, even if SPORT mode
was selected before the engine was
last turned off.
NORMAL mode is intended specifically
for comfortable and fuel-economy
driving (low longitudinal and lateral
acceleration); the gears are shifted
with minimum rpm in lowest noise
Driving
5
159
Page 242 of 286

(Continued)
quick coupling from the negative
pole (–) of the battery.
If the battery needs to be removed
from its compartment, you must first
detach the terminal clamp from
negative pole (–) and then the other
terminal clamp from positive pole (+),
after removing the protective cover.
Battery poles are marked positive (+)
and negative (–) and are identified on
the battery case.
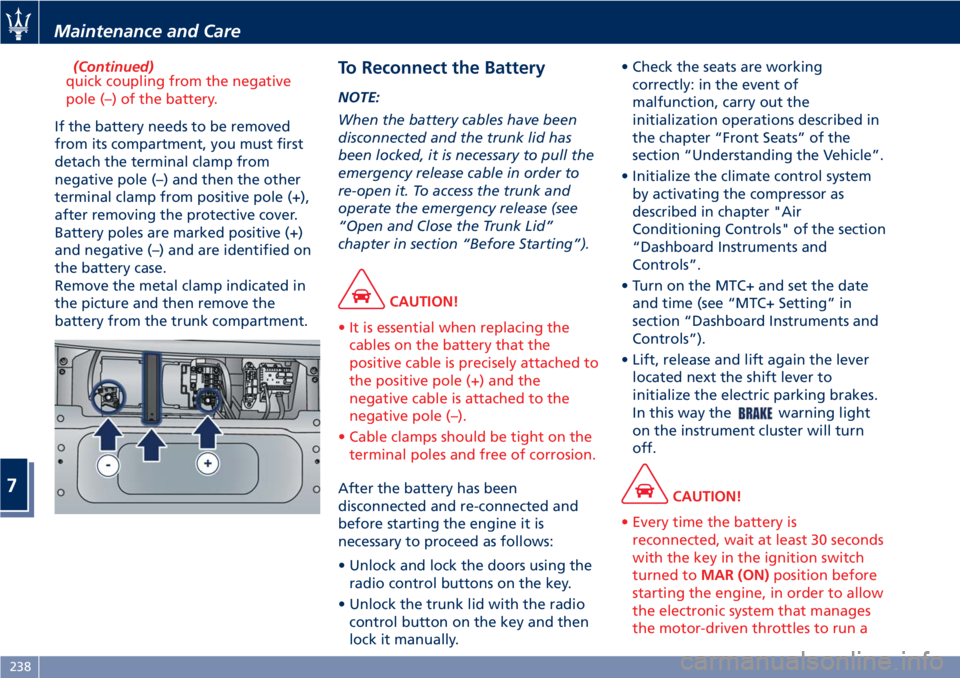
Remove the metal clamp indicated in
the picture and then remove the
battery from the trunk compartment.
To Reconnect the Battery
NOTE:
When the battery cables have been
disconnected and the trunk lid has
been locked, it is necessary to pull the
emergency release cable in order to
re-open it. To access the trunk and
operate the emergency release (see
“Open and Close the Trunk Lid”
chapter in section “Before Starting”).
CAUTION!
• It is essential when replacing the
cables on the battery that the
positive cable is precisely attached to
the positive pole (+) and the
negative cable is attached to the
negative pole (–).
• Cable clamps should be tight on the
terminal poles and free of corrosion.
After the battery has been
disconnected and re-connected and
before starting the engine it is
necessary to proceed as follows:
• Unlock and lock the doors using the
radio control buttons on the key.
• Unlock the trunk lid with the radio
control button on the key and then
lock it manually.• Check the seats are working
correctly: in the event of
malfunction, carry out the
initialization operations described in
the chapter “Front Seats” of the
section “Understanding the Vehicle”.
• Initialize the climate control system
by activating the compressor as
described in chapter "Air
Conditioning Controls" of the section
“Dashboard Instruments and
Controls”.
• Turn on the MTC+ and set the date
and time (see “MTC+ Setting” in
section “Dashboard Instruments and
Controls”).
• Lift, release and lift again the lever
located next the shift lever to
initialize the electric parking brakes.
In this way the
warning light
on the instrument cluster will turn
off.
CAUTION!
• Every time the battery is
reconnected, wait at least 30 seconds
with the key in the ignition switch
turned toMAR (ON)position before
starting the engine, in order to allow
the electronic system that manages
the motor-driven throttles to run a
Maintenance and Care
7
238