2020 MASERATI GRANTURISMO trunk
[x] Cancel search: trunkPage 42 of 286

Open and Close the Hood
Opening
From inside the vehicle, pull the hood
release lever located under the left
lower side of the dashboard.
Move to the outside and stand in front
of the vehicle front grille.
Slightly lift the hood and lift the safety
lever as indicated by the arrow. The
safety lever is located in the center of
the front lid contact area.Lift the hood completely: this
operation is facilitated by two gas
struts keeping the fully open position.
With the key in the ignition switch in
MAR (ON)position, the specific red
warning light will display on the
instrument cluster with the message
indicating that the hood is open (see
chapter “Instrument Cluster” in section
“Dashboard Instrument and
Controls”).
Closing
Lower the hood to about 20 cm (8 in)
from the contact area of the engine
compartment and then drop it. This
should secure the inclusion of the
latch.
CAUTION!
To prevent possible damage, do not
slam the hood to close it.
WARNING!
•Be sure the hood is fully latched
before driving your vehicle. If the lid
is not fully latched, it could open
when the vehicle is in motion and
block your vision. Failure to follow
this warning could result in serious
injury or death.
•Gear shifting is always active and
may be performed even when one
or more doors, the hood or the trunk
lid are open. Therefore, in these
conditions, take great care to avoid
moving the transmission shift lever
and so accidentally engage gears.
Before Starting
2
38
Page 69 of 286

NOTE:
If snow, ice, mud, or any other
substance builds up on the camera
lens, clean the lens, rinse with water,
and dry with a soft cloth. Do not cover
the lens.Safety Tips
Transporting Passengers
WARNING!
•Do not leave children or animals
inside parked vehicles in hot
weather. Interior heat build-up may
cause serious injury.
•Never ride in a cargo area, inside of
a vehicle.
•Do not allow people to ride in any
area of your vehicle that is not
equipped with seats and seat belts.
•Be sure everyone in your vehicle is
in a seat and using a seat belt
properly.
Exhaust Gas
WARNING!
Exhaust gases can injure. They contain
carbon monoxide (CO), which is
colorless and odorless. Breathing it
can make you unconscious and can
eventually poison you. To avoid
breathing (CO), follow these safety
tips:
•Do not run the engine in a closedgarage or in confined areas any
longer than needed to move your
vehicle in or out of the area.
•If it is necessary to sit in a parked
vehicle with the engine running,
adjust your heating or cooling
controls to force outside air into the
vehicle. Set the blower at high
speed.
•If you are required to drive with the
trunk lid open, make sure that all
windows are closed and the climate
control blowers switch is set at high
speed. DO NOT use the recirculation
mode.
The best protection against carbon
monoxide entry into the passenger
compartment is a properly maintained
engine exhaust system.
Whenever detecting a change in the
sound of the exhaust system or
eventual exhaust fumes inside the
vehicle have theAuthorized Maserati
Dealerinspect the complete exhaust
system and adjacent body areas for
broken, damaged, deteriorated, or
mispositioned parts.
Open seams or loose connections
could permit exhaust fumes to seep
into the passenger compartment.
Before Starting
2
65
Page 71 of 286

•Never place or install floor mats or
other floor coverings in the vehicle
that cannot be properly secured to
prevent them from moving and
interfering with the pedals.
•Never put floor mats or other floor
coverings on top of already installed
floor mats. Additional floor mats
and other coverings will reduce the
size of the pedal area and interfere
with the pedals.
•Check mounting of mats on a
regular basis. Always properly
reinstall and secure floor mats that
have been removed for cleaning.
•Always make sure that objects
cannot fall into the driver footwell
while the vehicle is moving. Objects
can become trapped under the
brake pedal and accelerator pedal
causing a loss of vehicle control.
•Mounting posts must be properly
installed, if not equipped from the
factory. Failure to properly follow
floor mat installation or mounting
can cause interference with the
brake pedal and accelerator pedal
operation causing loss of control of
the vehicle.Tires
• Examine tires for excessive tread
wear and uneven wear patterns.
• Check for stones, nails, glass, or
other objects lodged in the tread or
sidewall.
• Inspect the tread for cuts and cracks.
• Inspect sidewalls for cuts, cracks and
bulges.
• Check the wheel nuts for tightness.
• Check the tires (see “Tire Inflation
Pressure” chapter in section
“Features and Specifications”) for
proper cold inflation pressure.
Lights and Indicator Lights
• Have someone observe the
operation of exterior lights while
you operate the controls (see
“Lights” chapter in section
“Understanding the Vehicle”).
• Check turn signal and high beam
indicator lights on the instrument
cluster (see “Instrument Cluster”
chapter in section “Dashboard
Instruments and Controls”).
Door Latches
• Check for positive closing, latching,
and locking of doors and trunk lid
(see chapter “Doors” and “Open and
Close the Trunk Lid” in this section).Fluid Leaks
• Check area under vehicle after
overnight parking for recent fluid
leaks (oil, fuel, etc.).
• If gasoline fumes are detected or
fluid leaks are suspected, contact an
Authorized Maserati Dealer.
WARNING!
California Proposition 65
Operating, servicing and maintaining
a passenger vehicle or off-road vehicle
can expose you to chemicals including
such as, engine exhaust, carbon
monoxide, phthalates and lead, that
which are know to the State of
California to cause cancer and birth
defects or other reproductive harm. To
minimize exposure, avoid breathing
exhaust, do not idle the engine except
as necessary, service your vehicle in a
well-ventilated area and wear gloves
or wash your hands frequently when
servicing your vehicle. For more
information go to:
www.P65Warnings.ca.gov/passenger-
vehicle
Before Starting
2
67
Page 75 of 286

1Adjustable side air vents.
2Hood lid opening lever.
3Headlight and fog light switch.
4"Mode" and adjust "+" and
"–" buttons.
5Front parking sensors
disabling/enabling.
6Trunk lid opening button.
7Fuel tank door opening button
(see "Refueling" in section
"Driving" for operation).
8Multifunction lever (Cruise
Control, turn signals, headlight
washer and headlight
selection).
9Lower gearshift paddle
"DOWN".
10Instrument cluster.
11Steering wheel height and
depth adjustment lever.
12Upper air vent.
13Sun radiation sensor.
14Horn control.
15Multimedia controls repeated
on the steering wheel.
16Windshield/headlight
wiper/washer control lever.17Upper gearshift paddle "UP".
18Ignition switch.
19Clock.
20Central adjustable air vents.
21MTC+ display.
22Glove compartment.
23Side window vents.
Front Dome Console
Components
1Reading lights control button.
2Central light control button.
3Reading lights.
4Central light.
5Anti-lift alarm system
deactivation button.6Volumetric alarm system
deactivation button.
7Paired phone hands-free
microphone.
Understanding the Vehicle
3
71
Page 93 of 286

domelights turn on for about 10
seconds.
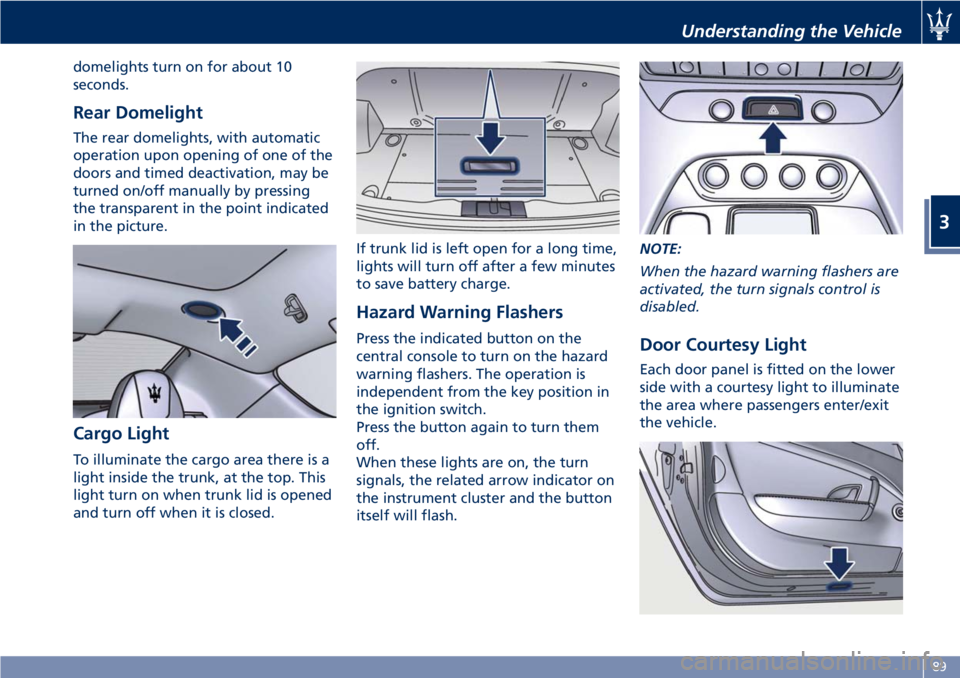
Rear Domelight
The rear domelights, with automatic
operation upon opening of one of the
doors and timed deactivation, may be
turned on/off manually by pressing
the transparent in the point indicated
in the picture.
Cargo Light
To illuminate the cargo area there is a
light inside the trunk, at the top. This
light turn on when trunk lid is opened
and turn off when it is closed.If trunk lid is left open for a long time,
lights will turn off after a few minutes
to save battery charge.
Hazard Warning Flashers
Press the indicated button on the
central console to turn on the hazard
warning flashers. The operation is
independent from the key position in
the ignition switch.
Press the button again to turn them
off.
When these lights are on, the turn
signals, the related arrow indicator on
the instrument cluster and the button
itself will flash.NOTE:
When the hazard warning flashers are
activated, the turn signals control is
disabled.Door Courtesy Light
Each door panel is fitted on the lower
side with a courtesy light to illuminate
the area where passengers enter/exit
the vehicle.
Understanding the Vehicle
3
89
Page 97 of 286

Interior Features
Electric Power Outlets
The vehicle is equipped with two 12
Volt (13 Amp) electric power outlets.
One in passenger compartment on the
central console, under the cover with
armrest function, using the socket of
the cigarette lighter as power outlet
and one fitted in the trunk.
All power outlets are supplied only
when the engine is started or the key
in the ignition switch is turned inACC
orMAR (ON)position.
Power outlets are protected by a fuse.
Insert a cigarette lighter or accessory
plug into the power outlets to ensure
proper operation. Otherwise, check
the matching fuse integrity, see “Fuse
Replacement” in section
“Maintenance and Care” for further
information.
CAUTION!
• Do not plug in accessories that
exceed the maximum power of 160
Watts (13 Amps) at 12 Volts.
• Power outlets are designed for
accessory plugs only. Do not insert
any other object in the power
outlets as this will damage the outletand blow the fuse. Damages caused
by improper use of the power outlet
are not covered by the New Vehicle
Limited Warranty.
WARNING!
To avoid serious injury or death:
•Only devices designed for use in this
type of outlet should be inserted
into any 12 Volt outlet.
•Replacing the fuses that protect
power outlets with others of higher
amperage, there is the risk of fire.
•Do not touch with wet hands.
•If this outlet is mishandled, it may
cause an electric shock and failure.
Power Outlet on Central Console
To access the power outlet on the
central console lift the cover with
armrest function by pushing the inside
handle.
Remove the cigarette lighter and use
its socket as power outlet.
WARNING!
High power consumption items
plugged into this outlet for longperiods may discharge the battery
and/or prevent the engine from
starting.
Power Outlet inside the Trunk
The power outlet is positioned on the
left side of the trunk compartment.
Understanding the Vehicle
3
93
Page 101 of 286

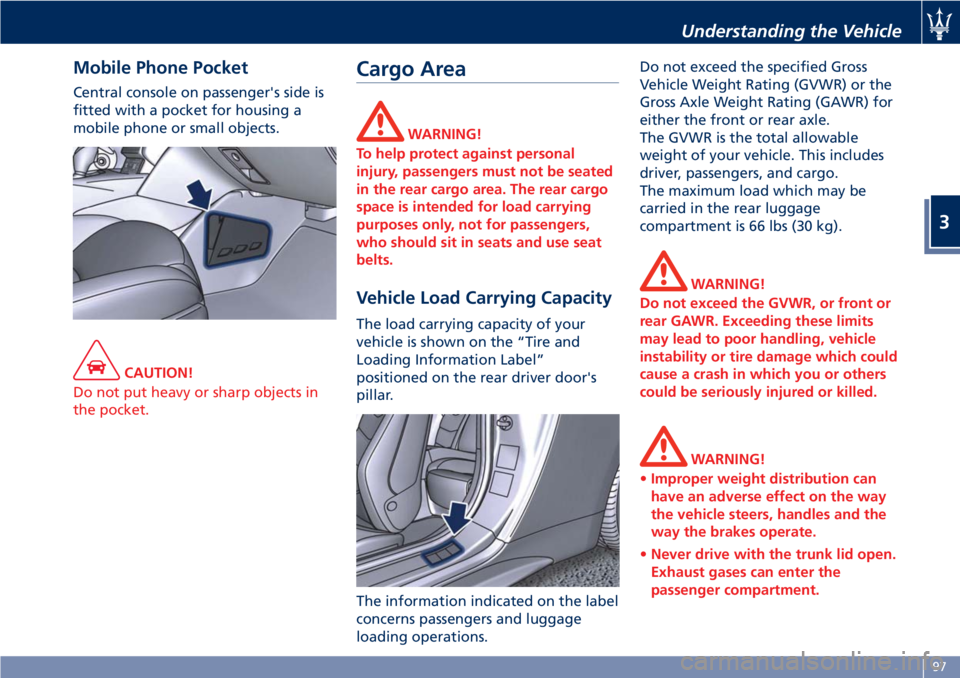
Mobile Phone Pocket
Central console on passenger's side is
fitted with a pocket for housing a
mobile phone or small objects.
CAUTION!
Do not put heavy or sharp objects in
the pocket.
Cargo Area
WARNING!
To help protect against personal
injury, passengers must not be seated
in the rear cargo area. The rear cargo
space is intended for load carrying
purposes only, not for passengers,
who should sit in seats and use seat
belts.
Vehicle Load Carrying Capacity
The load carrying capacity of your
vehicle is shown on the “Tire and
Loading Information Label”
positioned on the rear driver door's
pillar.
The information indicated on the label
concerns passengers and luggage
loading operations.Do not exceed the specified Gross
Vehicle Weight Rating (GVWR) or the
Gross Axle Weight Rating (GAWR) for
either the front or rear axle.
The GVWR is the total allowable
weight of your vehicle. This includes
driver, passengers, and cargo.
The maximum load which may be
carried in the rear luggage
compartment is 66 lbs (30 kg).
WARNING!
Do not exceed the GVWR, or front or
rear GAWR. Exceeding these limits
may lead to poor handling, vehicle
instability or tire damage which could
cause a crash in which you or others
could be seriously injured or killed.
WARNING!
•Improper weight distribution can
have an adverse effect on the way
the vehicle steers, handles and the
way the brakes operate.
•Never drive with the trunk lid open.
Exhaust gases can enter the
passenger compartment.
Understanding the Vehicle
3
97
Page 102 of 286

The trunk is the most suitable place to
load bulky and heavy objects onboard
the vehicle.
To load your vehicle properly, store
heavier items below and be sure you
distribute their weight as evenly as
possible.
Stow all loose items securely before
start driving as they could move during
the trip.HomeLink®(for
versions/markets, where
provided)
HomeLink®replaces up to three
hand-held transmitters operating the
automatic devices that open garage
doors and gates, enable/disable the
lighting or security systems. The
HomeLink
®unit is powered by your
vehicle's 12 Volt battery. The
HomeLink
®buttons that are located in
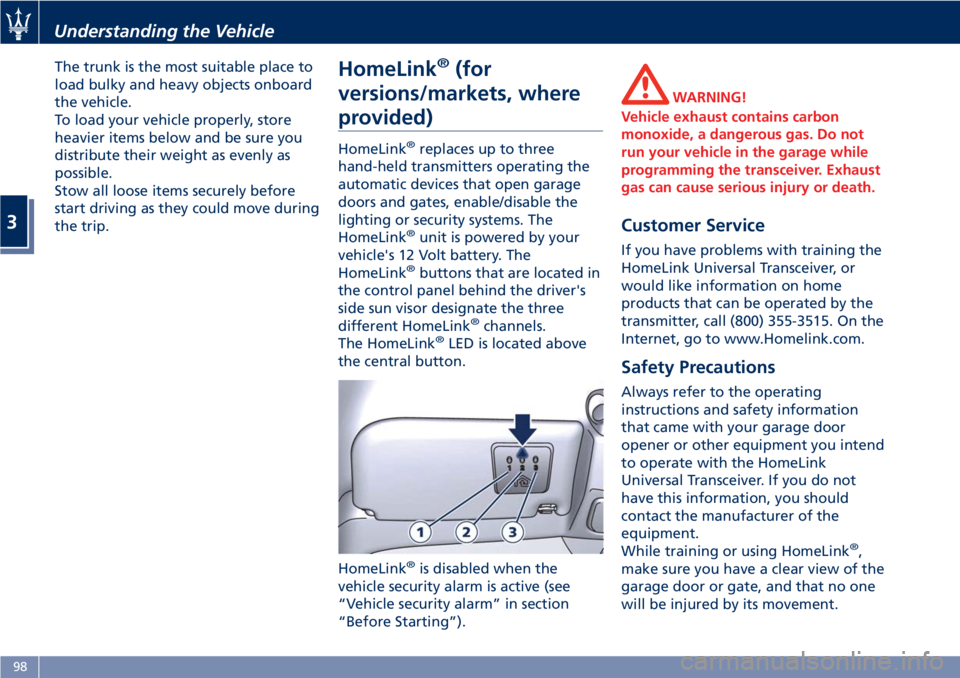
the control panel behind the driver's
side sun visor designate the three
different HomeLink
®channels.
The HomeLink®LED is located above
the central button.
HomeLink
®is disabled when the
vehicle security alarm is active (see
“Vehicle security alarm” in section
“Before Starting”).
WARNING!
Vehicle exhaust contains carbon
monoxide, a dangerous gas. Do not
run your vehicle in the garage while
programming the transceiver. Exhaust
gas can cause serious injury or death.
Customer Service
If you have problems with training the
HomeLink Universal Transceiver, or
would like information on home
products that can be operated by the
transmitter, call (800) 355-3515. On the
Internet, go to www.Homelink.com.
Safety Precautions
Always refer to the operating
instructions and safety information
that came with your garage door
opener or other equipment you intend
to operate with the HomeLink
Universal Transceiver. If you do not
have this information, you should
contact the manufacturer of the
equipment.
While training or using HomeLink
®,
make sure you have a clear view of the
garage door or gate, and that no one
will be injured by its movement.
Understanding the Vehicle
3
98