2020 LINCOLN MKZ HYBRID spare wheel
[x] Cancel search: spare wheelPage 218 of 544

Note:
If you change any tires, the system
must recalibrate and may not correctly
operate for a short time.
Active park assist is a multi-step process and
may require you to shift the transmission
multiple times. Follow the onscreen
instructions until the parking maneuver is
complete.
If you are uncomfortable with the proximity
to any vehicle or object, you may choose to
override the system by grabbing the steering
wheel, or by taking full control of your vehicle
after pressing the active park assist button.
Keep your hands, hair, clothing and any
loose items clear of the steering wheel when
using active park assist.
The sensors are on the front and rear
bumpers.
The system may not correctly operate in any
of the following conditions:
• You use a spare tire or a tire that is
significantly worn more than the other
tires.
• One or more tires are incorrectly inflated.
• You try to park on a tight curve. •
Something passes between the front
bumper and the parking space. For
example, a pedestrian or cyclist.
• The edge of the neighboring parked
vehicle is high off the ground. For
example, a bus, tow truck or flatbed
truck.
• The weather conditions are poor. For
example, during heavy rain, snow, fog,
high humidity and high temperatures.
Do not use the system if:
• You have attached an add-on accessory
close to the sensors on the front or rear
of your vehicle. For example, a bike rack
or trailer.
• You have attached an overhanging
object to the roof. For example, a
surfboard.
• The front bumper, rear bumper or the
side sensors are damaged.
• The correct tire size is not in use on your
vehicle. For example, a mini-spare tire. Using Active Park Assist
Selecting an Active Park Assist Mode Press the button once to activate
parallel parking. Press the button
a second time to activate
perpendicular parking. If you press the
button again the system switches off.
If your vehicle is parked and after you switch
the ignition on, you can use the information
display to toggle through the modes. Press
the button to switch the system on and open
the system menu in the information display.
Note: If your vehicle is parked, the default
mode is parallel park out assist. However, if
you did not use active park assist to parallel
park your vehicle, use the information
display to select park out assist.
Note: You can repeatedly press the active
park assist button to toggle through the
modes only after moving your vehicle
approximately 33 ft (10 m).
215
MKZ (CC9) Hybrid Electric Vehicle (HEV), Canada/United States of America, enUSA, Edition date: 201905, Second-Printing Parking AidsE146186
Page 298 of 544

Protected Component
Fuse Rating
Fuse or Relay Number
Not used (spare).
5A 1
4
Subwoofer amplifier.
20A 1
5
Not used (spare).
10A 2
6
Not used (spare).
10A 2
7
Not used (spare).
10A 2
8
Not used (spare).
10A 2
9
Power trunk logic.
5A 2
10
Keypad.
Cellphone passport module.
Not used (spare).
5A 2
11
Climate control.
7.5A 2
12
Gear shift.
Steering wheel column.
7.5A 2
13
Instrument cluster.
Datalink logic.
Extended power module.
10A 2
14
295
MKZ (CC9) Hybrid Electric Vehicle (HEV), Canada/United States of America, enUSA, Edition date: 201905, Second-Printing Fuses
Page 301 of 544
Protected Component
Fuse Rating
Fuse or Relay Number
Continuous control damping suspension module.
Heated steering wheel.
20A 1
37
Not used.
-
38
1 Micro 2 fuse.
2 Micro 3 fuse.
Note: Spare fuses can vary per amperage depending on the trim level of the veh\
icle.
CHANGING A FUSE
Fuses WARNING: Always replace a fuse
with one that has the specified amperage
rating. Using a fuse with a higher
amperage rating can cause severe wire
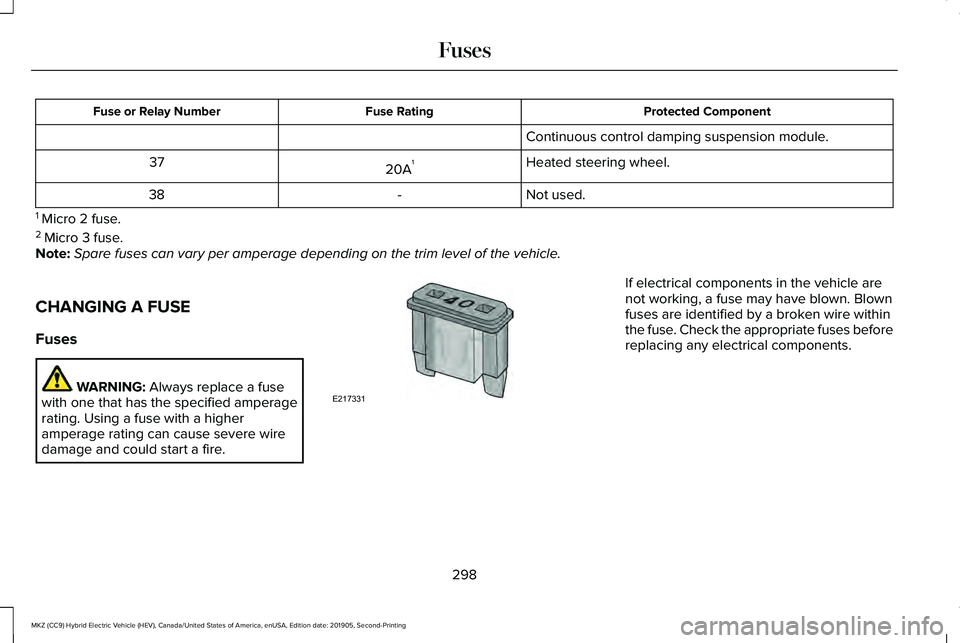
damage and could start a fire. If electrical components in the vehicle are
not working, a fuse may have blown. Blown
fuses are identified by a broken wire within
the fuse. Check the appropriate fuses before
replacing any electrical components.
298
MKZ (CC9) Hybrid Electric Vehicle (HEV), Canada/United States of America, enUSA, Edition date: 201905, Second-Printing FusesE217331
Page 339 of 544

5.
Wrap the power cord around the housing
and stow the accessory power plug into
its storage area.
Note: If you experience any difficulties with
the removal or installation of the sealant
bottle, consult your authorized dealer for
assistance.
Check and record the sealant compound’ s
use by date and make sure that it is replaced
with a fresh bottle after this date. The use by
date is on a label located on the sealant
bottle and can be seen through the
rectangular viewing window on the bottom
of the TMK housing. TIRE CARE
Information About Uniform Tire Quality
Grading
Tire Quality Grades apply to new
pneumatic passenger car tires. The
Quality grades can be found where
applicable on the tire sidewall between
tread shoulder and maximum section
width. For example: Treadwear 200
Traction AA Temperature A. These Tire Quality Grades are
determined by standards that the United
States Department of Transportation has
set.
Tire Quality Grades apply to new
pneumatic passenger car tires. They do
not apply to deep tread, winter-type
snow tires, space-saver or temporary
use spare tires, light truck or LT type
tires, tires with nominal rim diameters of
10 to 12 inches or limited production tires
as defined in Title 49 Code of Federal
Regulations Part 575.104 ©)(2).
U.S. Department of Transportation Tire
quality grades: The U.S. Department of
Transportation requires Lincoln Motor
Company to give you the following
information about tire grades exactly as
the government has written it.
336
MKZ (CC9) Hybrid Electric Vehicle (HEV), Canada/United States of America, enUSA, Edition date: 201905, Second-Printing Wheels and TiresE175990 E142542
Page 346 of 544
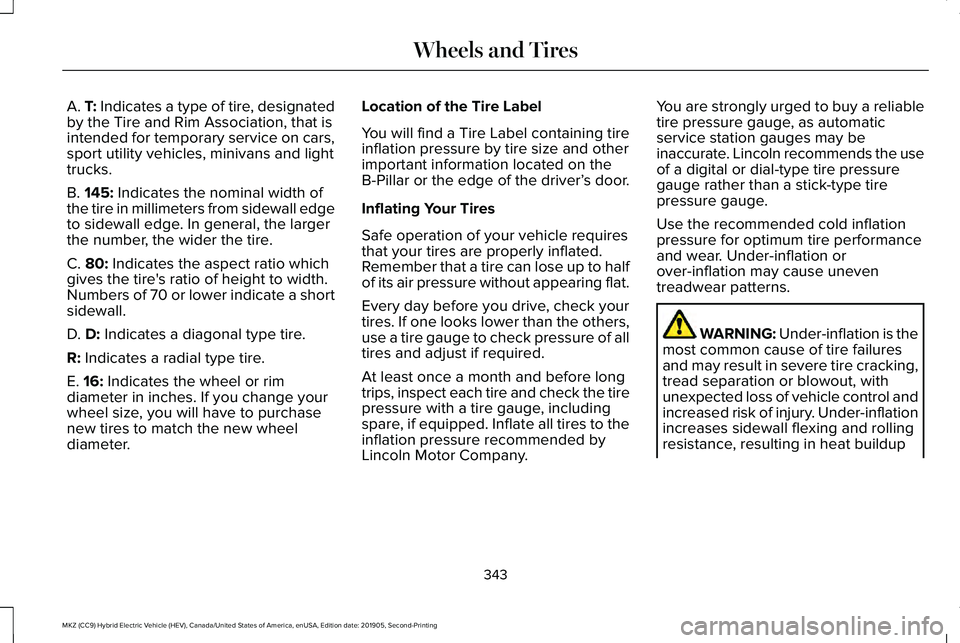
A. T: Indicates a type of tire, designated
by the Tire and Rim Association, that is
intended for temporary service on cars,
sport utility vehicles, minivans and light
trucks.
B.
145: Indicates the nominal width of
the tire in millimeters from sidewall edge
to sidewall edge. In general, the larger
the number, the wider the tire.
C.
80: Indicates the aspect ratio which
gives the tire's ratio of height to width.
Numbers of 70 or lower indicate a short
sidewall.
D.
D: Indicates a diagonal type tire.
R:
Indicates a radial type tire.
E.
16: Indicates the wheel or rim
diameter in inches. If you change your
wheel size, you will have to purchase
new tires to match the new wheel
diameter. Location of the Tire Label
You will find a Tire Label containing tire
inflation pressure by tire size and other
important information located on the
B-Pillar or the edge of the driver’
s door.
Inflating Your Tires
Safe operation of your vehicle requires
that your tires are properly inflated.
Remember that a tire can lose up to half
of its air pressure without appearing flat.
Every day before you drive, check your
tires. If one looks lower than the others,
use a tire gauge to check pressure of all
tires and adjust if required.
At least once a month and before long
trips, inspect each tire and check the tire
pressure with a tire gauge, including
spare, if equipped. Inflate all tires to the
inflation pressure recommended by
Lincoln Motor Company. You are strongly urged to buy a reliable
tire pressure gauge, as automatic
service station gauges may be
inaccurate. Lincoln recommends the use
of a digital or dial-type tire pressure
gauge rather than a stick-type tire
pressure gauge.
Use the recommended cold inflation
pressure for optimum tire performance
and wear. Under-inflation or
over-inflation may cause uneven
treadwear patterns.
WARNING: Under-inflation is the
most common cause of tire failures
and may result in severe tire cracking,
tread separation or blowout, with
unexpected loss of vehicle control and
increased risk of injury. Under-inflation
increases sidewall flexing and rolling
resistance, resulting in heat buildup
343
MKZ (CC9) Hybrid Electric Vehicle (HEV), Canada/United States of America, enUSA, Edition date: 201905, Second-Printing Wheels and Tires
Page 348 of 544
Note:
If you have to drive a distance to
get air for your tires, check and record
the tire pressure first and add the
appropriate air pressure when you get
to the pump. It is normal for tires to heat
up and the air pressure inside to go up
as you drive.
2. Remove the cap from the valve on
one tire, then firmly press the tire
gauge onto the valve and measure
the pressure.
3. Add enough air to reach the recommended air pressure.
Note: If you overfill the tire, release air
by pressing on the metal stem in the
center of the valve. Then recheck the
pressure with your tire gauge.
4. Replace the valve cap.
5. Repeat this procedure for each tire,
including the spare. Note:
Some spare tires operate at a
higher inflation pressure than the other
tires. For T type mini-spare tires, refer
to the Dissimilar spare wheel and tire
assembly information for a description:
Store and maintain at 60 psi (4.15 bar).
For full-size and dissimilar spare tires,
refer to the Dissimilar spare wheel and
tire assembly information for a
description: Store and maintain at the
higher of the front and rear inflation
pressure as shown on the Tire Label.
6. Visually inspect the tires to make
sure there are no nails or other
objects embedded that could poke
a hole in the tire and cause an air
leak.
7. Check the sidewalls to make sure there are no gouges, cuts or bulges. Inspecting Your Tires and Wheel Valve
Stems
Periodically inspect the tire treads for
uneven or excessive wear and remove
objects such as stones, nails or glass
that may be wedged in the tread
grooves. Check the tire and valve stems
for holes, cracks, or cuts that may permit
air leakage and repair or replace the tire
and replace the valve stem. Inspect the
tire sidewalls for cracking, cuts, bruises
and other signs of damage or excessive
wear. If internal damage to the tire is
suspected, have the tire demounted and
inspected in case it needs to be repaired
or replaced. For your safety, tires that
are damaged or show signs of excessive
wear should not be used because they
are more likely to blow out or fail.
Improper or inadequate vehicle
maintenance can cause tires to wear
abnormally. Inspect all your tires,
including the spare, frequently, and
replace them if one or more of the
following conditions exist:
345
MKZ (CC9) Hybrid Electric Vehicle (HEV), Canada/United States of America, enUSA, Edition date: 201905, Second-Printing Wheels and Tires
Page 349 of 544
Tire Wear
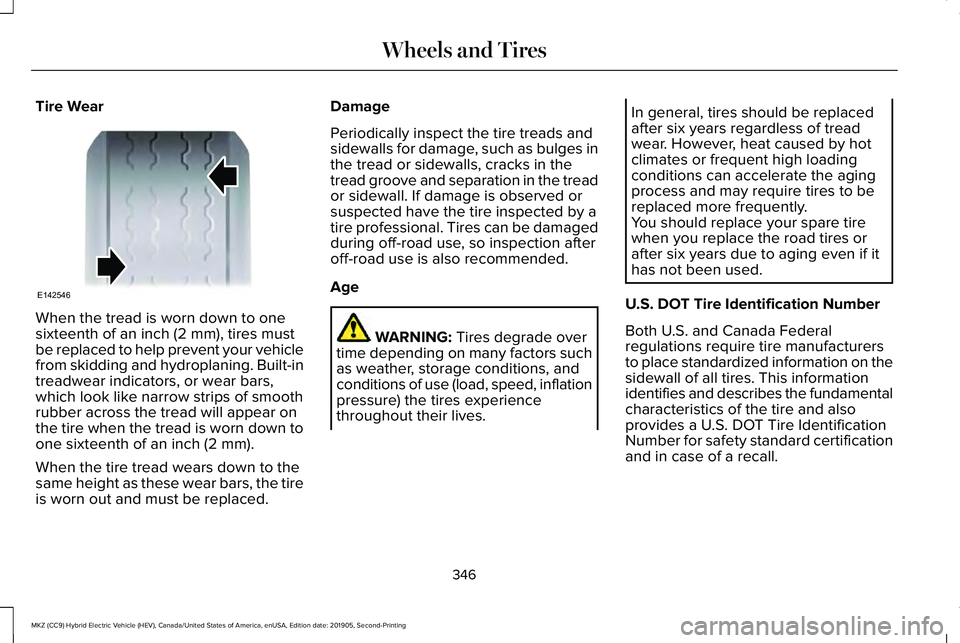
When the tread is worn down to one
sixteenth of an inch (2 mm), tires must
be replaced to help prevent your vehicle
from skidding and hydroplaning. Built-in
treadwear indicators, or wear bars,
which look like narrow strips of smooth
rubber across the tread will appear on
the tire when the tread is worn down to
one sixteenth of an inch (2 mm).
When the tire tread wears down to the
same height as these wear bars, the tire
is worn out and must be replaced. Damage
Periodically inspect the tire treads and
sidewalls for damage, such as bulges in
the tread or sidewalls, cracks in the
tread groove and separation in the tread
or sidewall. If damage is observed or
suspected have the tire inspected by a
tire professional. Tires can be damaged
during off-road use, so inspection after
off-road use is also recommended.
Age
WARNING: Tires degrade over
time depending on many factors such
as weather, storage conditions, and
conditions of use (load, speed, inflation
pressure) the tires experience
throughout their lives. In general, tires should be replaced
after six years regardless of tread
wear. However, heat caused by hot
climates or frequent high loading
conditions can accelerate the aging
process and may require tires to be
replaced more frequently.
You should replace your spare tire
when you replace the road tires or
after six years due to aging even if it
has not been used.
U.S. DOT Tire Identification Number
Both U.S. and Canada Federal
regulations require tire manufacturers
to place standardized information on the
sidewall of all tires. This information
identifies and describes the fundamental
characteristics of the tire and also
provides a U.S. DOT Tire Identification
Number for safety standard certification
and in case of a recall.
346
MKZ (CC9) Hybrid Electric Vehicle (HEV), Canada/United States of America, enUSA, Edition date: 201905, Second-Printing Wheels and TiresE142546
Page 352 of 544
If you feel a sudden vibration or ride
disturbance while driving, or you suspect
your tire or vehicle has been damaged,
immediately reduce your speed. Drive
with caution until you can safely pull off
the road. Stop and inspect the tires for
damage. If you cannot detect a cause,
have the vehicle towed to the nearest
repair facility or tire dealer to have the
vehicle inspected.
Tire and Wheel Alignment
A bad jolt from hitting a curb or pothole
can cause the front end of your vehicle
to become misaligned or cause damage
to your tires. If your vehicle seems to
pull to one side when you’re driving, the
wheels may be out of alignment. Have
an authorized dealer check the wheel
alignment periodically.
Wheel misalignment in the front or the
rear can cause uneven and rapid
treadwear of your tires and should be
corrected by an authorized dealer.
Front-wheel drive vehicles and those
with an optional independent rear
suspension may require alignment of all
four wheels.
You should balance the tires
periodically. An unbalanced tire and
wheel assembly may result in irregular
tire wear.
Tire Rotation
Note:
If your tires show uneven wear
ask an authorized dealer to check for
and correct any wheel misalignment,
tire imbalance or mechanical problem
involved before tire rotation. Note:
Your vehicle may be equipped
with a dissimilar spare wheel and tire
assembly. A dissimilar spare wheel and
tire assembly is defined as a spare
wheel and tire assembly that is different
in brand, size or appearance from the
road tires and wheels. If you have a
dissimilar spare wheel and tire assembly
it is intended for temporary use only and
should not be used in a tire rotation.
Note: After having your tires rotated,
inflation pressure must be checked and
adjusted to the vehicle requirements.
Rotating your tires at the recommended
interval will help your tires wear more
evenly, providing better tire performance
and longer tire life. See your Scheduled
Maintenance information.
Front-wheel drive or all-wheel drive
vehicles, front tires on the left side of
the diagram.
349
MKZ (CC9) Hybrid Electric Vehicle (HEV), Canada/United States of America, enUSA, Edition date: 201905, Second-Printing Wheels and Tires