2020 LINCOLN CORSAIR steering wheel
[x] Cancel search: steering wheelPage 380 of 591

If you get a flat tire when driving, do not
apply the brake heavily. Instead, gradually
decrease your speed. Hold the steering
wheel firmly and slowly move to a safe place
on the side of the road.
Have a flat serviced by an authorized dealer
in order to prevent damage to the tire
pressure monitoring system sensors. See
Tire Pressure Monitoring System (page 371).
Replace the spare tire with a road tire as
soon as possible. During repairing or
replacing of the flat tire, have the authorized
dealer inspect the tire pressure monitoring
system sensor for damage.
Dissimilar Spare Wheel and Tire
Assembly Information WARNING:
Failure to follow these
guidelines could result in an increased risk
of loss of vehicle control, injury or death. If you have a dissimilar spare wheel and tire,
then it is intended for temporary use only.
This means that if you need to use it, you
should replace it as soon as possible with a
road wheel and tire assembly that is the
same size and type as the road tires and
wheels that we provided with the vehicle. If
the dissimilar spare tire or wheel is damaged,
replace it instead of repairing it.
A dissimilar spare wheel and tire assembly
is defined as a spare wheel and tire assembly
that is different in brand, size or appearance
from the road tires and wheels and can be
one of three types:
1.
T-type mini-spare: This spare tire begins
with the letter T for tire size and may have
Temporary Use Only molded in the sidewall.
2.
Full-size dissimilar spare with label on
wheel: This spare tire has a label on the
wheel that states: THIS WHEEL AND TIRE
ASSEMBLY FOR TEMPORARY USE ONLY.
When driving with one of the dissimilar spare
tires listed above, do not: •
Exceed
50 mph (80 km/h).
• Load the vehicle beyond maximum
vehicle load rating listed on the Safety
Compliance Label.
• Tow a trailer.
• Use snow chains on the end of the
vehicle with the dissimilar spare tire.
• Use more than one dissimilar spare tire
at a time.
• Use commercial car washing equipment.
• Try to repair the dissimilar spare tire.
Use of one of the dissimilar spare tires listed
above at any one wheel location can lead to
impairment of the following:
• Handling, stability and braking
performance.
• Comfort and noise.
• Ground clearance and parking at curbs.
• Winter weather driving capability.
• Wet weather driving capability.
• All-wheel driving capability
3.
Full-size dissimilar spare without label
on wheel
377
Corsair (CTF) Canada/United States of America, enUSA, Edition date: 201906, Second-Printing Wheels and Tires
Page 382 of 591

WARNING: The jack supplied with
this vehicle is only intended for changing
wheels. Do not use the vehicle jack other
than when you are changing a wheel in an
emergency. WARNING:
Ensure screwthread is
adequately lubricated before use. WARNING:
Check that the vehicle
jack is not damaged or deformed and the
thread is lubricated and clean. WARNING: The jack should be used
on level firm ground wherever possible. WARNING:
Use only the specified
jacking points. If you use other positions,
you may damage the body, steering,
suspension, engine, braking system or the
fuel lines. WARNING:
Switch the ignition off
and apply the park brake fully before lifting
vehicle. WARNING:
Park your vehicle so that
you do not obstruct the flow of traffic or
place yourself in any danger and set up a
warning triangle. WARNING:
Do not get under a
vehicle that is only supported by a vehicle
jack. Note:
The jack does not require
maintenance or additional lubrication over
the service life of your vehicle.
1. Park on a level surface, set the parking brake and activate the hazard flashers.
2. Place the transmission in park (P) and turn the engine off. 3.
Lift and remove the carpeted cargo area
floor behind the rear seats to access the
spare tire and jack.
4. Remove the wing nut that secures the spare tire by turning it counterclockwise.
5. Remove the spare tire and jack kit from the spare tire compartment.
6. Remove the jack and the flat tire retainer
strap from the jack base. 7. Turn the jack hex nut drive screw
counterclockwise to detach the lug
wrench from the jack. This lowers the
jack and releases the mechanical lock.
379
Corsair (CTF) Canada/United States of America, enUSA, Edition date: 201906, Second-Printing Wheels and TiresE166722 E309224
Page 435 of 591

Installing an Update
Note:
You can use the system when an
installation is in progress.
1. Disconnect all other USB devices from the USB ports.
2. Connect the USB drive with the update to a USB port.
Note: Installation starts automatically within
a few minutes.
Updating the System Using a Wi-Fi Network
Connection
Switching Automatic System Updates On Select the settings option on the
feature bar.
1. Select Automatic Updates.
2. Switch
Automatic System Updates on.
The system is now set to check for and
receive system updates when it is connected
to a Wi-Fi network. Note:
You can use the system when a
download is in progress.
Note: If the system is disconnected from the
Wi-Fi network when a download is in
progress, the download continues the next
time the system is connected to a Wi-Fi
network.
Connecting to a Wi-Fi Network
See
Vehicle Wi-Fi Hotspot (page 418).
Additional Information and Assistance
For additional information and assistance,
we recommend that you contact an
authorized dealer or refer to the local
website.
USING VOICE RECOGNITION
The system allows you to interact with the
entertainment, information and
communication systems on your vehicle
using voice commands. This allows you to
keep your hands on the steering wheel and
focus on what is in front of you. Press the voice control button on
the steering wheel and wait for the
voice prompt.
Note: Press the voice control button again
to interrupt a voice prompt and begin
speaking.
Note: Turn the volume control when a voice
prompt plays to adjust the volume.
Note: Press and hold the voice control
button on the steering wheel to use Siri on
your iOS device.
The following voice commands are designed
to help you from any screen:
• List of Commands
• Help
The following tables list some of the more
frequently used voice commands. For a
complete list of voice commands, refer to
our website.
432
Corsair (CTF) Canada/United States of America, enUSA, Edition date: 201906, Second-Printing SYNC™ 3E280315 E142599
Page 461 of 591

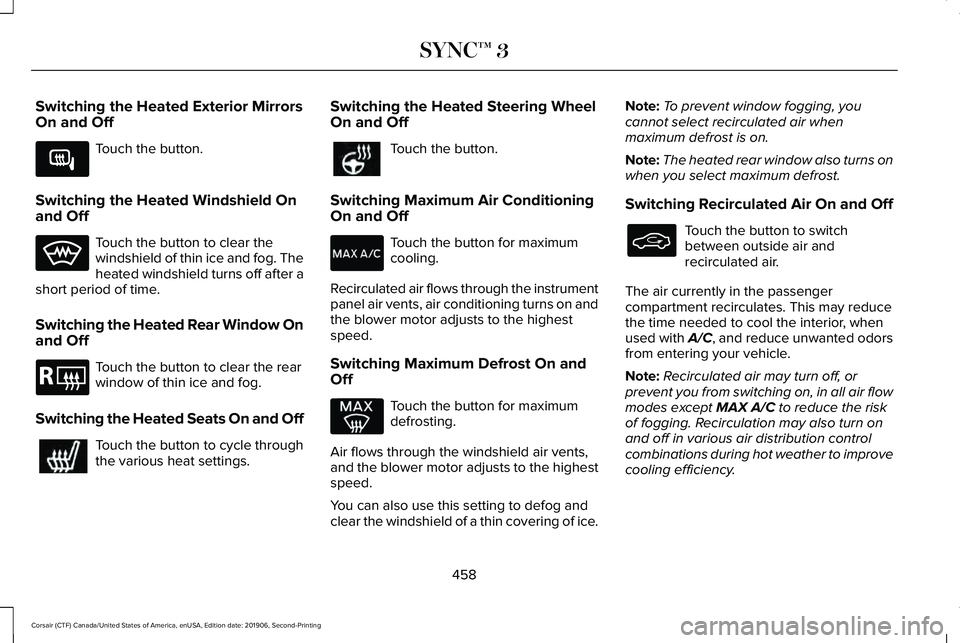
Switching the Heated Exterior Mirrors
On and Off
Touch the button.
Switching the Heated Windshield On
and Off Touch the button to clear the
windshield of thin ice and fog. The
heated windshield turns off after a
short period of time.
Switching the Heated Rear Window On
and Off Touch the button to clear the rear
window of thin ice and fog.
Switching the Heated Seats On and Off Touch the button to cycle through
the various heat settings. Switching the Heated Steering Wheel
On and Off Touch the button.
Switching Maximum Air Conditioning
On and Off Touch the button for maximum
cooling.
Recirculated air flows through the instrument
panel air vents, air conditioning turns on and
the blower motor adjusts to the highest
speed.
Switching Maximum Defrost On and
Off Touch the button for maximum
defrosting.
Air flows through the windshield air vents,
and the blower motor adjusts to the highest
speed.
You can also use this setting to defog and
clear the windshield of a thin covering of ice. Note:
To prevent window fogging, you
cannot select recirculated air when
maximum defrost is on.
Note: The heated rear window also turns on
when you select maximum defrost.
Switching Recirculated Air On and Off Touch the button to switch
between outside air and
recirculated air.
The air currently in the passenger
compartment recirculates. This may reduce
the time needed to cool the interior, when
used with A/C, and reduce unwanted odors
from entering your vehicle.
Note: Recirculated air may turn off, or
prevent you from switching on, in all air flow
modes except MAX A/C to reduce the risk
of fogging. Recirculation may also turn on
and off in various air distribution control
combinations during hot weather to improve
cooling efficiency.
458
Corsair (CTF) Canada/United States of America, enUSA, Edition date: 201906, Second-Printing SYNC™ 3E266189 E184884
Page 478 of 591

7. On the Select preferred WEEKDAY or
WEEKEND Charge Times screen, use the
circular 24 hour clock to select your
charging time windows. You can select
up to two time windows by pressing and
dragging across the hour buttons. When
you have selected your preferred times
then press Next to return to the Preferred
Charge Times screen. Repeat for
WEEKEND or WEEKDAY as desired.
Once you are done setting preferred
charge times, press Save.
Note: Selecting all or none of the 24 hours
results in any time of day given equal priority
for charging.
8. Your saved location now shows on the Charge Times screen. Select Done to
return to the main charge settings screen.
Whenever your vehicle is at a saved
charging location, the charge settings
screen displays the location name, and
the charging times are based on your
Charge Time settings for that location
plus the next Departure Time. Note:
Reaching your max charge level by
your next Departure Time is always the
priority. When Charge Times are set,
charging outside your preferred charging
time windows could be necessary in order
to finish by your next Departure Time.
Departure Time Settings
1. Select Charge Preferences on the Charge Settings screen.
2. Select Departure Time Setup on the Edit
Charge Preferences screen.
3. Two time settings show for each day of the week on the Departure Times
schedule screen. Select any one.
4. On the Departure Time settings screen, set your desired departure time, cabin
temperature and days of the week to
repeat. Press Save.
5. Your settings are now shown on the Departure Times schedule screen. Press
Back two times to return to the main
charge settings screen. The next
departure time and cabin temperature
setting display. Note:
Cabin conditioning can perform
differently depending on if you plug in with
the included convenience cord or a higher
power charging station. The power available
for conditioning is limited to the charging
station power available.
Note: Your vehicle may not always reach
the set cabin temperature due to charging
and ambient temperature conditions. This is
normal operation
APPS
The system allows you interact with select
mobile apps while keeping your eyes on the
road. Voice commands, your steering wheel
buttons, or a quick tap on your touchscreen
give you advanced control of compatible
mobile apps. You can also stream your
favorite music or podcasts, share your time
of arrival with friends, and keep connected
safely.
475
Corsair (CTF) Canada/United States of America, enUSA, Edition date: 201906, Second-Printing SYNC™ 3
Page 484 of 591

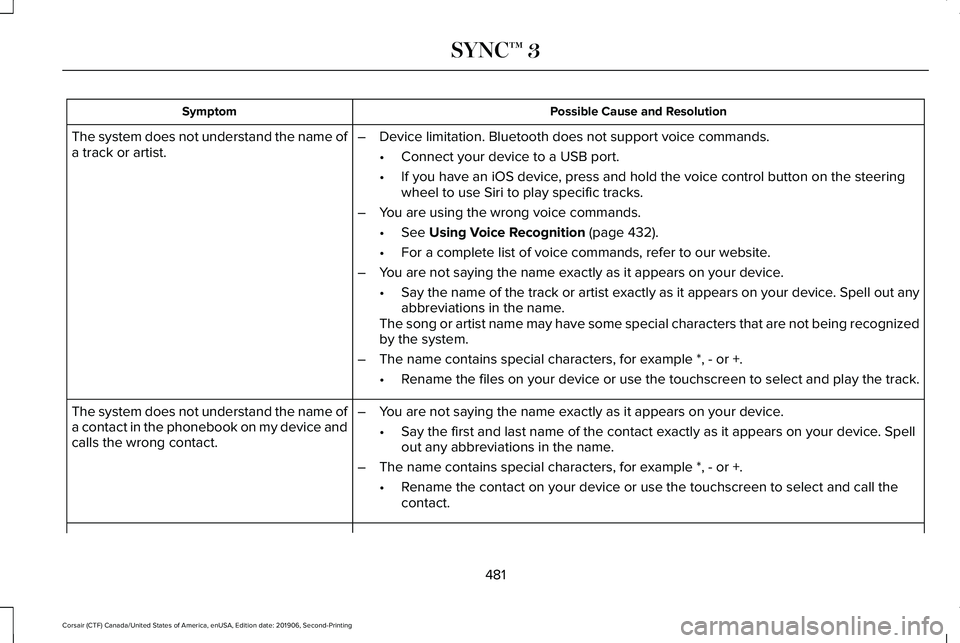
Possible Cause and Resolution
Symptom
–Device limitation. Bluetooth does not support voice commands.
•Connect your device to a USB port.
• If you have an iOS device, press and hold the voice control button on the steering
wheel to use Siri to play specific tracks.
– You are using the wrong voice commands.
•See Using Voice Recognition (page 432).
• For a complete list of voice commands, refer to our website.
– You are not saying the name exactly as it appears on your device.
•Say the name of the track or artist exactly as it appears on your device\
. Spell out any
abbreviations in the name.
The song or artist name may have some special characters that are not be\
ing recognized
by the system.
– The name contains special characters, for example *, - or +.
•Rename the files on your device or use the touchscreen to select and play\
the track.
The system does not understand the name of
a track or artist.
–You are not saying the name exactly as it appears on your device.
•Say the first and last name of the contact exactly as it appears on your\
device. Spell
out any abbreviations in the name.
– The name contains special characters, for example *, - or +.
•Rename the contact on your device or use the touchscreen to select and ca\
ll the
contact.
The system does not understand the name of
a contact in the phonebook on my device and
calls the wrong contact.
481
Corsair (CTF) Canada/United States of America, enUSA, Edition date: 201906, Second-Printing SYNC™ 3
Page 486 of 591

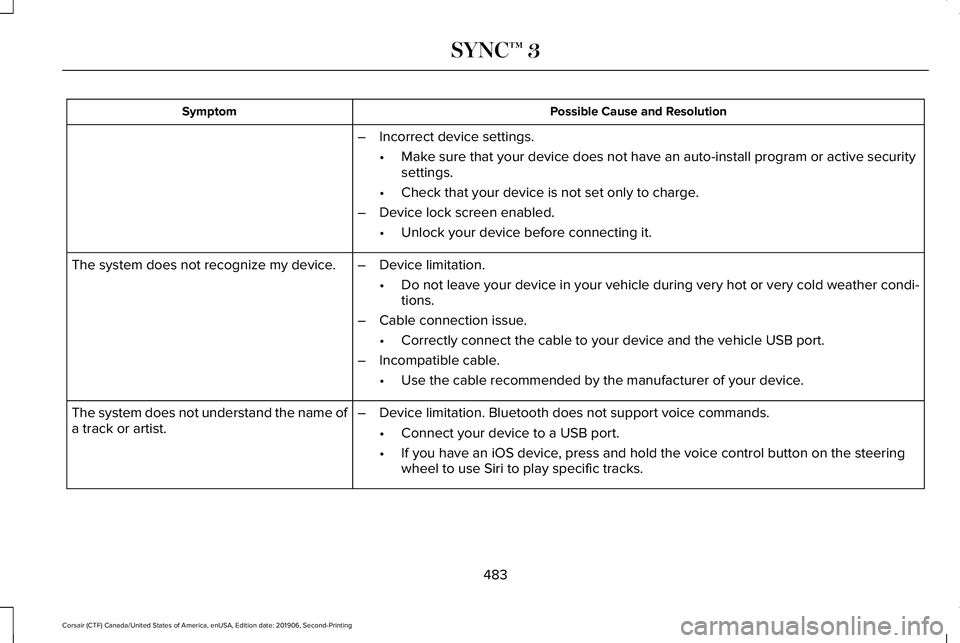
Possible Cause and Resolution
Symptom
–Incorrect device settings.
•Make sure that your device does not have an auto-install program or active \
security
settings.
• Check that your device is not set only to charge.
– Device lock screen enabled.
•Unlock your device before connecting it.
The system does not recognize my device. –Device limitation.
•Do not leave your device in your vehicle during very hot or very cold we\
ather condi-
tions.
– Cable connection issue.
•Correctly connect the cable to your device and the vehicle USB port.
– Incompatible cable.
•Use the cable recommended by the manufacturer of your device.
The system does not understand the name of
a track or artist. –
Device limitation. Bluetooth does not support voice commands.
•Connect your device to a USB port.
• If you have an iOS device, press and hold the voice control button on the steering
wheel to use Siri to play specific tracks.
483
Corsair (CTF) Canada/United States of America, enUSA, Edition date: 201906, Second-Printing SYNC™ 3
Page 512 of 591

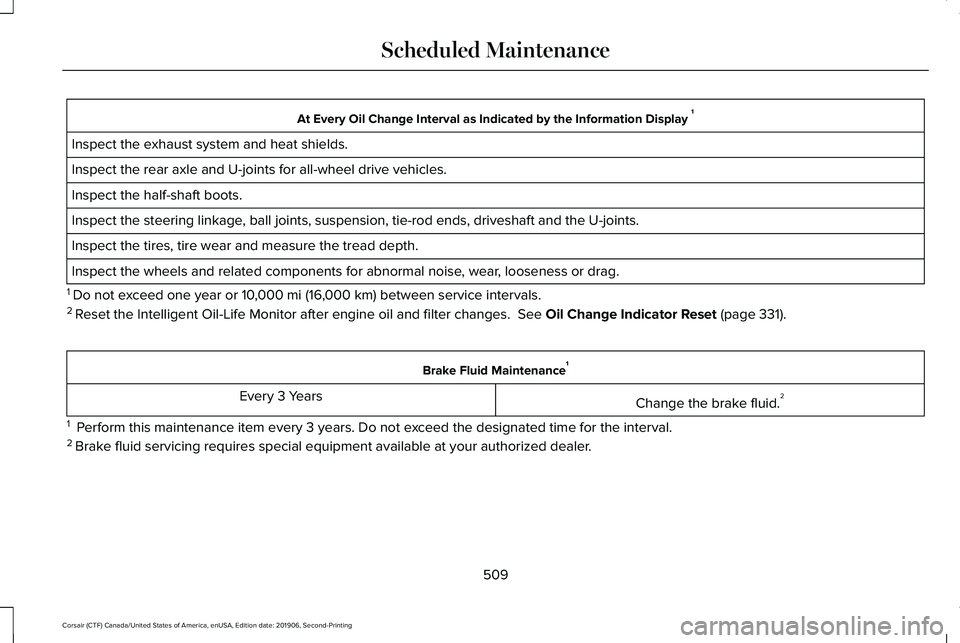
At Every Oil Change Interval as Indicated by the Information Display
1
Inspect the exhaust system and heat shields.
Inspect the rear axle and U-joints for all-wheel drive vehicles.
Inspect the half-shaft boots.
Inspect the steering linkage, ball joints, suspension, tie-rod ends, driveshaft and the U-joints.
Inspect the tires, tire wear and measure the tread depth.
Inspect the wheels and related components for abnormal noise, wear, looseness or drag.
1 Do not exceed one year or 10,000 mi (16,000 km) between service intervals.
2 Reset the Intelligent Oil-Life Monitor after engine oil and filter change\
s.
See Oil Change Indicator Reset (page 331). Brake Fluid Maintenance
1
Change the brake fluid. 2
Every 3 Years
1 Perform this maintenance item every 3 years. Do not exceed the designated time for the interval.
2 Brake fluid servicing requires special equipment available at your authorize\
d dealer.
509
Corsair (CTF) Canada/United States of America, enUSA, Edition date: 201906, Second-Printing Scheduled Maintenance