2020 LINCOLN CORSAIR mirror
[x] Cancel search: mirrorPage 158 of 591
Note:
The system adjusts to heat or cool the
interior to the temperature you select as
quickly as possible.
Note: For the system to function efficiently,
the instrument panel and side air vents
should be fully open.
Note: If you select AUTO during cold outside
temperatures, the system directs air flow to
the windshield and side window air vents. In
addition, the blower motor may run at a
slower speed until the engine warms up.
Note: If you select
AUTO during hot
temperatures and the inside of the vehicle
is hot, the system uses recirculated air to
maximize interior cooling. Blower motor
speed may also reduce until the air cools.
Quickly Heating the Interior
1. Press and release
AUTO.
2. Adjust the temperature function to the setting you prefer.
Recommended Settings for Heating
1. Press and release
AUTO. 2. Adjust the temperature function to the
setting you prefer. Use
72°F (22°C) as a
starting point, then adjust the setting as
necessary.
Quickly Cooling the Interior
1. Press and release
MAX A/C.
Recommended Settings for Cooling
1. Press and release
AUTO.
2. Adjust the temperature function to the setting you prefer. Use
72°F (22°C) as a
starting point, then adjust the setting as
necessary.
Defogging the Side Windows in Cold
Weather
1. Press and release defrost or maximum defrost.
2. Adjust the temperature control to the setting you prefer. Use
72°F (22°C) as a
starting point, then adjust the setting as
necessary. HEATED WINDSHIELD
(IF EQUIPPED)
Windshield Wiper De-Icer When you switch the heated rear
window on, the windshield wiper
de-icer turns on.
HEATED REAR WINDOW Press the button to clear the rear
window of thin ice and fog. The
heated rear window turns off after
a short period of time.
Note: Do not use harsh chemicals, razor
blades or other sharp objects to clean or
remove decals from the inside of the heated
rear window. The vehicle warranty may not
cover damage to the heated rear window
grid lines.
HEATED EXTERIOR MIRRORS
When you switch the heated rear window
on, the heated exterior mirrors turn on.
155
Corsair (CTF) Canada/United States of America, enUSA, Edition date: 201906, Second-Printing Climate ControlE184884 E184884
Page 159 of 591

Note:
Do not remove ice from the mirrors
with a scraper or adjust the mirror glass
when it is frozen in place.
Note: Do not clean the mirror housing or
glass with harsh abrasives, fuel or other
petroleum-based cleaning products. The
vehicle warranty may not cover damage
caused to the mirror housing or glass.
CABIN AIR FILTER
The cabin air filter is under the instrument
panel in the passenger footwell area or
under the center console on the passenger
side.
The system filters airborne particles such as
dust, spores and pollen in the air supplied to
and recirculated in the interior of your
vehicle.
Make sure you have a cabin air filter installed
at all times. Running the system without a
filter in place could degrade or damage the
system. Your vehicle cabin air filter gives you and
your passengers the following benefits:
•
It improves your driving comfort by
reducing particle concentration.
• It improves the interior compartment
cleanliness.
• It protects the climate control
components from particle deposits.
Change the air filter element at the proper
intervals. See Scheduled Maintenance
(page 502).
For additional cabin air filter information, or
to replace the filter, see an authorized dealer.
REMOTE START
(IF EQUIPPED)
The system adjusts the interior temperature
depending on your chosen settings during
remote start.
You cannot adjust the climate control setting
during remote start operation. When you
switch the ignition on, the climate control
system returns to the previous settings. You
can now make adjustments. Some features may remain on if they turn on
during remote start:
•
Driver heated seat.
• Driver ventilated seat.
• Heated steering wheel.
• Heated mirrors.
• Heated rear window.
• Windshield wiper de-icer.
Note: If the passenger heated or ventilated
seats are on when you switch the vehicle
off, they default to the driver setting when
you switch the vehicle on.
You can adjust the default remote start
settings using the information display
controls. See Information Displays (page
123).
Automatic Settings
In hot weather, the system sets to
72°F
(22°C). The ventilated seats set to high (if
available, and if you select AUTO in the
information display).
156
Corsair (CTF) Canada/United States of America, enUSA, Edition date: 201906, Second-Printing Climate Control
Page 160 of 591
In moderate weather, the system heats or
cools (based on pre-selected settings). The
rear defroster, heated mirrors and heated or
ventilated seats do not turn on.
In cold weather, the system sets to 72°F
(22°C). The heated seats and heated steering
wheel set to high (if available, and if you
select AUTO in the information display). The
rear defroster and heated mirrors turn on.
157
Corsair (CTF) Canada/United States of America, enUSA, Edition date: 201906, Second-Printing Climate Control
Page 168 of 591
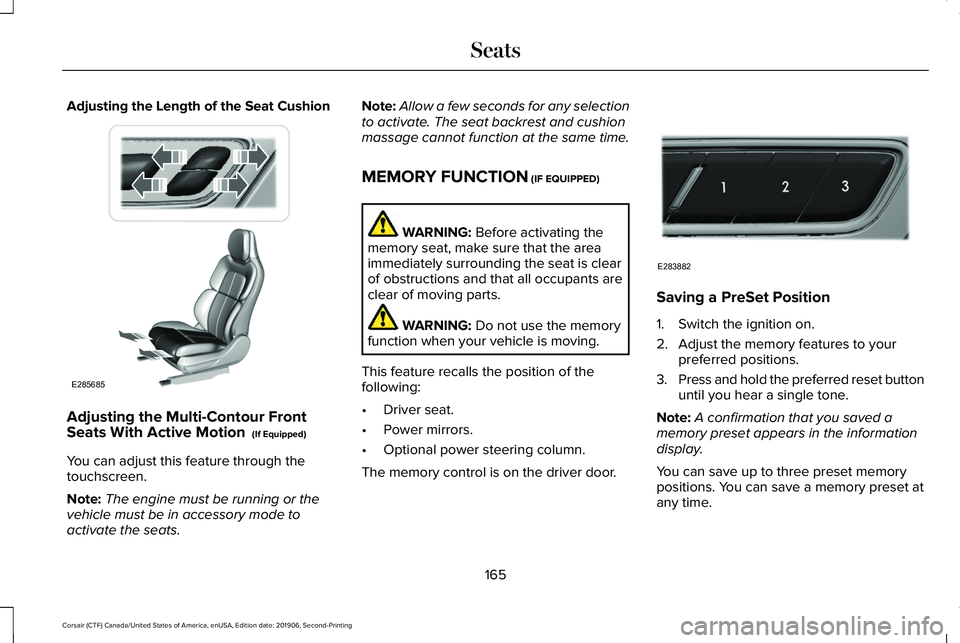
Adjusting the Length of the Seat Cushion
Adjusting the Multi-Contour Front
Seats With Active Motion (If Equipped)
You can adjust this feature through the
touchscreen.
Note: The engine must be running or the
vehicle must be in accessory mode to
activate the seats. Note:
Allow a few seconds for any selection
to activate. The seat backrest and cushion
massage cannot function at the same time.
MEMORY FUNCTION
(IF EQUIPPED) WARNING:
Before activating the
memory seat, make sure that the area
immediately surrounding the seat is clear
of obstructions and that all occupants are
clear of moving parts. WARNING:
Do not use the memory
function when your vehicle is moving.
This feature recalls the position of the
following:
• Driver seat.
• Power mirrors.
• Optional power steering column.
The memory control is on the driver door. Saving a PreSet Position
1. Switch the ignition on.
2. Adjust the memory features to your
preferred positions.
3. Press and hold the preferred reset button
until you hear a single tone.
Note: A confirmation that you saved a
memory preset appears in the information
display.
You can save up to three preset memory
positions. You can save a memory preset at
any time.
165
Corsair (CTF) Canada/United States of America, enUSA, Edition date: 201906, Second-Printing SeatsE285685 E283882
Page 169 of 591

Recalling a PreSet Position
Press and release the preset button
associated with your preferred driving
position. The memory features move to the
position stored for that preset.
Note:
You can only recall a preset memory
position when the ignition is off, or when the
transmission is in park (P) or neutral (N) and
the ignition is on.
Note: Press any seat or mirror adjustment
switch, or any memory button during a
memory recall, to cancel the operation.
You can also recall a preset memory position
by:
• Pressing the unlock button on your
remote control if you linked it to a preset
position.
• Unlocking the driver door if a linked
remote control is present.
Note: Using a linked remote control to recall
your memory position when the ignition is
off moves the seat and steering column to
the Easy Entry position. Linking a PreSet Position to Your
Remote Control
For information on linking a preset position
to your remote control, see the Personal
Profiles section.
Easy Entry and Exit Feature
If you enable the easy entry and exit feature,
it moves the driver seat position rearward up
to 2 in (5 cm) when you switch the ignition
off. The driver seat returns to the previous
position when you switch the ignition on.
You can enable or disable this feature
through the information display.
See
Information Displays (page 123). Personal Profiles
This feature allows you to create multiple
personal profiles enabling users to
personalize vehicle
’s settings. You can
create one profile for each preset memory
seat button along with a guest profile. You
can recall a profile using the touchscreen or
the preset button you selected when you
created your profile. You can also link a
remote control and a mobile device to your
profile, which are used to recall it.
Creating a Personal Profile
Use the touchscreen to create a personal
profile.
1. Switch the ignition on and leave the vehicle in park (P).
2. Select the Personal Profiles button under
Settings.
3. Follow the instructions on the display.
166
Corsair (CTF) Canada/United States of America, enUSA, Edition date: 201906, Second-Printing Seats
Page 170 of 591
Linking a Personal Profile to Your Remote
Control or Mobile Device
You can save preset memory positions for
up to three remote controls by assigning a
remote control to a personal profile using
the touchscreen. You can assign three
additional remote controls set up as Phone
as a Key.
Use the touchscreen to link a remote control,
mobile device or both to a personal profile.
1. Switch the ignition on and leave the
vehicle in park (P).
2. Select the Personal Profiles button under
Settings.
3. Touch the arrow for the profile you wish to link to a remote control or mobile
device.
4. Select remote control, mobile device, or
both.
5. Follow the instructions on the display.
Note: To successfully link a mobile device,
the mobile device must be in your vehicle,
and must have previously been setup as a
remote control for your vehicle. Note:
If more than one linked remote control
is in range, the memory function moves to
the settings of the first key to initiate a
memory recall.
Note: The guest profile consists of existing
settings when there is no driver profile
created. After you create a driver profile, the
guest profile serves as an additional driver
profile.
Note: You cannot link a personalized name,
a memory seat button or a remote control
to a guest profile.
Personal Settings
Personal Profiles allow you to personalize
positional settings such as seats and mirrors,
as well as non-positional settings such as
radio, navigation, driver assist and system
settings. See SYNC™ 3 (page 430). You
cannot change the menu locations and
settings of those personalized features with
Personal Profiles.
Note: Non-positional settings save to the
active driver profile whenever you change
a setting. Note:
You can save positional settings if you
press and hold a memory seat button.
Recalling and Changing a Profile
You can recall a profile by:
• Using a remote control or mobile device
linked to a driver profile to access the
remote start feature, press an unlock
button or open the door with the exterior
door handle.
• Pressing a memory seat button linked to
a driver profile.
• Using the Personal Profiles menu on the
touchscreen.
Note: The recalled profile replaces the
previously active profile. If the active profile
is not your preferred profile, you can change
it using any of the three methods listed.
167
Corsair (CTF) Canada/United States of America, enUSA, Edition date: 201906, Second-Printing Seats
Page 240 of 591
REAR VIEW CAMERA
WARNING: The rear view camera
system is a reverse aid supplement device
that still requires the driver to use it in
conjunction with the interior and exterior
mirrors for maximum coverage. WARNING:
Objects that are close to
either corner of the bumper or under the
bumper, might not be seen on the screen
due to the limited coverage of the camera
system. WARNING:
Reverse your vehicle
slowly. Failure to follow this instruction
could result in the loss of control of your
vehicle, personal injury or death. WARNING:
Use caution when the
rear cargo door is ajar. If the rear cargo
door is ajar, the camera will be out of
position and the video image may be
incorrect. All guidelines disappear when
the rear cargo door is ajar. Failure to follow
this instruction could result in personal
injury. WARNING:
Use caution when turning
camera features on or off when the
transmission is not in park (P). Make sure
your vehicle is not moving.
The rear view camera system provides a
video image of the area behind your vehicle.
During operation, lines appear in the display
which represent your vehicle ’s path and
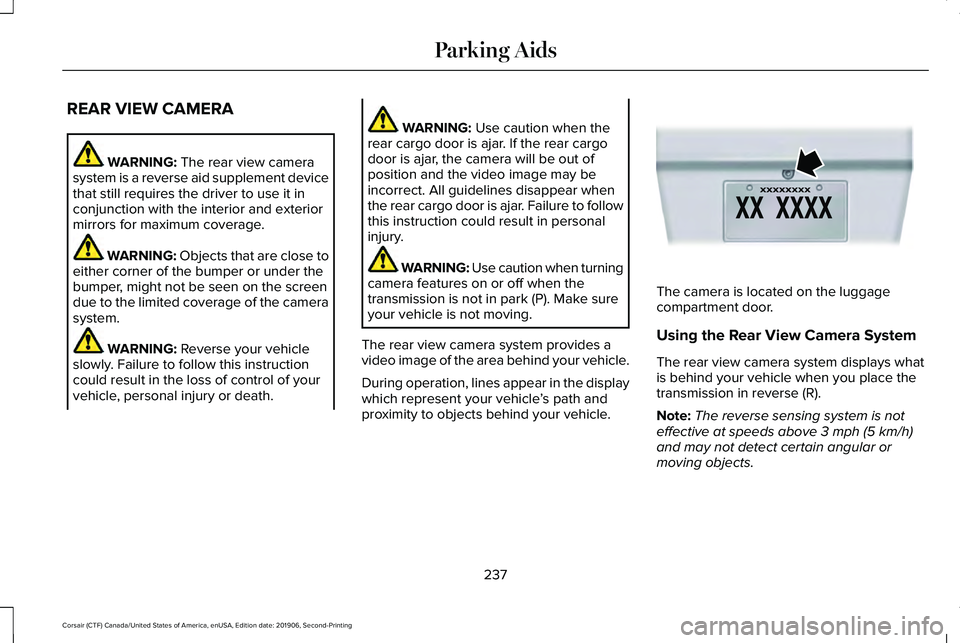
proximity to objects behind your vehicle. The camera is located on the luggage
compartment door.
Using the Rear View Camera System
The rear view camera system displays what
is behind your vehicle when you place the
transmission in reverse (R).
Note:
The reverse sensing system is not
effective at speeds above
3 mph (5 km/h)
and may not detect certain angular or
moving objects.
237
Corsair (CTF) Canada/United States of America, enUSA, Edition date: 201906, Second-Printing Parking AidsE142435
Page 242 of 591
Fixed guideline: Yellow zone
D
Fixed guideline: Red zone
E
Rear bumper
F
Active guidelines are only shown with fixed
guidelines. To use active guidelines, turn
the steering wheel to point the guidelines
toward an intended path. If you change the
steering wheel position while reversing, your
vehicle might deviate from the original
intended path.
The fixed and active guidelines fade in and
out depending on the steering wheel
position. The active guidelines do not
display when the steering wheel position is
straight.
Always use caution while reversing. Objects
in the red zone are closest to your vehicle
and objects in the green zone are farther
away. Objects are getting closer to your
vehicle as they move from the green zone
to the yellow or red zones. Use the side view
mirrors and rear view mirror to get better
coverage on both sides and rear of the
vehicle. Manual Zoom WARNING: When manual zoom is
on, the full area behind your vehicle may
not show. Be aware of your surroundings
when using the manual zoom feature.
Note: Manual zoom is only available when
the transmission is in reverse (R).
Note: When you enable manual zoom, only
the centerline is shown.
Selectable settings for this feature are Zoom
in (+) and Zoom out (-). Press the symbol in
the camera screen to change the view. The
default setting is Zoom OFF.
This allows you to get a closer view of an
object behind your vehicle. The zoomed
image keeps the bumper in the image to
provide a reference. The zoom is only active
while the transmission is in reverse (R).
Camera System Settings
The rear view camera system settings can
be changed in the display screen.
See
Settings (page 478). Enhanced Park Aids or Park Pilot
Selectable settings for this feature are ON
and OFF.
The system uses red, yellow and green
highlights that appear on top of the video
image when any of the sensing systems
detect an object.
Rear Camera Delay
Selectable settings for this feature are ON
and OFF.
The default setting for the rear camera delay
is OFF.
When shifting the transmission out of reverse
(R) and into any gear other than park (P), the
camera image remains in the display until:
•
Your vehicle speed sufficiently increases.
• You shift your vehicle into park (P).
239
Corsair (CTF) Canada/United States of America, enUSA, Edition date: 201906, Second-Printing Parking Aids