Page 110 of 611
Features of your vehicle
22
4
✽ ✽
NOTICE
• Avoid trying to start the engine
while the alarm is activated. The
vehicle starting motor is disabled
during the theft-alarm stage.
- If the system is not disarmed withthe transmitter, insert the key
into the ignition switch, turn the
ignition switch to the ON position
and wait for 30 seconds. Then the
system will be disarmed.
- If the system is not disarmed with the smart key, press the engine
start/stop button with smart key.
The side with the lock button
should contact the engine
start/stop button directly.
• If you lose your keys, consult your authorized Kia dealer.
✽ ✽ NOTICE
Malfunctions caused by improper
alterations, adjustments or modifi-
cations to the theft-alarm system are
not covered by your vehicle manu-
facturer warranty.
CAUTION - Adjusting
alarm system
Do not change, alter or adjust
the theft-alarm system becauseit could cause the theft-alarmsystem to malfunction andshould only be serviced by anauthorized Kia dealer.
Page 122 of 611
Features of your vehicle
34
4
✽ ✽
NOTICE
• The power liftgate can be operated
when the engine is not running.
However the power liftgate opera-
tion consumes large amounts of
vehicle electric power. To prevent
the battery from being discharged,
do not operate it excessively.
• To prevent the battery from being discharged, do not leave the power
liftgate in the open position for a
long time.
• Do not modify or repair any part of the power liftgate by yourself.
This must be done by an author-
ized Kia dealer.
• When jacking up the vehicle to change a tire or repair the vehicle,
do not operate the power liftgate.
This could cause the power liftgate
to operate improperly. (Continued)(Continued)
• In cold and wet climates, the
power liftgate may not work prop-
erly due to freezing conditions.
• It is recommended to wait until the power liftgate is fully closed
before starting the vehicle. The
power liftgate may not close fully
if the vehicle is started during
automatic closing.
CAUTION
Do not operate the power lift-
gate more than 5 times continu-ously.
It may damage the power liftgatesystem. If you operate the powerliftgate more than 5 times con-tinuously, the chime will sound 3times and the power liftgate willnot operate. At this time, stopoperating the liftgate and leave itfor more than 1 minute.
WARNING
Make sure there are no people
or objects around the liftgate
before opening or closing the
power liftgate. Wait until the lift-
gate is open fully and stopped
before loading or unloading
cargo from the vehicle.
Page 138 of 611
Features of your vehicle
50
4
WARNING- Cell phone
fires
Do not use cellular phones
while refueling. Electric current
and/or electronic interference
from cellular phones can poten-
tially ignite fuel vapors causing
a fire.
WARNING- Smoking
DO NOT use matches or a lighter
and DO NOT SMOKE or leave a lit
cigarette in your vehicle while at
a gas station especially during
refueling. Automotive fuel is
highly flammable and can, when
ignited, result in fire.
WARNING- Refueling & Vehicle fires
When refueling, always shut the
engine off. Sparks produced by
electrical components related
to the engine can ignite fuel
vapors causing a fire. Once
refueling is complete, check to
make sure the filler cap and
filler door are securely closed,
before starting the engine.
WARNING- Portable fuel container
When using an approved portable
fuel container, be sure to place
the container on the ground prior
to refueling. Static electricity dis-
charge from the container can
ignite fuel vapors causing a fire.
Once refueling has begun, con-
tact with the vehicle should be
maintained until the filling is com-
plete. Use only approved portable
plastic fuel containers designed
to carry and store gasoline.WARNING- Static electricity
Before touching the fuel noz- zle, you should eliminate
potentially dangerous static
electricity discharge by touch-
ing another metal part of the
vehicle, a safe distance away
from the fuel filler neck, noz-
zle, or other gas source.
Do not get back into a vehicle once you have begun refueling
since you can generate static
electricity by touching, rubbing
or sliding against any item or
fabric (polyester, satin, nylon,
etc.) capable of producing stat-
ic electricity. Static electricity
discharge can ignite fuel
vapors resulting in rapid burn-
ing. If you must reenter the
vehicle, you should once again
eliminate potentially danger-
ous static electricity discharge
by touching a metal part of the
vehicle, away from the fuel filler
neck, nozzle or other gasoline
source.
Page 144 of 611
Features of your vehicle
56
4
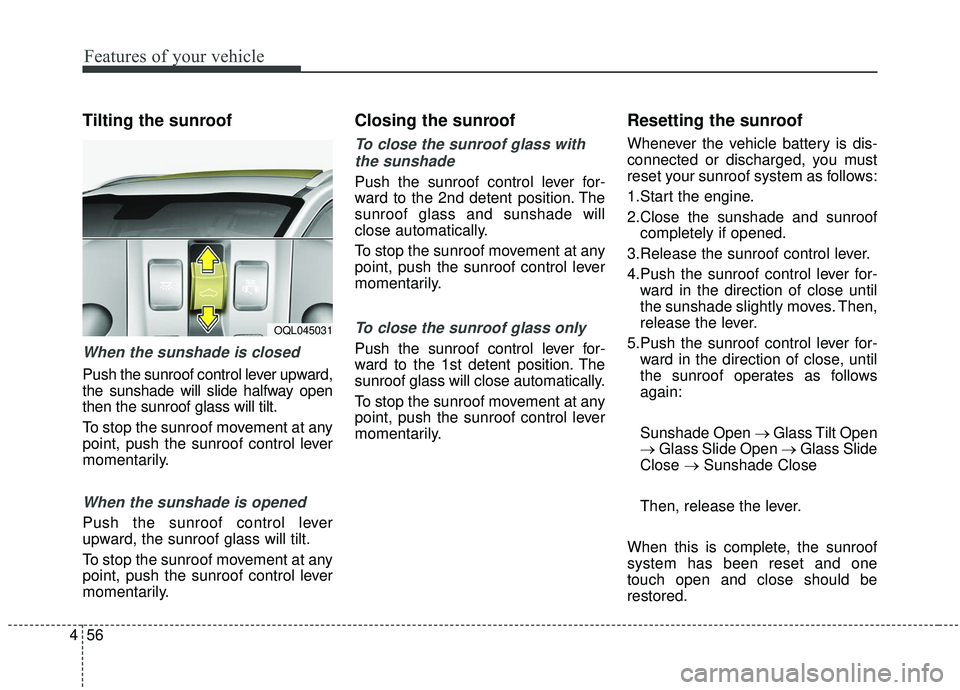
Tilting the sunroof
When the sunshade is closed
Push the sunroof control lever upward,
the sunshade will slide halfway open
then the sunroof glass will tilt.
To stop the sunroof movement at any
point, push the sunroof control lever
momentarily.
When the sunshade is opened
Push the sunroof control lever
upward, the sunroof glass will tilt.
To stop the sunroof movement at any
point, push the sunroof control lever
momentarily.
Closing the sunroof
To close the sunroof glass with
the sunshade
Push the sunroof control lever for-
ward to the 2nd detent position. The
sunroof glass and sunshade will
close automatically.
To stop the sunroof movement at any
point, push the sunroof control lever
momentarily.
To close the sunroof glass only
Push the sunroof control lever for-
ward to the 1st detent position. The
sunroof glass will close automatically.
To stop the sunroof movement at any
point, push the sunroof control lever
momentarily.
Resetting the sunroof
Whenever the vehicle battery is dis-
connected or discharged, you must
reset your sunroof system as follows:
1.Start the engine.
2.Close the sunshade and sunroof completely if opened.
3.Release the sunroof control lever.
4.Push the sunroof control lever for- ward in the direction of close until
the sunshade slightly moves. Then,
release the lever.
5.Push the sunroof control lever for- ward in the direction of close, until
the sunroof operates as follows
again:
Sunshade Open → Glass Tilt Open
→ Glass Slide Open → Glass Slide
Close → Sunshade Close
Then, release the lever.
When this is complete, the sunroof
system has been reset and one
touch open and close should be
restored.
OQL045031
Page 166 of 611
Features of your vehicle
78
4
Folding the outside rearview mirror
(if equipped)
Electric type
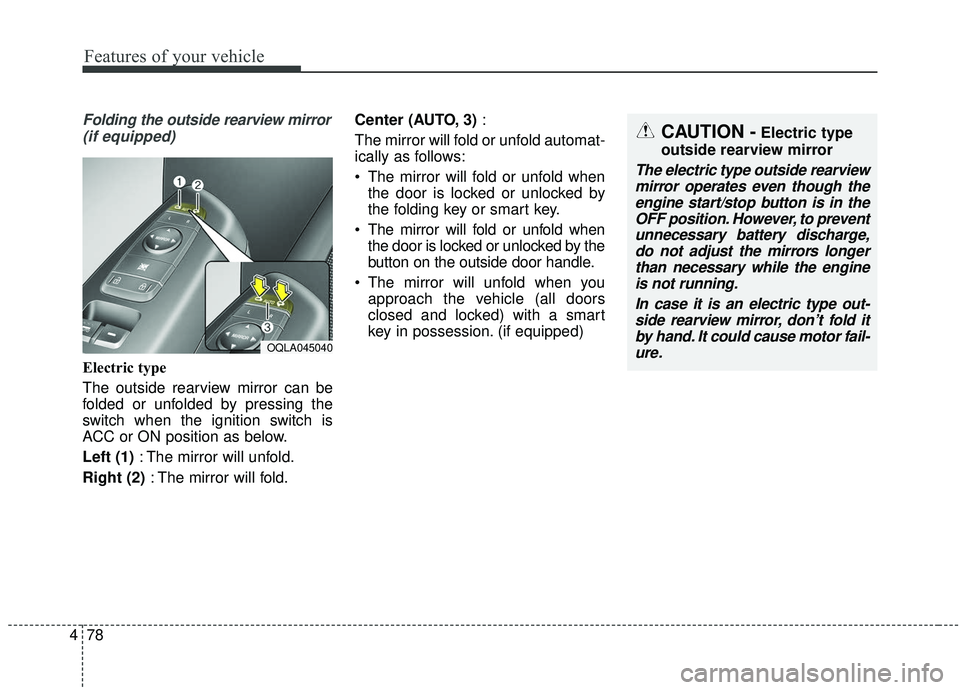
The outside rearview mirror can be
folded or unfolded by pressing the
switch when the ignition switch is
ACC or ON position as below.
Left (1) : The mirror will unfold.
Right (2) : The mirror will fold. Center (AUTO, 3)
:
The mirror will fold or unfold automat-
ically as follows:
The mirror will fold or unfold when the door is locked or unlocked by
the folding key or smart key.
The mirror will fold or unfold when the door is locked or unlocked by the
button on the outside door handle.
The mirror will unfold when you approach the vehicle (all doors
closed and locked) with a smart
key in possession. (if equipped)
OQLA045040
CAUTION -Electric type
outside rearview mirror
The electric type outside rearview mirror operates even though theengine start/stop button is in theOFF position. However, to preventunnecessary battery discharge,do not adjust the mirrors longerthan necessary while the engineis not running.
In case it is an electric type out-side rearview mirror, don’t fold itby hand. It could cause motor fail-ure.
Page 169 of 611
481
Features of your vehicle
Instrument Cluster Control
Adjusting Instrument ClusterIllumination
The brightness of the instrument
panel illumination is changed by
pressing the illumination control button
(“+” or “-”) when the ignition switch or
Engine Start/Stop button is ON, or the
taillights are turned on. If you hold the illumination control
button (“+” or “-”), the brightness
will be changed continuously.
If the brightness reaches to the maximum or minimum level, an
alarm will sound.
LCD Display Control
The LCD display modes can be
changed by using the control buttons
on the steering wheel.
(1) : MODE button for change the LCD MODES
(2) / : MO VE scroll switch for
select the items
(3) OK : SET/RESET button for set the items or reset the items
❈ For the LCD modes, refer to “LCD
Display” in this chapter.OQL048062L
OQL048061L
OUM048452L
Page 170 of 611
Features of your vehicle
82
4
Gauges
Speedometer
The speedometer indicates the
speed of the vehicle and is calibrated
in miles per hour (mph) and/or kilo-
meters per hour (km/h).
Tachometer
The tachometer indicates the
approximate number of engine revo-
lutions per minute (rpm).
Use the tachometer to select the cor-
rect shift points and to prevent lug-
ging and/or over-revving the engine.
Engine Coolant Temperature
Gauge
This gauge indicates the tempera-
ture of the engine coolant when the
ignition switch or Engine Start/Stop
button is ON.
If the gauge pointer moves beyond
the normal range area toward the "H"
position, it indicates overheating that
may damage the engine.
Do not continue driving with an over-
heated engine. If your vehicle over-
heats, refer to “If the Engine
Overheats” in chapter 7.
CAUTION - Red zone
Do not operate the engine with-in the tachometer's RED ZONE.This may cause severe enginedamage.
OQL048183L
OQL048230LOQL045184C
Page 176 of 611
Features of your vehicle
88
4
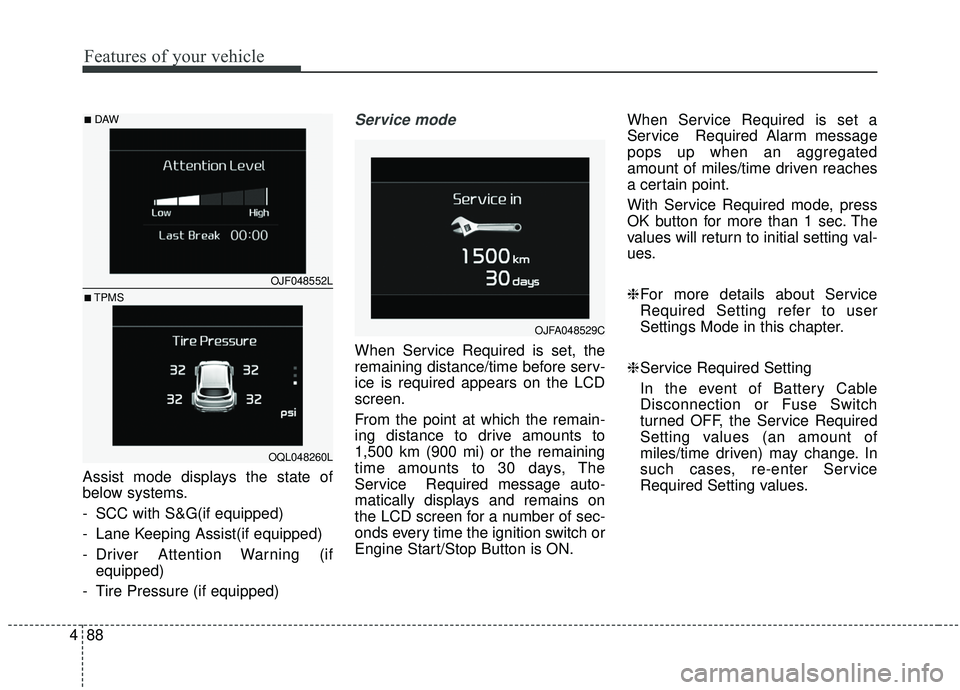
Assist mode displays the state of
below systems.
- SCC with S&G(if equipped)
- Lane Keeping Assist(if equipped)
- Driver Attention Warning (if
equipped)
- Tire Pressure (if equipped)
Service mode
When Service Required is set, the
remaining distance/time before serv-
ice is required appears on the LCD
screen.
From the point at which the remain-
ing distance to drive amounts to
1,500 km (900 mi) or the remaining
time amounts to 30 days, The
Service Required message auto-
matically displays and remains on
the LCD screen for a number of sec-
onds every time the ignition switch or
Engine Start/Stop Button is ON. When Service Required is set a
Service Required Alarm message
pops up when an aggregated
amount of miles/time driven reaches
a certain point.
With Service Required mode, press
OK button for more than 1 sec. The
values will return to initial setting val-
ues.
❈
For more details about Service
Required Setting refer to user
Settings Mode in this chapter.
❈ Service Required Setting
In the event of Battery Cable
Disconnection or Fuse Switch
turned OFF, the Service Required
Setting values (an amount of
miles/time driven) may change. In
such cases, re-enter Service
Required Setting values.
OJFA048529C
OJF048552L
OQL048260L
■DAW
■TPMS