2020 HYUNDAI VELOSTER ignition
[x] Cancel search: ignitionPage 114 of 480
3-114
Convenient features of your vehicle
Fan speed control (2)
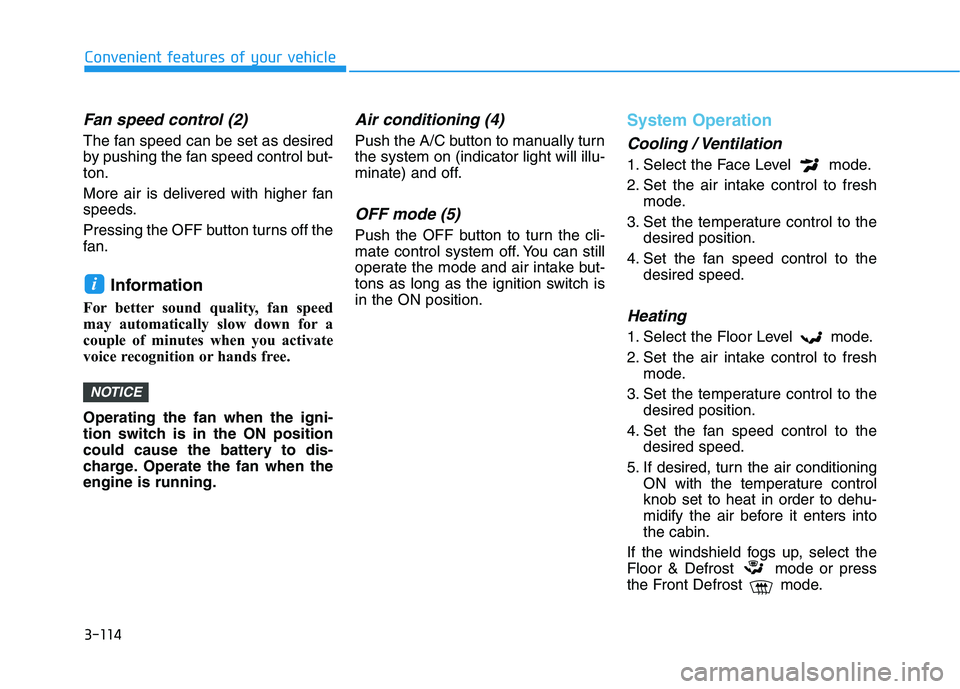
The fan speed can be set as desired
by pushing the fan speed control but-
ton.
More air is delivered with higher fan
speeds.
Pressing the OFF button turns off the
fan.
Information
For better sound quality, fan speed
may automatically slow down for a
couple of minutes when you activate
voice recognition or hands free.
Operating the fan when the igni-
tion switch is in the ON position
could cause the battery to dis-
charge. Operate the fan when the
engine is running.
Air conditioning (4)
Push the A/C button to manually turn
the system on (indicator light will illu-
minate) and off.
OFF mode (5)
Push the OFF button to turn the cli-
mate control system off. You can still
operate the mode and air intake but-
tons as long as the ignition switch is
in the ON position.
System Operation
Cooling / Ventilation
1. Select the Face Level mode.
2. Set the air intake control to fresh
mode.
3. Set the temperature control to the
desired position.
4. Set the fan speed control to the
desired speed.
Heating
1. Select the Floor Level mode.
2. Set the air intake control to fresh
mode.
3. Set the temperature control to the
desired position.
4. Set the fan speed control to the
desired speed.
5. If desired, turn the air conditioning
ON with the temperature control
knob set to heat in order to dehu-
midify the air before it enters into
the cabin.
If the windshield fogs up, select the
Floor & Defrost mode or press
the Front Defrost mode.
NOTICE
i
Page 120 of 480
3-120
Convenient features of your vehicle
Defogging logic
To reduce the probability of fogging
up the inside of the windshield, the
air intake or air conditioning are con-
trolled automatically according to
certain conditions such as or
positions. To cancel or reset the
defogging logic, do the following.
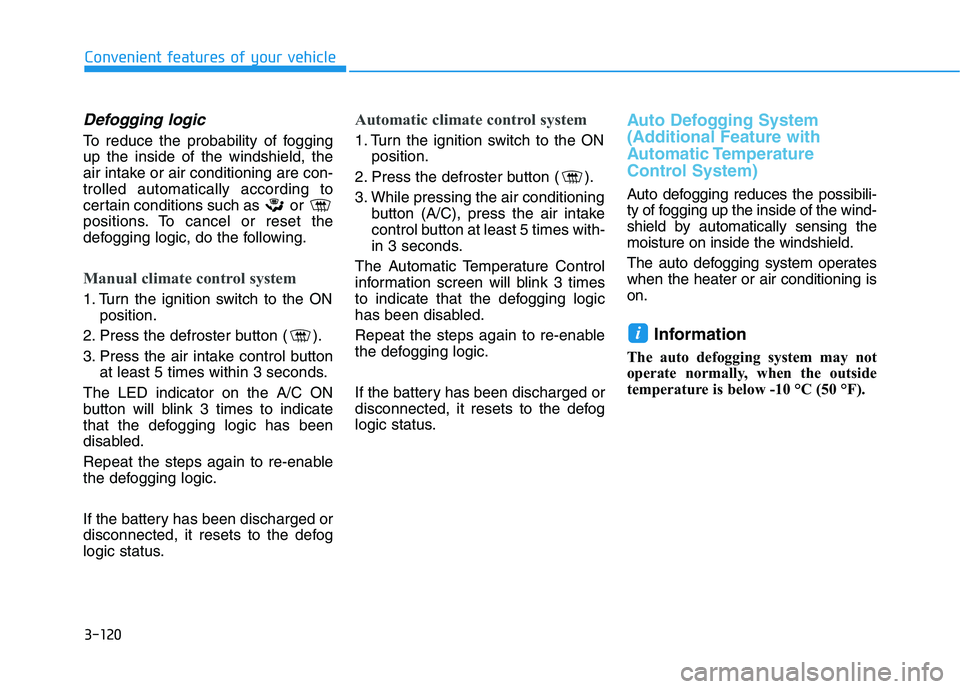
Manual climate control system
1. Turn the ignition switch to the ON
position.
2. Press the defroster button ( ).
3. Press the air intake control button
at least 5 times within 3 seconds.
The LED indicator on the A/C ON
button will blink 3 times to indicate
that the defogging logic has been
disabled.
Repeat the steps again to re-enable
the defogging logic.
If the battery has been discharged or
disconnected, it resets to the defog
logic status.
Automatic climate control system
1. Turn the ignition switch to the ON
position.
2. Press the defroster button ( ).
3. While pressing the air conditioning
button (A/C), press the air intake
control button at least 5 times with-
in 3 seconds.
The Automatic Temperature Control
information screen will blink 3 times
to indicate that the defogging logic
has been disabled.
Repeat the steps again to re-enable
the defogging logic.
If the battery has been discharged or
disconnected, it resets to the defog
logic status.
Auto Defogging System
(Additional Feature with
Automatic Temperature
Control System)
Auto defogging reduces the possibili-
ty of fogging up the inside of the wind-
shield by automatically sensing the
moisture on inside the windshield.
The auto defogging system operates
when the heater or air conditioning is
on.
Information
The auto defogging system may not
operate normally, when the outside
temperature is below -10 °C (50 °F).
i
Page 121 of 480
3-121
Convenient features of your vehicle
3
When the Auto Defogging
System operates, the indi-
cator will illuminate.
If a high amount of humidity is
detected in the vehicle, the Auto
Defogging System will be enabled.
The following steps will be performed
automatically:
Step 1) The air intake control will
change to Fresh mode.
Step 2) The A/C button will turn ON.
Step 3) The mode will be changed to
defrost to direct airflow to the
windshield.
Step 4) The fan speed will be set to
MAX.
If the air conditioning is off or recircu-
lated air position is manually select-
ed while Auto Defogging System is
ON, the Auto Defogging System
Indicator will blink 3 times to signal
that the manual operation has been
canceled.To cancel or reset the
Auto Defogging System
Press the front windshield defroster
button for 3 seconds when the ignition
switch is in the ON position. When the
Auto Defogging System is canceled,
the ADS OFF symbol will blink 3 times
and ADS OFF will be displayed on the
climate control information screen.
When the Auto Defogging System is
reset, the ADS OFF symbol will blink
6 times without a signal.
Information
• When the air conditioning is turned
on by Auto defogging system, if you
try to turn off the air conditioning, the
indicator will blink 3 times and the air
conditioning will not be turned off.
• To maintain the effectiveness and
efficiency of the Auto Defogging
System, do not select Recirculation
mode while the system is operating.
• When the Auto Defogging System is
operating, the fan speed adjustment
knob, the temperature adjustment
knob, and the air intake control but-
ton are all disabled.Do not remove the sensor cover
located on the upper end of the
windshield glass.
Damage to system parts could
occur and may not be covered by
your vehicle warranty.
NOTICE
i
Page 122 of 480
3-122
Convenient features of your vehicle
Rear Window Defroster
To prevent damage to the rear
window defroster conducting ele-
ments bonded to the inside sur-
face of the rear window, never use
sharp instruments or window
cleaners containing abrasives to
clean the window.
If you want to defrost and defog
the front windshield, refer to the
"Windshield Defrosting and
Defogging" section in this chapter.
The defroster heats the window to
remove frost, fog and thin ice from
the interior and exterior of the rear
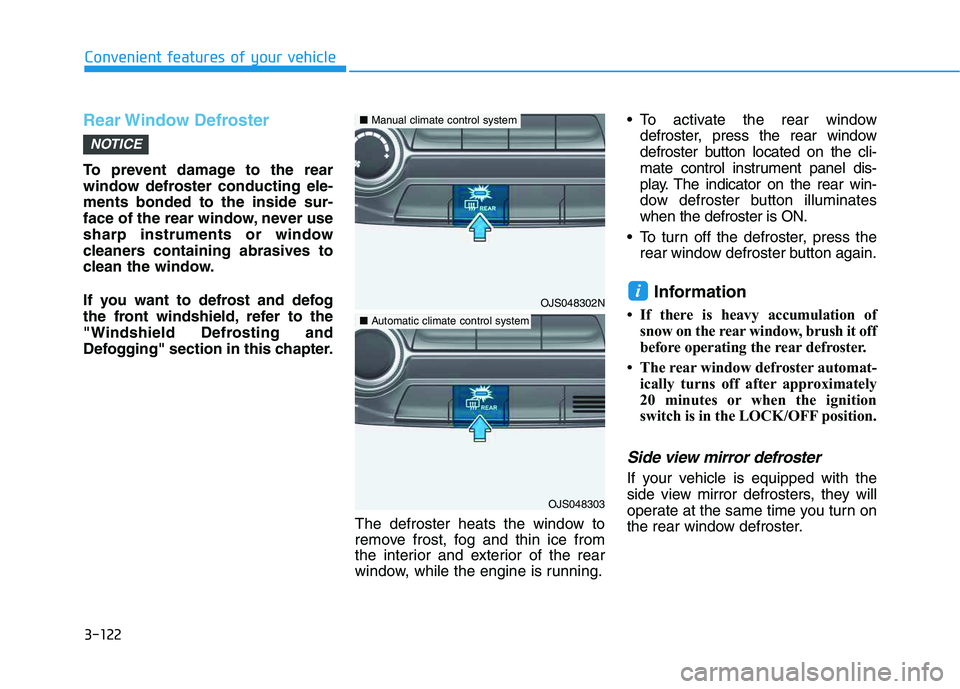
window, while the engine is running. To activate the rear window
defroster, press the rear window
defroster button located on the cli-
mate control instrument panel dis-
play. The indicator on the rear win-
dow defroster button illuminates
when the defroster is ON.
To turn off the defroster, press the
rear window defroster button again.
Information
• If there is heavy accumulation of
snow on the rear window, brush it off
before operating the rear defroster.
• The rear window defroster automat-
ically turns off after approximately
20 minutes or when the ignition
switch is in the LOCK/OFF position.
Side view mirror defroster
If your vehicle is equipped with the
side view mirror defrosters, they will
operate at the same time you turn on
the rear window defroster.
i
NOTICE
OJS048302N
OJS048303
■Manual climate control system
■Automatic climate control system
Page 123 of 480
3-123
Convenient features of your vehicle
3
C CL
LI
IM
MA
AT
TE
E
C
CO
ON
NT
TR
RO
OL
L
A
AD
DD
DI
IT
TI
IO
ON
NA
AL
L
F
FE
EA
AT
TU
UR
RE
ES
S
(
(I
IF
F
E
EQ
QU
UI
IP
PP
PE
ED
D)
)
Automatic Ventilation
When the ignition switch is in the ON
position or when the engine is run-
ning and temperature is below 15°C
(59°F) with the recirculation mode
selected more than five minutes, the
air intake position will automatically
change to fresh mode.
To cancel or reset the Automatic
Ventilation
When the air conditioning system is
on, press the mode selection button
and the recirculation mode button
five times within three seconds.
When the Automatic Ventilation fea-
ture is enabled, the Recirculation
button LED indicator will blink 6
times.
When the Automatic Ventilation fea-
ture is disabled, the Recirculation
button LED indicator will blink 3
times.
Sunroof Inside Air
Recirculation
When the heater or air conditioning
system is on with the sunroof
opened, the fresh mode will be auto-
matically selected. If you press the
Recirculation mode button with the
sunroof open, Recirculation mode
activate but will only remain enabled
for 3 minutes. After 3 minutes the air
intake control will revert back to
Fresh mode.
When the sunroof is closed, the air
intake position will return to the orig-
inal position that was selected.
Page 128 of 480
3-128
Convenient features of your vehicle
To prevent damage to the Power
Outlets :
Use the power outlet only when
the engine is running and
remove the accessory plug after
use. Using the accessory plug
for prolonged periods of time
with the engine off could cause
the battery to discharge.
Only use 12V electric acces-
sories which are less than 180 W
in electric capacity.
Adjust the air-conditioner or
heater to the lowest operating
level when using the power outlet.
Close the cover when not in use. Some electronic devices can
cause electronic interference
when plugged into a vehicle's
power outlet. These devices may
cause excessive audio static
and malfunctions in other elec-
tronic systems or devices used
in your vehicle.
Push the plug in as far as it will
go. If good contact is not made,
the plug may overheat and the
fuse may open.
Plug in battery equipped electri-
cal/electronic devices with
reverse current protection. The
current from the battery may
flow into the vehicle's electri-
cal/electronic system and cause
system malfunction.
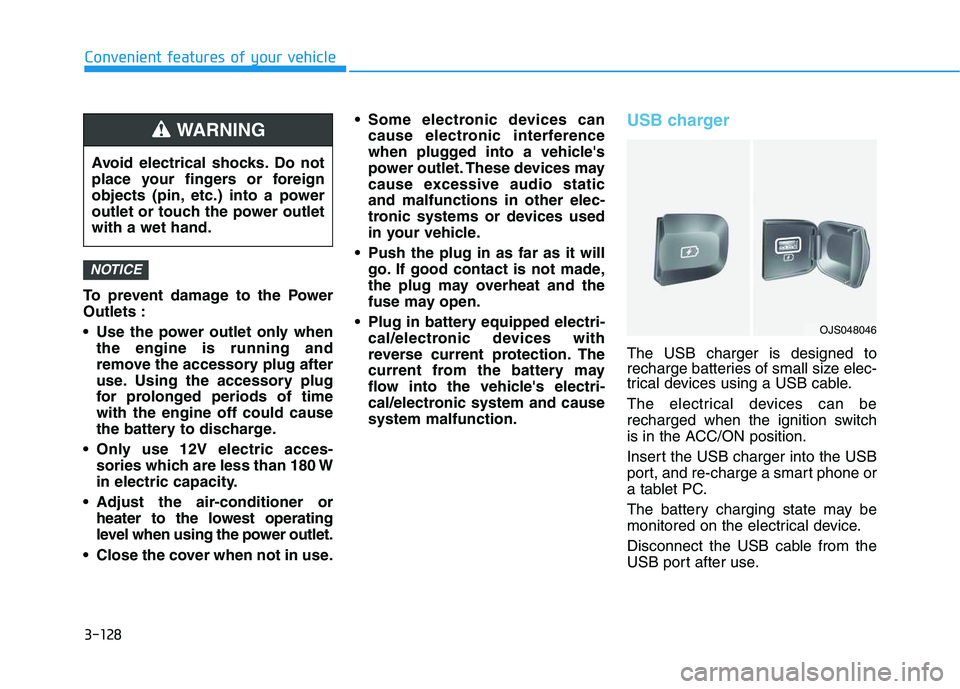
USB charger
The USB charger is designed to
recharge batteries of small size elec-
trical devices using a USB cable.
The electrical devices can be
recharged when the ignition switch
is in the ACC/ON position.
Insert the USB charger into the USB
port, and re-charge a smart phone or
a tablet PC.
The battery charging state may be
monitored on the electrical device.
Disconnect the USB cable from the
USB port after use.
NOTICE
Avoid electrical shocks. Do not
place your fingers or foreign
objects (pin, etc.) into a power
outlet or touch the power outlet
with a wet hand.
WARNING
OJS048046
Page 131 of 480
3-131
Convenient features of your vehicle
3
Some magnetic items like credit
cards, phone cards or rail tickets
may be damaged if left with the
cellular phone during the charg-
ing process.
If the cellular phone without the
wireless charging function or
the metallic items are placed on
the charging pad, it may cause
slight noise. This noise does not
affect the cellular phone and the
vehicle, because this noise is an
operating sound during deter-
mining the item on the charging
pad.
If the ignition switch is OFF, the
charging also stops.Information
This device complies with Industry
Canada RSS-210 standard.
Operation is subject to the following
two conditions:
1. This device may not cause harmful
interference, and
2. This device must accept any inter-
ference received, including interfer-
ence that may cause undesired
operation.
Clock
Vehicles with Audio system
Select the [SETUP]button on the
audio system ➟Select [Date/Time].
Set time: Set the time displayed on
the audio screen.
Time format: Choose between 12-
hour and 24-hour time formats.
Vehicles with Navigation system
Select the Settings menu on the
Navigation system➟Select
[Date/Time].
GPS time: Displays time according
to the received GNSS time.
24-hour: Switches to 12 hour or 24
hour.
i
Do not attempt to adjust the
clock while driving. Doing so
may result in distracted driving
which may lead to an accident
involving personal injury or
death.
WARNING
Page 138 of 480
3-4
Unlocking your vehicle
To unlock your vehicle :
1. Press the Door Unlock button (2)
on the remote key.
2. The driver's door will unlock. The
hazard warning lights will blink two
times.
Two press unlock setting:
If you press the Door Unlock but-
ton on the remote key again with-
in four seconds, then all the doors
will unlock.
Two press unlock setting can be
changed according to owner's pref-
erence in the cluster User Settings
mode or with the remote key.
• User settings mode method:
Select or deselect the 'Two Press
Unlock' feature in the User
Settings mode on the cluster LCD
display (User Settings ➞Door ➞
Two Press Unlock).
Press and hold both Door Lock (1)
and Door Unlock (2) buttons at the
same time until the hazard warn-
ing lights blink.Now all doors will unlock when the
Door Unlock button is pressed one
time. To change the setting back,
repeat this procedure.
Information
After unlocking the doors, the doors
will automatically relock after 30 sec-
onds unless a door is opened.
Tailgate unlocking
To unlock the tailgate :
1. Press and hold the Tailgate
Unlock button (3) on the remote
key for more than one second.
2. The hazard warning lights will
blink two times and the tailgate will
be unlocked.
Once the tailgate is opened and then
closed, the tailgate will lock automat-
ically.
Information
The word "HOLD" is written on the
button to inform you that you must
press and hold the button for more
than one second.
Panic button (if equipped)
Press and hold the Panic button (4)
for more than one second. The horn
sounds and hazard warning lights
flash for about 30 seconds.
To cancel the panic mode, press any
button on the remote key.
Start-up
For information, refer to the "Key
Ignition Switch" section in chapter 5.
To prevent damaging the remote
key:
• Keep the remote key away from
water or any liquid and fire.
Internal circuits may malfunc-
tion if the inside of the remote
key gets damp (from liquids or
moisture) or if it is heated. This
can exclude the remote key from
being covered under warranty.
Avoid dropping or throwing the
remote key.
Protect the remote key from
extreme temperatures.
NOTICE
i
i
Convenient features of your vehicle