Page 111 of 637

3-25
Convenient features of your vehicle
3
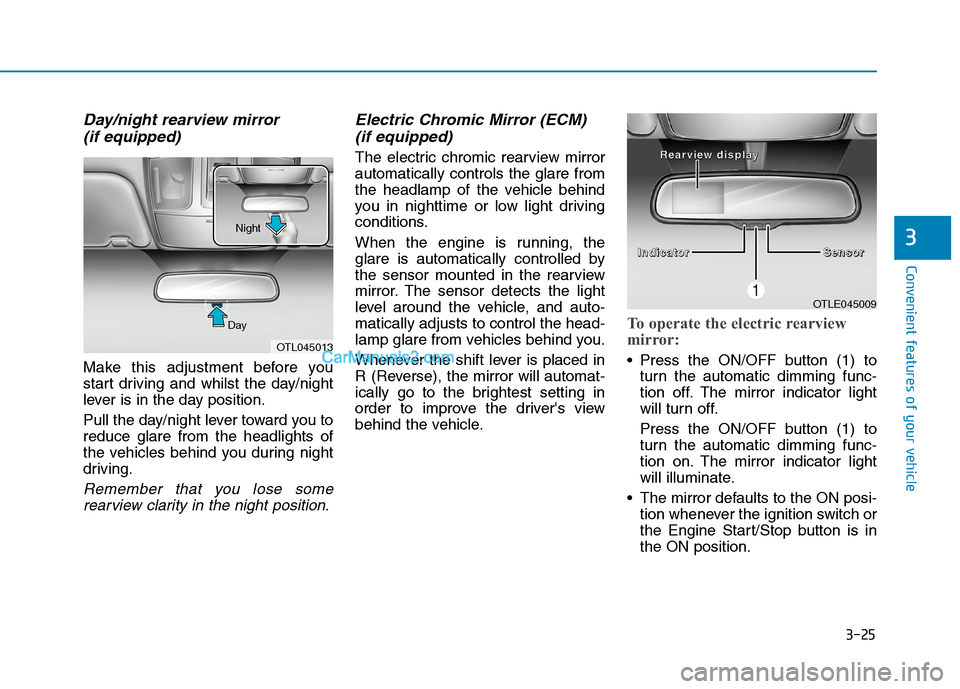
Day/night rearview mirror
(if equipped)
Make this adjustment before you
start driving and whilst the day/night
lever is in the day position.
Pull the day/night lever toward you to
reduce glare from the headlights of
the vehicles behind you during night
driving.
Remember that you lose some
rearview clarity in the night position.
Electric Chromic Mirror (ECM)
(if equipped)
The electric chromic rearview mirror
automatically controls the glare from
the headlamp of the vehicle behind
you in nighttime or low light driving
conditions.
When the engine is running, the
glare is automatically controlled by
the sensor mounted in the rearview
mirror. The sensor detects the light
level around the vehicle, and auto-
matically adjusts to control the head-
lamp glare from vehicles behind you.
Whenever the shift lever is placed in
R (Reverse), the mirror will automat-
ically go to the brightest setting in
order to improve the driver's view
behind the vehicle.
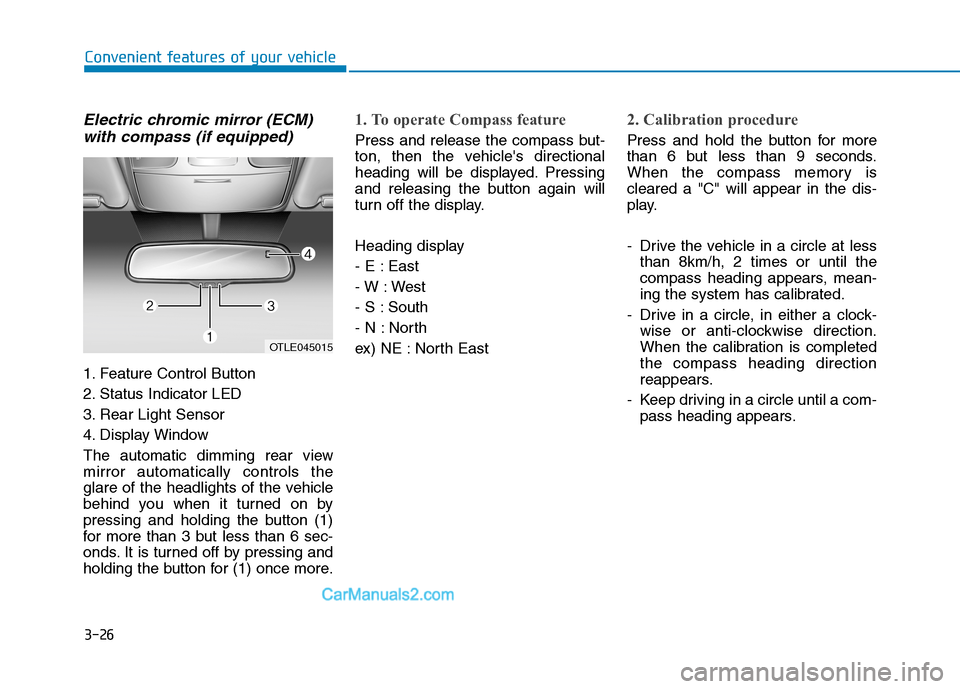
To operate the electric rearview
mirror:
Press the ON/OFF button (1) to
turn the automatic dimming func-
tion off. The mirror indicator light
will turn off.
Press the ON/OFF button (1) to
turn the automatic dimming func-
tion on. The mirror indicator light
will illuminate.
The mirror defaults to the ON posi-
tion whenever the ignition switch or
the Engine Start/Stop button is in
the ON position.
OTLE045009
I I I I
n n n n
d d d d
i i i i
c c c c
a a a a
t t t t
o o o o
r r r r
S S S S
e e e e
n n n n
s s s s
o o o o
r r r r R R R R
e e e e
a a a a
r r r r
v v v v
i i i i
e e e e
w w w w
d d d d
i
i i i
s s s s
p p p p
l l l l
a a a a
y y y y
OTL045013 DayNight
Page 112 of 637

3-26
Convenient features of your vehicle
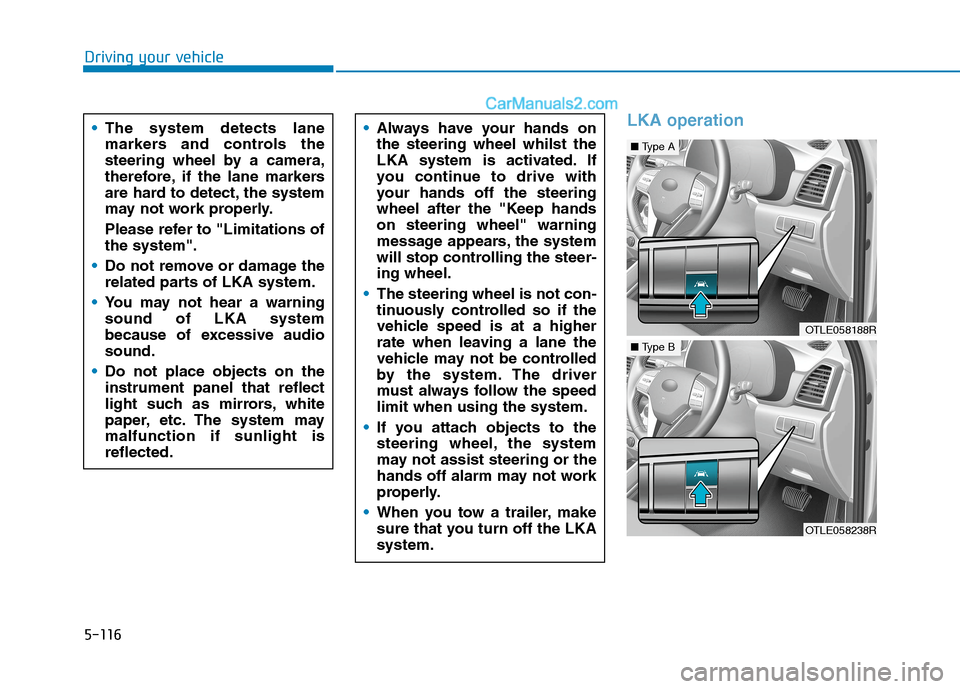
Electric chromic mirror (ECM)
with compass (if equipped)
1. Feature Control Button
2. Status Indicator LED
3. Rear Light Sensor
4. Display Window
The automatic dimming rear view
mirror automatically controls the
glare of the headlights of the vehicle
behind you when it turned on by
pressing and holding the button (1)
for more than 3 but less than 6 sec-
onds. It is turned off by pressing and
holding the button for (1) once more.
1. To operate Compass feature
Press and release the compass but-
ton, then the vehicle's directional
heading will be displayed. Pressing
and releasing the button again will
turn off the display.
Heading display
- E : East
- W : West
- S : South
- N : North
ex) NE : North East
2. Calibration procedure
Press and hold the button for more
than 6 but less than 9 seconds.
When the compass memory is
cleared a "C" will appear in the dis-
play.
- Drive the vehicle in a circle at less
than 8km/h, 2 times or until the
compass heading appears, mean-
ing the system has calibrated.
- Drive in a circle, in either a clock-
wise or anti-clockwise direction.
When the calibration is completed
the compass heading direction
reappears.
- Keep driving in a circle until a com-
pass heading appears.
OTLE045015
Page 433 of 637

5-116
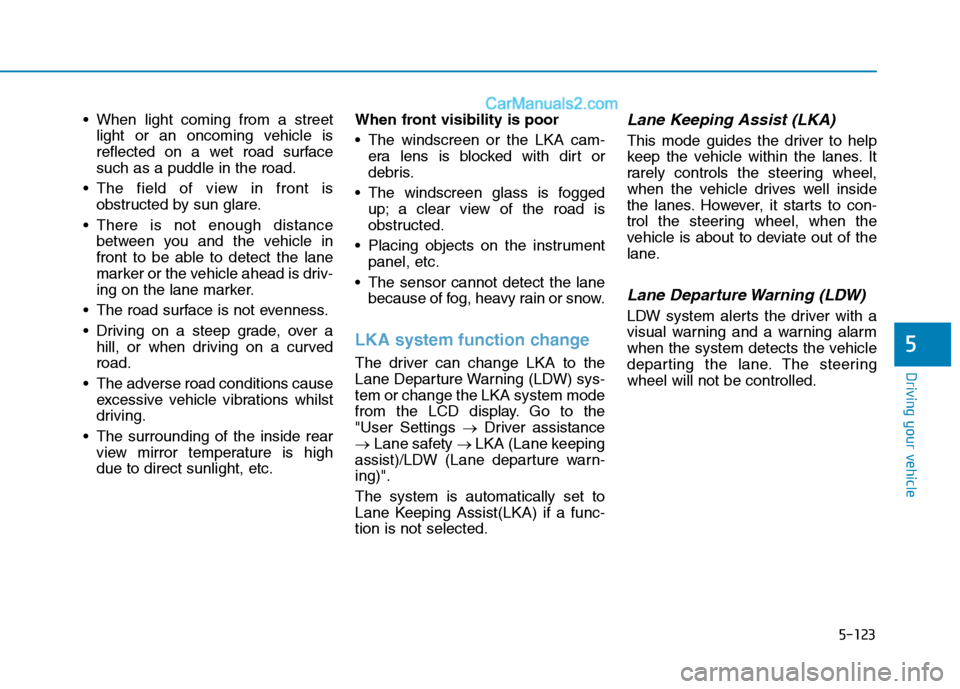
LKA operation
Driving your vehicle
The system detects lane
markers and controls the
steering wheel by a camera,
therefore, if the lane markers
are hard to detect, the system
may not work properly.
Please refer to "Limitations of
the system".
Do not remove or damage the
related parts of LKA system.
You may not hear a warning
sound of LKA system
because of excessive audio
sound.
Do not place objects on the
instrument panel that reflect
light such as mirrors, white
paper, etc. The system may
malfunction if sunlight is
reflected.
Always have your hands on
the steering wheel whilst the
LKA system is activated. If
you continue to drive with
your hands off the steering
wheel after the "Keep hands
on steering wheel" warning
message appears, the system
will stop controlling the steer-
ing wheel.
The steering wheel is not con-
tinuously controlled so if the
vehicle speed is at a higher
rate when leaving a lane the
vehicle may not be controlled
by the system. The driver
must always follow the speed
limit when using the system.
If you attach objects to the
steering wheel, the system
may not assist steering or the
hands off alarm may not work
properly.
When you tow a trailer, make
sure that you turn off the LKA
system.
OTLE058188R
■Type A
OTLE058238R
■Type B
Page 440 of 637

5-123
Driving your vehicle
When light coming from a street
light or an oncoming vehicle is
reflected on a wet road surface
such as a puddle in the road.
The field of view in front is
obstructed by sun glare.
There is not enough distance
between you and the vehicle in
front to be able to detect the lane
marker or the vehicle ahead is driv-
ing on the lane marker.
The road surface is not evenness.
Driving on a steep grade, over a
hill, or when driving on a curved
road.
The adverse road conditions cause
excessive vehicle vibrations whilst
driving.
The surrounding of the inside rear
view mirror temperature is high
due to direct sunlight, etc.When front visibility is poor
The windscreen or the LKA cam-
era lens is blocked with dirt or
debris.
The windscreen glass is fogged
up; a clear view of the road is
obstructed.
Placing objects on the instrument
panel, etc.
The sensor cannot detect the lane
because of fog, heavy rain or snow.
LKA system function change
The driver can change LKA to the
Lane Departure Warning (LDW) sys-
tem or change the LKA system mode
from the LCD display. Go to the
"User Settings →Driver assistance
→Lane safety → LKA (Lane keeping
assist)/LDW (Lane departure warn-
ing)".
The system is automatically set to
Lane Keeping Assist(LKA) if a func-
tion is not selected.
Lane Keeping Assist (LKA)
This mode guides the driver to help
keep the vehicle within the lanes. It
rarely controls the steering wheel,
when the vehicle drives well inside
the lanes. However, it starts to con-
trol the steering wheel, when the
vehicle is about to deviate out of the
lane.
Lane Departure Warning (LDW)
LDW system alerts the driver with a
visual warning and a warning alarm
when the system detects the vehicle
departing the lane. The steering
wheel will not be controlled.
5