2020 Hyundai Tucson display
[x] Cancel search: displayPage 87 of 637
Convenient features of your vehicle
3
Accessing your vehicle .........................................3-4
Remote key .........................................................................3-4
Smart key ............................................................................3-8
Immobiliser system .........................................................3-13
Door locks .............................................................3-14
Operating door locks from outside the vehicle ......3-14
Operating door locks from inside the vehicle .........3-16
Auto door lock/unlock features..................................3-18
Child-protector rear door locks ..................................3-19
Theft-alarm system.............................................3-20
Steering wheel......................................................3-21
Electric power steering (EPS) ......................................3-21
Tilt steering / Telescope steering...............................3-22
Heated steering wheel ...................................................3-23
Horn ....................................................................................3-23
Mirrors ...................................................................3-24
Inside rearview mirror....................................................3-24
Outside rearview mirrors ..............................................3-29
Windows ................................................................3-32
Power windows ................................................................3-32
Panorama sunroof ...............................................3-37
Sunshade ...........................................................................3-38
Sliding the sunroof .........................................................3-38
Tilting the sunroof ..........................................................3-39
Closing the sunroof ........................................................3-40
Resetting the sunroof ....................................................3-41
Sunroof open warning ...................................................3-41
Exterior features .................................................3-42
Bonnet................................................................................3-42
Fuel filler door .................................................................3-44
Tailgate ..................................................................3-47
Non-power tailgate ........................................................3-47
Power tailgate ..................................................................3-49
Smart tailgate ...................................................................3-55
Instrument cluster................................................3-59
Instrument cluster control ............................................3-61
Gauges ...............................................................................3-61
Distance to empty ...........................................................3-65
Icy Road Warning Light .................................................3-65
Transmission Shift Indicator .........................................3-66
LCD display ...........................................................3-69
LCD display control.........................................................3-69
LCD display modes ..........................................................3-70
Warning messages ..........................................................3-80
Page 104 of 637
3-18
Convenient features of your vehicle
Auto door lock/unlock features
Impact sensing door unlock
system (if equipped)
All doors will be automatically
unlocked when an impact causes the
air bags to deploy.
Speed sensing door lock system
(if equipped)
All doors will be automatically locked
when vehicle speed exceeds 15
km/h.
You can activate or deactivate the
Auto Door Lock/Unlock features from
the User Settings Mode on the LCD
display.For more details, refer to
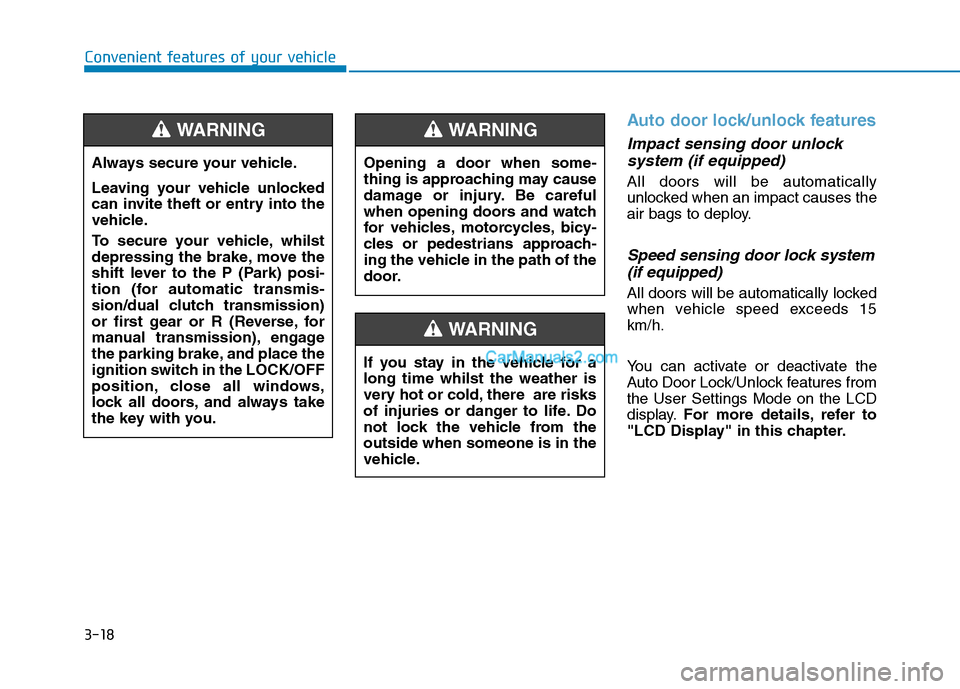
"LCD Display" in this chapter. Always secure your vehicle.
Leaving your vehicle unlocked
can invite theft or entry into the
vehicle.
To secure your vehicle, whilst
depressing the brake, move the
shift lever to the P (Park) posi-
tion (for automatic transmis-
sion/dual clutch transmission)
or first gear or R (Reverse, for
manual transmission), engage
the parking brake, and place the
ignition switch in the LOCK/OFF
position, close all windows,
lock all doors, and always take
the key with you.
WARNING
Opening a door when some-
thing is approaching may cause
damage or injury. Be careful
when opening doors and watch
for vehicles, motorcycles, bicy-
cles or pedestrians approach-
ing the vehicle in the path of the
door.
WARNING
If you stay in the vehicle for a
long time whilst the weather is
very hot or cold, there are risks
of injuries or danger to life. Do
not lock the vehicle from the
outside when someone is in the
vehicle.
WARNING
Page 112 of 637
3-26
Convenient features of your vehicle
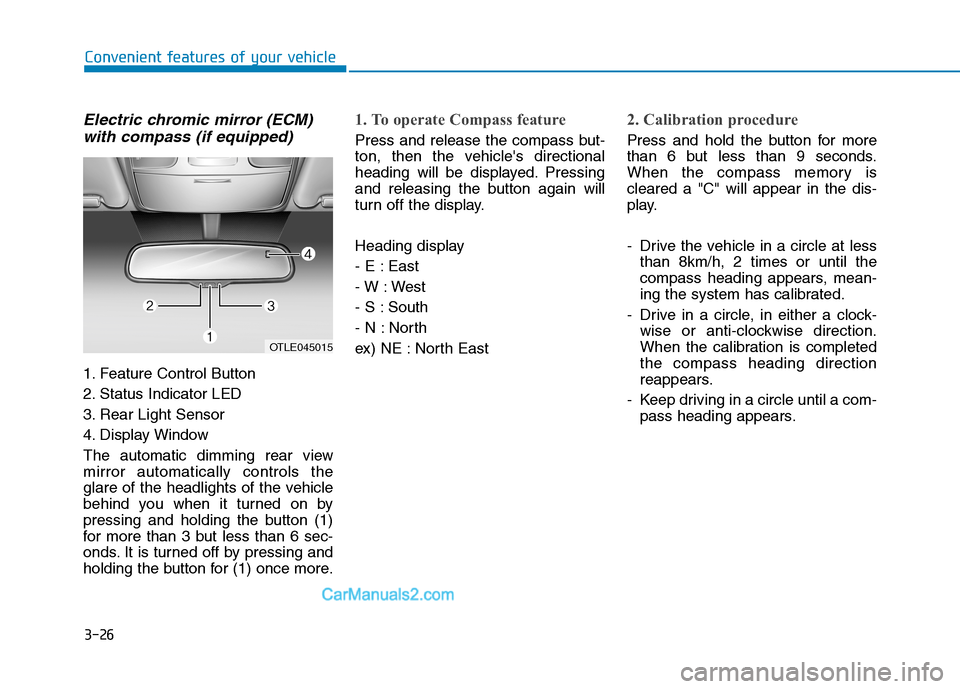
Electric chromic mirror (ECM)
with compass (if equipped)
1. Feature Control Button
2. Status Indicator LED
3. Rear Light Sensor
4. Display Window
The automatic dimming rear view
mirror automatically controls the
glare of the headlights of the vehicle
behind you when it turned on by
pressing and holding the button (1)
for more than 3 but less than 6 sec-
onds. It is turned off by pressing and
holding the button for (1) once more.
1. To operate Compass feature
Press and release the compass but-
ton, then the vehicle's directional
heading will be displayed. Pressing
and releasing the button again will
turn off the display.
Heading display
- E : East
- W : West
- S : South
- N : North
ex) NE : North East
2. Calibration procedure
Press and hold the button for more
than 6 but less than 9 seconds.
When the compass memory is
cleared a "C" will appear in the dis-
play.
- Drive the vehicle in a circle at less
than 8km/h, 2 times or until the
compass heading appears, mean-
ing the system has calibrated.
- Drive in a circle, in either a clock-
wise or anti-clockwise direction.
When the calibration is completed
the compass heading direction
reappears.
- Keep driving in a circle until a com-
pass heading appears.
OTLE045015
Page 113 of 637
3-27
Convenient features of your vehicle
3
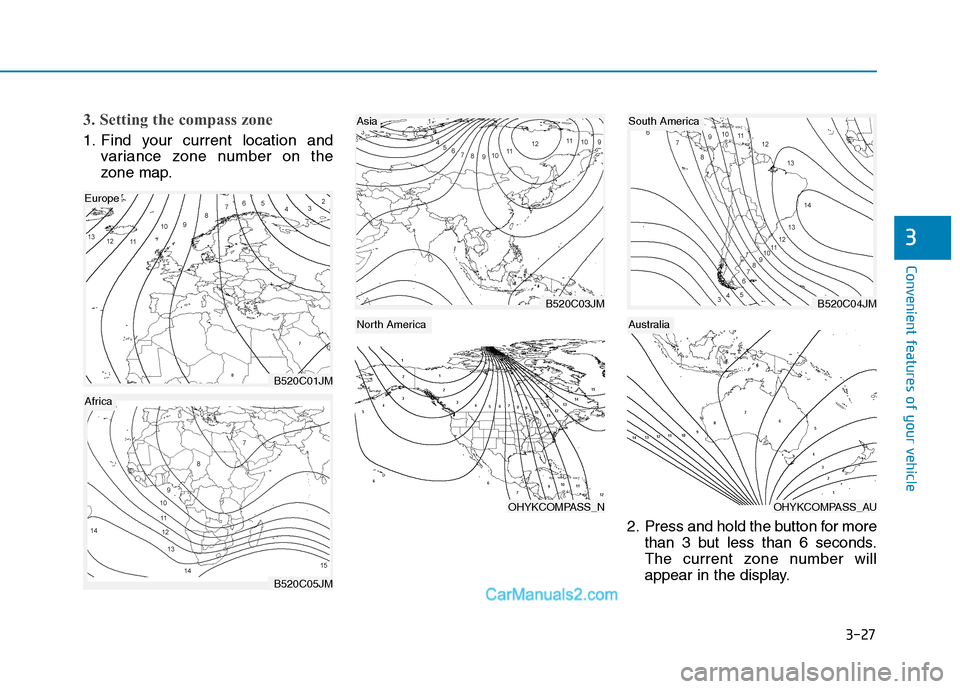
3. Setting the compass zone
1. Find your current location and
variance zone number on the
zone map.
2. Press and hold the button for more
than 3 but less than 6 seconds.
The current zone number will
appear in the display.
B520C01JM
Europe
B520C05JM
Africa
B520C04JM
South America
OHYKCOMPASS_AU
Australia
B520C03JM
Asia
OHYKCOMPASS_N
North America
Page 114 of 637
3-28
Convenient features of your vehicle
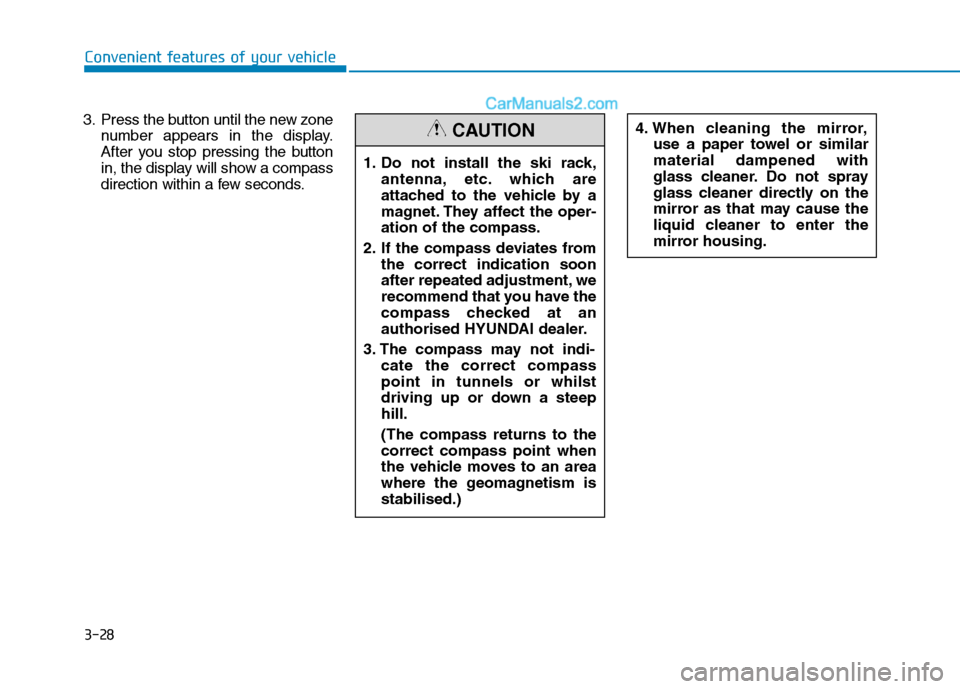
3. Press the button until the new zone
number appears in the display.
After you stop pressing the button
in, the display will show a compass
direction within a few seconds.1. Do not install the ski rack,
antenna, etc. which are
attached to the vehicle by a
magnet. They affect the oper-
ation of the compass.
2. If the compass deviates from
the correct indication soon
after repeated adjustment, we
recommend that you have the
compass checked at an
authorised HYUNDAI dealer.
3. The compass may not indi-
cate the correct compass
point in tunnels or whilst
driving up or down a steep
hill.
(The compass returns to the
correct compass point when
the vehicle moves to an area
where the geomagnetism is
stabilised.)
4. When cleaning the mirror,
use a paper towel or similar
material dampened with
glass cleaner. Do not spray
glass cleaner directly on the
mirror as that may cause the
liquid cleaner to enter the
mirror housing.CAUTION
Page 129 of 637
3-43
Convenient features of your vehicle
3
Closing the bonnet
1. Before closing the bonnet, check
the following:
partment must be correctly
installed.
bustible material must be
removed from the engine com-
partment.
2. Return the stay rod to its clip to
prevent it from rattling.
3. Lower the bonnet halfway (lifted
approximately 30cm from the
closed position) and push down to
securely lock in place. Then dou-
ble check to be sure the bonnet is
secure.Before closing the bonnet,
ensure that all obstructions
are removed from the bonnet
opening. Closing the bonnet
with an obstruction present in
the bonnet opening may
result in property damage or
severe personal injury.
Do not leave gloves, rags or
any other combustible materi-
al in the engine compartment.
Doing so may cause a heat-
induced fire.
Do not move the vehicle with
the bonnet raised. The view
will be blocked and the bon-
net could fall or be damaged.WARNING
Always double check to be sure
that the bonnet is firmly latched
before driving away. Check
there is no bonnet open warn-
ing light or message displayed
on the instrument cluster. If the
bonnet is not latched whilst the
vehicle is moving, the chime
will sound to warn the driver the
bonnet is not fully latched.
Driving with the bonnet open
may cause a total loss of visibil-
ity, which can result in an acci-
dent.
WARNING
Page 135 of 637
3-49
Convenient features of your vehicle
3
Power tailgate (if equipped)
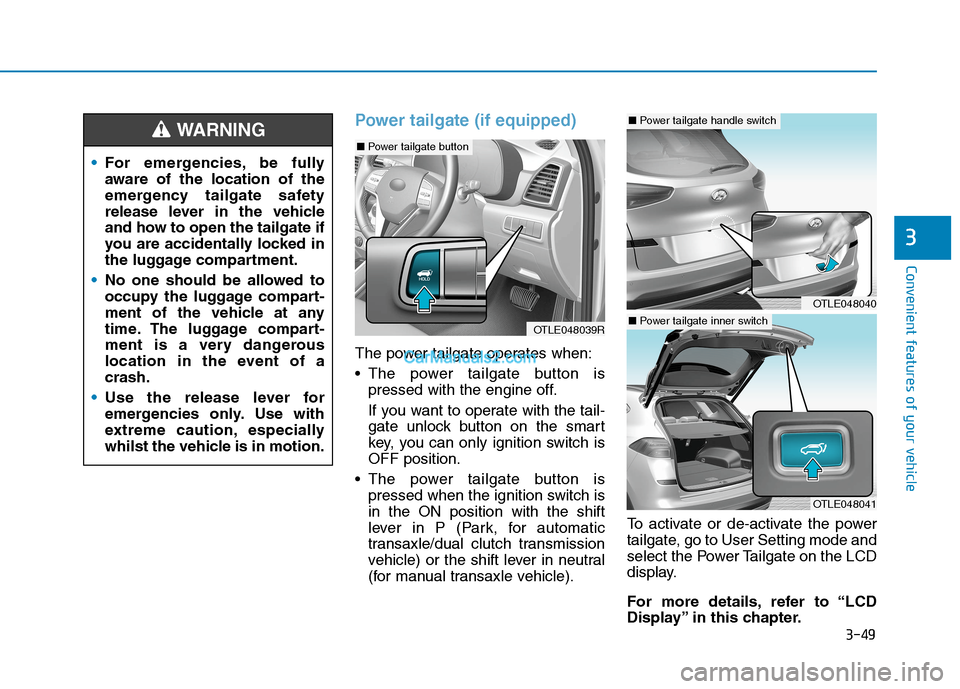
The power tailgate operates when:
The power tailgate button is
pressed with the engine off.
If you want to operate with the tail-
gate unlock button on the smart
key, you can only ignition switch is
OFF position.
The power tailgate button is
pressed when the ignition switch is
in the ON position with the shift
lever in P (Park, for automatic
transaxle/dual clutch transmission
vehicle) or the shift lever in neutral
(for manual transaxle vehicle).To activate or de-activate the power
tailgate, go to User Setting mode and
select the Power Tailgate on the LCD
display.
For more details, refer to “LCD
Display” in this chapter. For emergencies, be fully
aware of the location of the
emergency tailgate safety
release lever in the vehicle
and how to open the tailgate if
you are accidentally locked in
the luggage compartment.
No one should be allowed to
occupy the luggage compart-
ment of the vehicle at any
time. The luggage compart-
ment is a very dangerous
location in the event of a
crash.
Use the release lever for
emergencies only. Use with
extreme caution, especially
whilst the vehicle is in motion.
WARNING
OTLE048039R
OTLE048040
■Power tailgate handle switch
OTLE048041
■Power tailgate inner switch
■Power tailgate button
Page 142 of 637
3-56
Convenient features of your vehicle
How to use the Smart Tailgate
The tailgate can be opened with no-
touch activation satisfying all the
conditions below.
After 15 seconds when all doors
are closed and locked
Positioned in the detecting area for
more than 3 seconds.
Information
• The Smart Tailgate does not operate
when:
- The smart key is detected within
15 seconds after the doors are
closed and locked, and is continu-
ously detected.
- The smart key is detected within
15 seconds after the doors are
closed and locked, and 1.5 m from
the front door handles (for vehicles
equipped with Welcome Light).
- A door is not locked or closed.
- The smart key is in the vehicle.1. Setting
To activate the Smart Tailgate, go to
User Settings Mode and select
Smart Tailgate on the LCD display.
❈For more details, refer to "LCD
Display" in this chapter.
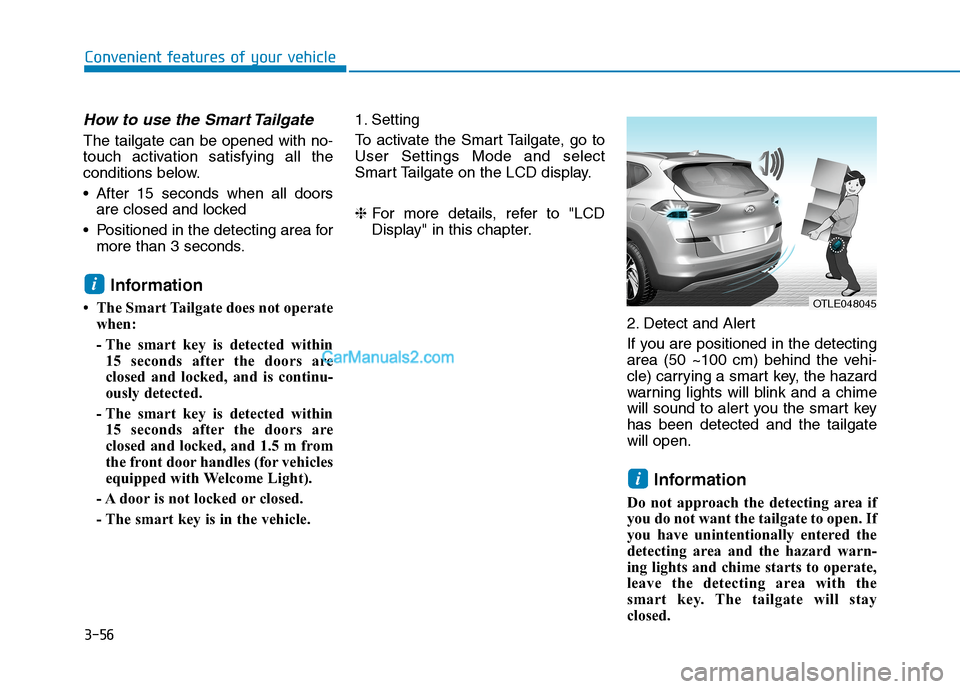
2. Detect and Alert
If you are positioned in the detecting
area (50 ~100 cm) behind the vehi-
cle) carrying a smart key, the hazard
warning lights will blink and a chime
will sound to alert you the smart key
has been detected and the tailgate
will open.
Information
Do not approach the detecting area if
you do not want the tailgate to open. If
you have unintentionally entered the
detecting area and the hazard warn-
ing lights and chime starts to operate,
leave the detecting area with the
smart key. The tailgate will stay
closed.
i
i
OTLE048045