2020 Hyundai Santa Fe AUTO START
[x] Cancel search: AUTO STARTPage 16 of 557

I
IN
N S
ST
T R
R U
U M
M E
EN
N T
T
P
P A
A N
N E
EL
L
O
O V
VE
ER
R V
V I
IE
E W
W
(
( I
I)
)
The actual shape may differ from the illustration.
1-5
Your vehicle at a glance
11. Instrument cluster ....................................3-66
2. Horn ........................................................3-28
3. Driver’s front air bag ................................2-51
4. Key ignition switch/ ....................................5-6
Engine Start/Stop button ............................5-9
5. Hazard warning flasher switch ..................6-2
6. Audio system/Navigation system ..............4-4
7. Manual climate control system/ ............3-137 Automatic climate control system ..........3-146
8. Heated steering wheel ............................3-29
9. Seat warmer ............................................2-21
10. Air ventilation seat ................................2-22
11. Power outlet ........................................3-168
12. Aux, USB and USB port ..........................4-2
13. USB charger ........................................3-170
14. Wireless cellular phone charging system ..................................3-170
15. Passenger’s front air bag ......................2-51
16. Glove box ............................................3-165
17. Automatic transmission shift lever ........5-14
18. Drive mode button ................................5-51
19. Idle Stop and Go(ISG) OFF button ......5-46
20. Downhill Brake Control (DBC) ..............5-36
21. Reverse Parking Distance Warning OFF button ..........................................3-133
22. Surround view monitor button ............3-129
23. Electronic Parking Brake (EPB) ............5-21
24. Auto Hold switch ....................................5-27
25. AC inverter ..........................................3-171
OTMA018004
Page 41 of 557
2-23
Safety system of your vehicle
2
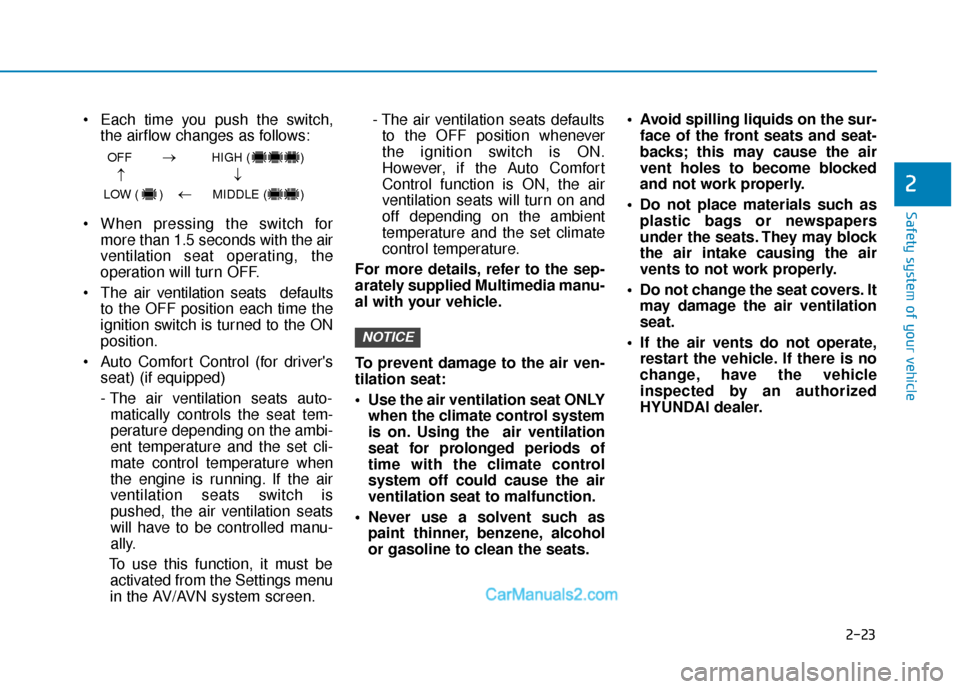
Each time you push the switch,the airflow changes as follows:
When pressing the switch for more than 1.5 seconds with the air
ventilation seat operating, the
operation will turn OFF.
The air v entilation seats def aults
to the OFF position each time the
ignition switch is turned to the ON
position.
Auto Comfort Control (for driver's seat) (if equipped)
- The air ventilation seats auto-matically controls the seat tem-
perature depending on the ambi-
ent temperature and the set cli-
mate control temperature when
the engine is running. If the air
ventilation seats switch is
pushed, the air ventilation seats
will have to be controlled manu-
ally.
To use this function, it must be activated from the Settings menu
in the AV/AVN system screen. - The air ventilation seats defaults
to the OFF position whenever
the ignition switch is ON.
However, if the Auto Comfort
Control function is ON, the air
ventilation seats will turn on and
off depending on the ambient
temperature and the set climate
control temperature.
For more details, refer to the sep-
arately supplied Multimedia manu-
al with your vehicle.
To prevent damage to the air ven-
tilation seat:
Use the air ventilation seat ONLY when the climate control system
is on. Using the air ventilation
seat for prolonged periods of
time with the climate control
system off could cause the air
ventilation seat to malfunction.
Never use a solvent such as paint thinner, benzene, alcohol
or gasoline to clean the seats. Avoid spilling liquids on the sur-
face of the front seats and seat-
backs; this may cause the air
vent holes to become blocked
and not work properly.
Do not place materials such as plastic bags or newspapers
under the seats. They may block
the air intake causing the air
vents to not work properly.
Do not change the seat covers. It may damage the air ventilation
seat.
If the air vents do not operate, restart the vehicle. If there is no
change, have the vehicle
inspected by an authorized
HYUNDAI dealer.
NOTICE
OFF HIGH ( )
LOW ( ) MIDDLE ( )
→→
→
→
Page 94 of 557
3-5
Convenient features of your vehicle
3
The Two Press Unlock feature can
also be enabled or disabled by press-
ing the door lock and unlock buttons
simultaneously on the Key FOB:
Press and hold both the Door Lock
button and the Door Unlock button
simultaneously until the hazard
warning lights blink.
This will enable or disable the Two
Press Unlock feature. Repeat this
procedure to enable/disable the
mode again.
Information
After unlocking the doors, the doors
will automatically relock after 30 sec-
onds unless a door is opened.
Liftgate unlocking
To unlock the liftgate :
1. Press and hold the Liftgate Unlockbutton (3) on the remote key for
more than one second.
2. The hazard warning lights will blink two times and the liftgate will
be unlocked.
3. Once the liftgate is opened and then closed, the liftgate will auto-
matically re-lock after 30 seconds.
Information
The word "HOLD" is written on the
button to inform you that you must
press and hold the button for more
than one second.
Panic button
Press and hold the Panic button (4)
for more than one second. The horn
sounds and hazard warning lights
flash for about 30 seconds.
To cancel the panic mode, press any
button on the remote key.
Start-up
For information, refer to the "Key
Ignition Switch" section in chapter 5.
To prevent damaging the remote
key:
• Keep the remote key away fromwater or any liquid and fire.
Internal circuits may malfunc-
tion if the inside of the remote
key gets damp (from liquids or
moisture) or if it is heated. This
can exclude the remote key from
being covered under warranty.
Avoid dropping or throwing the remote key.
Protect the remote key from extreme temperatures.
NOTICE
ii
Page 99 of 557

3-10
Convenient features of your vehicle
Power liftgate
To unlock and open the liftgate:
1. Make sure you have the smart keyin your possession.
2. Press either the liftgate handle release switch on the vehicle or
press and hold the Liftgate Unlock
button on the smart key for more
than one second. The hazard
warning lights will blink two times
and the liftgate latch will open.
3. Once the liftgate is opened and then closed, the liftgate will auto-
matically re-lock after 30 seconds.
Information
The liftgate handle switch will only
operate when the smart key is within
28 inches (0.7 m) from the liftgate
handle.
Panic button
Press and hold the Panic button (4)
for more than one second. The horn
sounds and hazard warning lights
blink for about 30 seconds. To cancel
the panic mode, press any button on
the Smart Key.
Start-up
You can start the vehicle without
inserting the key.
For information, refer to the
"Engine Start/Stop Button" sec-
tion in chapter 5.
To prevent damaging the smart key:
Keep the smart key in a cool, dryplace to avoid damage or mal-
function. Exposure to moisture
or high temperature may cause
the internal circuit of the smart
key to malfunction which may
not be covered under warranty.
Avoid dropping or throwing the smart key.
Protect the smart key from extreme temperatures.
Mechanical key
If the Smart Key does not operate
normally, you can lock or unlock the
driver's door by using the mechanical
key.
To remove the mechanical key from
the smart key FOB, slide the release
lever in the direction of the arrow (1)
and then pull the mechanical key (2)
outward.
To unlock the vehicle using the
mechanical key, insert the mechani-
cal key into the key hole in the driver
door (Refer to page 3-14).
To reinstall the mechanical key into
the FOB, insert the key in the top of
the key FOB and push inward until a
click sound is heard.
NOTICEiOPD046045
Page 109 of 557
3-20
Convenient features of your vehicle
Safe Exit Assist (SEA) System
(if equipped)
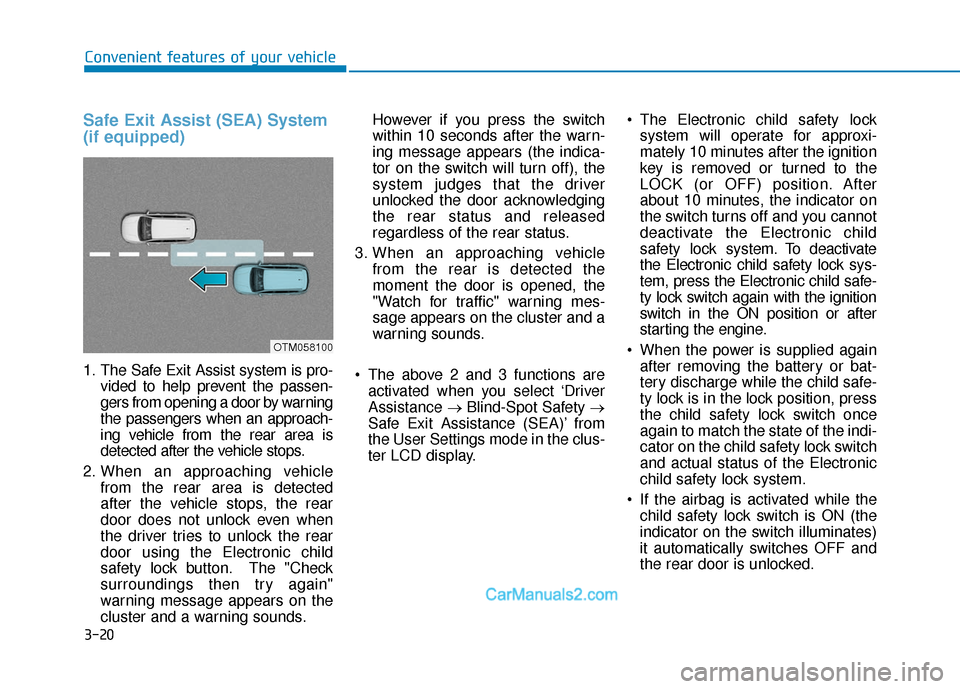
1. The Safe Exit Assist system is pro-vided to help prevent the passen-
gers from opening a door by warning
the passengers when an approach-
ing vehicle from the rear area is
detected after the vehicle stops.
2. When an approaching vehicle from the rear area is detected
after the vehicle stops, the rear
door does not unlock even when
the driver tries to unlock the rear
door using the Electronic child
safety lock button. The "Check
surroundings then try again"
warning message appears on the
cluster and a warning sounds. However if you press the switch
within 10 seconds after the warn-
ing message appears (the indica-
tor on the switch will turn off), the
system judges that the driver
unlocked the door acknowledging
the rear status and released
regardless of the rear status.
3. When an approaching vehicle from the rear is detected the
moment the door is opened, the
"Watch for traffic" warning mes-
sage appears on the cluster and a
warning sounds.
The above 2 and 3 functions are activated when you select ‘Driver
Assistance →Blind-Spot Safety →
Safe Exit Assistance (SEA)’ from
the User Settings mode in the clus-
ter LCD display. The Electronic child safety lock
system will operate for approxi-
mately 10 minutes after the ignition
key is removed or turned to the
LOCK (or OFF) position. After
about 10 minutes, the indicator on
the switch turns off and you cannot
deactivate the Electronic child
safety lock system. To deactivate
the Electronic child safety lock sys-
tem, press the Electronic child safe-
ty lock switch again with the ignition
switch in the ON position or after
starting the engine.
When the power is supplied again after removing the battery or bat-
tery discharge while the child safe-
ty lock is in the lock position, press
the child safety lock switch once
again to match the state of the indi-
cator on the child safety lock switch
and actual status of the Electronic
child safety lock system.
If the airbag is activated while the child safety lock switch is ON (the
indicator on the switch illuminates)
it automatically switches OFF and
the rear door is unlocked.
OTM058100
Page 112 of 557
3-23
Convenient features of your vehicle
3
This system helps to protect your vehi-
cle and valuables. The horn will sound
and the hazard warning lights will blink
continuously if any of the following
occur:
- A door is opened without using theremote key or smart key.
- The liftgate is opened without using the remote key or smart key.
- The engine hood is opened.
The alarm continues for 30 seconds
(repeats 2 times unless the system is
disarmed), then the system resets. To
turn off the alarm, unlock the doors
with the remote key or smart key.
The Theft Alarm System automatically
sets 30 seconds after you lock the
doors and the liftgate. For the system
to activate, you must lock the doors
and the liftgate from outside the vehi-
cle with the remote key or smart key or
by pressing the button on the outside
of the door handle with the smart key
in your possession.
The hazard warning lights will blink
and the chime will sound once to indi-
cate the system is armed.
Once the security system is set, open-
ing any door, the liftgate, or the hood without using the remote key or smart
key will cause the alarm to activate.
The Theft Alarm System will not set if
the hood, the liftgate, or any door is
not fully closed. If the system will not
set, check the hood, the liftgate, or the
doors are fully closed.
Do not attempt to alter this system or
add other devices to it.
Information
• Do not lock the doors until all pas-
sengers have left the vehicle. If the
remaining passenger leaves the
vehicle when the system is armed,
the alarm will be activated.
• If the vehicle is not disarmed with the remote key or smart key, open
the doors by using the mechanical
key and place the ignition switch in
the ON position (for remote key) or
start the engine (for smart key) by
directly pressing the ignition switch
with the smart key.
• If the system is disarmed by unlock- ing the vehicle, but neither a door or
the liftgate is opened within 30 sec-
onds, the doors will relock and the
system will rearm automatically.
i
Even if your vehicle is
equipped with the Rear
Occupant Alert (ROA) system,
always make sure you check
the rear seat before you get
off the vehicle.
The alert may not operate if:
- The movement does notcontinue for a certain period
of time or the movement is
small.
- The rear passenger is cov- ered with an obstacle such
as a blanket.
- Also, always be cautious of the passenger’s safety as
the detection function and
2nd alert may not operate
according to the surround-
ing environment and certain
conditions.
WARNING
T TH
H E
EF
FT
T -
-A
A L
LA
A R
RM
M
S
S Y
Y S
ST
T E
EM
M
Page 114 of 557

3-25
Convenient features of your vehicle
3
Recalling Positions from
Memory
1. Shift to P (Park) while the ignitionswitch is in the ON position.
2. Press the desired memory button (1 or 2). The system will beep
once, and then the driver's seat
position, side view mirror position,
instrument panel illumination
intensity and head-up display
height/brightness will automatical-
ly adjust to the stored positions.
3. "Driver 1 (or 2) settings applied" will appear on the cluster LCD dis-
play.
Information
• While recalling the "1" memoryposition, pressing the SET or 1 but-
ton temporarily stops the adjust-
ment of the recalled memory posi-
tion. Pressing the 2 button recalls
the "2" memory position. • While recalling the "2" memory
position, pressing the SET or 2 but-
ton temporarily stops the adjust-
ment of the recalled memory posi-
tion. Pressing the 1 button recalls
the "1" memory position.
• While recalling the stored positions, pressing one of the control buttons
for the driver's seat, side view mir-
ror, instrument panel illumination
or head-up display will cause the
movement of that component to stop
and move in the direction that the
control button is pressed.
Resetting the Driver's Seat
Memory System
Take the following procedures to reset
the driver's seat memory system,
when it does not operate properly.
To reset the driver's seat memo-ry system
1. Place the ignition switch to the ON
position, shift to P (Park), and
open the driver's door. 2. Operate the control switch to set
the driver's seat and seatback to
the foremost position.
3. Simultaneously press the SET button and push forward the seat
movement switch over 2 seconds.
While resetting the driver's seatmemory system
1. It starts with the notification sound.
2. The driver's seat and seatback is
adjusted to the rearward position
with the notification sound.
3. The driver's seat and seatback is re-adjusted to the default position
(central position) with the notifica-
tion sound.
However, in the following cases, the
resetting procedure and the notifica-
tion sound may stop.
- The memory button is pressed.
- The control switch is operated.
- The gear is shifted out of P (Park).
- The driving speed exceeds 2 mph (3 km/h).
- The driver's door is closed.
i
Page 115 of 557
3-26
Convenient features of your vehicle
Reattempt to do the resetting procedure again, when the reset-
ting procedure incompletely
stops or the notification sound
do not stop.
Make sure that there is no obsta- cle around the driver's seat in
advance of resetting the driver's
seat memory system.
Easy Access Function
The system will move the driver's
seat automatically as follows:
- It will move the driver’s seat rear- ward when the ignition key is
removed.
- It will move the driver’s seat for- ward when the ignition key is
inserted.
- It will move the driver’s seat rear- ward when the Engine Start/Stop
button is pressed to the OFF posi-
tion. - It will move the driver’s seat for-
ward when the Engine Start/Stop
button is pressed to the ACC or
START position.
You can activate or deactivate the
Easy Access Function from the User
Settings mode in the cluster LCD dis-
play.
'Convenience →Seat Easy Access →
Off/Normal/Extended'.
For more details, refer to "LCD
Display" in this chapter.
NOTICE
Driver should be cautious when
using this function to assure no
injury to passenger or child on
the back seat. In case of emer-
gency the driver has to stop
movement of front seat (when
easy access feature is activat-
ed) by pressing SET button or
any of the driver seat control
switches.
CAUTION