Page 511 of 557

7-69
7
Maintenance
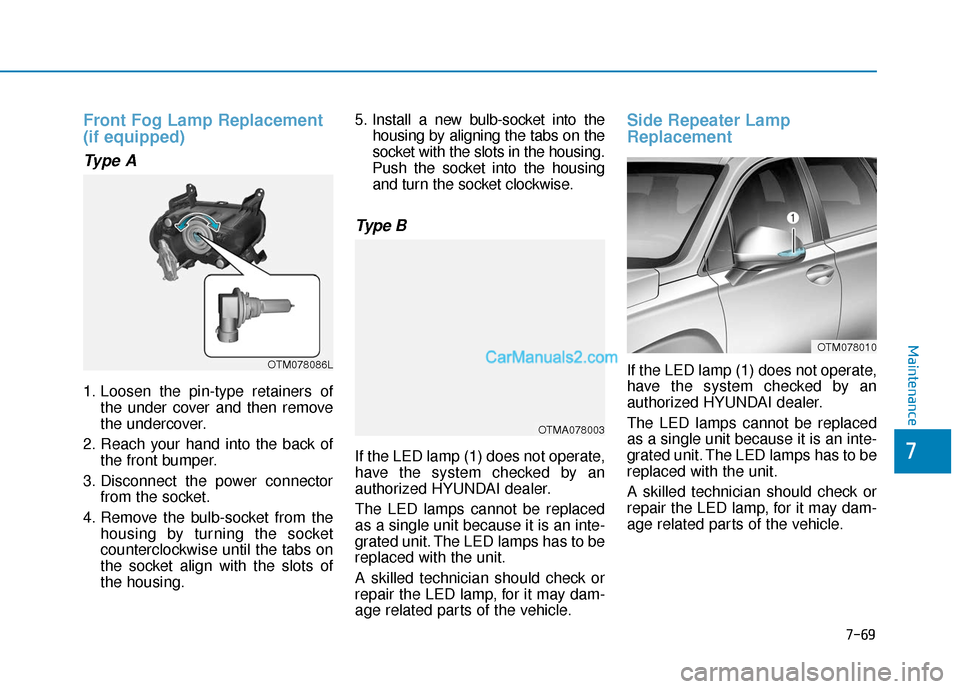
Front Fog Lamp Replacement
(if equipped)
Type A
1. Loosen the pin-type retainers ofthe under cover and then remove
the undercover.
2. Reach your hand into the back of the front bumper.
3. Disconnect the power connector from the socket.
4. Remove the bulb-socket from the housing by turning the socket
counterclockwise until the tabs on
the socket align with the slots of
the housing. 5. Install a new bulb-socket into the
housing by aligning the tabs on the
socket with the slots in the housing.
Push the socket into the housing and turn the socket clockwise.
Type B
If the LED lamp (1) does not operate,
have the system checked by an
authorized HYUNDAI dealer.
The LED lamps cannot be replaced
as a single unit because it is an inte-
grated unit. The LED lamps has to be
replaced with the unit.
A skilled technician should check or
repair the LED lamp, for it may dam-
age related parts of the vehicle.
Side Repeater Lamp
Replacement
If the LED lamp (1) does not operate,
have the system checked by an
authorized HYUNDAI dealer.
The LED lamps cannot be replaced
as a single unit because it is an inte-
grated unit. The LED lamps has to be
replaced with the unit.
A skilled technician should check or
repair the LED lamp, for it may dam-
age related parts of the vehicle.
OTM078010
OTMA078003
OTM078086L
7
Maintenance
Page 512 of 557
Rear Combination Light Bulb
Replacement
Type A
(1) Stop/Tail lamp
(2) Tail lamp
(3) Side marker
(4) Turn signal lamp
(5) Backup lamp
Stop/Tail lamp and side marker
lamp
1. Turn off the engine.
2. Open the liftgate.
3. Remove the cover using a flat-blade screwdriver. 4. Loosen the lamp assembly retain-
ing screws with a cross-tip screw-
driver.
5. Remove the rear combination lamp assembly from the body of
the vehicle.
OTM078006
OTMA078004
OTM078005
Maintenance
7-70
Page 514 of 557
4. Remove the socket from theassembly by turning the socket
counterclockwise until the tabs on
the socket align with the slots on
the assembly.
5. Remove the bulb from the socket by pulling it straight out.
6. Insert a new bulb by pushing it in into the socket.
7. Install the socket into the assem- bly by aligning the tabs on the
socket with the slots in the assem-
bly. Push the socket into the
assembly and turn the socket
clockwise.
8. Reinstall the lamp assembly to the body of the vehicle.
Turn signal lamp and back up lamp
If the light bulb does not operate,
have the vehicle checked by an
authorized HYUNDAI dealer.
Type B
(1) Tail lamp
(2) Stop lamp
(3) Side marker
(4) Turn signal lamp
(5) Back up lamp
OTMA078050
OTM078007
Maintenance
7-72
Page 515 of 557

Tail lamp, stop lamp and side
marker lamp
If the LED lamp does not operate,
have the system checked by an
authorized HYUNDAI dealer.
The LED lamps cannot replaced as a
single unit because it is an integrated
unit. The LED lamps has to be
replaced with the unit.
A skilled technician should check or
repair the LED lamp, for it may dam-
age related parts of the vehicle.
Turn signal lamp and back up lamp
If the light bulb does not operate,
have the vehicle checked by an
authorized HYUNDI dealer.
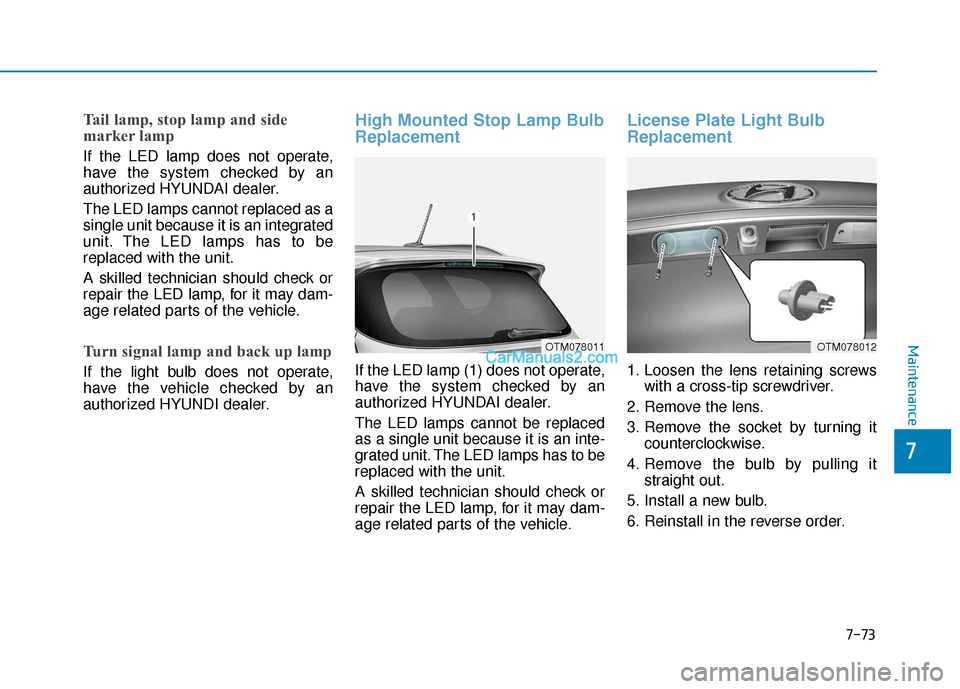
High Mounted Stop Lamp Bulb
Replacement
If the LED lamp (1) does not operate,
have the system checked by an
authorized HYUNDAI dealer.
The LED lamps cannot be replaced
as a single unit because it is an inte-
grated unit. The LED lamps has to be
replaced with the unit.
A skilled technician should check or
repair the LED lamp, for it may dam-
age related parts of the vehicle.
License Plate Light Bulb
Replacement
1. Loosen the lens retaining screwswith a cross-tip screwdriver.
2. Remove the lens.
3. Remove the socket by turning it counterclockwise.
4. Remove the bulb by pulling it straight out.
5. Install a new bulb.
6. Reinstall in the reverse order.
OTM078011OTM078012Maintenance
7-73
7
Page 524 of 557

Cleaning the upholstery andinterior trim
Vinyl (if equipped)
Remove dust and loose dirt from
vinyl with a whisk broom or vacuum
cleaner. Clean vinyl surfaces with a
vinyl cleaner.
Fabric (if equipped)
Remove dust and loose dirt from fab-
ric with a whisk broom or vacuum
cleaner. Clean with a mild soap solu-
tion recommended for upholstery or
carpets. Remove fresh spots imme-
diately with a fabric spot cleaner. If
fresh spots do not receive immediate
attention, the fabric can be stained
and its color can be affected. Also, its
fire-resistant properties can be
reduced if the material is not proper-
ly maintained.
Using anything but recommended
cleaners and procedures may
affect the fabric's appearance and
fire-resistant properties.
Leather (if equipped)
Features of seat leather
- Leather is made from the outerskin of an animal, which goes
through a special process to be
available for use. Since it is a
natural product, each part differs
in thickness or density.
Wrinkles may appear as a natu-
ral result of stretching and
shrinking depending on the tem-
perature and humidity.
- The seat is made of stretchable fabric to improve comfort.
- The parts contacting the body are curved and the side support-
ing area is high which provides
driving comfort and stability.
- Wrinkles may appear naturally from usage. It is not a fault of the
products.
NOTICE
Wrinkles or abrasions which
appear naturally from usage
are not covered by warranty.
Belts with metallic acces-
sories, zippers or keys inside
the back pocket may damage
the seat fabric.
Make sure not to wet the seat.
It may change the nature of
natural leather.
Jeans or clothes which could
bleach may contaminate the
surface of the seat covering
fabric.
CAUTION
Maintenance
7-82
Page 526 of 557

The emission control system of your
vehicle is covered by a written limited
warranty. Please see the warranty
information contained in the Owner’s
Handbook & Warranty Information
booklet in your vehicle.
Your vehicle is equipped with an
emission control system to meet all
applicable emission regulations.
There are three emission control
systems, as follows.
(1) Crankcase emission control sys-tem
(2) Evaporative emission control sys- tem
(3) Exhaust emission control system
In order to ensure the proper func-
tion of the emission control systems,
it is recommended that you have
your vehicle inspected and main-
tained by an authorized HYUNDAI
dealer in accordance with the main-
tenance schedule in this manual. For the Inspection and
Maintenance Test (with Electronic
Stability Control (ESC) system)
To prevent the vehicle from mis-
firing during dynamometer test-
ing, turn the Electronic Stability
Control (ESC) system off by
pressing the ESC switch (ESC
OFF light illuminated).
After dynamometer testing is completed, turn the ESC system
back on by pressing the ESC
switch again.1. Crankcase Emission Control System
The positive crankcase ventilation
system is employed to prevent air
pollution caused by blow-by gases
being emitted from the crankcase.
This system supplies fresh filtered air
to the crankcase through the air
intake hose. Inside the crankcase,
the fresh air mixes with blow-by
gases, which then pass through the
PCV valve into the induction system.
2. Evaporative Emission ControlSystem Including Onboard
Refueling Vapor Recovery
(ORVR)
The Evaporative Emission Control
System is designed to prevent fuel
vapors from escaping into the atmos-
phere. The ORVR system is
designed to allow the vapors from
the fuel tank to be loaded into a can-
ister while refueling at the gas sta-
tion, preventing the escape of fuel
vapors into the atmosphere.
NOTICE
E EM
M I
IS
S S
SI
IO
O N
N
C
C O
O N
NT
TR
R O
O L
L
S
S Y
Y S
ST
T E
EM
M
Maintenance
7-84
Page 533 of 557
B
BU
U L
LB
B
W
W A
AT
TT
TA
A G
G E
E
88
Specifications, Consumer information and Reporting safety defects
Light Bulb Bulb Type Wattage
FrontType A
Headlamp
Low HB3 60
High HB3 60
Turn signal lamp PY28W28
Type B
Headlamp Low/High LED LED
Low/High (sub) LED LED
Turn signal lampPY28W28
Side marker lamp LEDLED
Parking lamp LEDLED
Daytime Running Lamp (DRL) LEDLED
Fog lamp Type A
H835
Type B LEDLED
Rear Type A
Tail lamp
W5W5
Tail/Stop lamp P21/5W5/21
Side marker lamp W5W5
Type B
Tail lamp LEDLED
Tail/Stop lamp LEDLED
Side marker lampLEDLED
Turn signal lamp PY21W21
Back up lamp W16W16
License plate lamp W5W5
High mounted stop lamp LEDLED
8-3