2020 Hyundai Santa Fe Eco button
[x] Cancel search: Eco buttonPage 66 of 557

2-48
Safety system of your vehicle
5. Remove as much slack from the belt as possible by pushing down
on the child restraint system while
feeding the shoulder belt back into
the retractor.
6. Push and pull on the child restraint system to confirm that the seat
belt is holding it firmly in place. If it
is not, release the seat belt and
repeat steps 2 through 6.
7. Double check that the retractor is in the "Automatic Locking" mode
by attempting to pull more of the
seat belt out of the retractor. If you
cannot, the retractor is in the
"Automatic Locking" mode.
If your CRS manufacturer instructs or
recommends you to use a tether
anchor with the lap/shoulder belt,
refer to the previous pages for more
information. When the seat belt is allowed to
retract to its fully stowed position,
the retractor will automatically
switch from the "Automatic
Locking" mode to the emergency
lock mode for normal adult usage.
To remove the child restraint, press
the release button on the buckle and
then pull the lap/shoulder belt out of
the restraint and allow the seat belt
to retract fully.
NOTICE
If the retractor is not in the
"Automatic Locking" mode, the
child restraint can move when
your vehicle turns or stops sud-
denly. A child can be seriously
injured or killed if the child
restraint is not properly anchored
in the car, including manually
pulling the seat belt all the way
out to shift the rectractor to the
"Automatic Locking" mode.
WARNING
Page 71 of 557
2-53
Safety system of your vehicle
2
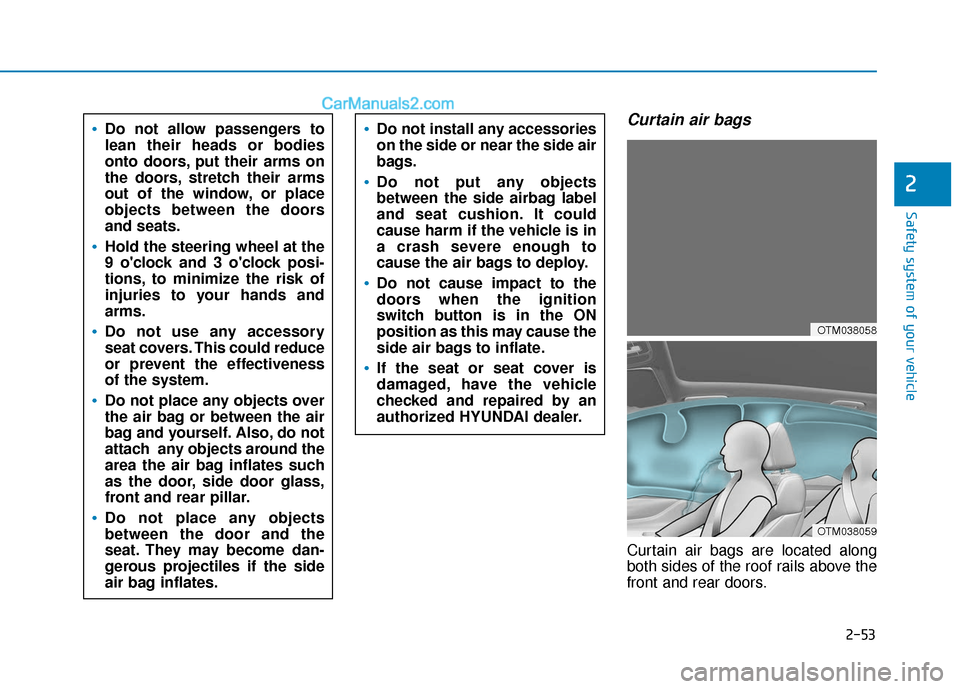
Curtain air bags
Curtain air bags are located along
both sides of the roof rails above the
front and rear doors.
Do not allow passengers to
lean their heads or bodies
onto doors, put their arms on
the doors, stretch their arms
out of the window, or place
objects between the doors
and seats.
Hold the steering wheel at the
9 o'clock and 3 o'clock posi-
tions, to minimize the risk of
injuries to your hands and
arms.
Do not use any accessory
seat covers. This could reduce
or prevent the effectiveness
of the system.
Do not place any objects over
the air bag or between the air
bag and yourself. Also, do not
attach any objects around the
area the air bag inflates such
as the door, side door glass,
front and rear pillar.
Do not place any objects
between the door and the
seat. They may become dan-
gerous projectiles if the side
air bag inflates.
Do not install any accessories
on the side or near the side air
bags.
Do not put any objects
between the side airbag label
and seat cushion. It could
cause harm if the vehicle is in
a crash severe enough to
cause the air bags to deploy.
Do not cause impact to the
doors when the ignition
switch button is in the ON
position as this may cause the
side air bags to inflate.
If the seat or seat cover is
damaged, have the vehicle
checked and repaired by an
authorized HYUNDAI dealer.
OTM038058
OTM038059
Page 73 of 557

2-55
Safety system of your vehicle
2
10.Side pressure sensors
11.Seat belt buckle sensor
12.Emergency Fastening DeviceSystem
13.Occupant classification system
The SRSCM (Supplemental Restraint
System Control Module) continually
monitors all SRS components while
the ignition switch is in the ON position
to determine if a crash impact is
severe enough to require air bag
deployment or pre-tensioner seat belt
deployment.SRS warning light
The SRS (Supplement Restraint
System) air bag warning light on the
instrument panel displays the air bag
symbol depicted in the illustration.
The system checks the air bag elec-
trical system for malfunctions. The
light indicates that there is a potential
malfunction with your air bag system,
which could include your side and
curtain air bags used for rollover pro-
tection.
If your SRS malfunctions, the air
bag may not inflate properly dur-
ing an accident increasing the
risk of serious injury or death.
If any of the following condi-
tions occur, your SRS is mal-
functioning:
The light does not turn on for
approximately six seconds
when the Engine Start/Stop
button is in the ON position.
The light stays on after illumi-
nating for approximately six
seconds.
The light comes on while the
vehicle is in motion.
The light blinks when the
engine is running.
Have an authorized HYUNDAI
dealer inspect the SRS as soon
as possible if any of these con-
ditions occur.
WARNING
Page 82 of 557
2-64
Safety system of your vehicle
Proper seated position for OCS
If the "PASSENGER AIR BAG OFF"
indicator is on when an adult is seat-
ed in the front passenger seat, place
the Engine Start/Stop button in the
OFF position and ask the passenger
to sit properly (sitting upright with the
seat back in an upright position, cen-
tered on the seat cushion with their
seat belt on, legs comfortably
extended and their feet on the floor).
Restart the engine and have the per-
son remain in that position. This will
allow the system to detect the person
and to enable the passenger air bag.
If the "PASSENGER AIR BAG OFF"
indicator is still on, ask the passen-
ger to move to the rear seat.The "PASSENGER AIR BAG OFF"
indicator illuminates for approxi-
mately 4 seconds after the Engine
Start/Stop button is in the ON
position or after the engine is
started. If the front passenger seat
is occupied, the OCS will then
classify the front passenger after
several more seconds.
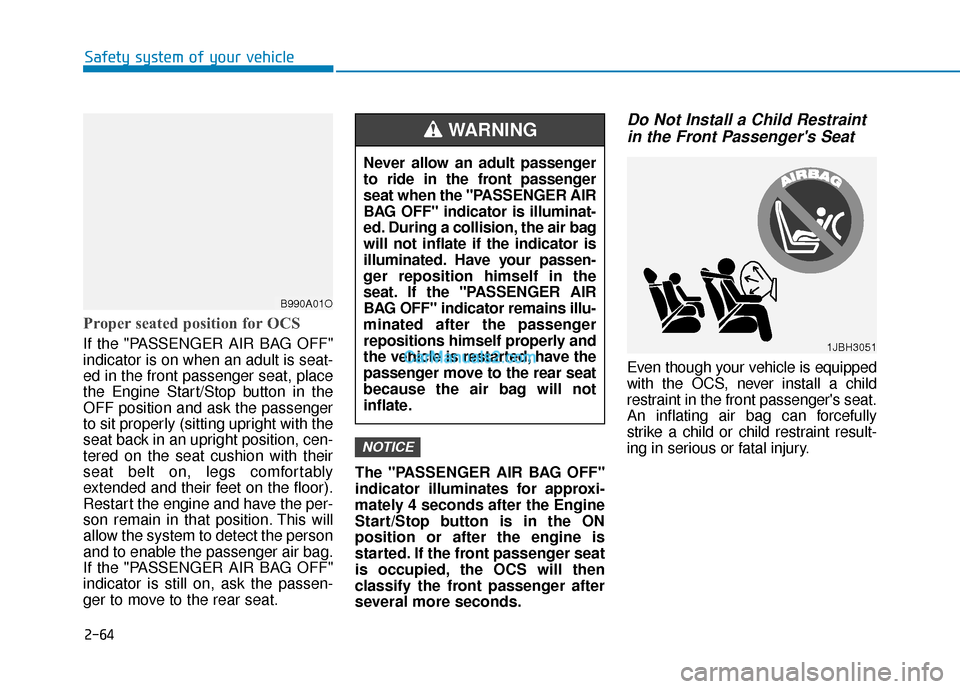
Do Not Install a Child Restraint
in the Front Passenger's Seat
Even though your vehicle is equipped
with the OCS, never install a child
restraint in the front passenger's seat.
An inflating air bag can forcefully
strike a child or child restraint result-
ing in serious or fatal injury.
NOTICE
B990A01O
Never allow an adult passenger
to ride in the front passenger
seat when the "PASSENGER AIR
BAG OFF" indicator is illuminat-
ed. During a collision, the air bag
will not inflate if the indicator is
illuminated. Have your passen-
ger reposition himself in the
seat. If the "PASSENGER AIR
BAG OFF" indicator remains illu-
minated after the passenger
repositions himself properly and
the vehicle is restarted, have the
passenger move to the rear seat
because the air bag will not
inflate.
WARNING
1JBH3051
Page 93 of 557
3-4
Convenient features of your vehicle
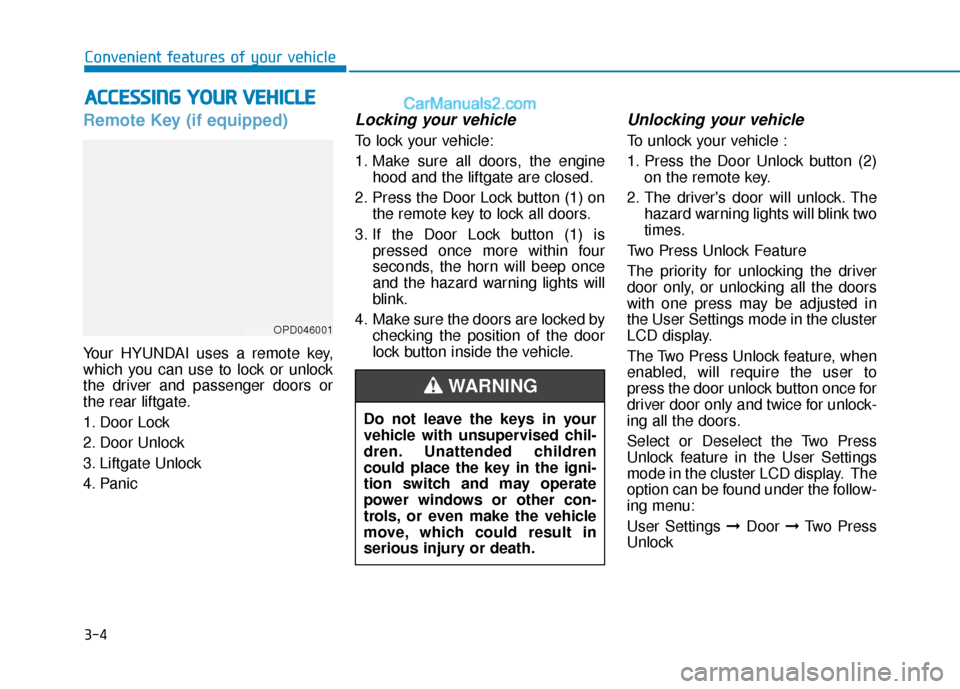
Remote Key (if equipped)
Your HYUNDAI uses a remote key,
which you can use to lock or unlock
the driver and passenger doors or
the rear liftgate.
1. Door Lock
2. Door Unlock
3. Liftgate Unlock
4. Panic
Locking your vehicle
To lock your vehicle:
1. Make sure all doors, the enginehood and the liftgate are closed.
2. Press the Door Lock button (1) on the remote key to lock all doors.
3. If the Door Lock button (1) is pressed once more within four
seconds, the horn will beep once
and the hazard warning lights will
blink.
4. Make sure the doors are locked by checking the position of the door
lock button inside the vehicle.
Unlocking your vehicle
To unlock your vehicle :
1. Press the Door Unlock button (2)on the remote key.
2. The driver's door will unlock. The hazard warning lights will blink two
times.
Two Press Unlock Feature
The priority for unlocking the driver
door only, or unlocking all the doors
with one press may be adjusted in
the User Settings mode in the cluster
LCD display.
The Two Press Unlock feature, when
enabled, will require the user to
press the door unlock button once for
driver door only and twice for unlock-
ing all the doors.
Select or Deselect the Two Press
Unlock feature in the User Settings
mode in the cluster LCD display. The
option can be found under the follow-
ing menu:
User Settings ➞ Door ➞Two Press
Unlock
A A C
CC
CE
E S
SS
SI
IN
N G
G
Y
Y O
O U
UR
R
V
V E
EH
H I
IC
C L
LE
E
OPD046001
Do not leave the keys in your
vehicle with unsupervised chil-
dren. Unattended children
could place the key in the igni-
tion switch and may operate
power windows or other con-
trols, or even make the vehicle
move, which could result in
serious injury or death.
WARNING
Page 94 of 557
3-5
Convenient features of your vehicle
3
The Two Press Unlock feature can
also be enabled or disabled by press-
ing the door lock and unlock buttons
simultaneously on the Key FOB:
Press and hold both the Door Lock
button and the Door Unlock button
simultaneously until the hazard
warning lights blink.
This will enable or disable the Two
Press Unlock feature. Repeat this
procedure to enable/disable the
mode again.
Information
After unlocking the doors, the doors
will automatically relock after 30 sec-
onds unless a door is opened.
Liftgate unlocking
To unlock the liftgate :
1. Press and hold the Liftgate Unlockbutton (3) on the remote key for
more than one second.
2. The hazard warning lights will blink two times and the liftgate will
be unlocked.
3. Once the liftgate is opened and then closed, the liftgate will auto-
matically re-lock after 30 seconds.
Information
The word "HOLD" is written on the
button to inform you that you must
press and hold the button for more
than one second.
Panic button
Press and hold the Panic button (4)
for more than one second. The horn
sounds and hazard warning lights
flash for about 30 seconds.
To cancel the panic mode, press any
button on the remote key.
Start-up
For information, refer to the "Key
Ignition Switch" section in chapter 5.
To prevent damaging the remote
key:
• Keep the remote key away fromwater or any liquid and fire.
Internal circuits may malfunc-
tion if the inside of the remote
key gets damp (from liquids or
moisture) or if it is heated. This
can exclude the remote key from
being covered under warranty.
Avoid dropping or throwing the remote key.
Protect the remote key from extreme temperatures.
NOTICE
ii
Page 98 of 557
3-9
Convenient features of your vehicle
3
Two Press Unlock Feature
The priority for unlocking the driver
door only, or unlocking all the doors
with one press may be adjusted in
the User Settings mode in the cluster
LCD display.
The Two Press Unlock feature, when
enabled, will require the user to
press the door unlock button once for
driver door only and twice for unlock-
ing all the doors.
Select or Deselect the Two Press
Unlock feature in the User Settings
mode in the cluster LCD display. The
option can be found under the follow-
ing menu:
User Settings ➞Door ➞Two Press
Unlock The Two Press Unlock feature can
also be enabled or disabled by
pressing the door lock and unlock
buttons simultaneously on the Key
FOB:
Press and hold both the Door Lock
button and the Door Unlock button
simultaneously until the hazard
warning lights blink.
This will enable or disable the Two
Press Unlock feature. Repeat this
procedure to enable/disable the
mode again.
Information
• The door handle buttons will only
operate when the smart key is with-
in 28-40 inches (0.7~1m) from the
outside door handle.
• Either the driver or front passenger door can be opened with the door
handle button when the smart key
is within this range.
• If you press the front passenger outside door handle with the smart
key in your possession, all the doors
will unlock.
Opening the liftgate
Non-power liftgate
To unlock and open the liftgate:
1. Make sure you have the smart keyin your possession.
2. Press either the liftgate handle release switch on the vehicle or
press and hold the Liftgate Unlock
button on the smart key for more
than one second. The hazard
warning lights will blink two times
and the liftgate latch will unlock.
3. Once the liftgate is opened and then closed, the liftgate will auto-
matically re-lock after 30 seconds.
Information
• The liftgate handle switch will onlyoperate when the smart key is with-
in 28 inches (0.7 m) from the lift-
gate handle.
• The Liftgate Unlock button (3) will only unlock the liftgate. It will not
release the latch and open the lift-
gate automatically. If the Liftgate
Unlock button is used, someone
must still press the liftgate handle
switch to open the liftgate.
i
i
Page 99 of 557

3-10
Convenient features of your vehicle
Power liftgate
To unlock and open the liftgate:
1. Make sure you have the smart keyin your possession.
2. Press either the liftgate handle release switch on the vehicle or
press and hold the Liftgate Unlock
button on the smart key for more
than one second. The hazard
warning lights will blink two times
and the liftgate latch will open.
3. Once the liftgate is opened and then closed, the liftgate will auto-
matically re-lock after 30 seconds.
Information
The liftgate handle switch will only
operate when the smart key is within
28 inches (0.7 m) from the liftgate
handle.
Panic button
Press and hold the Panic button (4)
for more than one second. The horn
sounds and hazard warning lights
blink for about 30 seconds. To cancel
the panic mode, press any button on
the Smart Key.
Start-up
You can start the vehicle without
inserting the key.
For information, refer to the
"Engine Start/Stop Button" sec-
tion in chapter 5.
To prevent damaging the smart key:
Keep the smart key in a cool, dryplace to avoid damage or mal-
function. Exposure to moisture
or high temperature may cause
the internal circuit of the smart
key to malfunction which may
not be covered under warranty.
Avoid dropping or throwing the smart key.
Protect the smart key from extreme temperatures.
Mechanical key
If the Smart Key does not operate
normally, you can lock or unlock the
driver's door by using the mechanical
key.
To remove the mechanical key from
the smart key FOB, slide the release
lever in the direction of the arrow (1)
and then pull the mechanical key (2)
outward.
To unlock the vehicle using the
mechanical key, insert the mechani-
cal key into the key hole in the driver
door (Refer to page 3-14).
To reinstall the mechanical key into
the FOB, insert the key in the top of
the key FOB and push inward until a
click sound is heard.
NOTICEiOPD046045