2020 FORD EXPEDITION battery
[x] Cancel search: batteryPage 164 of 542
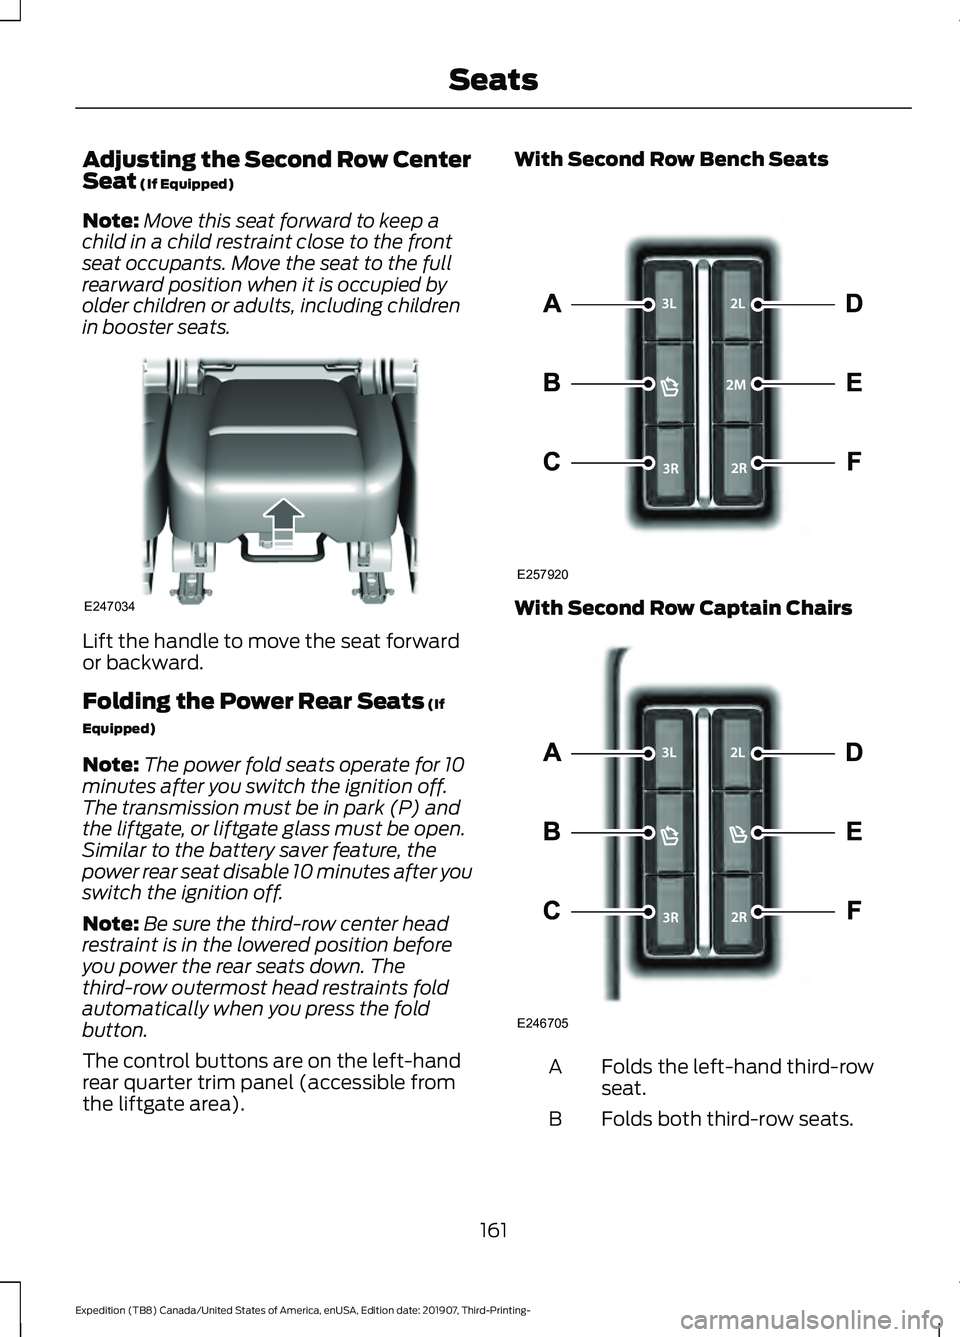
Adjusting the Second Row Center
Seat (If Equipped)
Note: Move this seat forward to keep a
child in a child restraint close to the front
seat occupants. Move the seat to the full
rearward position when it is occupied by
older children or adults, including children
in booster seats. Lift the handle to move the seat forward
or backward.
Folding the Power Rear Seats
(If
Equipped)
Note: The power fold seats operate for 10
minutes after you switch the ignition off.
The transmission must be in park (P) and
the liftgate, or liftgate glass must be open.
Similar to the battery saver feature, the
power rear seat disable 10 minutes after you
switch the ignition off.
Note: Be sure the third-row center head
restraint is in the lowered position before
you power the rear seats down. The
third-row outermost head restraints fold
automatically when you press the fold
button.
The control buttons are on the left-hand
rear quarter trim panel (accessible from
the liftgate area). With Second Row Bench Seats
With Second Row Captain Chairs
Folds the left-hand third-row
seat.
A
Folds both third-row seats.
B
161
Expedition (TB8) Canada/United States of America, enUSA, Edition date: 201907, Third-Printing- SeatsE247034 E257920 E246705
Page 168 of 542
UNIVERSAL GARAGE DOOR
OPENER
HomeLink Wireless Control
System
WARNING: Do not use the system
with any garage door opener that does
not have the safety stop and reverse
feature as required by U.S. Federal
Safety Standards (this includes any
garage door opener manufactured
before April 1, 1982). A garage door
opener which cannot detect an object,
signaling the door to stop and reverse,
does not meet current federal safety
standards. Using a garage door opener
without these features increases the risk
of serious injury or death.
Note: Make sure that the garage door and
security device are free from obstruction
when you are programming. Do not program
the system with the vehicle in the garage.
Note: Make sure you keep the original
remote control transmitter for use in other
vehicles as well as for future system
programming.
Note: We recommend that upon the sale
or lease termination of your vehicle, you
erase the programmed function buttons for
security reasons. See Erasing the Function
Button Codes
later in this section.
Note: You can program a maximum of
three devices. To change or replace any of
the three devices after it has been initially
programmed, you must first erase the
current settings. See Erasing the Function
Button Codes
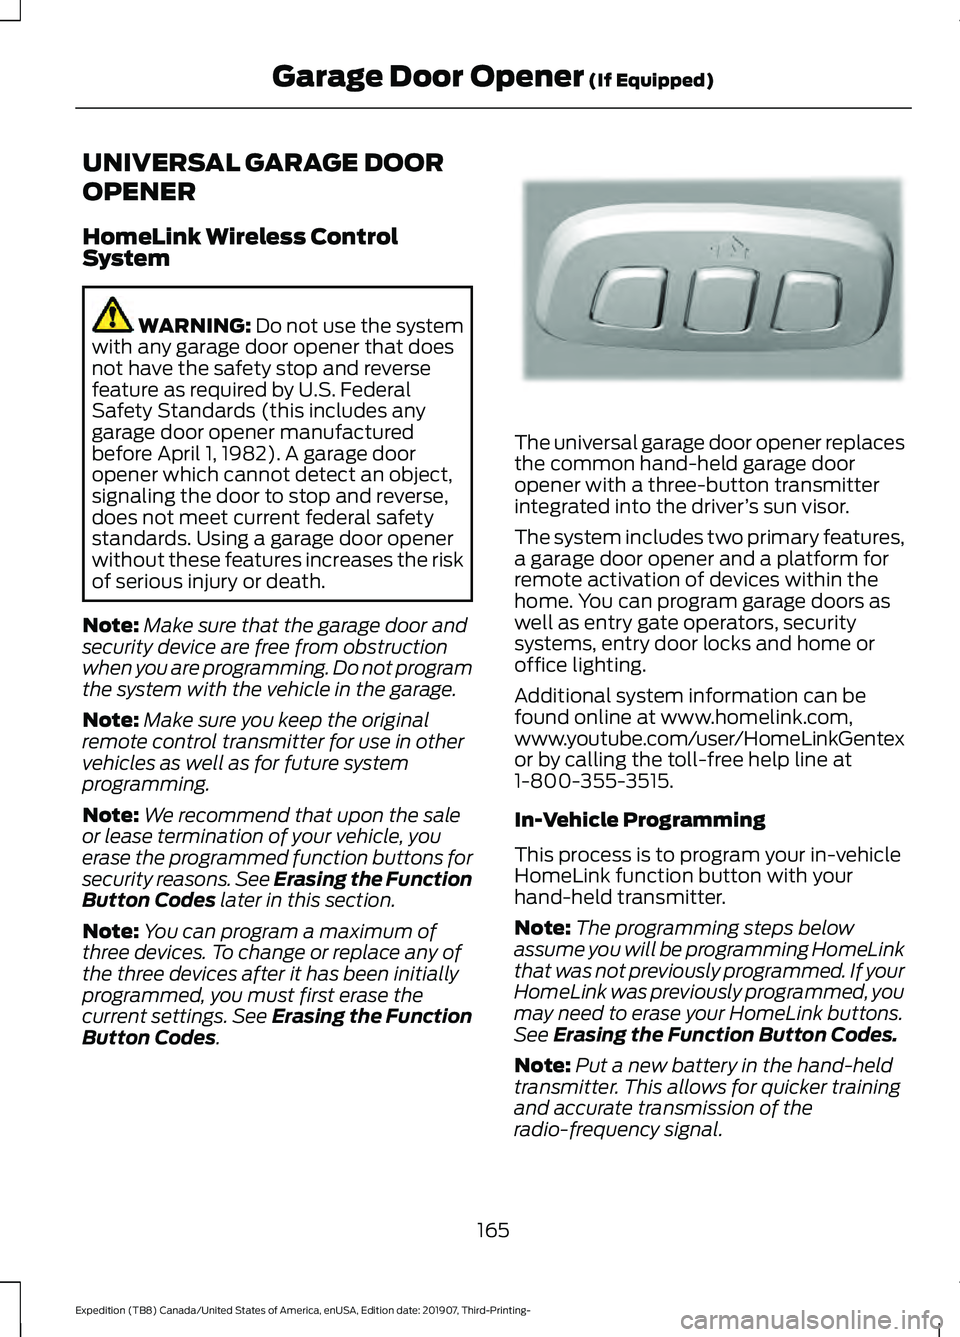
. The universal garage door opener replaces
the common hand-held garage door
opener with a three-button transmitter
integrated into the driver
’s sun visor.
The system includes two primary features,
a garage door opener and a platform for
remote activation of devices within the
home. You can program garage doors as
well as entry gate operators, security
systems, entry door locks and home or
office lighting.
Additional system information can be
found online at www.homelink.com,
www.youtube.com/user/HomeLinkGentex
or by calling the toll-free help line at
1-800-355-3515.
In-Vehicle Programming
This process is to program your in-vehicle
HomeLink function button with your
hand-held transmitter.
Note: The programming steps below
assume you will be programming HomeLink
that was not previously programmed. If your
HomeLink was previously programmed, you
may need to erase your HomeLink buttons.
See Erasing the Function Button Codes.
Note: Put a new battery in the hand-held
transmitter. This allows for quicker training
and accurate transmission of the
radio-frequency signal.
165
Expedition (TB8) Canada/United States of America, enUSA, Edition date: 201907, Third-Printing- Garage Door Opener
(If Equipped)E188211
Page 172 of 542
12 Volt DC Power Point
WARNING: Do not plug optional
electrical accessories into the cigar
lighter socket. Incorrect use of the cigar
lighter can cause damage not covered
by the vehicle warranty, and can result
in fire or serious injury.
Note: When you switch the ignition on, you
can use the socket to power 12 volt
appliances with a maximum current rating
of 15 amps.
Note: If the power supply does not work
after you switch the ignition off, switch the
ignition on.
Note: Do not hang any accessory from the
accessory plug.
Note: Do not use the power point over the
vehicle capacity of 12 volt DC 180 watts or
a fuse may blow.
Note: Always keep the power point caps
closed when not in use.
Do not insert objects other than an
accessory plug into the power point. This
damages the power point and may blow
the fuse.
Run the vehicle for full capacity use of the
power point.
To prevent the battery from running out of
charge:
• Do not use the power point longer than
necessary when the vehicle is not
running.
• Do not leave devices plugged in
overnight or when you park your vehicle
for extended periods. USB Port and Power Point
Locations
USB Ports and Power Points may be in the
following locations:
•
On the lower instrument panel.
• Inside the center console.
• On the front of the center console.
• On the rear of the center console.
• In the cargo area.
• On the passenger side floor panel.
• 3rd row on the quarter trim panels.
Note: Some of the USB ports may not have
data transfer capabilities.
Note: Incorrect use of the USB ports can
cause damage not covered by the vehicle
warranty.
110 Volt AC Power Point
(If Equipped) WARNING:
Do not keep electrical
devices plugged in the power point
whenever the device is not in use. Do not
use any extension cord with the 110 volt
AC power point, since it will defeat the
safety protection design. Doing so may
cause the power point to overload due
to powering multiple devices that can
reach beyond the 150 watt load limit and
could result in fire or serious injury.
Note: The power point turns off when you
switch off the ignition, when the vehicle is
not in accessory mode or when the battery
voltage drops below 11 volts.
You can use the power point for electric
devices that require up to 150 watts. It is
on the rear of the center console.
169
Expedition (TB8) Canada/United States of America, enUSA, Edition date: 201907, Third-Printing- Auxiliary Power Points
Page 174 of 542
This device complies with Industry Canada
licence-exempt RSS standard(s).
Operation is subject to:
•
This device may not cause interference.
• This device must accept any
interference, including interference that
may cause undesired operation of the
device.
Note: Devices without built-in Qi wireless
charging receivers require an additional Qi
receiver or sleeve.
Note: For compatible devices with built-in
Qi wireless charging capability, the charging
performance may be affected if your device
is in a case. It may be necessary to remove
the case to wirelessly charge your device.
The system supports one Qi wireless
charging compatible device on the
charging area.
Keep the charging area clean and remove
foreign objects prior to charging a device.
Do not place items with a magnetic strip,
for example passports, parking tickets or
credit cards, near the charging area when
charging a device. Damage may occur to
the magnetic strip. Do not place metal objects, for example
remote controls, coins and candy
wrappers, on or near the charging area
when charging a device. Metal objects may
heat up and degrade the charging
performance.
Note:
The device controls the rate of
charge, or charging power. During charging,
the device and the charger may heat up, this
is normal. If the battery gets hotter than
usual, the charger may stop charging. The charging area is on the
center console or lower
instrument panel. See Center
Console (page 172).
You can charge a device if the vehicle is
on, when in accessory mode, or anytime
SYNC is on.
To begin charging, place the device on the
center of the charging surface with the
charging side down. The charging stops
after your device reaches a full charge.
Note: If the system detects a foreign object
or if the device is misaligned on the charging
area, a message appears in the display.
Note: Software and firmware updates may
affect device compatibility, including the
use of unofficial software or firmware. You
should verify charging functionality with your
specific devices when in your vehicle. Description
Behavior
Message
This message appears whenwireless charging begins.
Message on screen display
or pop-up window.
Wireless Charger Active
The system stops chargingyour device if the system detects the phone is
misaligned, or a foreign
metal object is on the char- ging surface.
Pop-up window.
Charging Terminated
Phone misaligned or object
between phone and charger
detected. Correct the condi- tion to resume charging.
171
Expedition (TB8) Canada/United States of America, enUSA, Edition date: 201907, Third-Printing- Auxiliary Power PointsE297549
Page 176 of 542
GENERAL INFORMATION
WARNING: Extended idling at high
engine speeds can produce very high
temperatures in the engine and exhaust
system, creating the risk of fire or other
damage. WARNING:
Do not park, idle or
drive your vehicle on dry grass or other
dry ground cover. The emission system
heats up the engine compartment and
exhaust system, creating the risk of fire. WARNING: Do not start the engine
in a closed garage or in other enclosed
areas. Exhaust fumes can be toxic.
Always open the garage door before you
start the engine. WARNING:
Exhaust leaks may
result in entry of harmful and potentially
lethal fumes into the passenger
compartment. If you smell exhaust
fumes inside your vehicle, have your
vehicle inspected immediately. Do not
drive if you smell exhaust fumes.
If you disconnect the battery, your vehicle
may exhibit some unusual driving
characteristics for approximately
5 mi
(8 km) after you reconnect it. This is
because the engine management system
must realign itself with the engine. You
can disregard any unusual driving
characteristics during this period.
The powertrain control system meets all
Canadian interference-causing equipment
standard requirements regulating the
impulse electrical field or radio noise.
When you start the engine, avoid pressing
the accelerator pedal before and during
operation. Only use the accelerator pedal
when you have difficulty starting the
engine. IGNITION SWITCH
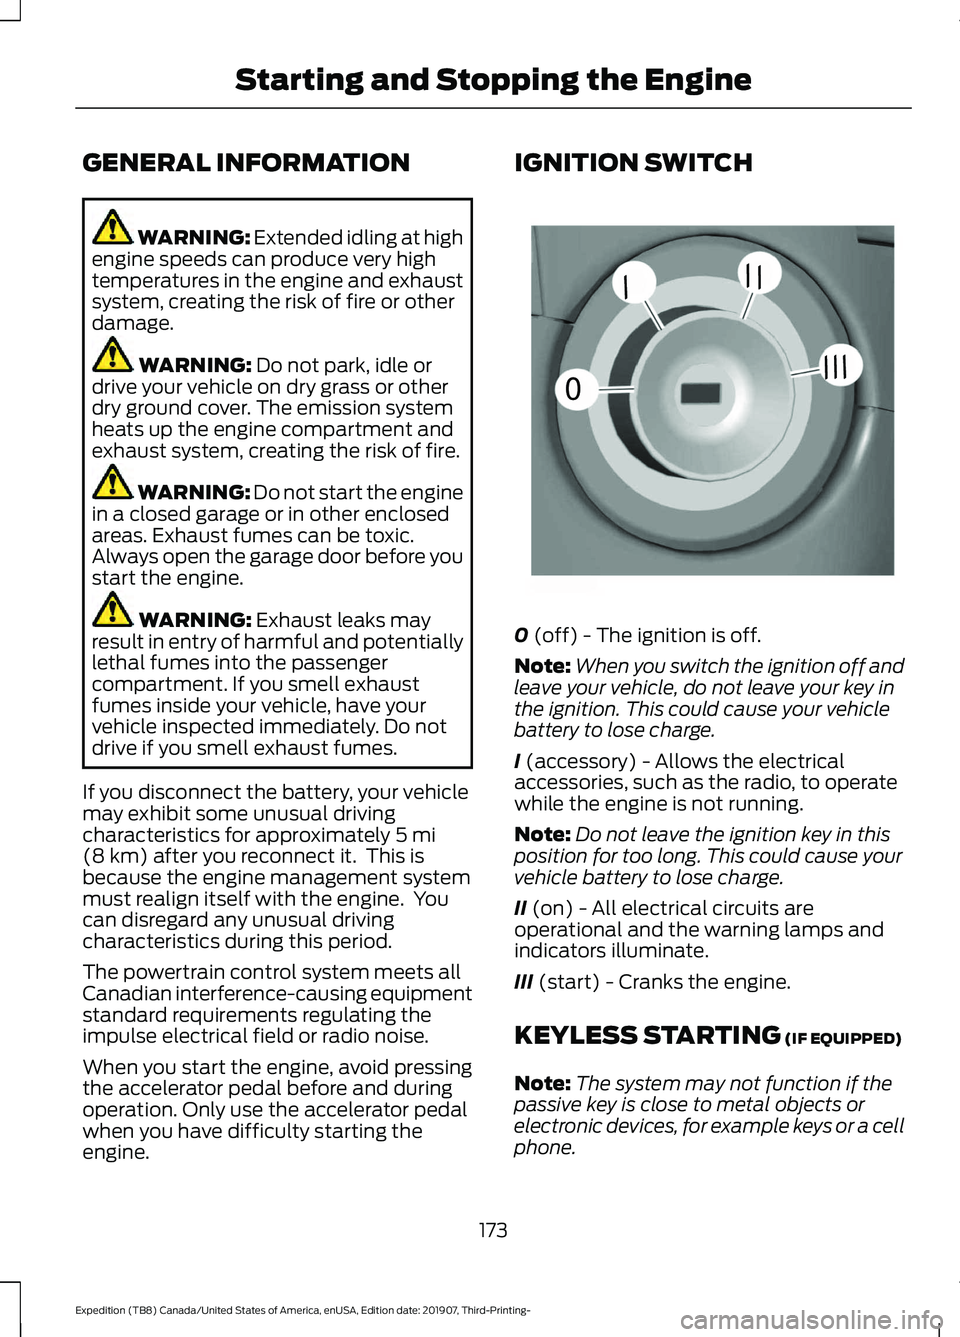
0
(off) - The ignition is off.
Note: When you switch the ignition off and
leave your vehicle, do not leave your key in
the ignition. This could cause your vehicle
battery to lose charge.
I
(accessory) - Allows the electrical
accessories, such as the radio, to operate
while the engine is not running.
Note: Do not leave the ignition key in this
position for too long. This could cause your
vehicle battery to lose charge.
II
(on) - All electrical circuits are
operational and the warning lamps and
indicators illuminate.
III
(start) - Cranks the engine.
KEYLESS STARTING
(IF EQUIPPED)
Note: The system may not function if the
passive key is close to metal objects or
electronic devices, for example keys or a cell
phone.
173
Expedition (TB8) Canada/United States of America, enUSA, Edition date: 201907, Third-Printing- Starting and Stopping the Engine0
///
///E252522
Page 178 of 542

Vehicles with Keyless Start
Note:
Do not touch the accelerator pedal.
Note: You must have your intelligent access
key in your vehicle in order to shift the
transmission out of park (P).
1. Fully depress the brake pedal.
2. Press the push button ignition switch.
The system does not function if:
• The passive key frequencies are
jammed.
• The key battery has no charge.
If you are unable to start your vehicle, do
the following: 1. Access the backup slot.
2. Insert the passive key into the backup
slot. 3. With the key in this position, press the
brake pedal then press the push button
ignition switch to switch the ignition on
and start your vehicle.
Fast Restart
The fast restart feature allows you to
restart your vehicle within 20 seconds of
switching it off, even if it does not detect
a valid passive key.
Within 20 seconds of switching the engine
off, press the brake pedal and press the
push button ignition switch.
After 20 seconds, you can no longer start
your vehicle if it does not detect a valid
passive key.
Once your vehicle starts, it remains running
until you press the push button ignition
switch, even if your vehicle does not detect
a valid passive key. If you open and close
a door while your vehicle is running, the
system searches for a valid passive key.
You cannot start your vehicle if the system
does not detect a valid passive key within
20 seconds.
Failure to Start
If you cannot start the engine after three
attempts, wait 10 seconds and follow this
procedure:
1. Fully depress the brake pedal.
2. Shift into park (P).
3. Fully press the accelerator pedal and hold it there.
4. Start the engine.
Automatic Engine Shutdown
For vehicles with a keyless ignition, this
automatically shuts down your vehicle if
it has been idling for an extended period.
The ignition also turns off to save battery
power. Before your vehicle shuts down, a
message appears in the information
175
Expedition (TB8) Canada/United States of America, enUSA, Edition date: 201907, Third-Printing- Starting and Stopping the EngineE256153
Page 182 of 542
AUTO-START-STOP
The system helps reduce fuel consumption
by automatically stopping and restarting
the engine when your vehicle has stopped.
The engine restarts automatically when
you release the brake pedal.
In some situations, your vehicle may restart
automatically, for example:
•
To maintain interior comfort.
• To recharge the battery.
Note: Power assist steering turns off when
the engine is off.
Note: If your vehicle is flex fuel capable,
Auto-Start-Stop will be inhibited for a short
time after a refuel event while the system
is verifying the fuel type being used. WARNING: Always fully apply the
parking brake. Make sure you shift into
park (P) for vehicles with an automatic
transmission. Switch the ignition off and
remove the key whenever you leave your
vehicle. WARNING:
Before opening the
hood or performing any maintenance,
fully apply the parking brake, shift into
park (P) or neutral (N) and switch the
ignition off. WARNING:
Always switch the
ignition off before leaving the vehicle. If
the ignition is switched on an automatic
restart may occur at any time. WARNING:
The system may
require the engine to automatically
restart when the auto-start-stop
indicator illuminates green or flashes
amber. Failure to follow this instruction
could result in personal injury. The Auto-Start-Stop system status is
available at a glance within the information
display. See Information Displays (page
114
).
Enabling Auto-Start-Stop
The system automatically enables every
time you start your vehicle if:
• You do not press the Auto-Start-Stop
button (not illuminated).
• Your vehicle exceeds an initial speed
of
3 mph (5 km/h) after you have
initially started your vehicle.
• You have stopped your vehicle.
• Your foot is on the brake pedal.
• The driver door is closed.
• There is adequate brake vacuum.
• The interior compartment has cooled
or warmed to an acceptable level.
• The front windshield defroster is off.
• You have not turned the steering wheel
rapidly or you do not have it at a sharp
angle.
• The vehicle is not on a steep road
grade.
• The battery is within optimal operating
conditions (battery state of charge and
temperature in range).
• The engine coolant is at operating
temperature.
• Elevation is below about
11,000 ft
(3,350 m).
• Ambient temperature is moderate.
• The trailer is not connected.
• If you select Normal, Eco, Snow/Wet
or Grass/Gravel/Snow modes.
• You are not in 4H or 4L.
• You have not selected Manual shift
mode.
179
Expedition (TB8) Canada/United States of America, enUSA, Edition date: 201907, Third-Printing- Unique Driving Characteristics
Page 183 of 542
•
Hill descent control is not active.
• You have not selected Tow haul, Sport,
Sand or Mud/Rut modes.
Note: Note when in Sport mode it can be
enabled by pressing the Auto-Start-Stop
button. The green Auto-Start-Stop
indicator light on the instrument
cluster will illuminate to indicate
when the automatic engine stop occurs. If the instrument cluster is
equipped with a grey
Auto-Start-Stop indicator light,
it illuminates when automatic engine stop
is not available due to one of the above
noted conditions not being met.
Automatic Engine Restart
Any of the following conditions will result
in an automatic restart of the engine:
• You have removed your foot from the
brake pedal.
• You press the accelerator pedal.
• You press the accelerator and the
brake pedal at the same time.
• The driver safety belt becomes
unfastened or the driver door is ajar.
• Your vehicle is moving.
• The interior compartment does not
meet customer comfort when air
conditioning or heat is on.
• Fogging of the windows could occur
and the air conditioning is on.
• The battery is not within optimal
operating conditions.
• You have exceeded the maximum
engine off time.
• When you press the Auto-Start-Stop
button with the engine automatically
stopped. •
The front defroster is turned to the Max
setting.
• When you shift into park (P), the engine
will restart.
Any of the following conditions may result
in an automatic restart of the engine:
• You have increased the blower fan
speed or changed the climate control
temperature.
• You have an electrical accessory
turned on or plugged in.
Note: You may notice that the climate seat
fan fluctuates during an automatic restart.
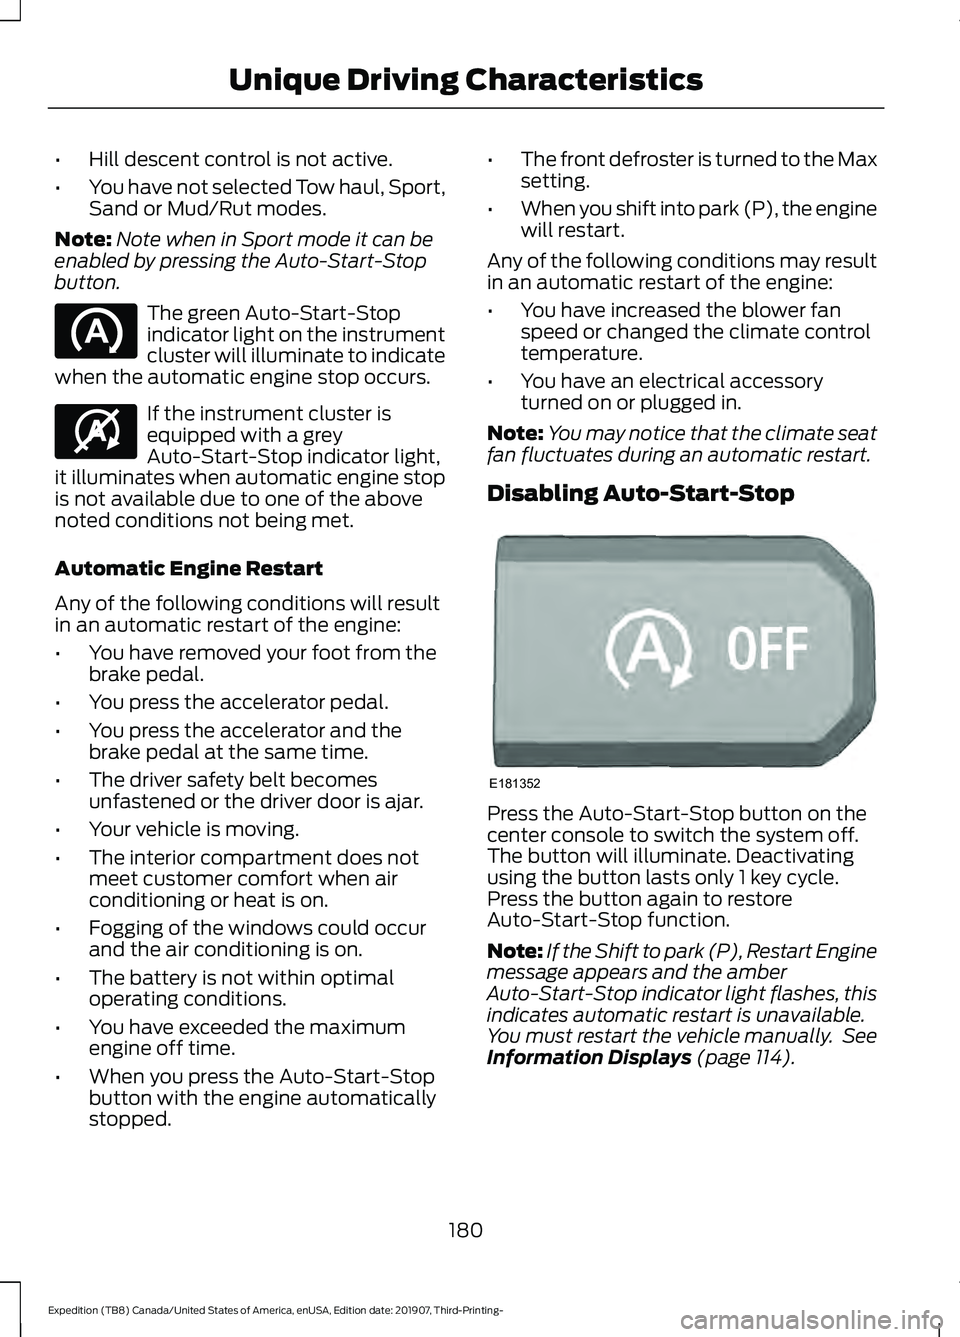
Disabling Auto-Start-Stop Press the Auto-Start-Stop button on the
center console to switch the system off.
The button will illuminate. Deactivating
using the button lasts only 1 key cycle.
Press the button again to restore
Auto-Start-Stop function.
Note:
If the Shift to park (P), Restart Engine
message appears and the amber
Auto-Start-Stop indicator light flashes, this
indicates automatic restart is unavailable.
You must restart the vehicle manually. See
Information Displays (page 114).
180
Expedition (TB8) Canada/United States of America, enUSA, Edition date: 201907, Third-Printing- Unique Driving Characteristics E146361 E181352