2020 FORD EXPEDITION change wheel
[x] Cancel search: change wheelPage 209 of 542
Four-wheel drive vehicles have advantages
over two-wheel drive vehicles in snow and
ice but can skid like any other vehicle.
Should you start to slide when driving on
snowy or icy roads, turn the steering wheel
in the direction of the slide until you regain
control.
Avoid sudden applications of power and
quick changes of direction on snow and
ice. Apply the accelerator slowly and
steadily when starting from a full stop.
Avoid sudden braking. Although a
four-wheel drive vehicle may accelerate
better than a two-wheel drive vehicle in
snow and ice, it does not stop any faster
as braking occurs at all four wheels. Do not
become overconfident as to road
conditions.
Make sure you allow sufficient distance
between you and other vehicles for
stopping. Drive slower than usual and
consider using one of the lower gears. In
emergency stopping situations, apply the
brake steadily. Do not pump the brake
pedal. See Hints on Driving With
Anti-Lock Brakes (page 209).
If Your Vehicle Gets Stuck In Mud or
Snow WARNING:
Do not spin the wheels
at over 34 mph (55 km/h). The tires may
fail and injure a passenger or bystander.
If your vehicle gets stuck in mud or snow,
you may rock it out by shifting between
forward and reverse gears, stopping
between shifts in a steady pattern. Press
lightly on the accelerator in each gear.
Note: Do not rock your vehicle if the engine
is not at normal operating temperature,
damage to the transmission may occur. Note:
Do not rock your vehicle for more
than a minute, damage to the transmission
and tires may occur or the engine may
overheat.
Parking WARNING:
If the parking brake is
fully released, but the brake warning
lamp remains illuminated, the brakes
may not be working properly. Have your
vehicle checked as soon as possible. WARNING:
Always fully apply the
parking brake. Make sure you shift into
park (P) for vehicles with an automatic
transmission. Switch the ignition off and
remove the key whenever you leave your
vehicle.
On some four-wheel drive vehicles, when
the transfer case is in the neutral (N)
position, the engine and transmission
disconnect from the rest of the driveline.
Therefore, your vehicle is free to roll even
if it is parked. Do not leave your vehicle
unattended with the transfer case in the
neutral (N) position. Always set the parking
brake fully and turn off the ignition when
leaving your vehicle.
Maintenance and Modifications
The suspension and steering systems on
your vehicle have been designed and
tested to provide predictable performance
whether loaded or empty. For this reason,
we strongly recommend that you do not
make modifications such as adding or
removing parts, for example, lift kits or
stabilizer bars or by using replacement
parts not equivalent to the original factory
equipment.
206
Expedition (TB8) Canada/United States of America, enUSA, Edition date: 201907, Third-Printing- Four-Wheel Drive
(If Equipped)
Page 217 of 542
PRINCIPLE OF OPERATION
WARNING: Vehicle modifications
involving braking system, aftermarket
roof racks, suspension, steering system,
tire construction and wheel and tire size
may change the handling characteristics
of your vehicle and may adversely affect
the performance of the electronic
stability control system. In addition,
installing any stereo loudspeakers may
interfere with and adversely affect the
electronic stability control system. Install
any aftermarket stereo loudspeaker as
far as possible from the front center
console, the tunnel, and the front seats
in order to minimize the risk of interfering
with the electronic stability control
sensors. Reducing the effectiveness of
the electronic stability control system
could lead to an increased risk of loss of
vehicle control, vehicle rollover, personal
injury and death. WARNING:
Remember that even
advanced technology cannot defy the
laws of physics. It’ s always possible to
lose control of a vehicle due to
inappropriate driver input for the
conditions. Aggressive driving on any
road condition can cause you to lose
control of your vehicle increasing the risk
of personal injury or property damage.
Activation of the electronic stability
control system is an indication that at
least some of the tires have exceeded
their ability to grip the road; this could
reduce the operator ’s ability to control
the vehicle potentially resulting in a loss
of vehicle control, vehicle rollover,
personal injury and death. If your
electronic stability control system
activates, SLOW DOWN.
The system automatically turns on each
time you switch the ignition on. If a fault occurs in either the stability
control or the traction control system, you
may experience the following conditions:
•
The stability and traction control light
illuminates steadily.
• The stability control and traction
control systems do not enhance your
vehicle's ability to maintain traction of
the wheels.
If a driving condition activates either the
stability control or the traction control
system you may experience the following
conditions:
• The stability and traction control light
flashes.
• Your vehicle slows down.
• Reduced engine power.
• A vibration in the brake pedal.
• The brake pedal is stiffer than usual.
• If the driving condition is severe and
your foot is not on the brake, the brake
pedal may move as the system applies
higher brake force.
The stability control system has several
features built into it to help you maintain
control of your vehicle:
Electronic Stability Control
The system enhances your vehicle ’s ability
to prevent skids or lateral slides by
applying brakes to one or more of the
wheels individually and, if necessary,
reducing engine power.
Roll Stability Control
The system enhances your vehicle ’s ability
to prevent rollovers by detecting your
vehicle ’s roll motion and the rate at which
it changes by applying the brakes to one
or more wheels individually.
214
Expedition (TB8) Canada/United States of America, enUSA, Edition date: 201907, Third-Printing- Stability Control
Page 227 of 542

WARNING: Active park assist does
not apply the brakes under any
circumstances. WARNING: You are responsible for
controlling your vehicle at all times. The
system is designed to be an aid and does
not relieve you of your responsibility to
drive with due care and attention. Failure
to follow this instruction could result in
the loss of control of your vehicle,
personal injury or death.
Active park assist is a multi-step process
and may require you to shift the
transmission multiple times. Follow the
onscreen instructions until the parking
maneuver is complete.
If you are uncomfortable with the proximity
to any vehicle or object, you may choose
to override the system by grabbing the
steering wheel, or by taking full control of
your vehicle after pressing the active park
assist button.
Keep your hands, hair, clothing and any
loose items clear of the steering wheel
when using active park assist.
The sensors are on the front and rear
bumpers.
Note: Keep the sensors free from snow, ice
and large accumulations of dirt.
Note: Do not cover up the sensors.
Note: Do not clean the sensors with sharp
objects.
Note: The sensors may not detect objects
with surfaces that absorb ultrasonic waves.
The sensors may falsely detect objects due
to ultrasonic interference caused by
motorcycle exhausts, truck air brakes or
horns, for example.
Note: If you change any tires, the system
must recalibrate and may not correctly
operate for a short time. The system may not correctly operate in
any of the following conditions:
•
You use a spare tire or a tire that is
significantly worn more than the other
tires.
• One or more tires are incorrectly
inflated.
• You try to park on a tight curve.
• Something passes between the front
bumper and the parking space. For
example, a pedestrian or cyclist.
• The edge of the neighboring parked
vehicle is high off the ground. For
example, a bus, tow truck or flatbed
truck.
• The weather conditions are poor. For
example, during heavy rain, snow, fog,
high humidity and high temperatures.
Do not use the system if:
• You have attached an add-on
accessory close to the sensors on the
front or rear of your vehicle. For
example, a bike rack or trailer.
• You have attached an overhanging
object to the roof. For example, a
surfboard.
• The front bumper, rear bumper or the
side sensors are damaged.
• The correct tire size is not in use on your
vehicle. For example, a mini-spare tire.
Using Active Park Assist
Selecting an Active Park Assist Mode Press the button once to
activate parallel parking. Press
the button a second time to
activate perpendicular parking. If you press
the button again the system switches off.
224
Expedition (TB8) Canada/United States of America, enUSA, Edition date: 201907, Third-Printing- Parking AidsE146186
Page 235 of 542

Active guidelines are only shown with fixed
guidelines. To use active guidelines, turn
the steering wheel to point the guidelines
toward an intended path. If you change
the steering wheel position while reversing,
your vehicle might deviate from the original
intended path.
The fixed and active guidelines fade in and
out depending on the steering wheel
position. The active guidelines do not
display when the steering wheel position
is straight.
Always use caution while reversing.
Objects in the red zone are closest to your
vehicle and objects in the green zone are
farther away. Objects are getting closer to
your vehicle as they move from the green
zone to the yellow or red zones. Use the
side view mirrors and rear view mirror to
get better coverage on both sides and rear
of the vehicle.
Obstacle Distance Indicator (If
Equipped) The system will provide an image of your
vehicle and the sensor zones. The zones
will highlight green, yellow and red when
the parking aid sensors detect an object in
the coverage area.
Manual Zoom
WARNING:
When manual zoom is
on, the full area behind your vehicle may
not show. Be aware of your surroundings
when using the manual zoom feature.
Note: Manual zoom is only available when
the transmission is in reverse (R).
Note: When you enable manual zoom, only
the centerline is shown.
Selectable settings for this feature are
Zoom in (+) and Zoom out (-). Press the
symbol in the camera screen to change the
view. The default setting is Zoom OFF.
This allows you to get a closer view of an
object behind your vehicle. The zoomed
image keeps the bumper in the image to
provide a reference. The zoom is only
active while the transmission is in reverse
(R).
Rear Camera Delay
Selectable settings for this feature are ON
and OFF.
The default setting for the rear camera
delay is OFF.
When shifting the transmission out of
reverse (R) and into any gear other than
park (P), the camera image remains in the
display until:
• Your vehicle speed reaches
approximately
6 mph (10 km/h).
• You shift your vehicle into park (P).
232
Expedition (TB8) Canada/United States of America, enUSA, Edition date: 201907, Third-Printing- Parking AidsE190459
Page 239 of 542
WHAT IS CRUISE CONTROL
Cruise control lets you maintain a set
speed without keeping your foot on the
accelerator pedal.
Requirements
Use cruise control when the vehicle speed
is greater than 20 mph (30 km/h).
SWITCHING CRUISE CONTROL
ON AND OFF WARNING:
Do not use cruise
control on winding roads, in heavy traffic
or when the road surface is slippery. This
could result in loss of vehicle control,
serious injury or death.
The cruise controls are on the steering
wheel. See
Cruise Control (page 89).
Switching Cruise Control On Press the button.
Switching Cruise Control Off Press the button when the
system is in standby mode.
The system also turns off when you switch
the ignition off.
Note: The set speed erases when you
switch the system off. SETTING THE CRUISE
CONTROL SPEED WARNING:
When you are going
downhill, your vehicle speed could
increase above the set speed. The
system does not apply the brakes.
Drive to the speed you prefer. Press either button to set the
current speed.
Take your foot off the accelerator pedal.
Note: The indicator changes color in the
information display.
Changing the Set Speed Press and release the button to
increase the set speed in small
increments.
Press and hold the button to accelerate.
Release the button when you reach your
preferred speed. Press and release the button to
decrease the set speed in small
increments.
Press and hold the button to decelerate.
Release the button when you reach your
preferred speed.
Note: If you accelerate by pressing the
accelerator pedal, the set speed does not
change. When you release the accelerator
pedal, your vehicle returns to the speed that
you previously set.
236
Expedition (TB8) Canada/United States of America, enUSA, Edition date: 201907, Third-Printing- Cruise ControlE265296 E265297
Page 249 of 542
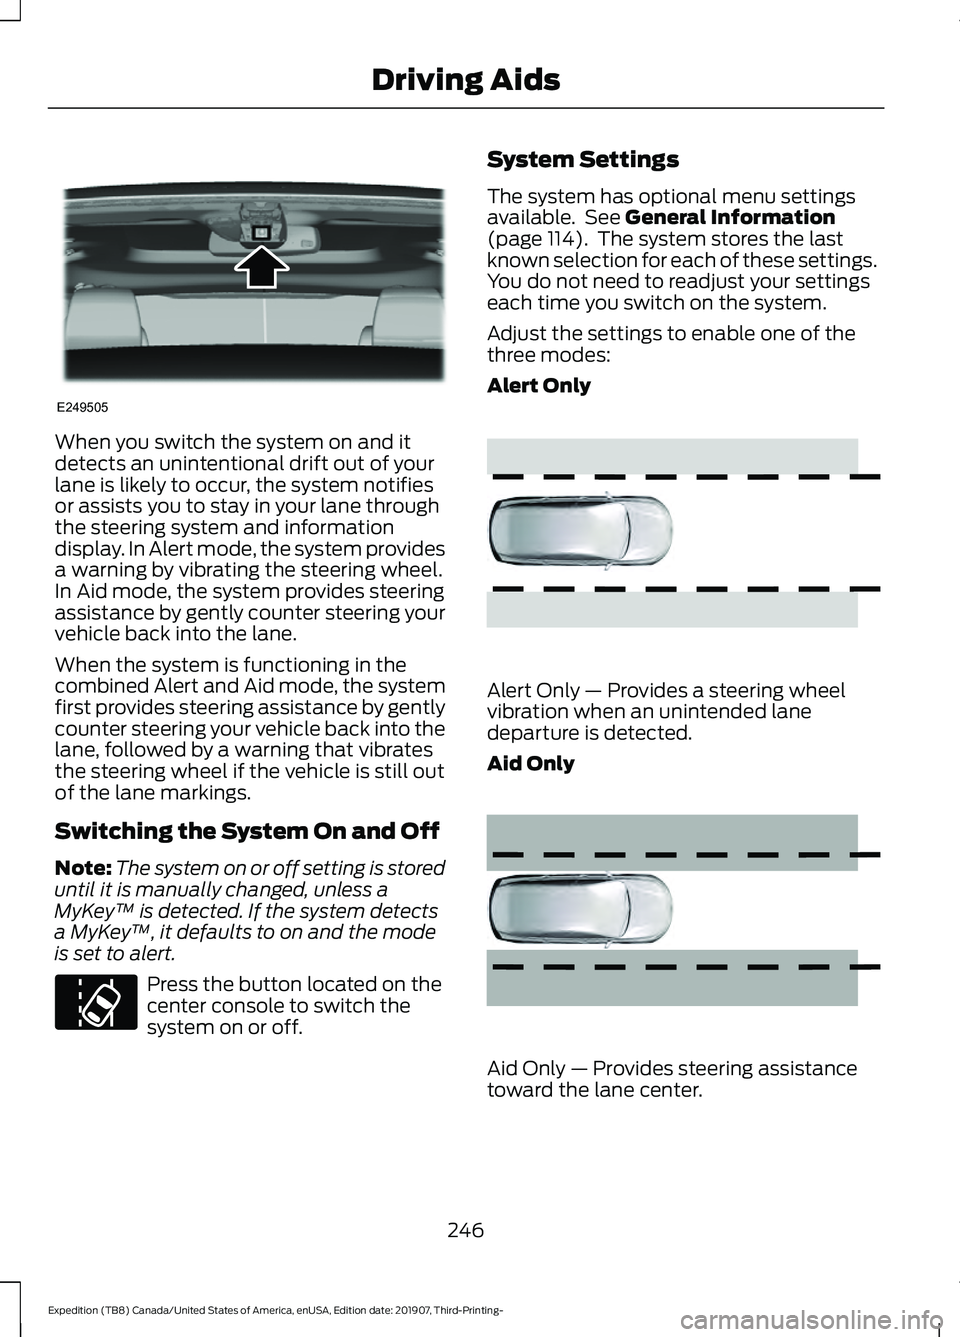
When you switch the system on and it
detects an unintentional drift out of your
lane is likely to occur, the system notifies
or assists you to stay in your lane through
the steering system and information
display. In Alert mode, the system provides
a warning by vibrating the steering wheel.
In Aid mode, the system provides steering
assistance by gently counter steering your
vehicle back into the lane.
When the system is functioning in the
combined Alert and Aid mode, the system
first provides steering assistance by gently
counter steering your vehicle back into the
lane, followed by a warning that vibrates
the steering wheel if the vehicle is still out
of the lane markings.
Switching the System On and Off
Note:
The system on or off setting is stored
until it is manually changed, unless a
MyKey ™ is detected. If the system detects
a MyKey ™, it defaults to on and the mode
is set to alert. Press the button located on the
center console to switch the
system on or off. System Settings
The system has optional menu settings
available. See General Information
(page 114). The system stores the last
known selection for each of these settings.
You do not need to readjust your settings
each time you switch on the system.
Adjust the settings to enable one of the
three modes:
Alert Only Alert Only — Provides a steering wheel
vibration when an unintended lane
departure is detected.
Aid Only
Aid Only — Provides steering assistance
toward the lane center.
246
Expedition (TB8) Canada/United States of America, enUSA, Edition date: 201907, Third-Printing- Driving AidsE249505 E173233 E165515 E165516
Page 250 of 542
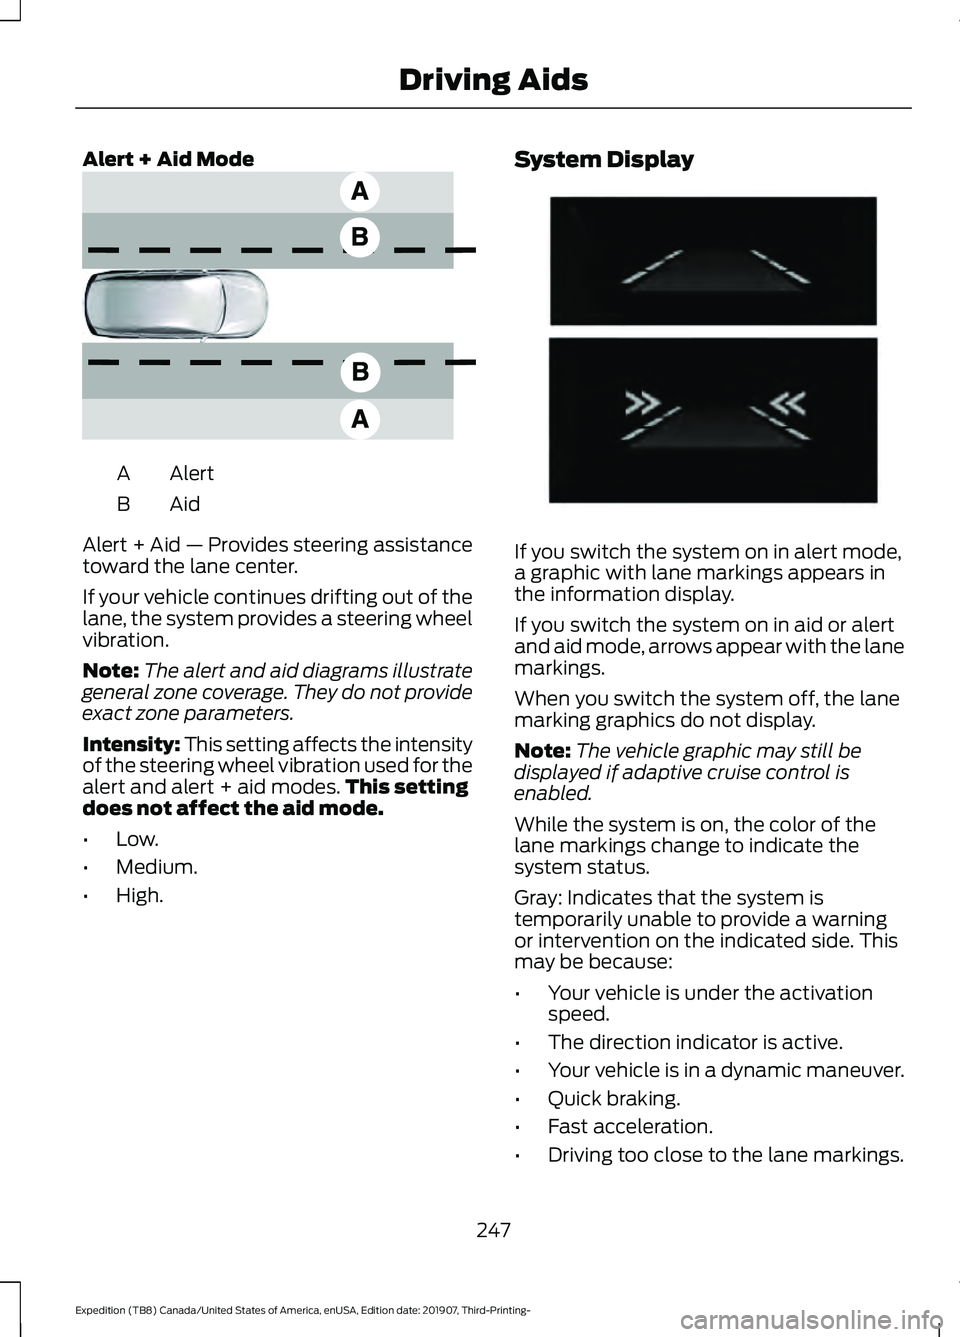
Alert + Aid Mode
Alert
A
AidB
Alert + Aid — Provides steering assistance
toward the lane center.
If your vehicle continues drifting out of the
lane, the system provides a steering wheel
vibration.
Note: The alert and aid diagrams illustrate
general zone coverage. They do not provide
exact zone parameters.
Intensity: This setting affects the intensity
of the steering wheel vibration used for the
alert and alert + aid modes. This setting
does not affect the aid mode.
• Low.
• Medium.
• High. System Display
If you switch the system on in alert mode,
a graphic with lane markings appears in
the information display.
If you switch the system on in aid or alert
and aid mode, arrows appear with the lane
markings.
When you switch the system off, the lane
marking graphics do not display.
Note:
The vehicle graphic may still be
displayed if adaptive cruise control is
enabled.
While the system is on, the color of the
lane markings change to indicate the
system status.
Gray: Indicates that the system is
temporarily unable to provide a warning
or intervention on the indicated side. This
may be because:
• Your vehicle is under the activation
speed.
• The direction indicator is active.
• Your vehicle is in a dynamic maneuver.
• Quick braking.
• Fast acceleration.
• Driving too close to the lane markings.
247
Expedition (TB8) Canada/United States of America, enUSA, Edition date: 201907, Third-Printing- Driving AidsE165517 E274073
Page 282 of 542
Note:
Use consistent metric or imperial
units as required by your country or vehicle.
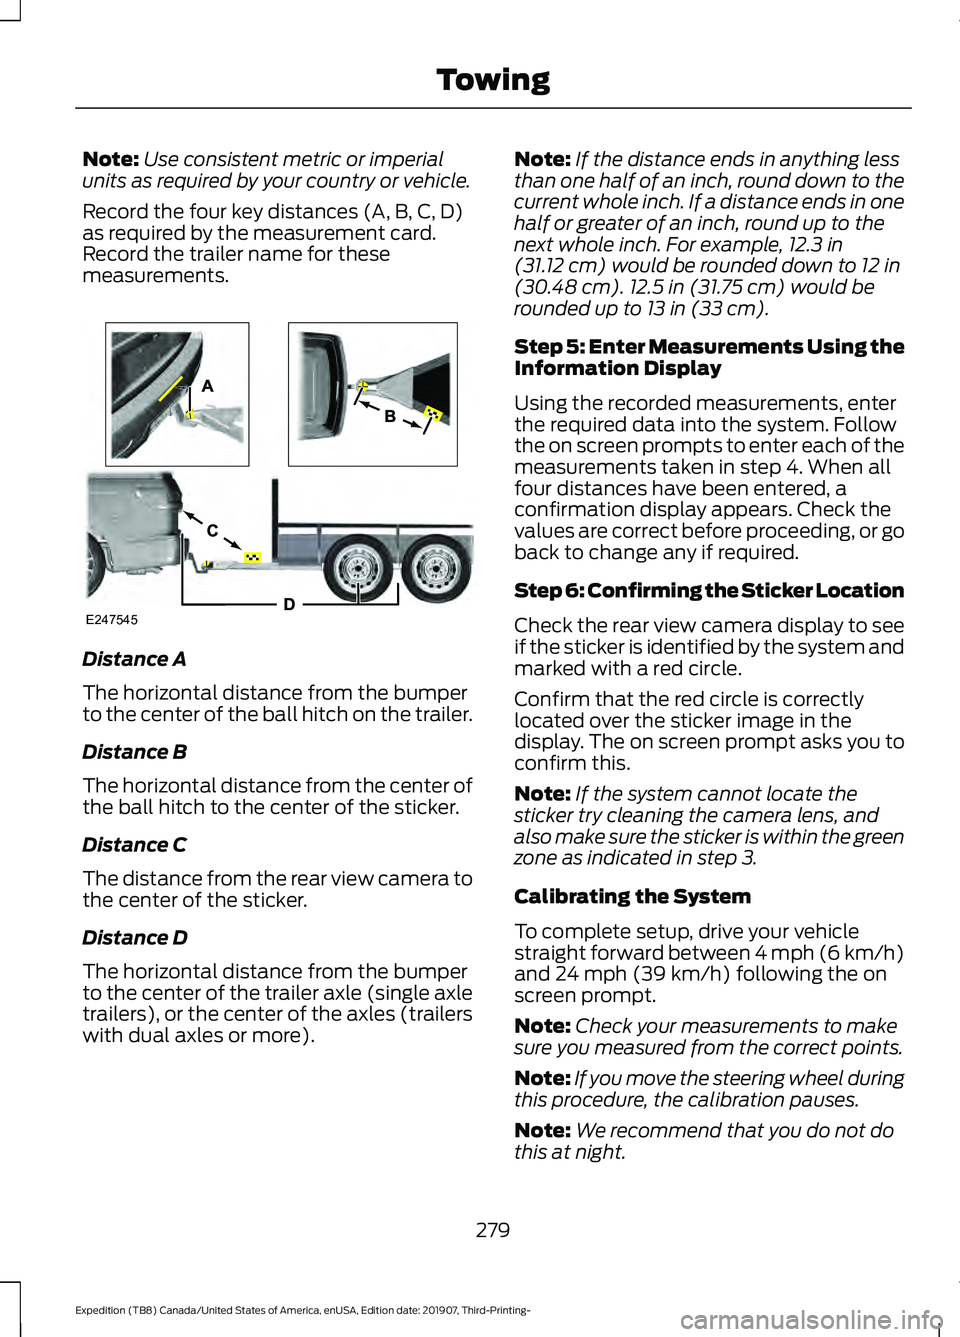
Record the four key distances (A, B, C, D)
as required by the measurement card.
Record the trailer name for these
measurements. Distance A
The horizontal distance from the bumper
to the center of the ball hitch on the trailer.
Distance B
The horizontal distance from the center of
the ball hitch to the center of the sticker.
Distance C
The distance from the rear view camera to
the center of the sticker.
Distance D
The horizontal distance from the bumper
to the center of the trailer axle (single axle
trailers), or the center of the axles (trailers
with dual axles or more). Note:
If the distance ends in anything less
than one half of an inch, round down to the
current whole inch. If a distance ends in one
half or greater of an inch, round up to the
next whole inch. For example, 12.3 in
(31.12 cm) would be rounded down to 12 in
(30.48 cm). 12.5 in (31.75 cm) would be
rounded up to 13 in (33 cm).
Step 5: Enter Measurements Using the
Information Display
Using the recorded measurements, enter
the required data into the system. Follow
the on screen prompts to enter each of the
measurements taken in step 4. When all
four distances have been entered, a
confirmation display appears. Check the
values are correct before proceeding, or go
back to change any if required.
Step 6: Confirming the Sticker Location
Check the rear view camera display to see
if the sticker is identified by the system and
marked with a red circle.
Confirm that the red circle is correctly
located over the sticker image in the
display. The on screen prompt asks you to
confirm this.
Note: If the system cannot locate the
sticker try cleaning the camera lens, and
also make sure the sticker is within the green
zone as indicated in step 3.
Calibrating the System
To complete setup, drive your vehicle
straight forward between 4 mph (6 km/h)
and
24 mph (39 km/h) following the on
screen prompt.
Note: Check your measurements to make
sure you measured from the correct points.
Note: If you move the steering wheel during
this procedure, the calibration pauses.
Note: We recommend that you do not do
this at night.
279
Expedition (TB8) Canada/United States of America, enUSA, Edition date: 201907, Third-Printing- TowingE247545