2020 FORD EXPEDITION brake
[x] Cancel search: brakePage 43 of 542
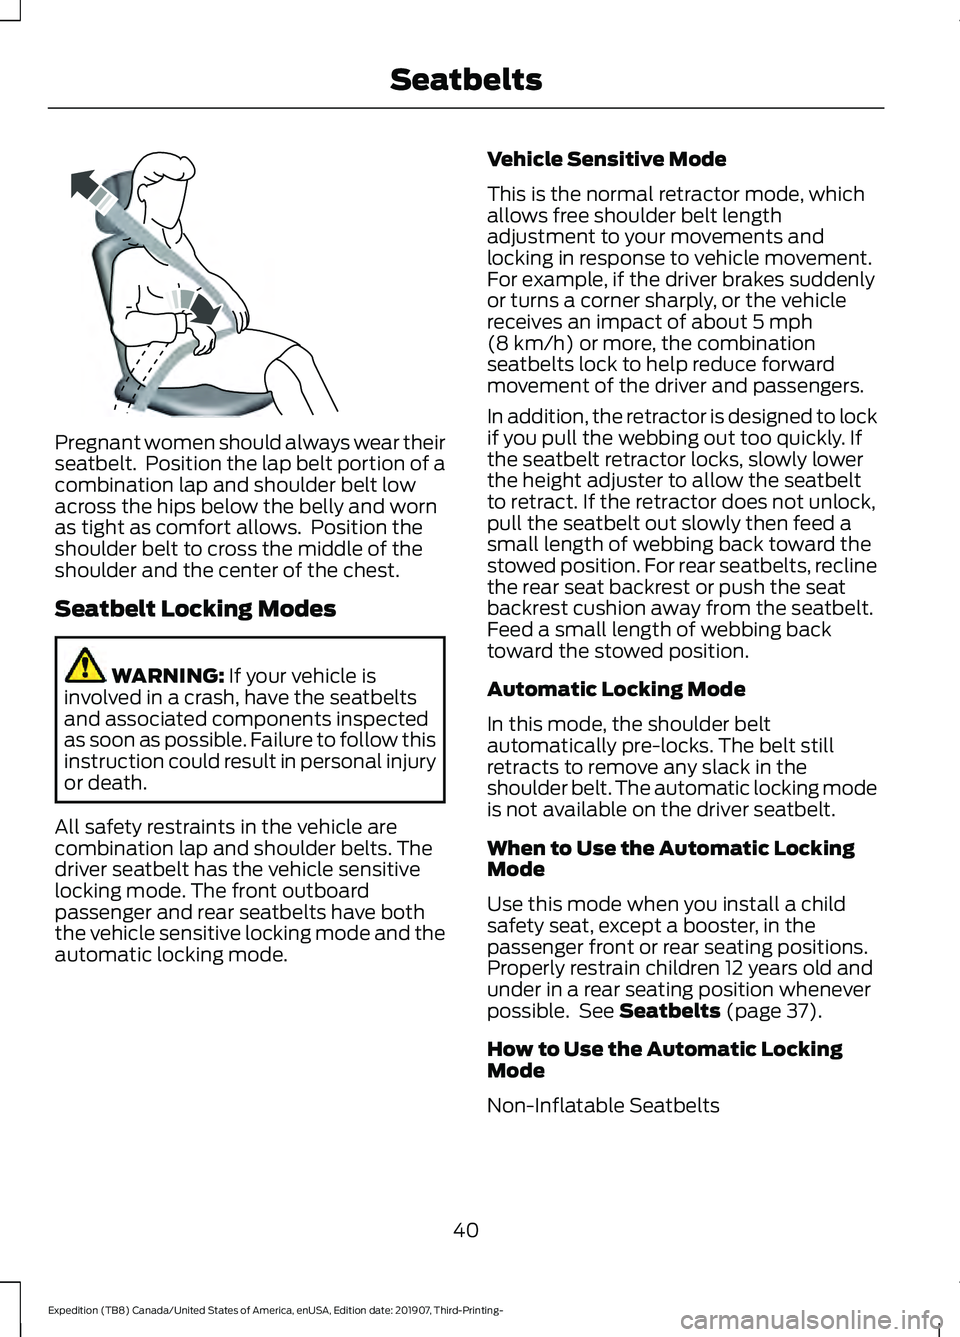
Pregnant women should always wear their
seatbelt. Position the lap belt portion of a
combination lap and shoulder belt low
across the hips below the belly and worn
as tight as comfort allows. Position the
shoulder belt to cross the middle of the
shoulder and the center of the chest.
Seatbelt Locking Modes
WARNING: If your vehicle is
involved in a crash, have the seatbelts
and associated components inspected
as soon as possible. Failure to follow this
instruction could result in personal injury
or death.
All safety restraints in the vehicle are
combination lap and shoulder belts. The
driver seatbelt has the vehicle sensitive
locking mode. The front outboard
passenger and rear seatbelts have both
the vehicle sensitive locking mode and the
automatic locking mode. Vehicle Sensitive Mode
This is the normal retractor mode, which
allows free shoulder belt length
adjustment to your movements and
locking in response to vehicle movement.
For example, if the driver brakes suddenly
or turns a corner sharply, or the vehicle
receives an impact of about
5 mph
(8 km/h) or more, the combination
seatbelts lock to help reduce forward
movement of the driver and passengers.
In addition, the retractor is designed to lock
if you pull the webbing out too quickly. If
the seatbelt retractor locks, slowly lower
the height adjuster to allow the seatbelt
to retract. If the retractor does not unlock,
pull the seatbelt out slowly then feed a
small length of webbing back toward the
stowed position. For rear seatbelts, recline
the rear seat backrest or push the seat
backrest cushion away from the seatbelt.
Feed a small length of webbing back
toward the stowed position.
Automatic Locking Mode
In this mode, the shoulder belt
automatically pre-locks. The belt still
retracts to remove any slack in the
shoulder belt. The automatic locking mode
is not available on the driver seatbelt.
When to Use the Automatic Locking
Mode
Use this mode when you install a child
safety seat, except a booster, in the
passenger front or rear seating positions.
Properly restrain children 12 years old and
under in a rear seating position whenever
possible. See
Seatbelts (page 37).
How to Use the Automatic Locking
Mode
Non-Inflatable Seatbelts
40
Expedition (TB8) Canada/United States of America, enUSA, Edition date: 201907, Third-Printing- SeatbeltsE142590
Page 48 of 542
Read Steps 1 - 4 before starting the
procedure.
Make sure that:
•
You set the parking brake.
• The transmission is in park (P).
• The ignition is off.
• You close all vehicle doors.
• You unbuckle the driver and front
passenger seatbelts.
1. Switch the ignition on. Do not start the
engine.
2. Wait until the seatbelt warning lamp turns off (about one minute). After
Step 2, wait an additional five seconds
before proceeding with Step 3. Once
you start Step 3, you must complete
the procedure within 60 seconds.
3. For the seating position you are switching off, buckle then unbuckle the
seatbelt three times at a moderate
speed, ending in the unbuckled state.
After Step 3, the seatbelt warning lamp
turns on.
4. When the seatbelt warning lamp is on,
buckle then unbuckle the seatbelt.
After Step 4, the seatbelt warning lamp
flashes for confirmation.
• This switches the feature off if it is
currently on.
• This switches the feature on if it is
currently off.
CHILD RESTRAINT AND
SEATBELT MAINTENANCE
Inspect the vehicle seatbelts and child
safety seat systems periodically to make
sure they work properly and are not
damaged. Inspect the vehicle and child
restraint seatbelts to make sure there are
no nicks, tears or cuts. Replace if
necessary. All vehicle seatbelt assemblies,
including retractors, buckles, front seatbelt buckle assemblies, buckle support
assemblies (slide bar-if equipped),
shoulder belt height adjusters (if
equipped), shoulder belt guide on seat
backrest (if equipped), child safety seat
LATCH and tether anchors, and attaching
hardware, should be inspected after a
crash. Read the child restraint
manufacturer's instructions for additional
inspection and maintenance information
specific to the child restraint.
We recommend that all seatbelt
assemblies in use in vehicles involved in a
crash be replaced. However, if the crash
was minor and an authorized dealer finds
that the belts do not show damage and
continue to operate properly, they do not
need to be replaced. Seatbelt assemblies
not in use during a crash should also be
inspected and replaced if either damage
or improper operation is noted.
Properly care for seatbelts. See Vehicle
Care (page 343).
SEATBELT EXTENSIONS WARNING:
Persons who fit into
the vehicle's seatbelt should not use an
extension. Unnecessary use could result
in serious personal injury in the event of
a crash. WARNING:
Only use extensions
provided free of charge by our dealers.
The dealer will provide an extension
designed specifically for this vehicle,
model year and seating position. The use
of an extension intended for another
vehicle, model year or seating position
may not offer you the full protection of
your vehicle's seatbelt restraint system. WARNING:
Never use seatbelt
extensions to install child restraints.
45
Expedition (TB8) Canada/United States of America, enUSA, Edition date: 201907, Third-Printing- Seatbelts
Page 94 of 542
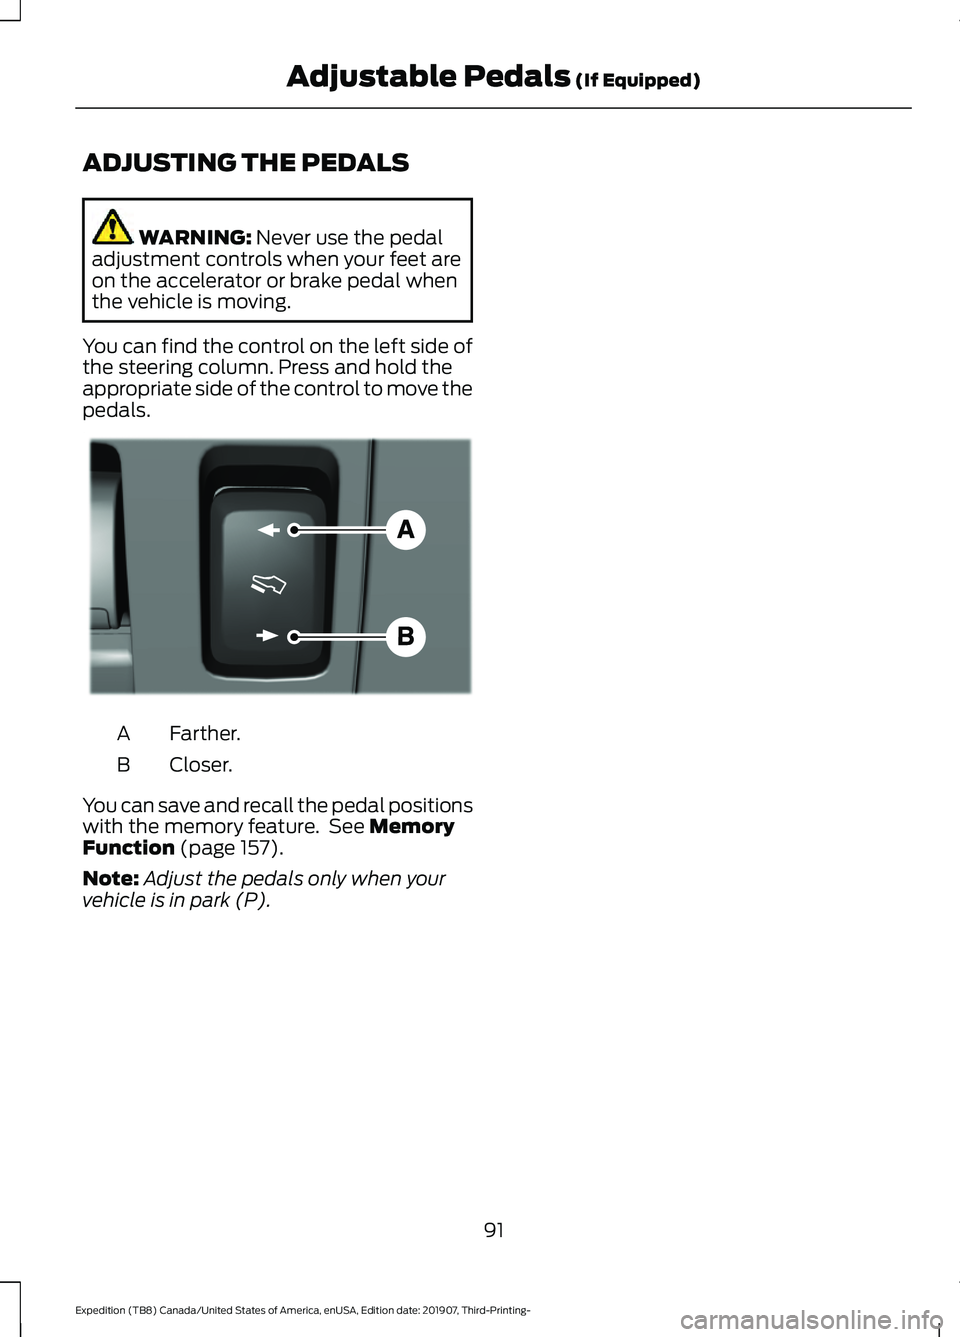
ADJUSTING THE PEDALS
WARNING: Never use the pedal
adjustment controls when your feet are
on the accelerator or brake pedal when
the vehicle is moving.
You can find the control on the left side of
the steering column. Press and hold the
appropriate side of the control to move the
pedals. Farther.
A
Closer.
B
You can save and recall the pedal positions
with the memory feature. See
Memory
Function (page 157).
Note: Adjust the pedals only when your
vehicle is in park (P).
91
Expedition (TB8) Canada/United States of America, enUSA, Edition date: 201907, Third-Printing- Adjustable Pedals
(If Equipped)E176213
Page 99 of 542

DAYTIME RUNNING LAMPS -
VEHICLES WITH:
CONFIGURABLE DAYTIME
RUNNING LAMPS
WARNING: The daytime running
lamps system does not activate the rear
lamps and may not provide adequate
lighting during low visibility driving
conditions. Make sure you switch the
headlamps on, as appropriate, during all
low visibility conditions. Failure to do so
may result in a crash.
Switch the daytime running lamps on or
off using the information display. See
General Information
(page 114).
The daytime running lamps turn on when:
1. The lamps are on in the information display.
2. You switch the ignition on.
3. The transmission is not in park (P) for vehicles with automatic transmissions
or you release the parking brake for
vehicles with manual transmissions.
4. The lighting control is in the autolamps
position.
5. The headlamps are off.
The other lighting control switch positions
do not turn on the daytime running lamps.
If the daytime running lamps are off in the
information display, the lamps stay off in
all switch positions. DAYTIME RUNNING LAMPS -
VEHICLES WITH: DAYTIME
RUNNING LAMPS (DRL) WARNING:
The daytime running
lamps system does not activate the rear
lamps and may not provide adequate
lighting during low visibility driving
conditions. Make sure you switch the
headlamps on, as appropriate, during all
low visibility conditions. Failure to do so
may result in a crash.
The system turns the lamps on in daylight
conditions.
To switch the system on, switch the
lighting control to any position except
headlamps.
FRONT FOG LAMPS
Switching the Front Fog Lamps On
or Off
Only switch the front fog lamps on during
reduced visibility.
You can switch the front fog lamps on if
any of the following occur:
• You set the lighting control to the
parking lamps position.
• You set the lighting control to the
headlamps position.
• You set the lighting control to the
autolamps position and the headlamps
are on.
The front fog lamp button is on the lighting
control. Press the button to switch the
front fog lamps on or off.
96
Expedition (TB8) Canada/United States of America, enUSA, Edition date: 201907, Third-Printing- Lighting
Page 113 of 542

Turbo Boost Gauge
Indicates the amount of manifold air
pressure in the engine.
WARNING LAMPS AND
INDICATORS
The following warning lamps and
indicators alert you to a vehicle condition
that may become serious. Some lamps
illuminate when you start your vehicle to
make sure they work. If any lamps remain
on after starting your vehicle, refer to the
respective system warning lamp for further
information.
Note:
Some warning indicators appear in
the information display and operate the
same as a warning lamp but do not
illuminate when you start your vehicle.
Adaptive Cruise Control Indicator
(If Equipped) It illuminates when you switch
the system on.
It illuminates white when the
system is in standby mode. It illuminates
green when you set the adaptive cruise
speed.
See Using Adaptive Cruise Control
(page 237).
Airbag Warning Lamp If it does not illuminate when you
switch the ignition on, continues
to flash or remains on when the
engine is running, this indicates a
malfunction. Have your vehicle checked
as soon as possible. Anti-Lock Brake System Warning
Lamp If it illuminates when you are
driving, this indicates a
malfunction. Your vehicle
continues to have normal braking without
the anti-lock brake system function. Have
your vehicle checked as soon as possible.
Automatic Headlamp High Beam
Indicator
(If Equipped) It illuminates when the system
turns the headlamp high beam
on.
Auto-Start-Stop Indicator It illuminates when the engine
has automatically stopped. It
flashes to inform you when the
engine needs to restart. The
indicator is shown with a
strikethrough if the system is not
available.
See
Auto-Start-Stop (page 179).
Battery If it illuminates when driving, it
indicates a malfunction. Switch
off all unnecessary electrical
equipment and have the system checked
by an authorized dealer immediately.
Blind Spot Information System
Indicator
(If Equipped) It illuminates when you switch
the system off.
See
Blind Spot Information
System (page 249).
110
Expedition (TB8) Canada/United States of America, enUSA, Edition date: 201907, Third-Printing- Instrument ClusterE144524 E67017 E146361 E151262
Page 114 of 542
Brake System Warning Lamp
WARNING: Driving your vehicle
with the warning lamp on is dangerous.
A significant decrease in braking
performance may occur. It may take you
longer to stop your vehicle. Have your
vehicle checked as soon as possible.
Driving extended distances with the
parking brake engaged can cause brake
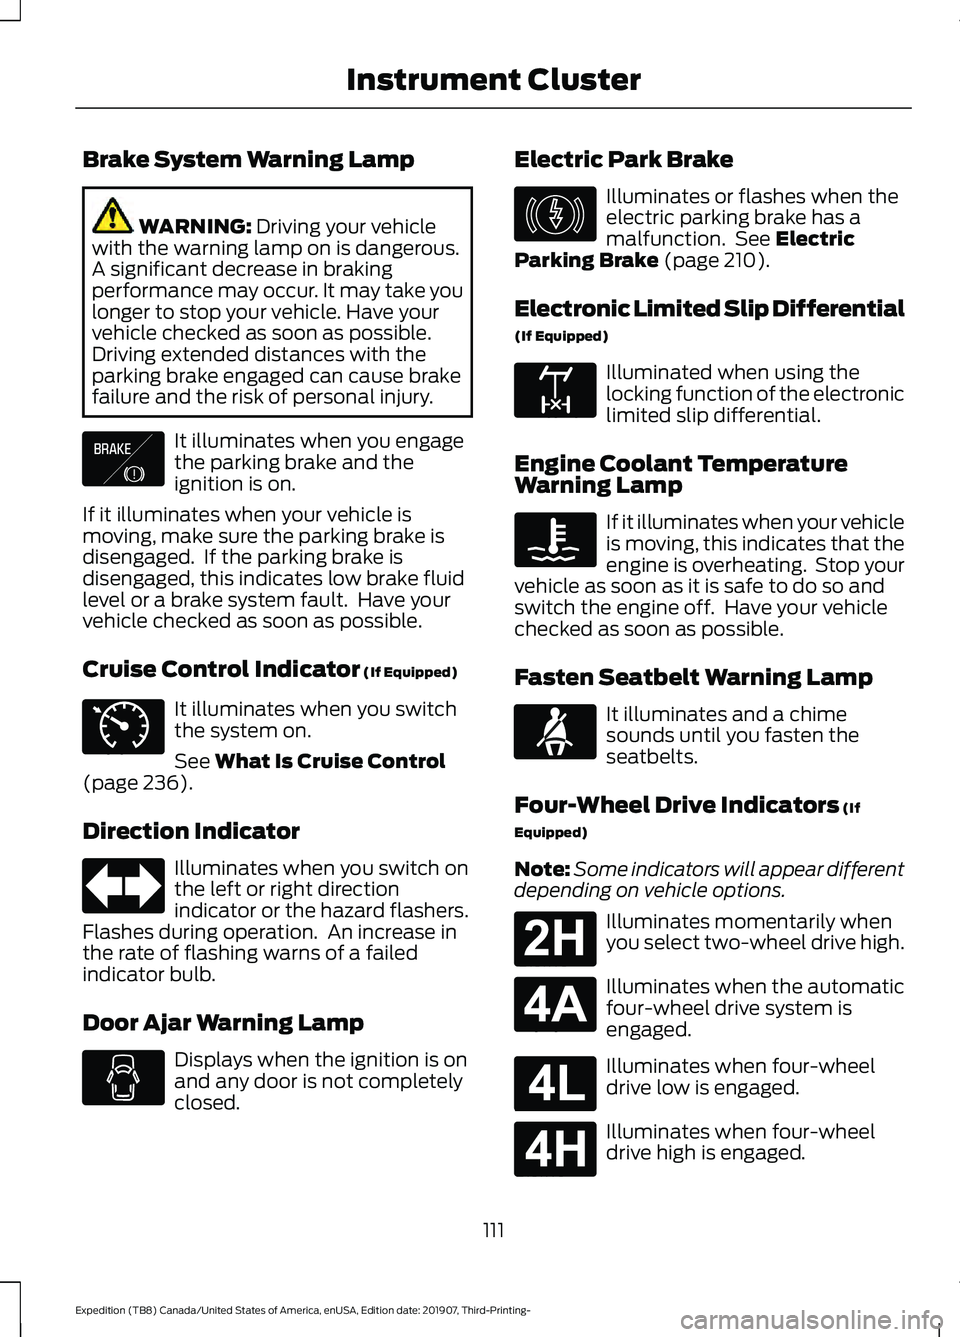
failure and the risk of personal injury. It illuminates when you engage
the parking brake and the
ignition is on.
If it illuminates when your vehicle is
moving, make sure the parking brake is
disengaged. If the parking brake is
disengaged, this indicates low brake fluid
level or a brake system fault. Have your
vehicle checked as soon as possible.
Cruise Control Indicator
(If Equipped) It illuminates when you switch
the system on.
See
What Is Cruise Control
(page 236).
Direction Indicator Illuminates when you switch on
the left or right direction
indicator or the hazard flashers.
Flashes during operation. An increase in
the rate of flashing warns of a failed
indicator bulb.
Door Ajar Warning Lamp Displays when the ignition is on
and any door is not completely
closed. Electric Park Brake Illuminates or flashes when the
electric parking brake has a
malfunction. See
Electric
Parking Brake (page 210).
Electronic Limited Slip Differential
(If Equipped) Illuminated when using the
locking function of the electronic
limited slip differential.
Engine Coolant Temperature
Warning Lamp If it illuminates when your vehicle
is moving, this indicates that the
engine is overheating. Stop your
vehicle as soon as it is safe to do so and
switch the engine off. Have your vehicle
checked as soon as possible.
Fasten Seatbelt Warning Lamp It illuminates and a chime
sounds until you fasten the
seatbelts.
Four-Wheel Drive Indicators
(If
Equipped)
Note: Some indicators will appear different
depending on vehicle options. Illuminates momentarily when
you select two-wheel drive high.
Illuminates when the automatic
four-wheel drive system is
engaged.
Illuminates when four-wheel
drive low is engaged.
Illuminates when four-wheel
drive high is engaged.
111
Expedition (TB8) Canada/United States of America, enUSA, Edition date: 201907, Third-Printing- Instrument ClusterE138644 E71340 E146190 E163170 E71880 E181778 E181781 E181780 E181779
Page 116 of 542

Normally, it illuminates until the engine is
cranked and automatically turns off if no
malfunctions are present. However, if after
15 seconds it flashes eight times, this
indicates that your vehicle is not ready for
Inspection and Maintenance (I/M) testing.
See Catalytic Converter (page 190).
Stability Control and Traction
Control Indicator Flashes during operation.
If it does not illuminate when you
switch the ignition on, or remains
on when the engine is running, this
indicates a malfunction. Have your vehicle
checked as soon as possible.
Note: The system automatically turns off
if there is a malfunction.
See
Using Stability Control (page 215).
Stability Control and Traction
Control Off Warning Lamp It illuminates when you switch
the system off.
Tow Haul Indicator Illuminates when the tow/haul
feature has been activated. If the
light flashes steadily, have the
system serviced immediately, damage to
the transmission could occur.
AUDIBLE WARNINGS AND
INDICATORS
Key in Ignition Warning Tone
Sounds when you leave the key in the
ignition and the driver door open. Keyless Warning Alert
Sounds the horn twice when you exit your
vehicle with the intelligent access key and
the keyless vehicle is in RUN, indicating the
vehicle is still on.
Headlamps On Warning Tone
Sounds when the headlamps or parking
lamps are on, the ignition is off (the key is
not in the ignition) and the driver door is
open.
Parking Brake On Warning Tone
Sounds when you have left the parking
brake on and drive your vehicle. If the
warning chime remains on after you have
released the parking brake, have the
system checked by an authorized dealer
immediately.
Direction Indicator Tone
Sounds when you leave the direction
indicator on when driving the vehicle more
than
1.5 mph (2.4 km/h).
113
Expedition (TB8) Canada/United States of America, enUSA, Edition date: 201907, Third-Printing- Instrument ClusterE138639 E130458 E246592
Page 124 of 542
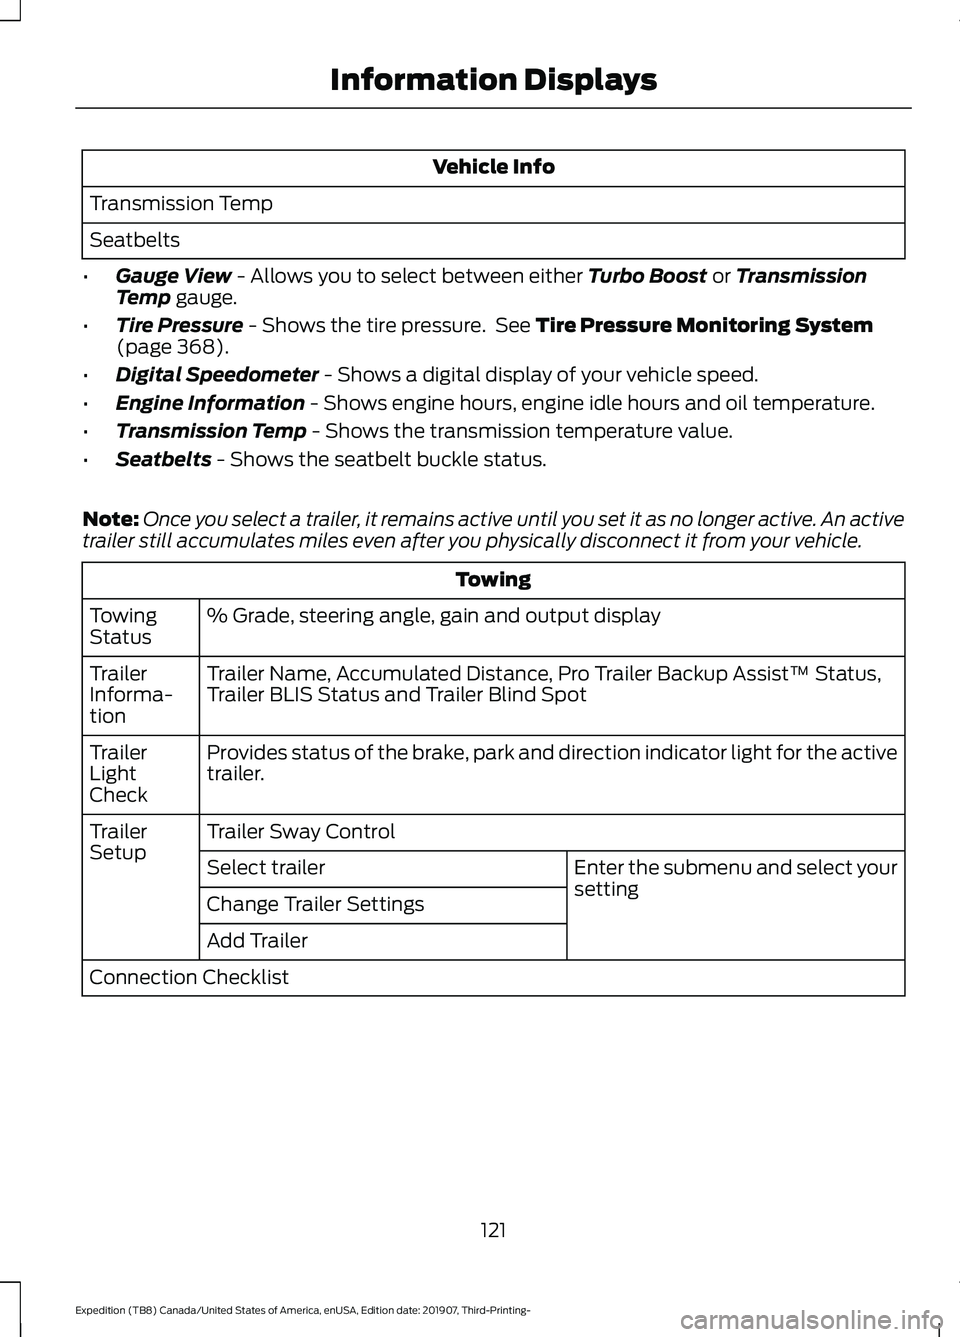
Vehicle Info
Transmission Temp
Seatbelts
• Gauge View - Allows you to select between either Turbo Boost or Transmission
Temp gauge.
• Tire Pressure
- Shows the tire pressure. See Tire Pressure Monitoring System
(page 368).
• Digital Speedometer
- Shows a digital display of your vehicle speed.
• Engine Information
- Shows engine hours, engine idle hours and oil temperature.
• Transmission Temp
- Shows the transmission temperature value.
• Seatbelts
- Shows the seatbelt buckle status.
Note: Once you select a trailer, it remains active until you set it as no longer active. An active
trailer still accumulates miles even after you physically disconnect it from your vehicle. Towing
% Grade, steering angle, gain and output display
Towing
Status
Trailer Name, Accumulated Distance, Pro Trailer Backup Assist™ Status,
Trailer BLIS Status and Trailer Blind Spot
Trailer
Informa-
tion
Provides status of the brake, park and direction indicator light for the active
trailer.
Trailer
Light
Check
Trailer Sway Control
Trailer
Setup
Enter the submenu and select your
setting
Select trailer
Change Trailer Settings
Add Trailer
Connection Checklist
121
Expedition (TB8) Canada/United States of America, enUSA, Edition date: 201907, Third-Printing- Information Displays