2020 DODGE CHARGER spare wheel
[x] Cancel search: spare wheelPage 7 of 412

5
PARKSENSE REAR PARK ASSIST —
IF EQUIPPED ....................................................... 191 ParkSense Sensors ...................................192
ParkSense Warning Display ......................192
ParkSense Display ..................................... 192Enabling And Disabling ParkSense ..........194
Service The ParkSense Rear Park
Assist System .............................................195 Cleaning The ParkSense System ..............195
ParkSense System Usage Precautions ....195
LANESENSE — IF EQUIPPED ........................... 196
LaneSense Operation ................................196Turning LaneSense On Or Off ...................196LaneSense Warning Message ..................197
Changing LaneSense Status .....................199
PARKVIEW REAR BACK UP CAMERA ............. 199
REFUELING THE VEHICLE ................................. 200
VEHICLE LOADING ............................................ 202
Vehicle Certification Label ........................ 202Gross Vehicle Weight Rating (GVWR) .......202
Gross Axle Weight Rating (GAWR) ........... 202Overloading ................................................202
Loading ......................................................203
TRAILER TOWING .............................................. 203
Common Towing Definitions .....................203Trailer Hitch Classification ........................ 205Trailer Towing Weights (Maximum Trailer
Weight Ratings) ..........................................205 Trailer And Tongue Weight ....................... 206
Towing Requirements................................ 206
Towing Tips ................................................ 209
RECREATIONAL TOWING (BEHIND MOTORHOME,
ETC.) ....................................................................210
DRIVING TIPS ...................................................... 210
Driving On Slippery Surfaces .................... 210
Driving Through Water .............................. 211
IN CASE OF EMERGENCY
HAZARD WARNING FLASHERS .......................212
ASSIST AND SOS MIRROR — IF EQUIPPED .... 212General Information .................................. 216
BULB REPLACEMENT ........................................ 217
Replacement Bulbs ................................... 217
Replacing Exterior Bulbs ........................... 219
FUSES ..................................................................220
General Information .................................. 220Underhood Fuses ...................................... 221
Rear Interior Fuses .................................... 225
JACKING AND TIRE CHANGING ........................229
Jack Location/Spare Tire Stowage ........... 230
Preparations For Jacking........................... 230
Jacking And Changing A Tire ..................... 231Road Tire Installation ................................ 234 TIRE SERVICE KIT — IF EQUIPPED ................... 234
Tire Service Kit Storage............................. 234
Tire Service Kit Components And
Operation ................................................... 235 Tire Service Kit Usage Precautions .......... 235Sealing A Tire With Tire Service Kit .......... 237
JUMP STARTING ............................................... 240
Preparations For Jump Start ..................... 240
Jump Starting Procedure .......................... 241
IF YOUR ENGINE OVERHEATS ......................... 242
MANUAL PARK RELEASE — 8 – SPEED
TRANSMISSION ................................................. 243
FREEING A STUCK VEHICLE ............................. 244
SRT — TOWING A DISABLED VEHICLE ............ 246
NON SRT — TOWING A DISABLED VEHICLE ... 248 All Wheel Drive (AWD) Models .................. 249Rear-Wheel Drive (RWD) Models ............. 249
ENHANCED ACCIDENT RESPONSE SYSTEM
(EARS) ................................................................ 249
EVENT DATA RECORDER (EDR) ....................... 249
SERVICING AND MAINTENANCE
SCHEDULED SERVICING .................................. 250
3.6L And 5.7L Engines ............................. 250
6.2L Supercharged And 6.4L Engines ..... 254
20_LD_OM_EN_USC_t.book Page 5
Page 8 of 412

6
ENGINE COMPARTMENT .................................. 266 3.6L Engine ...............................................2665.7L Engine ...............................................2676.2L Supercharged Engine ......................268
6.4L Engine ...............................................269Checking Oil Level — 3.6L And 5.7L
Engine.........................................................270 Checking Oil Level — 6.2L Supercharged
Engine And 6.4L Engine ...........................270 Adding Washer Fluid..................................270Maintenance-Free Battery .......................271
Pressure Washing ......................................271
DEALER SERVICE .............................................. 272
Engine Oil .................................................. 272Engine Oil Filter ..........................................274Engine Air Cleaner Filter ...........................275
Air Conditioner Maintenance ...................275Accessory Drive Belt Inspection................276Body Lubrication ........................................277
Windshield Wiper Blades ..........................278
Exhaust System .........................................279
Cooling System .........................................280
Brake System ............................................284
Automatic Transmission ............................285
Rear Axle ....................................................286
RAISING THE VEHICLE ...................................... 286 TIRES....................................................................286
Tire Safety Information ............................. 286Tires — General Information .................... 293
Tire Types ................................................... 298
Spare Tires — If Equipped ......................... 298
Wheel And Wheel Trim Care .................... 300
Tire Chains And Traction Devices —
Non-SRT ..................................................... 301 Tire Chains And Traction Devices — SRT.. 302
Tire Rotation Recommendations —
Non-SRT ..................................................... 302
Tire Rotation Recommendations — SRT .... 303
DEPARTMENT OF TRANSPORTATION UNIFORM
TIRE QUALITY GRADES .....................................303
Treadwear .................................................. 303
Traction Grades ......................................... 303
Temperature Grades ................................. 304
VEHICLE STORAGE .............................................304
BODYWORK ........................................................ 304
Protection From Atmospheric Agents....... 304
Body And Underbody Maintenance .......... 305Preserving The Bodywork .......................... 305
INTERIORS ......................................................... 306
Seats And Fabric Parts .............................. 306
Plastic And Coated Parts ........................... 306
Leather Parts ............................................. 307
Glass Surfaces .......................................... 307
TECHNICAL SPECIFICATIONS
IDENTIFICATION DATA ...................................... 308Vehicle Identification Number .................. 308
BRAKE SYSTEM ................................................ 308
WHEEL AND TIRE TORQUE
SPECIFICATIONS ................................................ 308
Torque Specifications................................ 308
FUEL REQUIREMENTS ...................................... 309
3.6L Engine ................................................ 309
5.7L Engine ................................................ 310
6.2L And 6.4L Engine................................ 310
Reformulated Gasoline ............................ 310Materials Added To Fuel ........................... 310
Gasoline/Oxygenate Blends ..................... 311
Do Not Use E-85 In Non-Flex Fuel
Vehicles ...................................................... 311 CNG And LP Fuel System Modifications .. 312MMT In Gasoline........................................ 312
Fuel System Cautions................................ 312
Carbon Monoxide Warnings...................... 312
FLUID CAPACITIES — NON-SRT ....................... 313
FLUID CAPACITIES — SRT ................................ 314
FLUIDS AND LUBRICANTS — NON-SRT .......... 315 Engine ........................................................ 315
Chassis ....................................................... 317
FLUIDS AND LUBRICANTS — SRT ................... 318
Engine ........................................................ 318
Chassis ....................................................... 320
20_LD_OM_EN_USC_t.book Page 6
Page 126 of 412

124SAFETY
Vehicles With Compact Spare
1. The compact spare tire or non-matching
full size does not have a Tire Pressure
Monitoring sensor. Therefore, the TPMS
will not monitor the pressure in the
compact or non-matching full size spare
tire.
2. If you install the compact or non-matching full size spare tire in place of a road tire that
has a pressure below the low-pressure
warning limit, upon the next ignition key
cycle, the TPMS Warning Light will remain
on and a chime will sound. In addition, the
graphic in the instrument cluster will still
display a different color pressure value and
an "Inflate to XX" message.
3. After driving the vehicle for up to 20 minutes above 15 mph (24 km/h), the
TPMS Warning Light will flash on and off for
75 seconds and then remain on solid. In
addition, the instrument cluster will display
a “Service Tire Pressure System” message
for five seconds and then display dashes
(- -) in place of the pressure value. 4. For each subsequent ignition key cycle, a
chime will sound, the TPMS Warning Light
will flash on and off for 75 seconds and then
remain on solid, and the instrument cluster
will display a “Service Tire Pressure System”
message for five seconds and then display
dashes (- -) in place of the pressure value.
5. Once you repair or replace the original road tire and reinstall it on the vehicle in place of
the compact spare or non-matching full
size, the TPMS will update automatically. In
addition, the TPMS Warning Light will turn
off and the graphic in the instrument cluster
will display a new pressure value instead of
dashes (- -), as long as no tire pressure is
below the low-pressure warning limit in any
of the four active road tires. The vehicle may
need to be driven for up to 20 minutes
above 15 mph (24 km/h) in order for the
TPMS to receive this information.
TPMS Deactivation — If Equipped
The Tire Pressure Monitoring System (TPMS)
can be deactivated if replacing all four wheel
and tire assemblies (road tires) with wheel and
tire assemblies that do not have TPMS sensors,
such as when installing winter wheel and tire
assemblies on your vehicle.
To deactivate the TPMS, first replace all four
wheel and tire assemblies (road tires) with tires
not equipped with Tire Pressure Monitoring (TPM)
sensors. Then, drive the vehicle for 20 minutes
above 15 mph (24 km/h). The TPMS will chime,
the TPMS Warning Light will flash on and off for
75 seconds and then remain on. The instrument
cluster will display the “Service Tire Pressure
System” message and then display dashes (--) in
place of the pressure values.
Beginning with the next ignition cycle, the TPMS
will no longer chime or display the “Service Tire
Pressure System” message in the instrument
cluster but dashes (--) will remain in place of the
pressure values.
To reactivate the TPMS, replace all four wheel
and tire assemblies (road tires) with tires
equipped with TPM sensors. Then, drive the
vehicle for up to 20 minutes above 15 mph
(24 km/h). The TPMS will chime, the TPMS
Warning Light will flash on and off for 75
seconds and then turn off. The instrument
cluster will display the “Service Tire Pressure
System” message and then display pressure
values in place of the dashes. On the next
ignition cycle the "Service Tire Pressure System"
message will no longer be displayed as long as
no system fault exists.
20_LD_OM_EN_USC_t.book Page 124
Page 159 of 412

SAFETY157
(Continued)
PERIODIC SAFETY CHECKS YOU SHOULD
M
AKE OUTSIDE THE VEHICLE
Tires
Examine tires for excessive tread wear and
uneven wear patterns. Check for stones, nails,
glass, or other objects lodged in the tread or
sidewall. Inspect the tread for cuts and cracks.
Inspect sidewalls for cuts, cracks, and bulges.
Check the wheel nuts for tightness. Check the
tires (including spare) for proper cold inflation
pressure.
Lights
Have someone observe the operation of brake
lights and exterior lights while you work the
controls. Check turn signal and high beam
indicator lights on the instrument panel.
ONLY use the driver’s side floor mat on the
driver’s side floor area. To check for inter -
ference, with the vehicle properly parked
with the engine off, fully depress the accel -
erator, the brake, and the clutch pedal (if
present) to check for interference. If your
floor mat interferes with the operation of
any pedal, or is not secure to the floor,
remove the floor mat from the vehicle and
place the floor mat in your trunk.
ONLY use the passenger’s side floor mat on
the passenger’s side floor area.
ALWAYS make sure objects cannot fall or slide
into the driver’s side floor area when the
vehicle is moving. Objects can become trapped
under accelerator, brake, or clutch pedals and
could cause a loss of vehicle control.
WARNING! (Continued)
NEVER place any objects under the floor
mat (e.g., towels, keys, etc.). These objects
could change the position of the floor mat
and may cause interference with the accel -
erator, brake, or clutch pedals.
If the vehicle carpet has been removed and
re-installed, always properly attach carpet
to the floor and check the floor mat
fasteners are secure to the vehicle carpet.
Fully depress each pedal to check for inter -
ference with the accelerator, brake, or
clutch pedals then re-install the floor mats.
It is recommended to only use mild soap
and water to clean your floor mats. After
cleaning, always check your floor mat has
been properly installed and is secured to
your vehicle using the floor mat fasteners
by lightly pulling mat.
WARNING! (Continued)
4
20_LD_OM_EN_USC_t.book Page 157
Page 224 of 412

222IN CASE OF EMERGENCY
CavityCartridge Fuse Mini-Fuse Description
F1––Fuse – Spare
F2 40 Amp Green –Radiator Fan #1 – (Non 6.2L Supercharged)
F3 50 Amp Red –Electric Power Steering #1 – If Equipped
F4 30 Amp Pink –Starter
F5 40 Amp Green –Anti-Lock Brakes
F6 30 Amp Pink –Anti-Lock Brakes
F7 20 Amp Blue –Police Ignition Run / ACC #1
F8 50 Amp Red / 20 Amp
Blue –Radiator Fan (6.2L Supercharged) / Police Ignition
Run / ACC # 2
F9 –20 Amp Yellow All-Wheel Drive Module – If Equipped
F10 –10 Amp RedIntrusion MOD (300) – If Equipped / Under Hood
Lamp – Police
F11 –20 Amp Yellow Horns
F12 –10 Amp Red Air Conditioning Clutch
F13 ––Fuse – Spare
F14 ––Fuse – Spare
F15 –20 Amp Yellow LH HID Headlamp – If Equipped
F16 –20 Amp Yellow RH HID Headlamp – If Equipped
20_LD_OM_EN_USC_t.book Page 222
Page 231 of 412

IN CASE OF EMERGENCY229
(Continued)
(Continued)
JACKING AND TIRE CHANGING
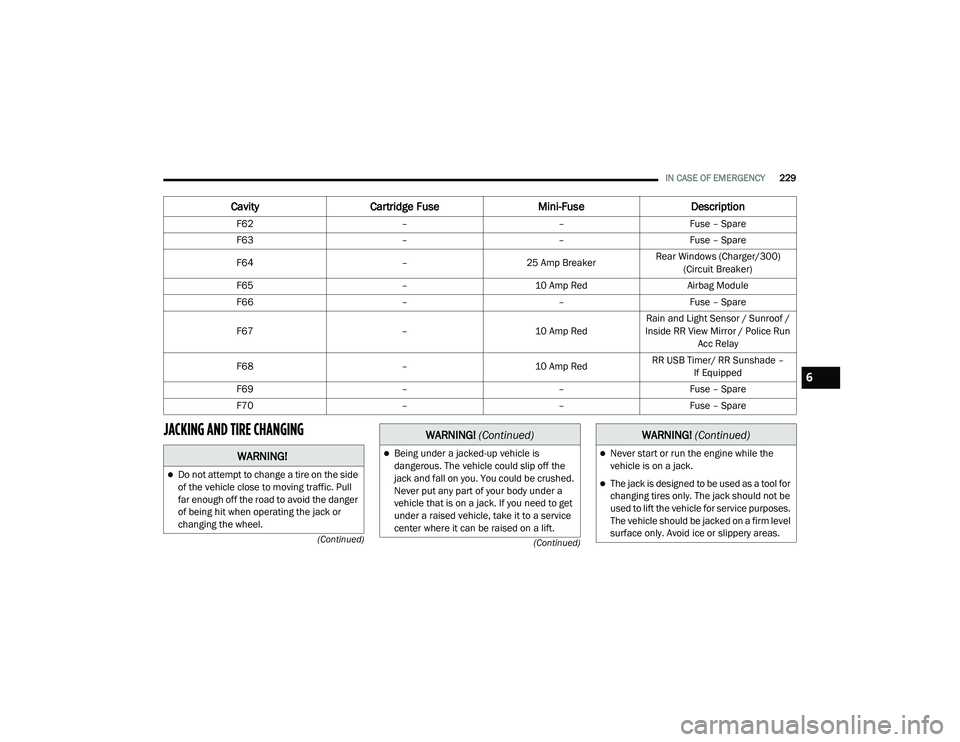
F62
––Fuse – Spare
F63 ––Fuse – Spare
F64 –25 Amp Breaker Rear Windows (Charger/300)
(Circuit Breaker)
F65 –10 Amp Red Airbag Module
F66 ––Fuse – Spare
F67 –10 Amp RedRain and Light Sensor / Sunroof /
Inside RR View Mirror / Police Run Acc Relay
F68 –10 Amp RedRR USB Timer/ RR Sunshade –
If Equipped
F69 ––Fuse – Spare
F70 ––Fuse – Spare
CavityCartridge Fuse Mini-FuseDescription
WARNING!
Do not attempt to change a tire on the side
of the vehicle close to moving traffic. Pull
far enough off the road to avoid the danger
of being hit when operating the jack or
changing the wheel.
Being under a jacked-up vehicle is
dangerous. The vehicle could slip off the
jack and fall on you. You could be crushed.
Never put any part of your body under a
vehicle that is on a jack. If you need to get
under a raised vehicle, take it to a service
center where it can be raised on a lift.
WARNING! (Continued)
Never start or run the engine while the
vehicle is on a jack.
The jack is designed to be used as a tool for
changing tires only. The jack should not be
used to lift the vehicle for service purposes.
The vehicle should be jacked on a firm level
surface only. Avoid ice or slippery areas.
WARNING! (Continued)
6
20_LD_OM_EN_USC_t.book Page 229
Page 232 of 412

230IN CASE OF EMERGENCY
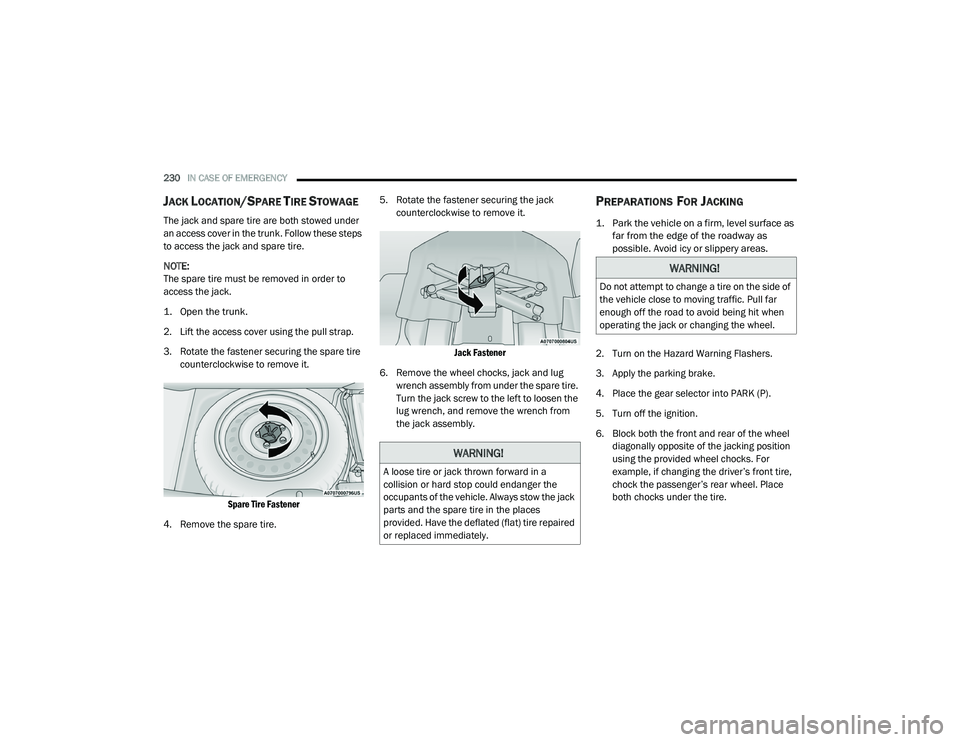
JACK LOCATION/SPARE TIRE STOWAGE
The jack and spare tire are both stowed under
an access cover in the trunk. Follow these steps
to access the jack and spare tire.
NOTE:
The spare tire must be removed in order to
access the jack.
1. Open the trunk.
2. Lift the access cover using the pull strap.
3. Rotate the fastener securing the spare tire
counterclockwise to remove it.
Spare Tire Fastener
4. Remove the spare tire. 5. Rotate the fastener securing the jack
counterclockwise to remove it.
Jack Fastener
6. Remove the wheel chocks, jack and lug wrench assembly from under the spare tire.
Turn the jack screw to the left to loosen the
lug wrench, and remove the wrench from
the jack assembly.
PREPARATIONS FOR JACKING
1. Park the vehicle on a firm, level surface as far from the edge of the roadway as
possible. Avoid icy or slippery areas.
2. Turn on the Hazard Warning Flashers.
3. Apply the parking brake.
4. Place the gear selector into PARK (P).
5. Turn off the ignition.
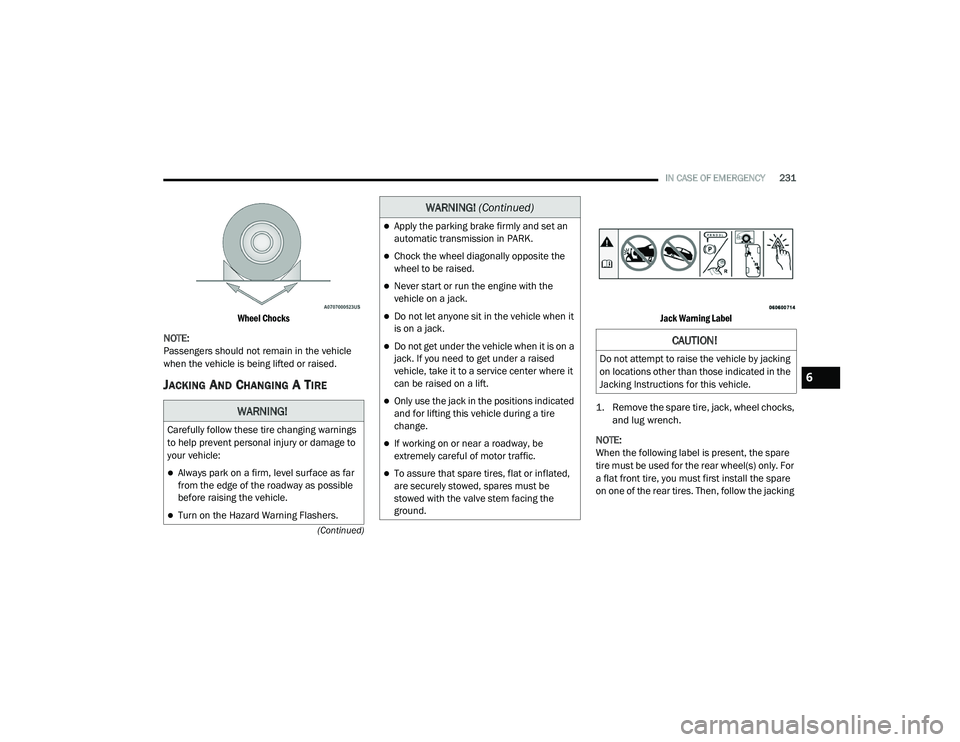
6. Block both the front and rear of the wheel diagonally opposite of the jacking position
using the provided wheel chocks. For
example, if changing the driver’s front tire,
chock the passenger’s rear wheel. Place
both chocks under the tire.
WARNING!
A loose tire or jack thrown forward in a
collision or hard stop could endanger the
occupants of the vehicle. Always stow the jack
parts and the spare tire in the places
provided. Have the deflated (flat) tire repaired
or replaced immediately.
WARNING!
Do not attempt to change a tire on the side of
the vehicle close to moving traffic. Pull far
enough off the road to avoid being hit when
operating the jack or changing the wheel.
20_LD_OM_EN_USC_t.book Page 230
Page 233 of 412

IN CASE OF EMERGENCY231
(Continued)
Wheel Chocks
NOTE:
Passengers should not remain in the vehicle
when the vehicle is being lifted or raised.
JACKING AND CHANGING A TIRE
Jack Warning Label
1. Remove the spare tire, jack, wheel chocks, and lug wrench.
NOTE:
When the following label is present, the spare
tire must be used for the rear wheel(s) only. For
a flat front tire, you must first install the spare
on one of the rear tires. Then, follow the jacking
WARNING!
Carefully follow these tire changing warnings
to help prevent personal injury or damage to
your vehicle:
Always park on a firm, level surface as far
from the edge of the roadway as possible
before raising the vehicle.
Turn on the Hazard Warning Flashers.
Apply the parking brake firmly and set an
automatic transmission in PARK.
Chock the wheel diagonally opposite the
wheel to be raised.
Never start or run the engine with the
vehicle on a jack.
Do not let anyone sit in the vehicle when it
is on a jack.
Do not get under the vehicle when it is on a
jack. If you need to get under a raised
vehicle, take it to a service center where it
can be raised on a lift.
Only use the jack in the positions indicated
and for lifting this vehicle during a tire
change.
If working on or near a roadway, be
extremely careful of motor traffic.
To assure that spare tires, flat or inflated,
are securely stowed, spares must be
stowed with the valve stem facing the
ground.
WARNING! (Continued)
CAUTION!
Do not attempt to raise the vehicle by jacking
on locations other than those indicated in the
Jacking Instructions for this vehicle.
6
20_LD_OM_EN_USC_t.book Page 231