2020 CITROEN RELAY USB port
[x] Cancel search: USB portPage 42 of 196

40
Ease of use and comfort
Chilled glove box
It is located on the upper part of the dashboard,
passenger side.
The air circulated in the glove box is the same as
that circulated by the air vents.
USB socket
The socket is used only to power or recharge the
connected portable device.
Multifunction support
This can hold a portable device, such as a
smartphone in a vertical position or a tablet in a
horizontal position.
► Pull the top of the support to unfold it.
► Tilt the side lever to unlock the upper and
lower clamps.
► Open the clamps to install the portable
device.
► Lift the side lever to lock the clamps.
Before folding the support, remove the
mobile device by repeating the same
operations.
Push the top of the support to fold it.
Front door pockets
Depending on the country of sale, one of the
door pockets may contain the puncture repair kit.
Page 43 of 196

41
Ease of use and comfort
3Chilled glove box
It is located on the upper part of the dashboard,
passenger side.
The air circulated in the glove box is the same as
that circulated by the air vents.
USB socket
The socket is used only to power or recharge the
connected portable device.
12 volt socket
Maximum power: 180 W.
The connection of an electrical device not approved by CITROËN, such as a
USB charger, may adversely affect the
operation of vehicle electrical systems,
causing faults such as poor radio reception or
interference with displays in the screens.
Cigarette lighter
► Press and wait a few moments for automatic
triggering.
Overhead storage
compartment
It is located above the sun visors.
Maximum load: approximately 20 kg.
Page 45 of 196

43
Ease of use and comfort
3Support for stowing rail
Supports for securing a stowing rail are available
above the trims, on each side of the vehicle.
Maximum load: 200 kg.
Side trim
The interior sections of the side walls are fitted
with loading protection trims.
12 volt socket
Maximum power: 180 W.
The connection of an electrical device not approved by CITROËN, such as a
USB charger, may adversely affect the
operation of vehicle electrical systems,
causing faults such as poor radio reception or
interference with displays in the screens.
Cigarette lighter
► Press and wait a few moments for automatic
triggering.
Courtesy lamps
If fitted to the vehicle, one or two courtesy lamps
are located above the rear and side doors.
They can be activated by:
– tilting the courtesy lamp (to the left or to the
right),
– opening or closing the rear or side doors.
This lighting will turn off automatically after a few
minutes if the doors remain open.
Reading lamps
They are located above each
row of seats.
Interior roof rack
This is a storage device located in the loading
area above the cab. Its capacity is variable
according to the height of the van (H2 or H3
type).
For safety reasons, do not install heavy
objects in the interior rack.
Page 154 of 196
152
Audio system
To protect the system, do not use a USB hub.
The system builds playlists (in temporary
memory); this operation can take from a
few seconds to several minutes at the first
connection.
Reduce the number of non-music files and the
number of folders to reduce the waiting time.
The playlists are updated every time the ignition
is switched off or a USB memory stick is
connected. The lists are memorised: if they are
not modified, the subsequent loading time will
be shorter.
USB socket
Located on the central console, this
socket is used only to power and
recharge the connected portable device.
Auxiliary socket (AUX)
Connect a portable device (MP3 player,
etc.) to the auxiliary jack socket using an
audio cable (not supplied).
First adjust the volume on your portable device
(to a high level). Then adjust the volume on your
audio system.
Controls are managed via the portable device.
The functions of the device connected to the
“AUX” socket are managed directly by this
device: it is therefore not possible to change the
track/folder/playlist or manipulate the playback
Radio, toggle up or down continuously: scan up/
down frequencies until you release the button.
Media, toggle up or down: select next/previous
track.
Media, toggle up or down continuously: fast
forward/rewind until you release the button.
Refuse an incoming call.
End the call in progress.
Radio
Selecting a station
The exterior environment (hills, buildings, tunnels, car parks, underground location,
etc.) may block reception, including in RDS
mode.
This behaviour is normal in the propagation of
radio waves and does not indicate any fault
with the audio system.
Press the "RADIO" button to select the
FM or AM waveband.
Briefly press one of the buttons to
automatically search for a lower/
higher frequency.
Turn the knob to manually search for a lower/higher frequency.
Press the knob to display the list of
stations received locally.
Turn the knob to select a station and press to
select it.
Memorising a station
Press the "RADIO" button to select the
FM or AM waveband.
Press the "A-B-C" button to select one of
the three memorised station levels.
Press and hold a button to memorise the
station being listened to.
The name of the station is displayed and an
audible signal confirms the memorisation.
Press "INFO" to display the information of
the station being listened to.
RDS
RDS, if displayed, allows you to continue
listening to the same station by
automatically retuning to alternative
frequencies. However, in certain conditions,
following this RDS station is not guaranteed
over the whole country, because radio
stations do not cover 100% of the area. When
the reception is weak, the frequency switches
to a regional station.
Press the "MENU" button.
Select "Regional" then press to activate
or deactivate RDS.
Alternative frequency (AF)
Select "Alternative frequency (AF)" then
press to activate or deactivate the
frequency.
When the "Regional” function is
activated, the system is therefore able to
search at any time for the best available
frequency.
Playing TA messages
The TA (Traffic Announcement) function gives priority to TA alert messages. To
operate, this function needs good reception of
a radio station that carries this type of
message. While traffic information is being
broadcast, the current media is automatically
interrupted so that the TA message can be
heard. Normal play of the previously playing
media resumes at the end of the message.
Press the "MENU" button.
Select "Traffic announcement (TA)" then
press to activate or deactivate the
reception of traffic announcements.
Media
USB socket
Insert the USB memory stick or connect
the device to the USB socket in the
central storage space , provided for transferring
data to the system, using a suitable cable (not
supplied).
Page 155 of 196
153
Audio system
11To protect the system, do not use a USB hub.
The system builds playlists (in temporary
memory); this operation can take from a
few seconds to several minutes at the first
connection.
Reduce the number of non-music files and the
number of folders to reduce the waiting time.
The playlists are updated every time the ignition
is switched off or a USB memory stick is
connected. The lists are memorised: if they are
not modified, the subsequent loading time will
be shorter.
USB socket
Located on the central console, this
socket is used only to power and
recharge the connected portable device.
Auxiliary socket (AUX)
Connect a portable device (MP3 player,
etc.) to the auxiliary jack socket using an
audio cable (not supplied).
First adjust the volume on your portable device
(to a high level). Then adjust the volume on your
audio system.
Controls are managed via the portable device.
The functions of the device connected to the
“AUX” socket are managed directly by this
device: it is therefore not possible to change the
track/folder/playlist or manipulate the playback
start/end/pause using the controls on the control
panel or the steering wheel.
Do not leave the cable of your portable device
connected to the “AUX” socket when not in use,
to avoid possible noise from the speakers.
Information and advice
The system supports USB Mass Storage
devices, BlackBerry® devices or Apple® players
via the USB sockets. The adapter cable is not
supplied.
Other devices, not recognised by the system
during connection, must be connected to
the auxiliary socket using a Jack cable (not
supplied).
It is advisable to restrict file names to 20
characters, without using special characters (e.g.
" " ? . ; ù) so as to avoid any reading or display
problems.
Only use USB memory sticks formatted to FAT
32 (File Allocation Table).
To protect the system, do not use a USB hub.
The system does not support the simultaneous connection of two identical
devices (two memory sticks or two
Apple
® players) but it is possible to connect
one memory stick and one Apple® player at
the same time.
It is recommended that you use genuine
Apple® USB cables to guarantee correct
operation.
Connecting Apple® players
Connect the Apple® player to the USB
socket using a suitable cable (not
supplied).
Play starts automatically.
Control is via the audio system.
The classifications available are those of the portable device connected (artists/
albums/types/tracks/playlists/audio books/
podcasts).
The default classification is sorting by artist.
To change the classification used, return to
the first level of the menu and then select the
desired classification (playlists for example)
and confirm to browse the tree to the desired
track.
The audio system software version may not be compatible with the generation of
your Apple
® player.
Page 158 of 196
156
Audio system
Play the audio book "Book 1”.
Listen to track number > "5"
Play track number “5”.
Select > "USB"
Select the USB media support as the active
audio source.
Browse > "Album"
View the list of available albums.
"Text message" voice
commands
The following commands can be made
from each main screen after pressing the
telephone button located on the steering wheel,
as long as there is no telephone call in progress.
Send a text message to > 0123456789
Start the voice procedure to send a preset text
message using the system.
Send a text message to > Henri Dupont >
Mobile phone
Start the voice procedure to send a preset text
message using the system.
View text message > Henri Dupont > Mobile
phone
View the list of text messages downloaded by
the phone.
"Hands-free calls" voice
commands
The following commands are available
when a call is in progress.
It is possible to replace the "Mobile
phone" tag with three other available
tags: "Home"; "Office"; "Other".
Call* > Henri Dupont
Dial the telephone number associated with the
contact Henri Dupont.
Call* > Henri Dupont > Mobile phone
Dial the telephone number with the mobile phone
tag associated with the contact Henri Dupont.
Call number > 0123456789
Call number 0123456789.
Redial
Call the number or contact of the last call made.
Call back
Call the number or contact of the last call
received.
Recent calls*
View the complete list of recent calls: outgoing,
missed and incoming.
Outgoing calls *
View the list of outgoing calls.
Missed calls*
View the list of missed calls.
Incoming calls *
View the list of incoming calls.
Directory *
View the directory of the connected telephone.
* This function is available only if the telephone connected to the system supports downloading of contacts and recent calls and if the corresponding
download has been performed.
** This function is available only if the telephone connected to the system supports the text message reading function.
*** It is possible to replace "Magic" with any other FM station name received by the radio. Not all radio stations provide this service.
Search* > Henri Dupont
View Henri Dupont's contact information in the
directory with all of the numbers saved.
Search* > Henri Dupont > Mobile phone
View the telephone number with the mobile
phone tag associated with the contact Henri
Dupont.
View messages **
View the list of text messages received by the
connected telephone.
If the telephone allows the recording of
the "First Name" (Henri) and the
"Surname" (Dupont) in two separate fields,
perform the following voice commands:
– "Call" > "Henri" > "Dupont" or "Call" >
"Dupont" > "Henri".
– "Search" > "Henri" > "Dupont" or "Search"
> "Dupont" > "Henri".
"AM/FM radio” voice
commands
The following commands can be made
from any main screen page after pressing
the voice recognition button located on the
steering wheel, as long as there is no telephone
call in progress. Tune to
> 105.5 > FM
Tune the radio to the 105.5 frequency of the FM
band.
Tune to > 940 > AM
Tune the radio to the 940 frequency of the AM
band.
Tune to *** > Magic > FM
Tune the radio to the station Magic.
"Media" voice commands
The following commands can be made from any main screen page after pressing
the voice recognition button located on the
steering wheel, as long as there is no telephone
call in progress.
Listen to track > "Track 1 "
Play the track “Track 1”.
Listen to album > "Album 1"
Play the songs of the album “Album 1”.
Listen to artist > "Artist 1"
Play the songs of the artist “Artist 1”.
Listen to music style > "Jazz"
Play the songs of the music style “Jazz”.
Listen to playlist > "Playlist 1"
Play the songs of the playlist “Playlist1”.
Listen to podcast > "Radio 1"
Play the podcast “Podcast 1”.
Listen to audio book > "Book 1"
Page 159 of 196
157
Audio system
11Play the audio book "Book 1”.
Listen to track number > "5"
Play track number “5”.
Select > "USB"
Select the USB media support as the active
audio source.
Browse > "Album"
View the list of available albums.
"Text message" voice
commands
The following commands can be made
from each main screen after pressing the
telephone button located on the steering wheel,
as long as there is no telephone call in progress.
Send a text message to > 0123456789
Start the voice procedure to send a preset text
message using the system.
Send a text message to > Henri Dupont >
Mobile phone
Start the voice procedure to send a preset text
message using the system.
View text message > Henri Dupont > Mobile
phone
View the list of text messages downloaded by
the phone.
"Hands-free calls" voice
commands
The following commands are available
when a call is in progress. The commands can be made from any screen
page during a call after pressing the telephone
button located on the steering wheel.
Send 0123456789
The selection tones are sent for 0123456789.
Send Voicemail password
The selection tones are sent for the numbers
registered in "Voicemail password".
Activate speakers
Transfer the call to the telephone or the system.
Activate/Deactivate microphone
Activate/deactivate the system microphone.
Page 164 of 196
162
Touch screen audio and telematics system
– Select the desired parameter; the option is
highlighted.
– Loudness.
– Optimise the quality of low volume audio.
– Automatic radio.
– Set the radio when starting up or recover the
active state when the ignition key was last turned
to STOP.
– Radio switch-off delay .
– Set the parameter.
– AUX vol. setting .
– Set the parameters.
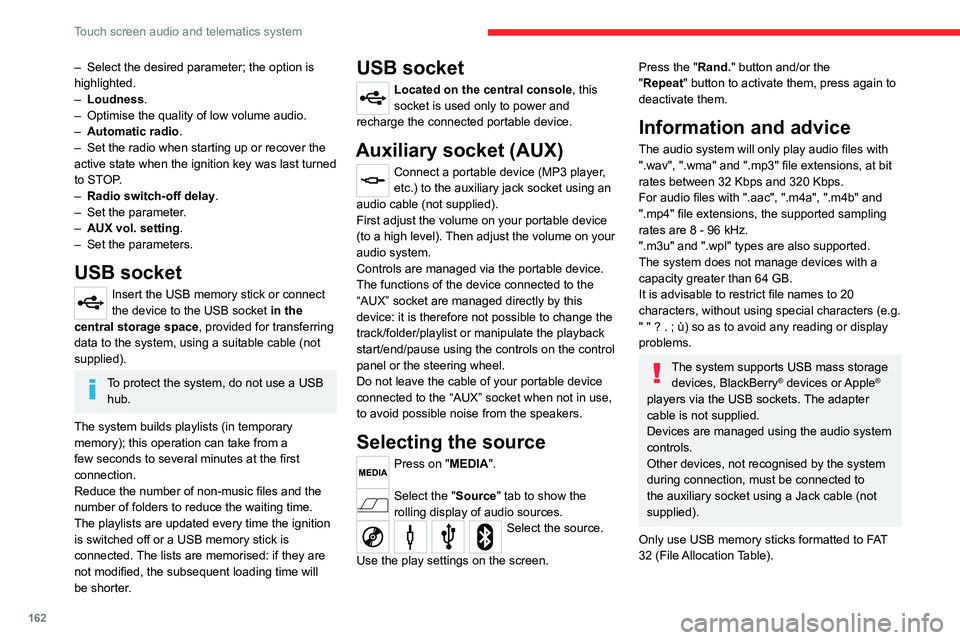
USB socket
Insert the USB memory stick or connect
the device to the USB socket in the
central storage space , provided for transferring
data to the system, using a suitable cable (not
supplied).
To protect the system, do not use a USB hub.
The system builds playlists (in temporary
memory); this operation can take from a
few seconds to several minutes at the first
connection.
Reduce the number of non-music files and the
number of folders to reduce the waiting time.
The playlists are updated every time the ignition
is switched off or a USB memory stick is
connected. The lists are memorised: if they are
not modified, the subsequent loading time will
be shorter.
USB socket
Located on the central console, this
socket is used only to power and
recharge the connected portable device.
Auxiliary socket (AUX)
Connect a portable device (MP3 player,
etc.) to the auxiliary jack socket using an
audio cable (not supplied).
First adjust the volume on your portable device
(to a high level). Then adjust the volume on your
audio system.
Controls are managed via the portable device.
The functions of the device connected to the
“AUX” socket are managed directly by this
device: it is therefore not possible to change the
track/folder/playlist or manipulate the playback
start/end/pause using the controls on the control
panel or the steering wheel.
Do not leave the cable of your portable device
connected to the “AUX” socket when not in use,
to avoid possible noise from the speakers.
Selecting the source
Press on "MEDIA".
Select the "Source" tab to show the
rolling display of audio sources.
Select the source.
Use the play settings on the screen.
Press the "Rand." button and/or the
"Repeat" button to activate them, press again to
deactivate them.
Information and advice
The audio system will only play audio files with
".wav", ".wma" and ".mp3" file extensions, at bit
rates between 32 Kbps and 320 Kbps.
For audio files with ".aac", ".m4a", ".m4b" and
".mp4" file extensions, the supported sampling
rates are 8 - 96 kHz.
".m3u" and ".wpl" types are also supported.
The system does not manage devices with a
capacity greater than 64 GB.
It is advisable to restrict file names to 20
characters, without using special characters (e.g.
" " ? . ; ù) so as to avoid any reading or display
problems.
The system supports USB mass storage devices, BlackBerry® devices or Apple®
players via the USB sockets. The adapter
cable is not supplied.
Devices are managed using the audio system
controls.
Other devices, not recognised by the system
during connection, must be connected to
the auxiliary socket using a Jack cable (not
supplied).
Only use USB memory sticks formatted to FAT
32 (File Allocation Table).
To protect the system, do not use a USB hub.
The system does not support the simultaneous connection of two identical
devices (two memory sticks or two
Apple
® players) but it is possible to connect
one memory stick and one Apple® player at
the same time.
It is recommended that you use genuine
Apple® USB cables to guarantee correct
operation.
Bluetooth® Streaming
Streaming allows music files on the telephone to
be played via the vehicle's speakers.
Active the Bluetooth
® function on the device.Press "MEDIA".
If there is a media source active, press
the "Source" button.
Select the "Bluetooth®" media source
then press the "Add device” button.
If no device has yet been paired with the system,
a special page is displayed on the screen.
Select "Yes" to start the pairing procedure, and
then search for the name of the system on the
device.
Select the name of the system on the device
and, when requested by the audio system,
enter the PIN code displayed on the screen of